Looking realy good now mate, when do you recon it will be sprayed ?


Project Cliff - The Cherry Red Thirty
Started by
stretch tech
, Dec 17 2011 06:45 PM
764 replies to this topic
#302

stretch tech
-
- Members
-

- 1,363 posts
One Carb Or Two?
- Location: Tamwoth
- Local Club: A5 & Mini Mainiacs
Posted 24 April 2012 - 07:11 PM
Looking realy good now mate, when do you recon it will be sprayed ?
cheers pal, 2 or 3 weeks maybe ? i'm not too sure myself but as soon as really

Cheers
Rhys
#303
Rich286
-

- Noobies
-
- 136 posts
Mini Mad
- Location: Cornwall
Posted 24 April 2012 - 07:26 PM
Geton! you spraying it yourself ?
#304
stretch tech
-
- Members
-
- 1,363 posts
One Carb Or Two?
- Location: Tamwoth
- Local Club: A5 & Mini Mainiacs
Posted 24 April 2012 - 07:30 PM
Geton! you spraying it yourself ?
nah, a friend of a friend is going to spray the whole car in 2 coats of pearlescent cherry red and a coat of lacquer for £150 ! ! couldn't say no to that
Rhys
#305
Rich286
-
- Noobies
-
- 136 posts
Mini Mad
- Location: Cornwall
Posted 24 April 2012 - 07:40 PM
Bargain!!!! im going to be spraying mine so maybe a few runs lol
#306
stretch tech
-
- Members
-
- 1,363 posts
One Carb Or Two?
- Location: Tamwoth
- Local Club: A5 & Mini Mainiacs
Posted 24 April 2012 - 08:05 PM
Bargain!!!! im going to be spraying mine so maybe a few runs lol
i was going to spray it myself originally but I'd have been stupid to turn that deal away

Rhys
#307
Rich286
-
- Noobies
-
- 136 posts
Mini Mad
- Location: Cornwall
Posted 24 April 2012 - 08:29 PM
Yeah to right, i would love to get a body shop to do it but to much for me lol
#308
stretch tech
-
- Members
-
- 1,363 posts
One Carb Or Two?
- Location: Tamwoth
- Local Club: A5 & Mini Mainiacs
Posted 25 April 2012 - 08:31 PM
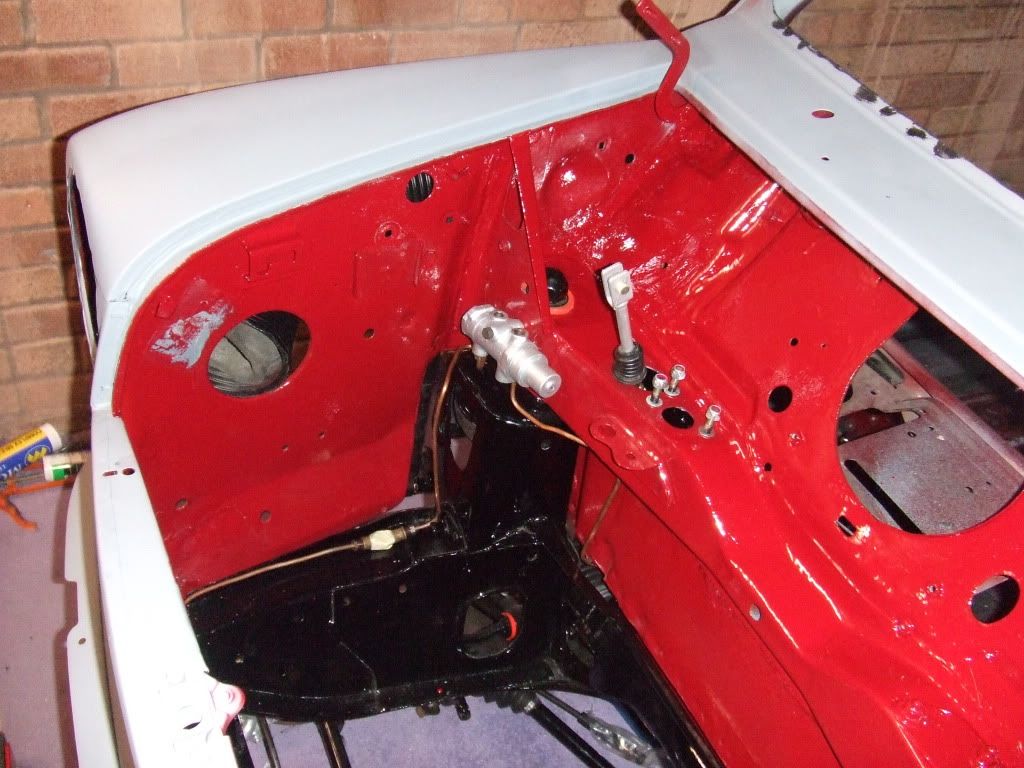
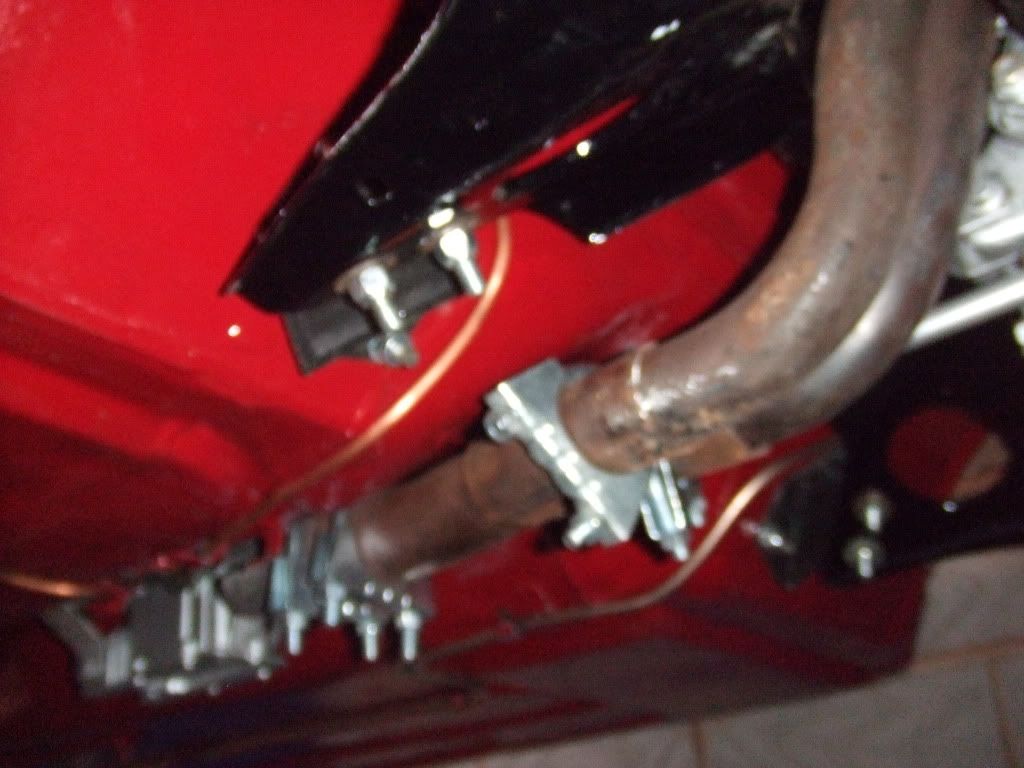
hi all, today i put a few more hours in
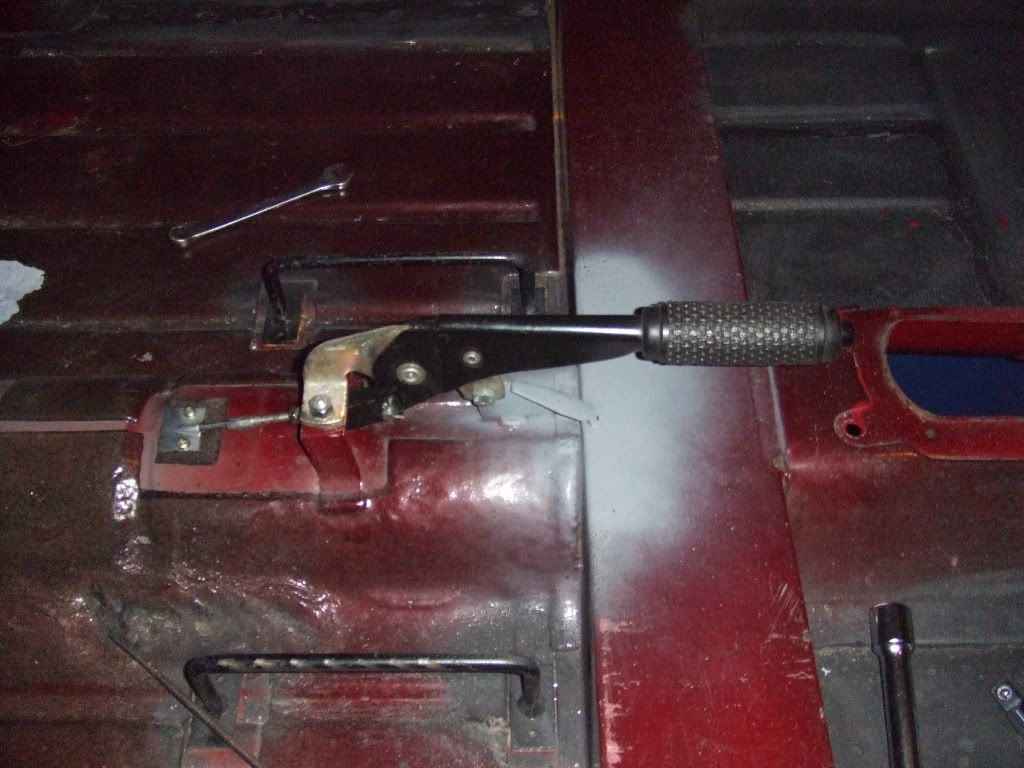
the handbrake is now installed and fully functioning
the brake lines are connected up
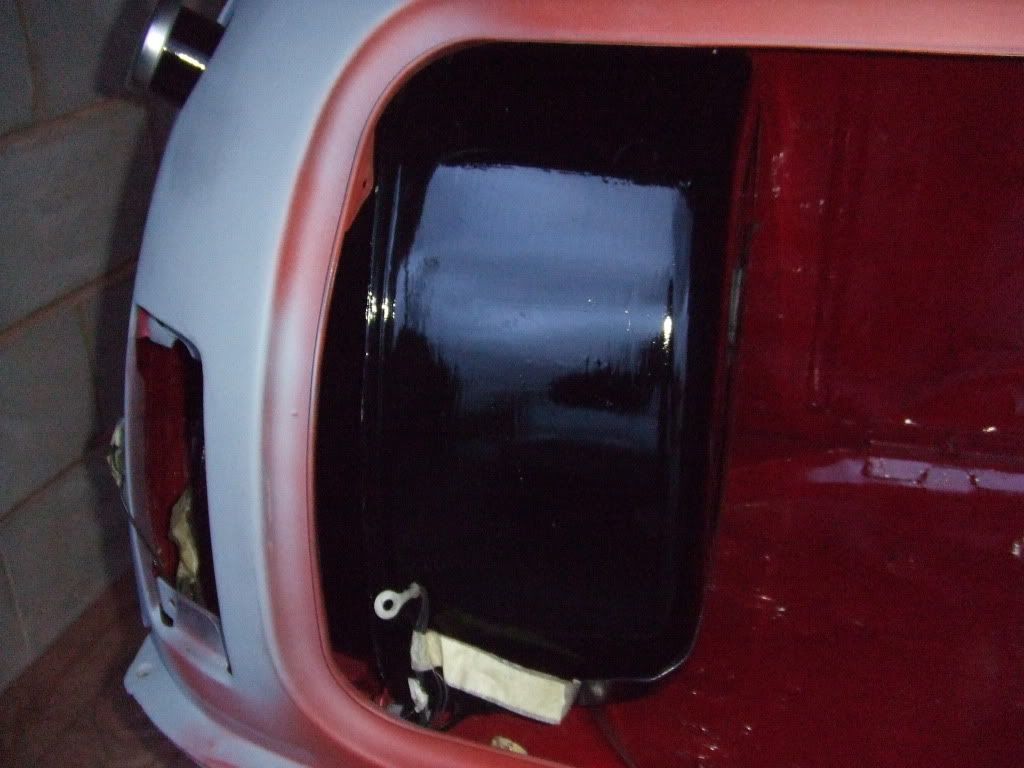
the fuel tank is in, although i'm not happy with how it is sitting at the minuet but it has got to come out for the respray
fuel line connected up
rear loom pinned into place
i haven't taken any pics as there isn't much to see really and my iphone's camera isn't the best quality
i'm not working on it tomorrow as i've got an important presentation day with a collage project but hopefully i'll get the wheels cleaned up ready
Rhys
the handbrake is now installed and fully functioning
the brake lines are connected up
the fuel tank is in, although i'm not happy with how it is sitting at the minuet but it has got to come out for the respray
fuel line connected up
rear loom pinned into place
i haven't taken any pics as there isn't much to see really and my iphone's camera isn't the best quality
i'm not working on it tomorrow as i've got an important presentation day with a collage project but hopefully i'll get the wheels cleaned up ready
Rhys
#309
stretch tech
-
- Members
-
- 1,363 posts
One Carb Or Two?
- Location: Tamwoth
- Local Club: A5 & Mini Mainiacs
Posted 26 April 2012 - 07:26 PM
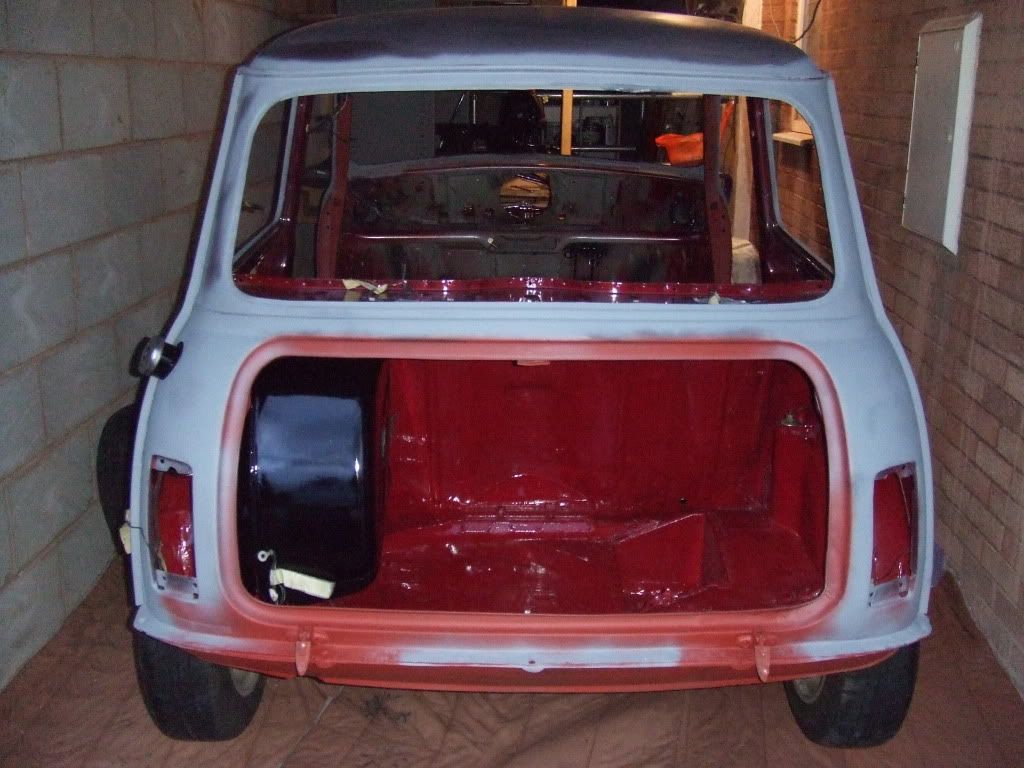
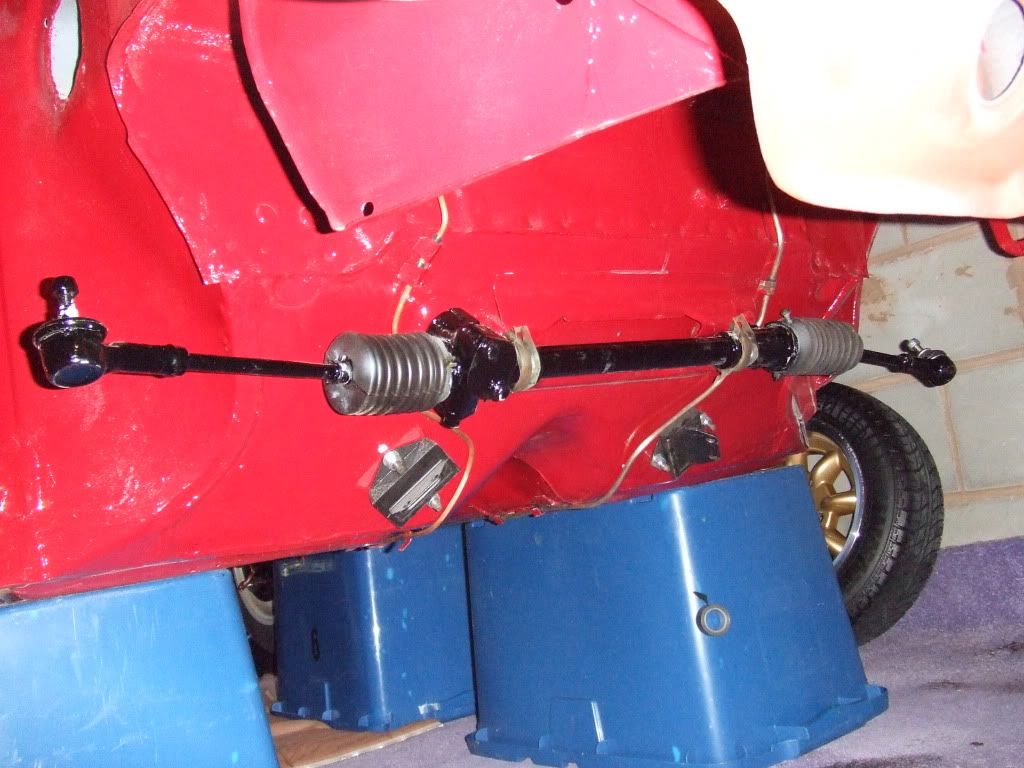
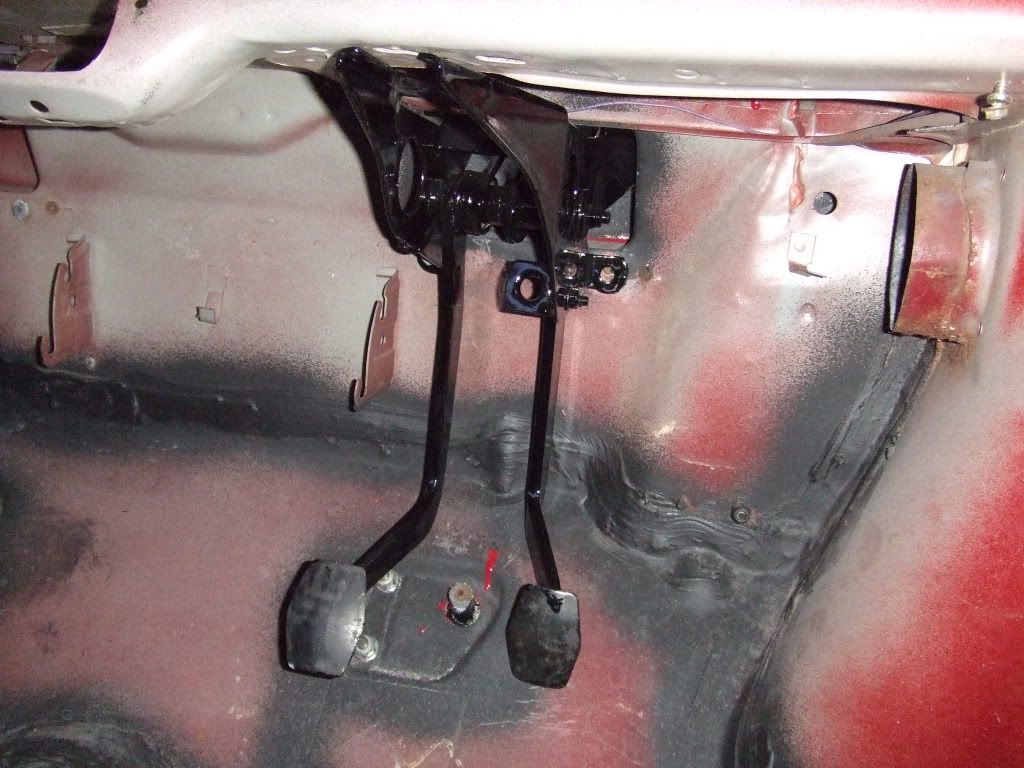
photos from yesterday
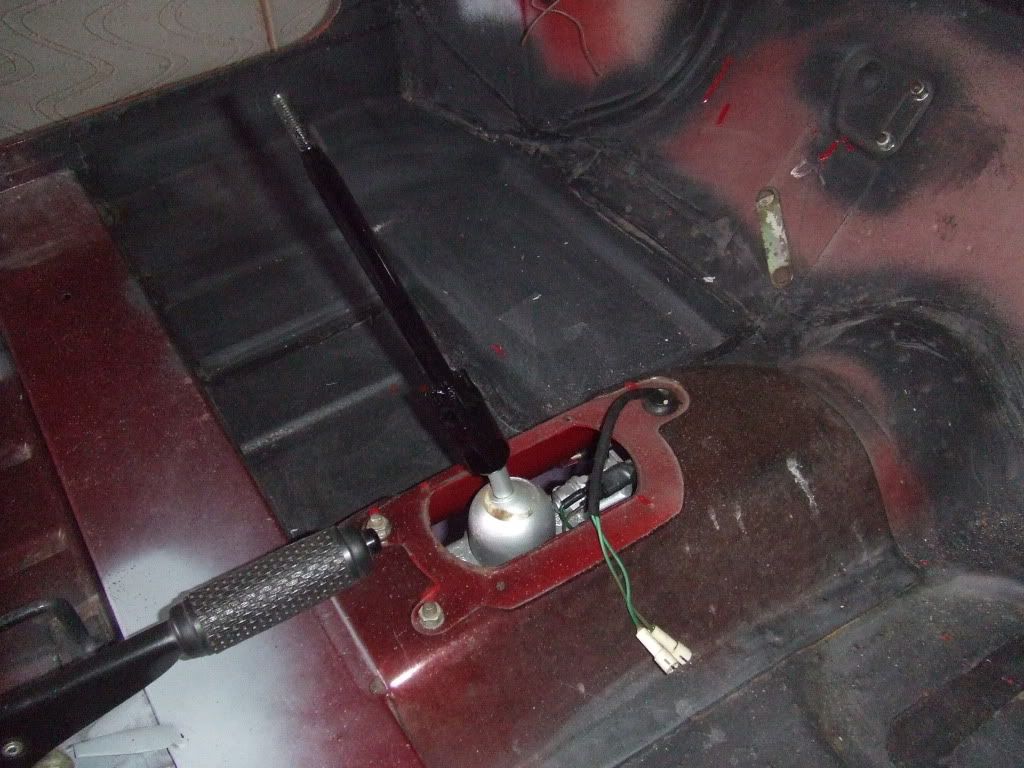
fuel tank in, any advice as to if this is fitted correctly as i am unsure ?
handbrake in
hi all, i managed to get an extra hour in tonight
rear wheels cleaned up and bolted on, and looking like brand new
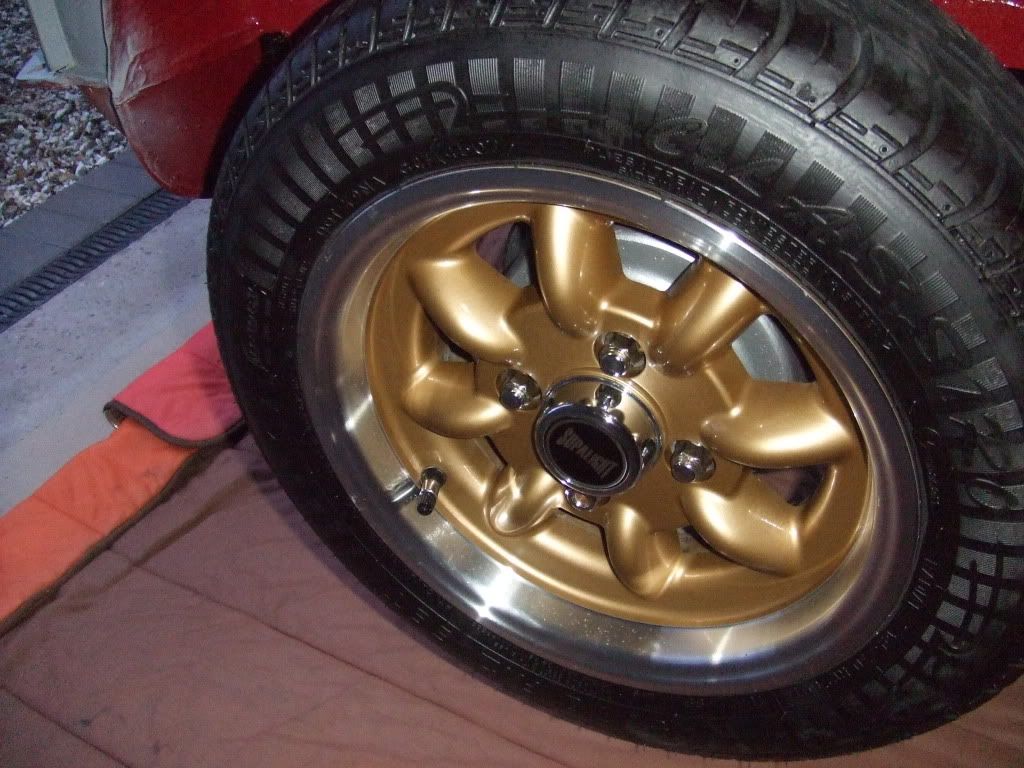
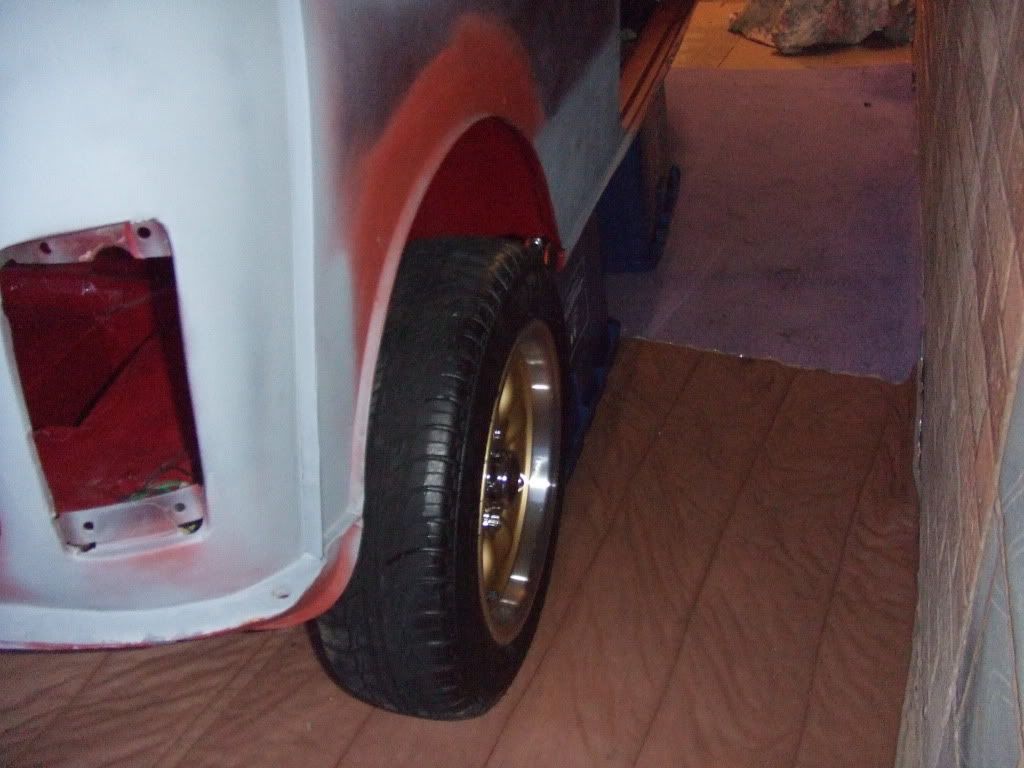
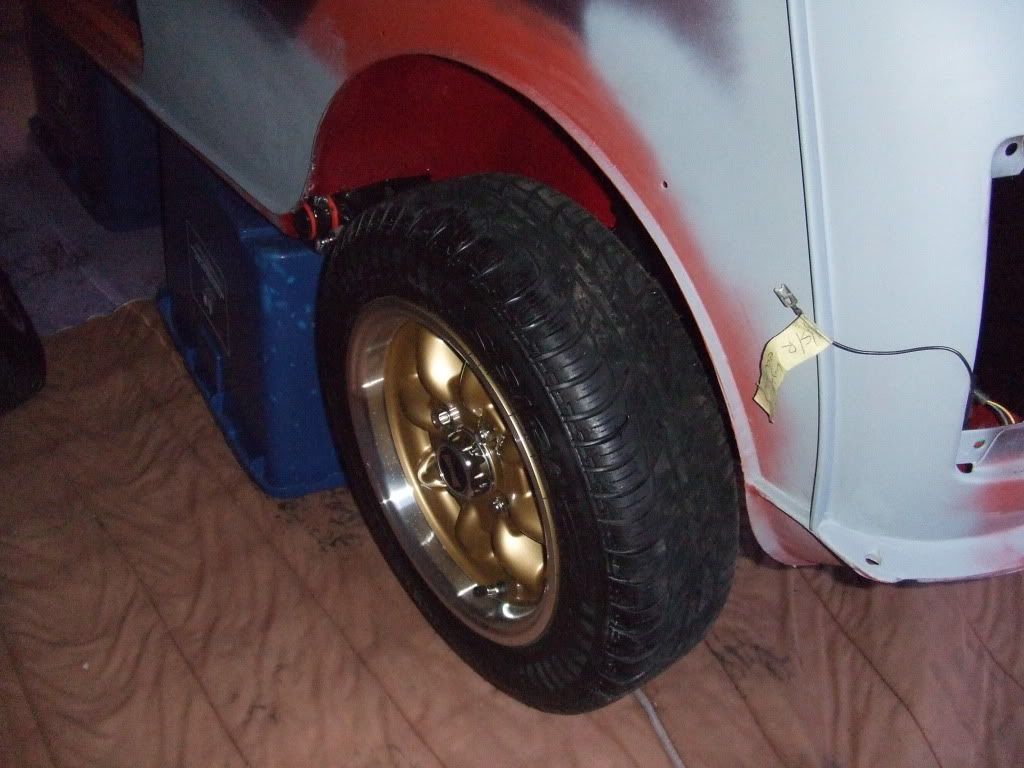

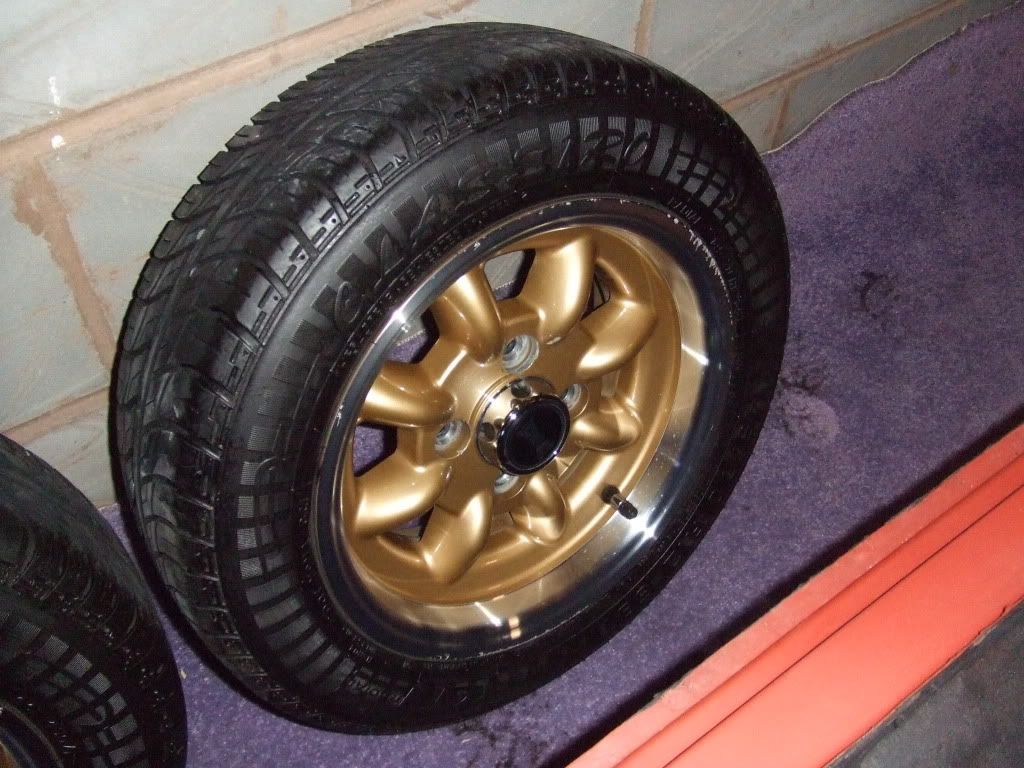
also gave the tyres a coat of tyre black and i realised that there is still markings visible on the tread, that just goes to show how recently the wheels were fitted
new handbrake cable greased up
steering rack fitted
pedal box fitted
i finish early tomorrow so we should get a good few hours in, hopefully we might even get it running by Saturday afternoon / Sunday morning
comments welcome as always
Rhys
fuel tank in, any advice as to if this is fitted correctly as i am unsure ?
handbrake in
hi all, i managed to get an extra hour in tonight
rear wheels cleaned up and bolted on, and looking like brand new
also gave the tyres a coat of tyre black and i realised that there is still markings visible on the tread, that just goes to show how recently the wheels were fitted
new handbrake cable greased up
steering rack fitted
pedal box fitted
i finish early tomorrow so we should get a good few hours in, hopefully we might even get it running by Saturday afternoon / Sunday morning
comments welcome as always
Rhys
#310
stretch tech
-
- Members
-
- 1,363 posts
One Carb Or Two?
- Location: Tamwoth
- Local Club: A5 & Mini Mainiacs
Posted 27 April 2012 - 08:35 PM
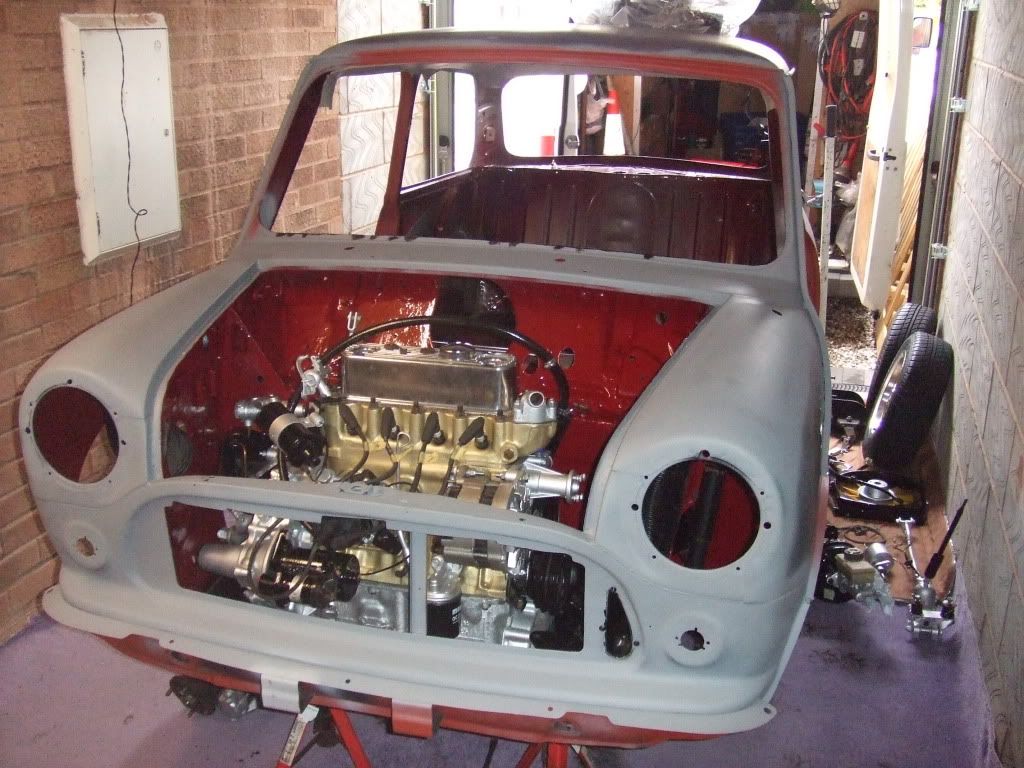
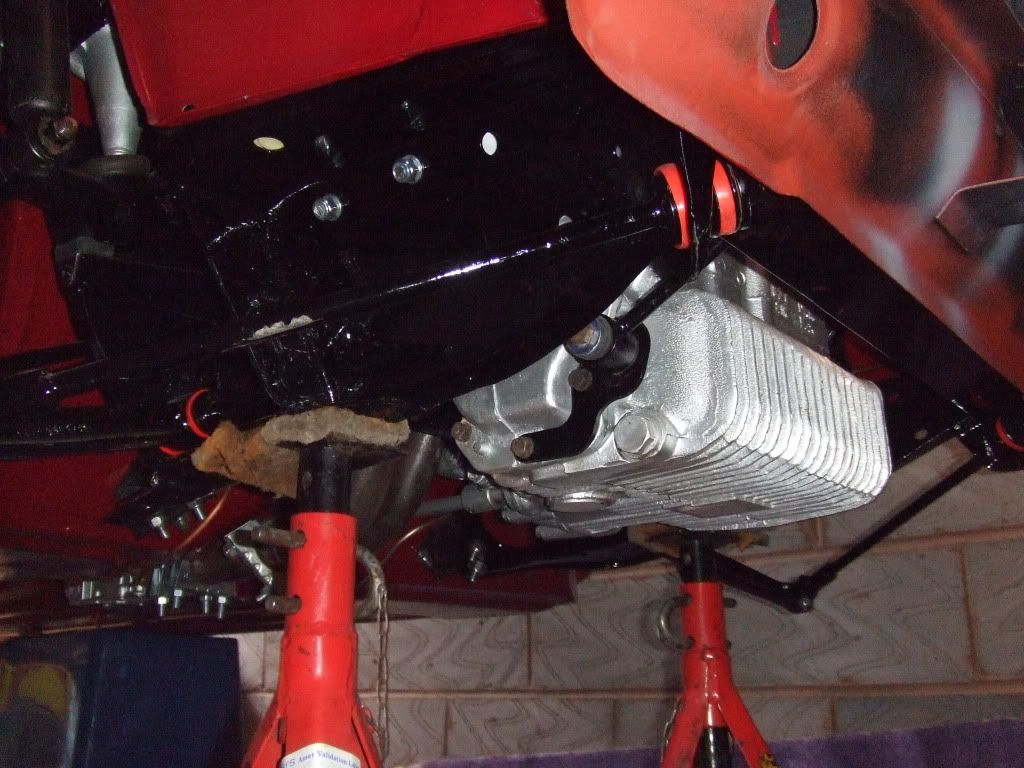
hi all, i managed to get 3 hours in today
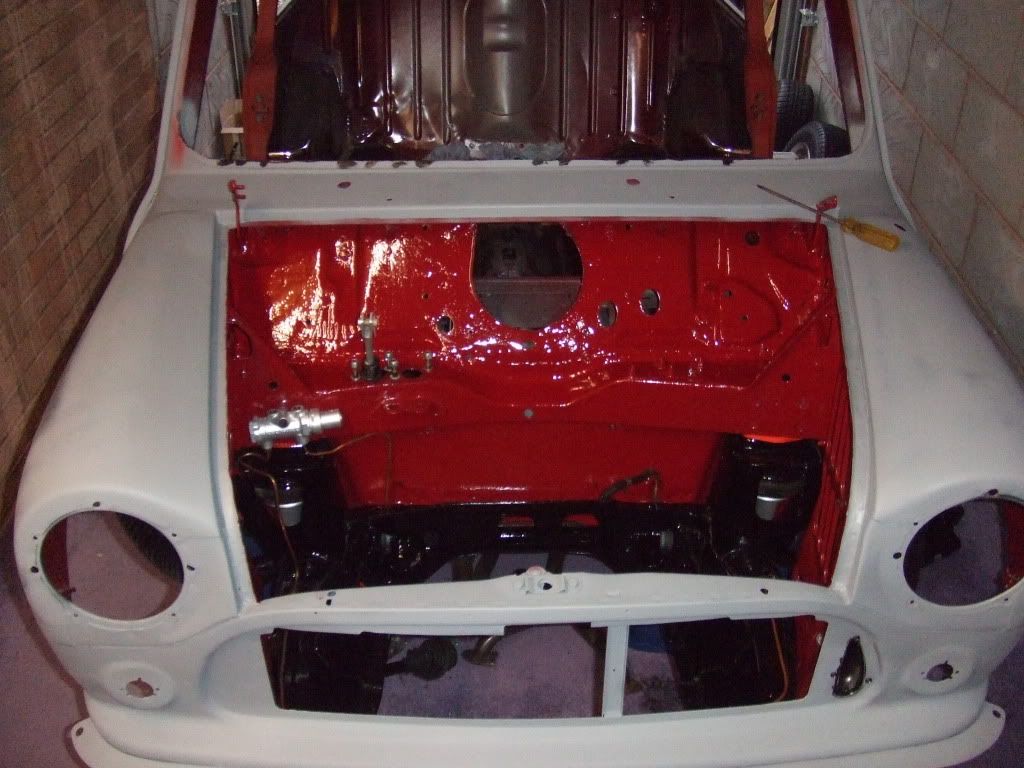
gave the engine bay another coat of paint
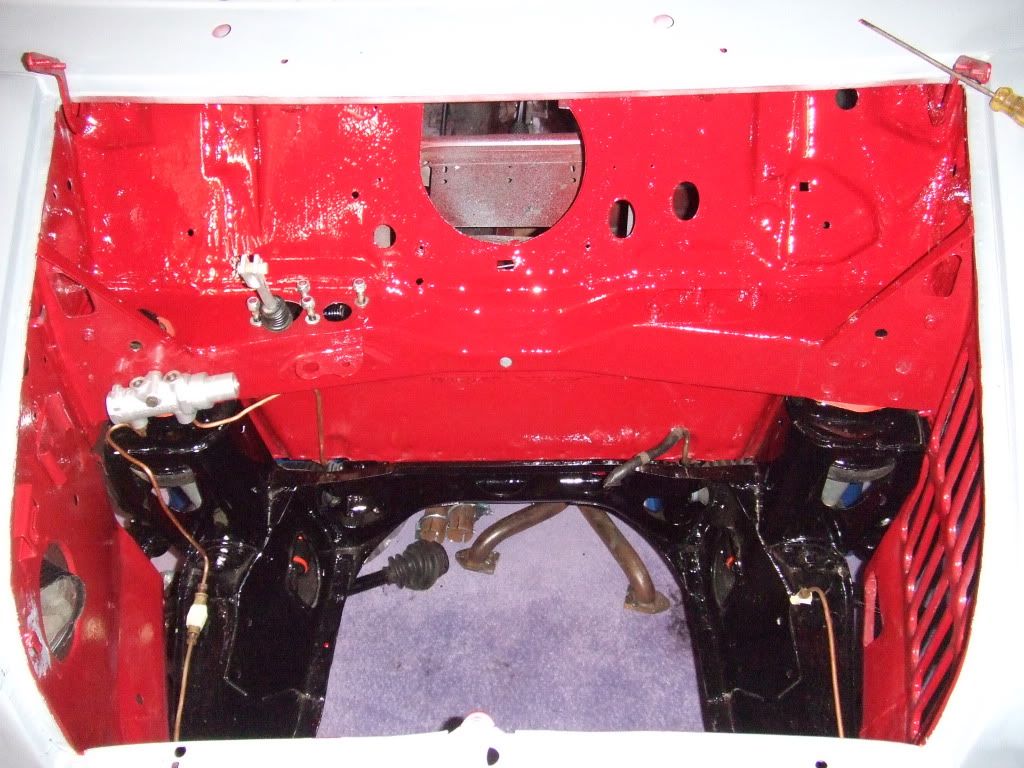
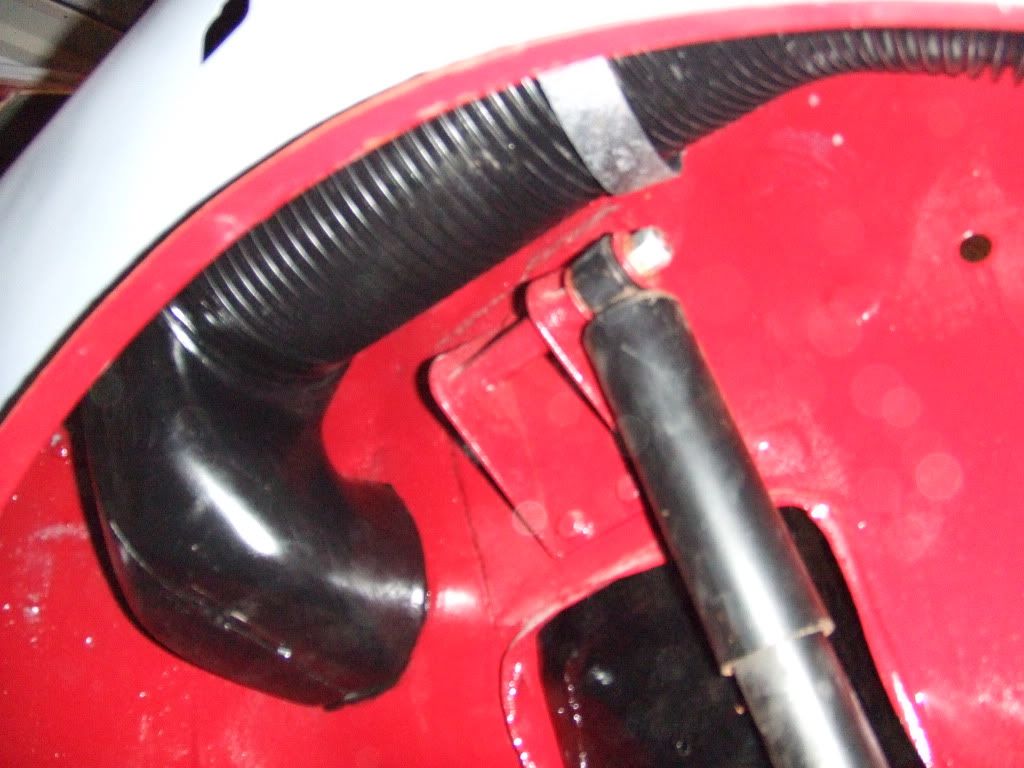
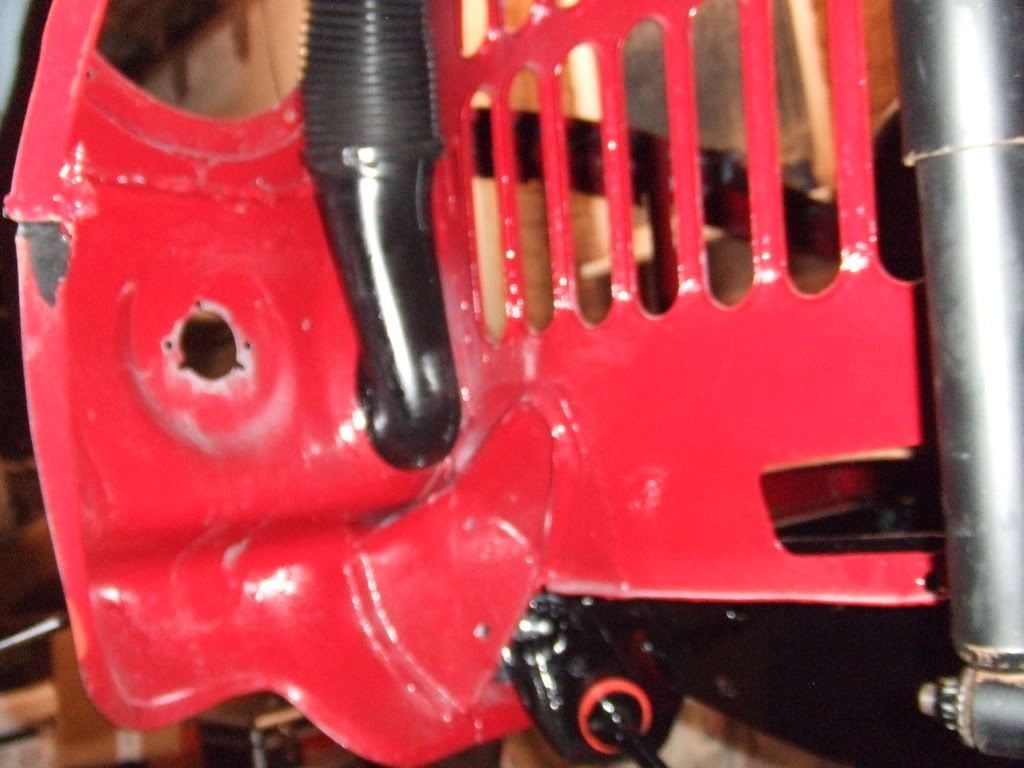
fitted the pre built front subframe
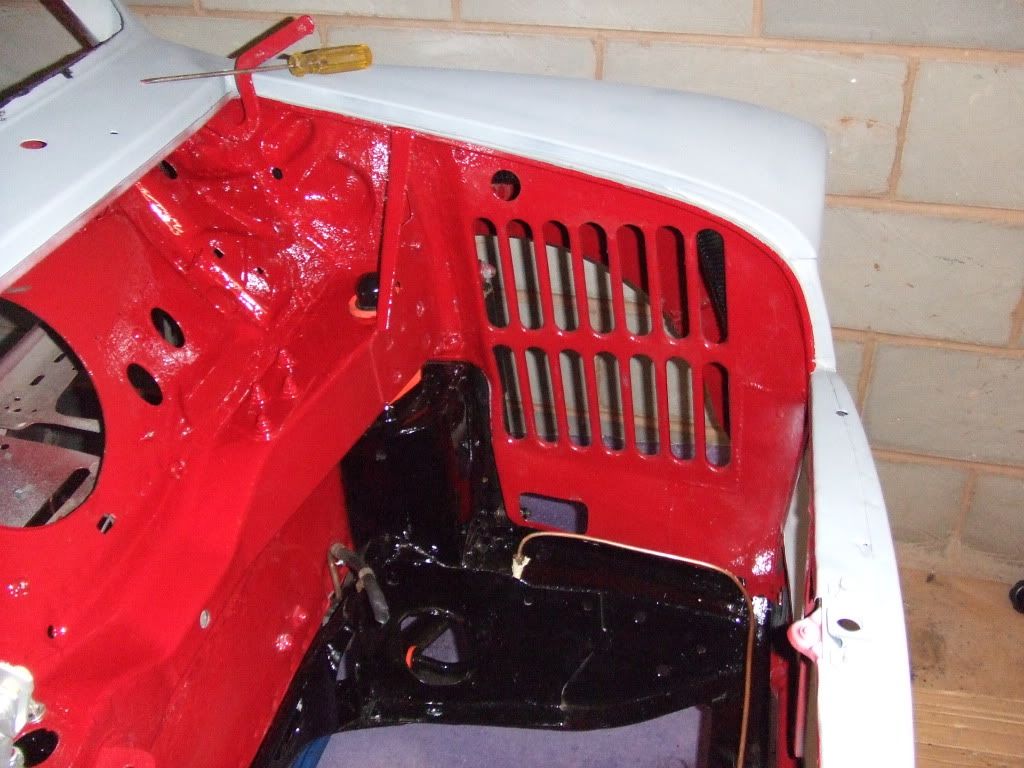

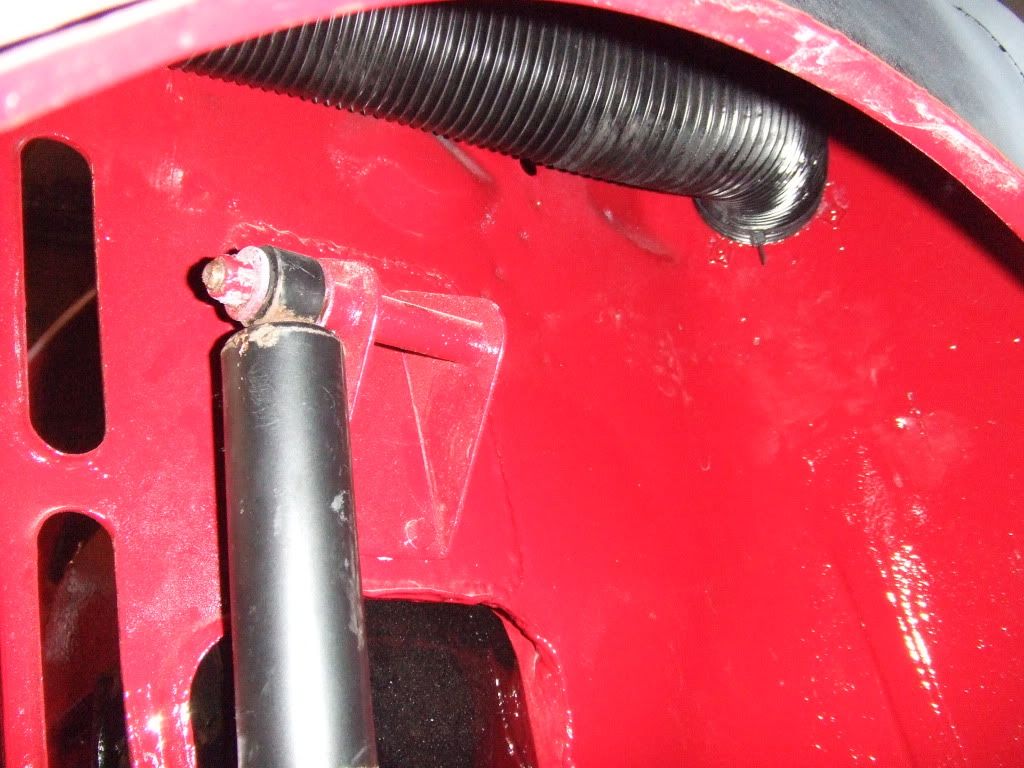
fitted the air vent pipes
and finally we dis assembled the racking and set up this beast of an engine hoist kindly lent to us by may dad's mate Paul .........
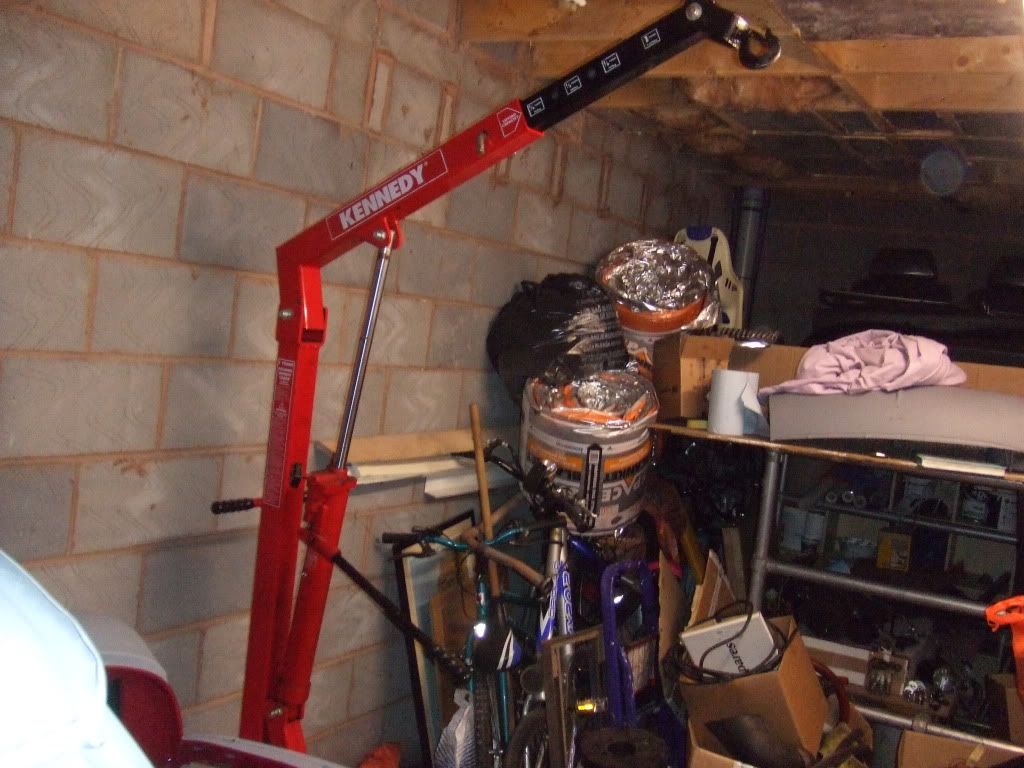
.....it can lift a fully built mini
that's all for today, tomorrow we will be working all day to hopefully get the mini running fingers crossed it goes smoothly
Rhys
gave the engine bay another coat of paint
fitted the pre built front subframe
fitted the air vent pipes
and finally we dis assembled the racking and set up this beast of an engine hoist kindly lent to us by may dad's mate Paul .........
.....it can lift a fully built mini
that's all for today, tomorrow we will be working all day to hopefully get the mini running
fingers crossed it goes smoothly Rhys
Edited by TH3aRchit3ct95, 30 April 2012 - 09:12 PM.
#311
fattail95
-

- Members
-
- 873 posts
One Carb Or Two?
- Location: East Sussex
Posted 28 April 2012 - 02:21 PM
You have done a fantastic job with this Mini mate, I bet you cant help but grin every time you look at it!  Can't wait to see it painted and ready to go, will be following this thread with interest.
Can't wait to see it painted and ready to go, will be following this thread with interest.
#312
stretch tech
-
- Members
-
- 1,363 posts
One Carb Or Two?
- Location: Tamwoth
- Local Club: A5 & Mini Mainiacs
Posted 29 April 2012 - 09:28 AM
You have done a fantastic job with this Mini mate, I bet you cant help but grin every time you look at it!
cheers mate, your right it does make me grin when i see it
and neither can i Rhys
#313
stretch tech
-
- Members
-
- 1,363 posts
One Carb Or Two?
- Location: Tamwoth
- Local Club: A5 & Mini Mainiacs
Posted 29 April 2012 - 09:40 AM
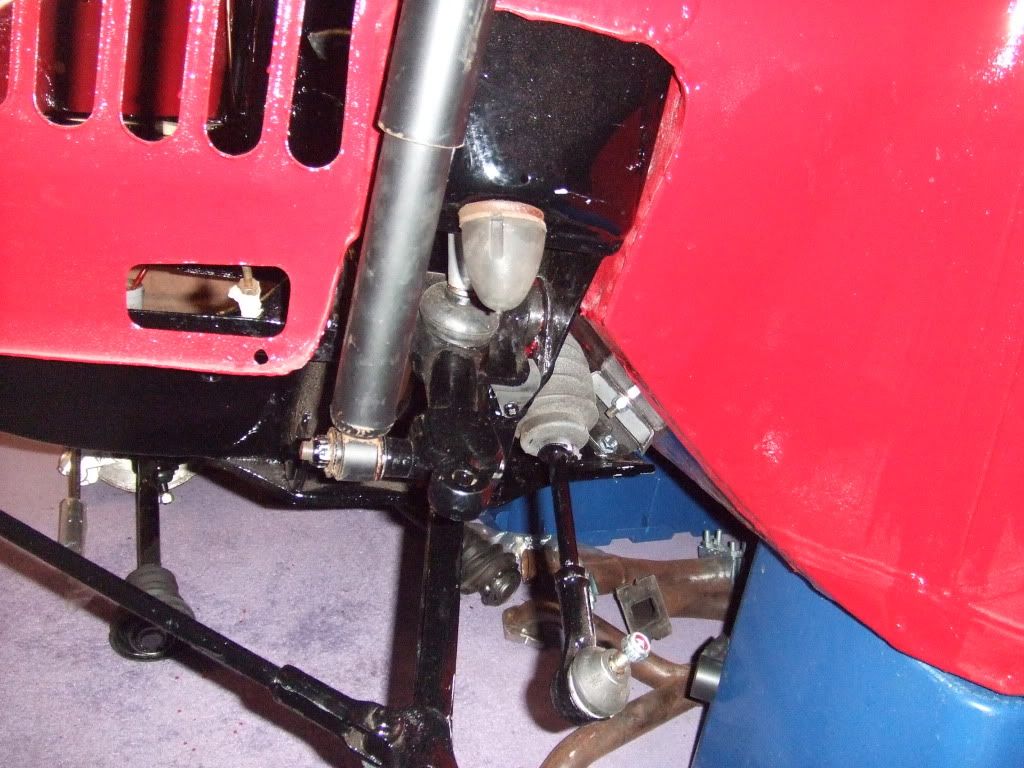
hi all, update from yesterday
first we used the engine hoist to drop the engine onto it's mounts and loosely fitted the bottom steady arm
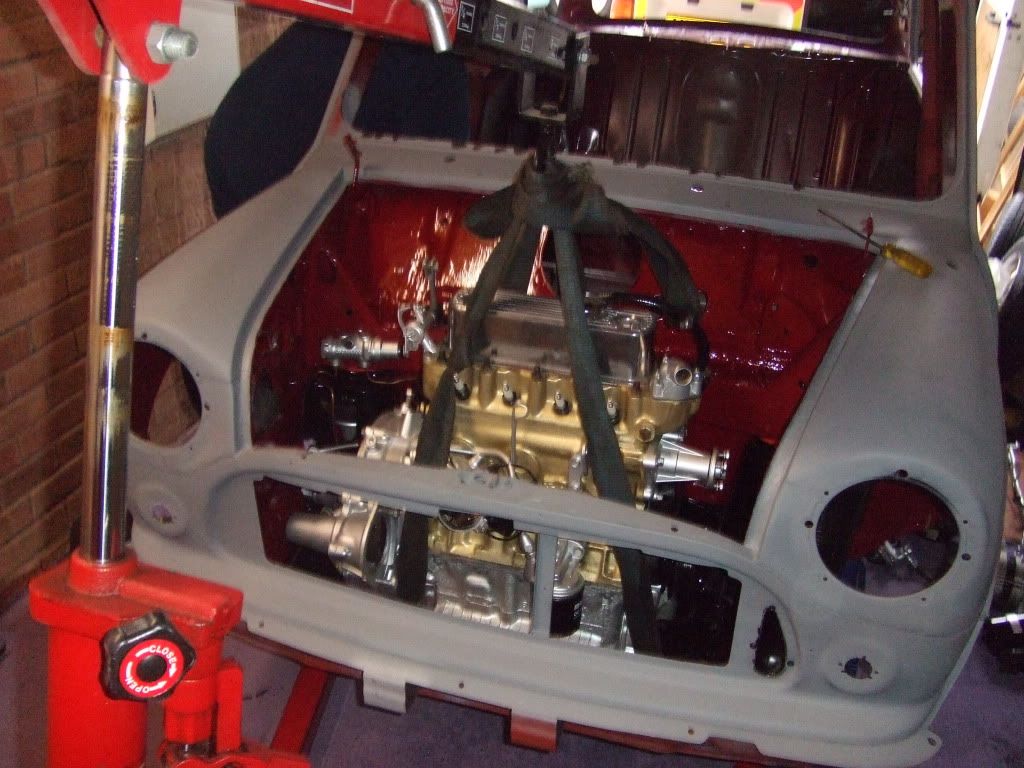
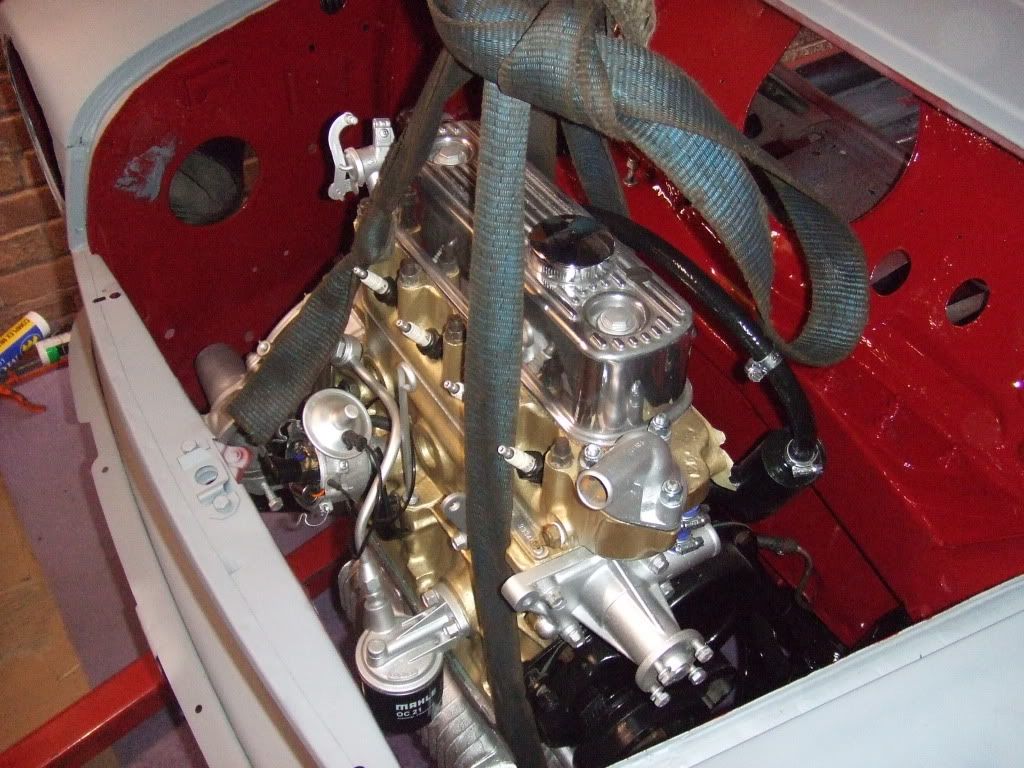
then we fitted the starter motor, alternator, coil, distributor cap and HT leads
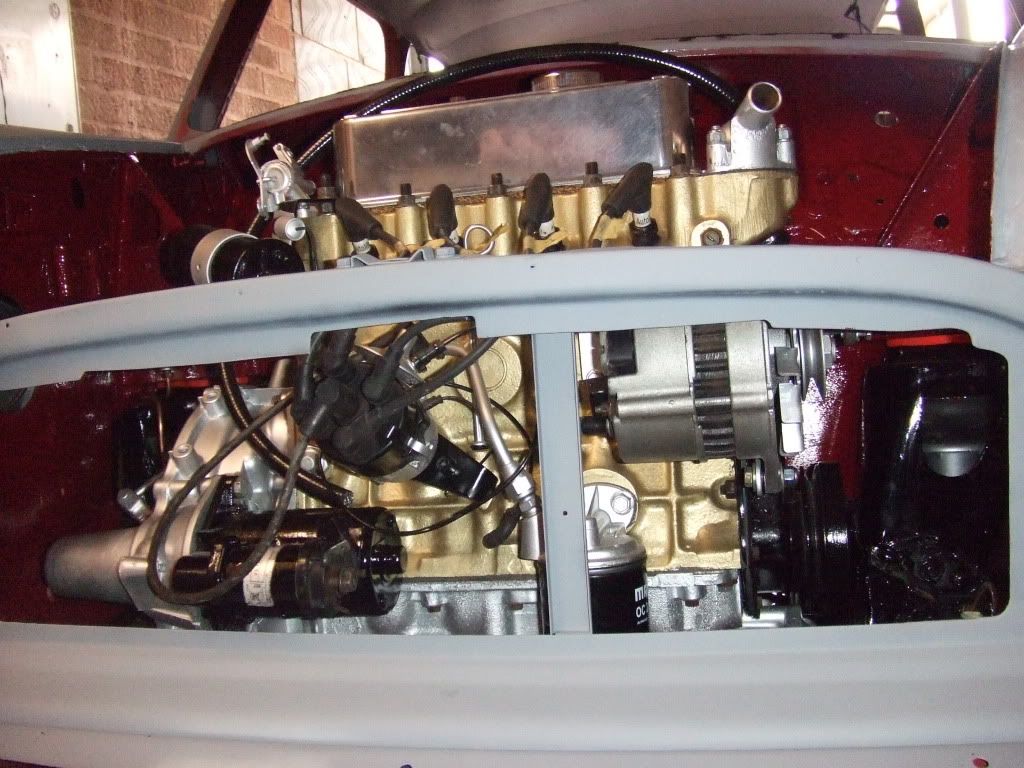
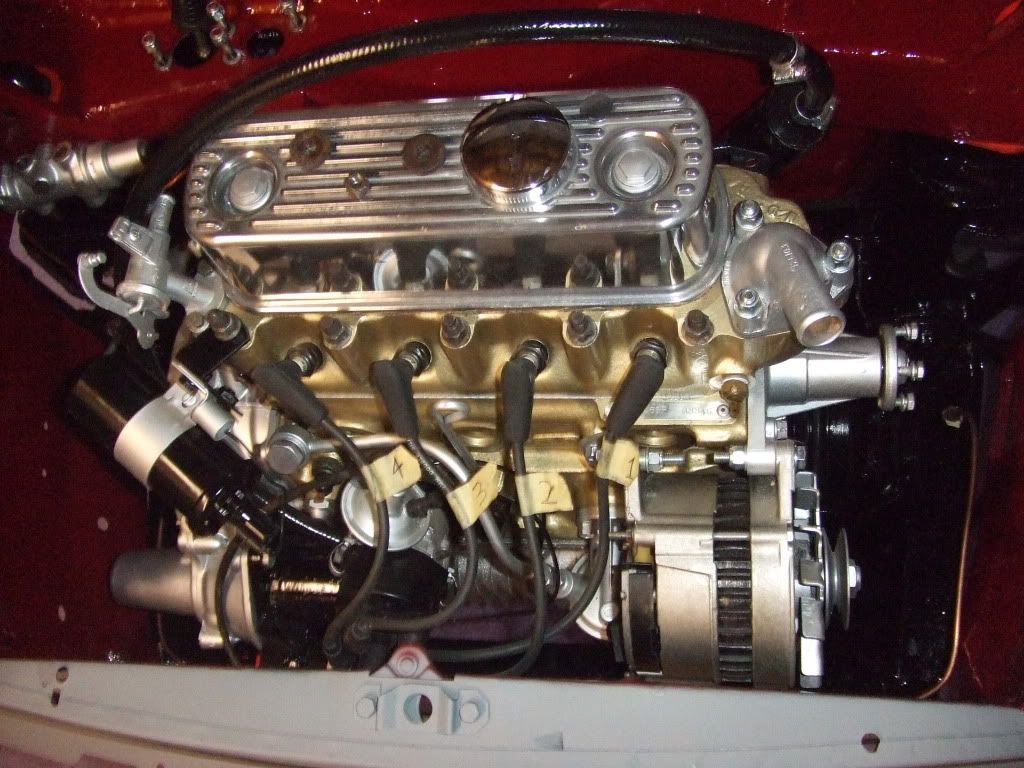
then we fitted the clutch slave cylinder, clutch master cylinder, brake servo, top engine steady, ballast resistor, inlet manifold, carb and airfilter (which took some adjustment to clear the bulk head) and the new lcb exhaust manifold
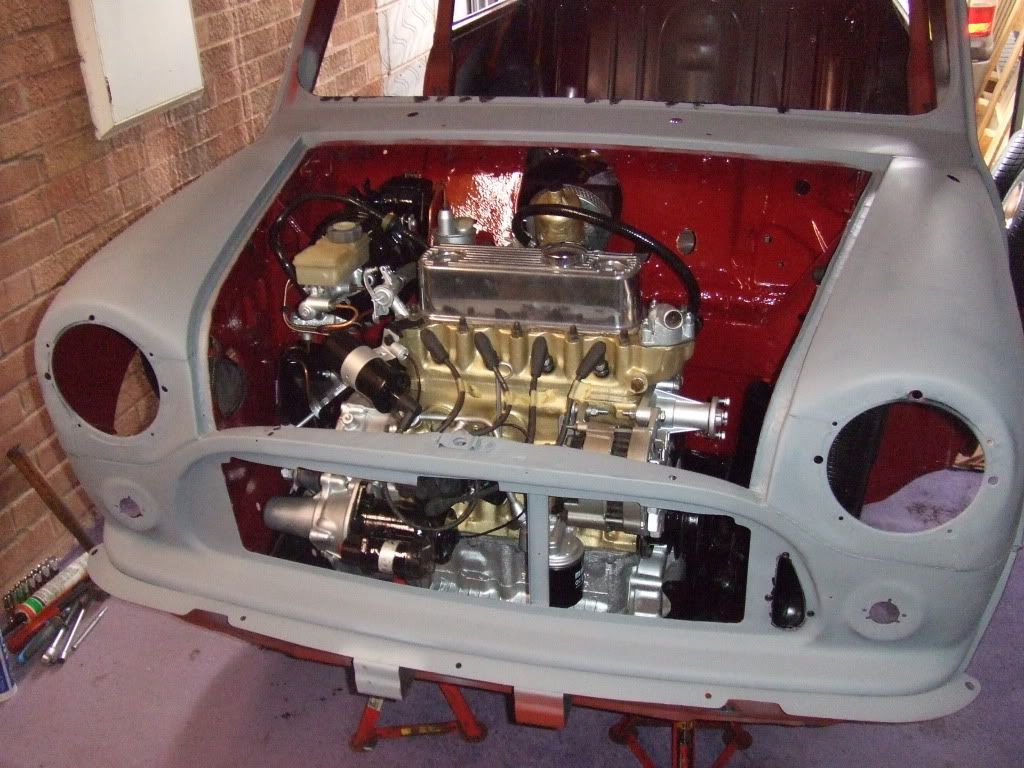
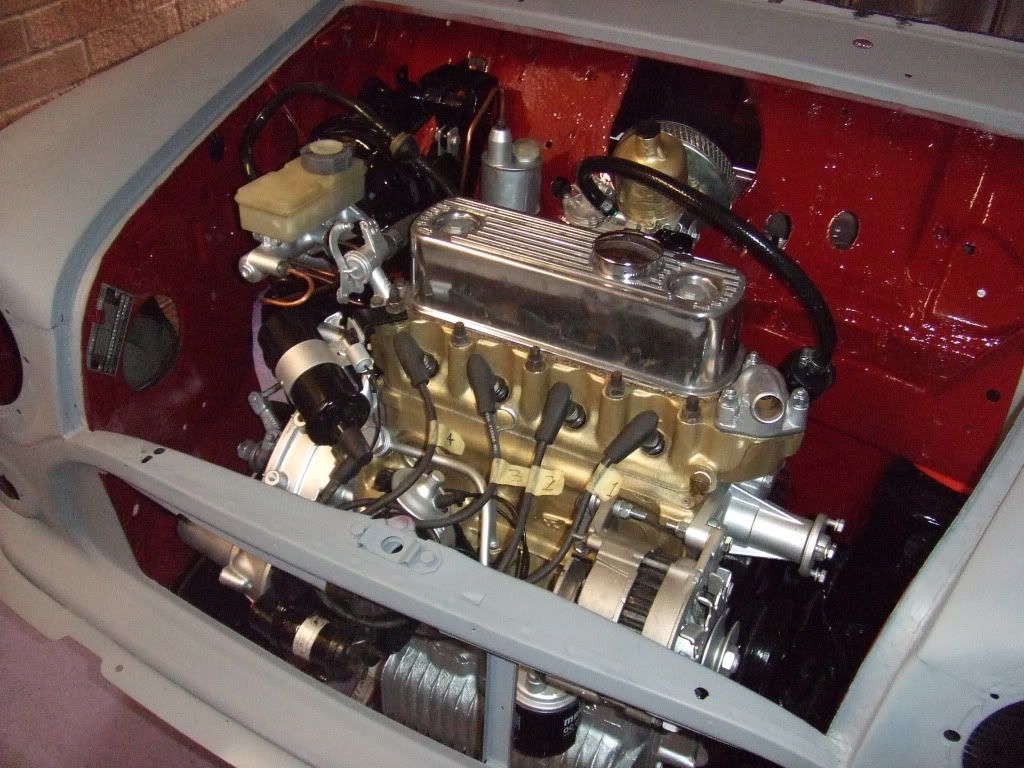
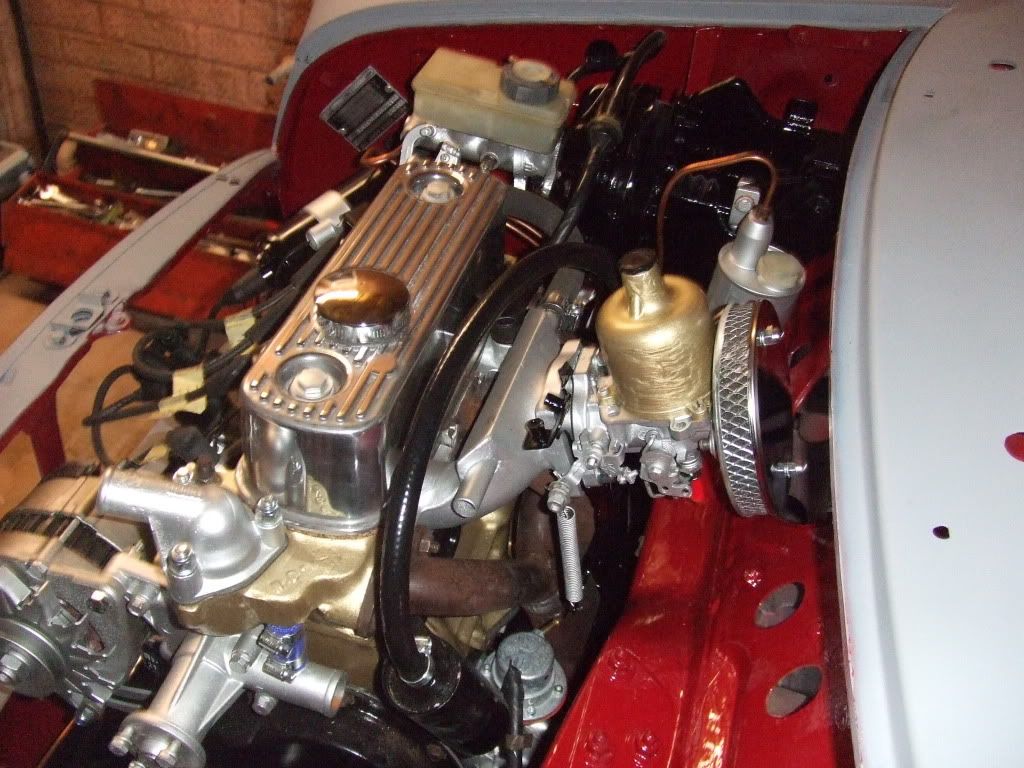
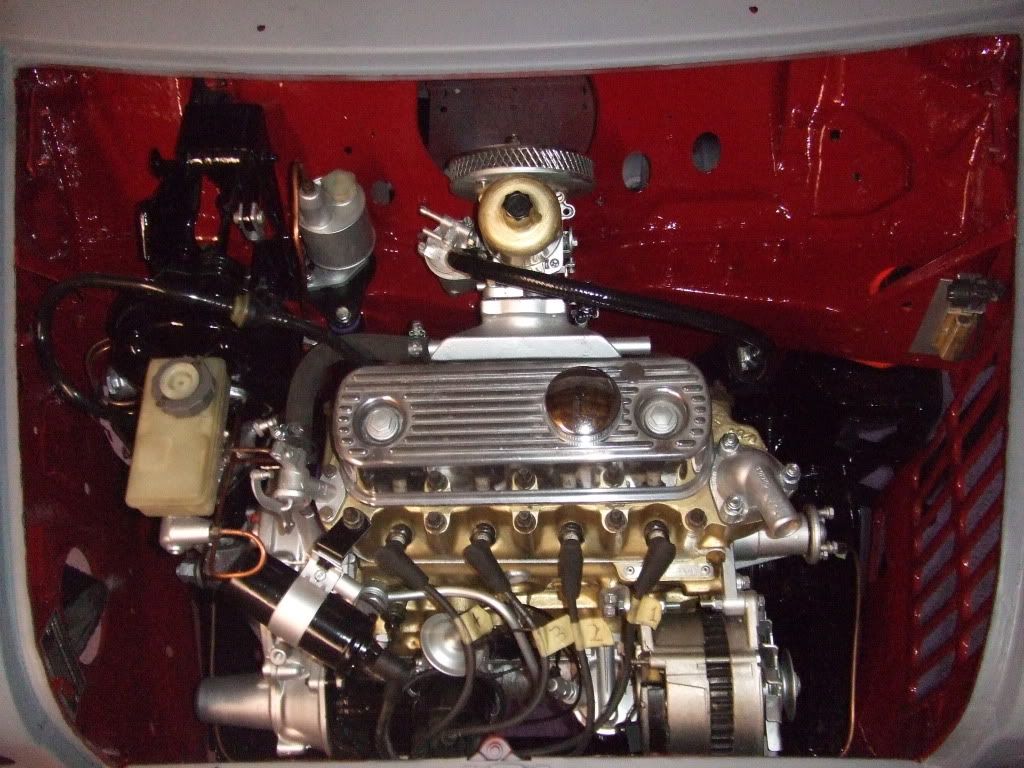
then we fitted the y piece and gear linkage
that's all from yesterday, i'm going into the garage now to put a few more hours in
Rhys
first we used the engine hoist to drop the engine onto it's mounts and loosely fitted the bottom steady arm
then we fitted the starter motor, alternator, coil, distributor cap and HT leads
then we fitted the clutch slave cylinder, clutch master cylinder, brake servo, top engine steady, ballast resistor, inlet manifold, carb and airfilter (which took some adjustment to clear the bulk head) and the new lcb exhaust manifold
then we fitted the y piece and gear linkage
that's all from yesterday, i'm going into the garage now to put a few more hours in
Rhys
Edited by TH3aRchit3ct95, 29 April 2012 - 09:41 AM.
#314
Andrew O
-

- Members
-
- 1,425 posts
Previously known as Andrewo330.
Posted 29 April 2012 - 09:48 AM
Looking good . Two questions
1 Have you put your throttle cable in ?
2 Have you put your speedo cable in ?
1 Have you put your throttle cable in ?
2 Have you put your speedo cable in ?
#315
stretch tech
-
- Members
-
- 1,363 posts
One Carb Or Two?
- Location: Tamwoth
- Local Club: A5 & Mini Mainiacs
Posted 29 April 2012 - 09:50 AM
Looking good . Two questions
1 Have you put your throttle cable in ? no
2 Have you put your speedo cable in ? no
cheers mate
Rhys


2 user(s) are reading this topic
0 members, 1 guests, 0 anonymous users
-
Bing (1)


