
Project Cliff - The Cherry Red Thirty
#181

Posted 24 February 2012 - 07:31 PM
Where did you get the new few box from and is it just the same to wire in as the normal one or any different ?
#182

Posted 24 February 2012 - 08:15 PM
Moving along now.
Where did you get the new few box from and is it just the same to wire in as the normal one or any different ?
i got it from a local electrical suppliers and i'm not sure how different it will be to wire in, it may require soldering new contacts on the end of the wires but nothing too challenging...i hope
Rhys
#183

Posted 25 February 2012 - 05:00 PM
this is what we are borrowing off of my dad's mate...
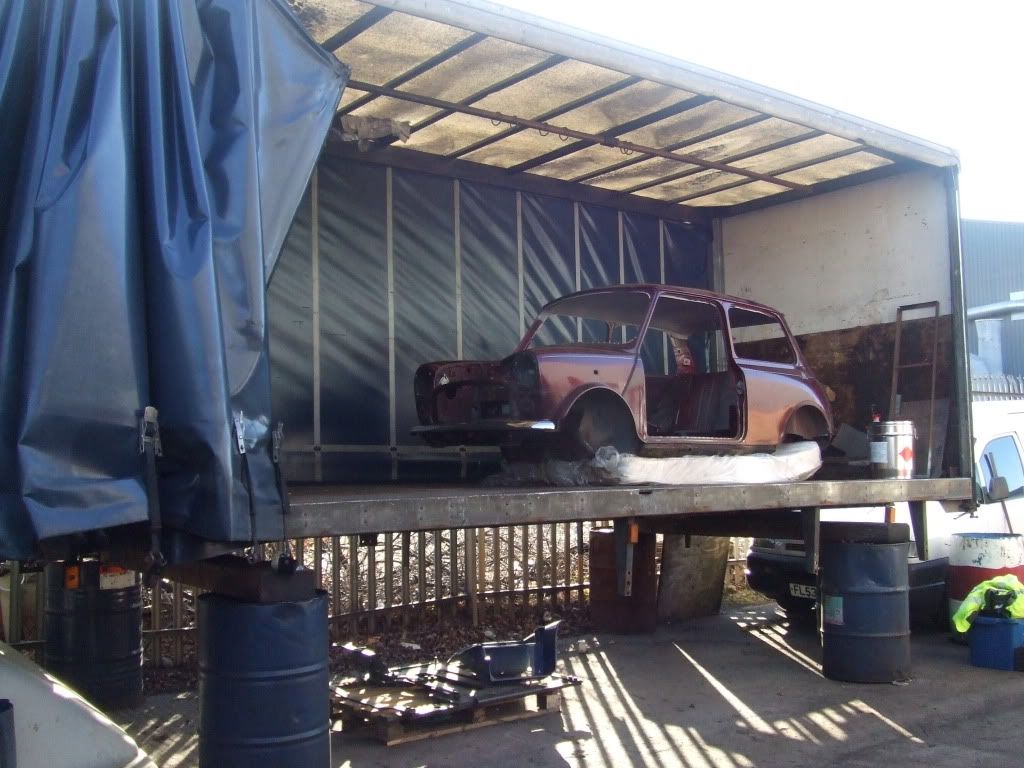
...it's the old curtain-sider body off the back of the recovery truck he lent us
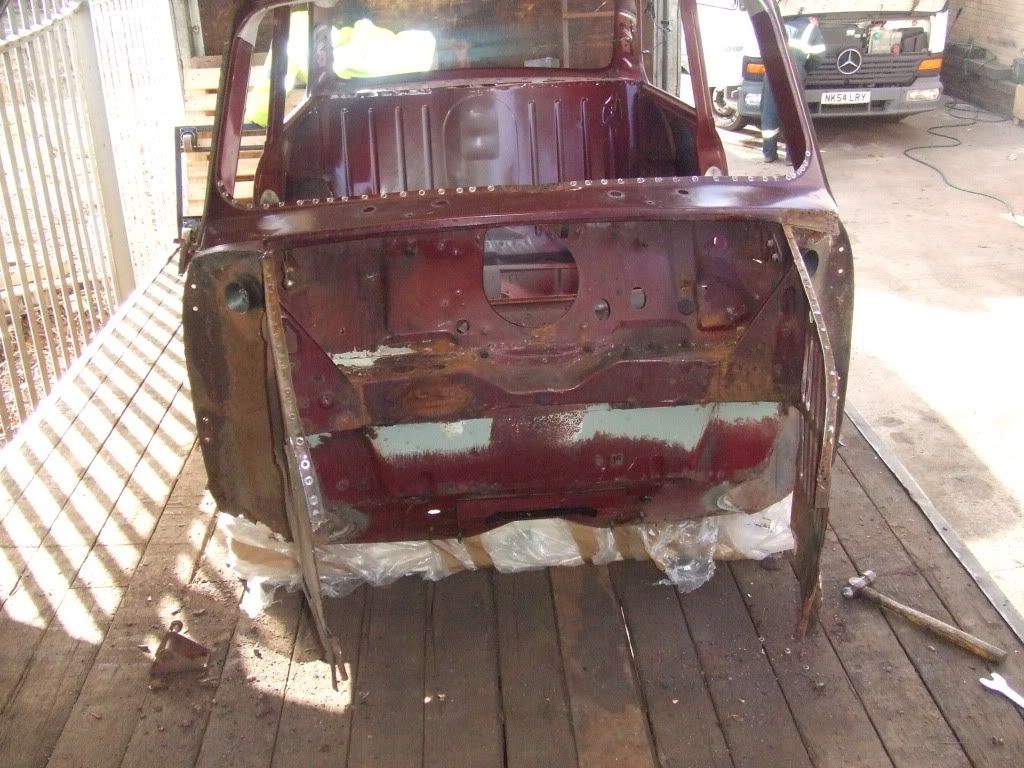
so we started by using a plasma cutter to remove the front end, now you see it...
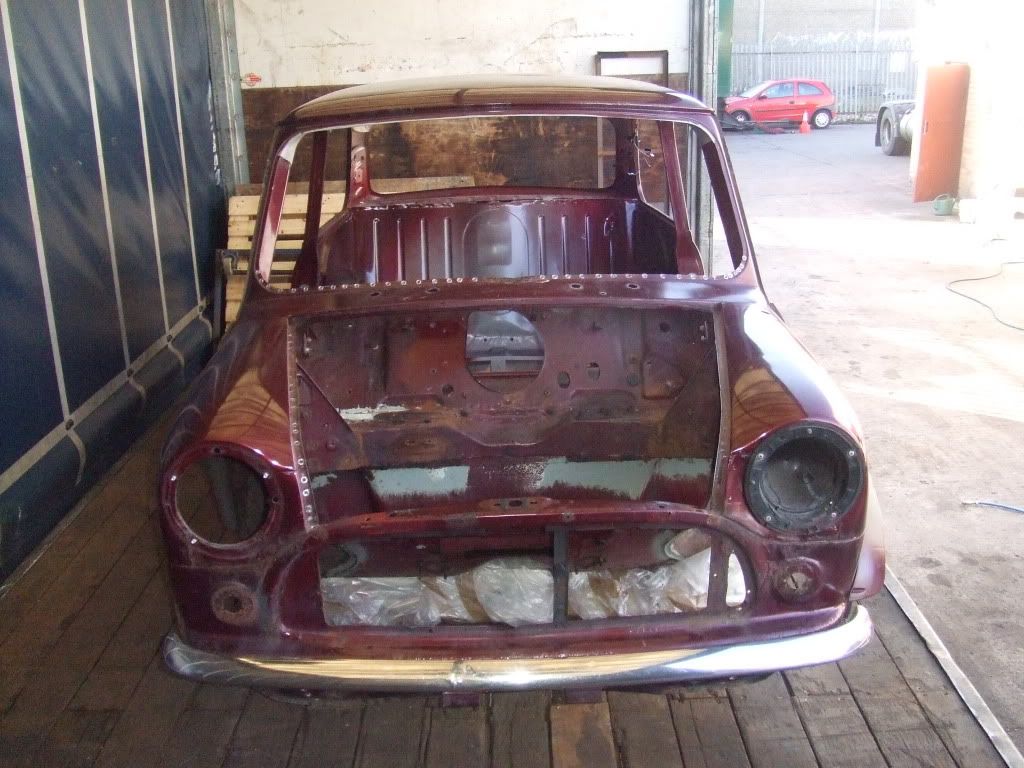
...now you don't...
#184

Posted 25 February 2012 - 05:19 PM
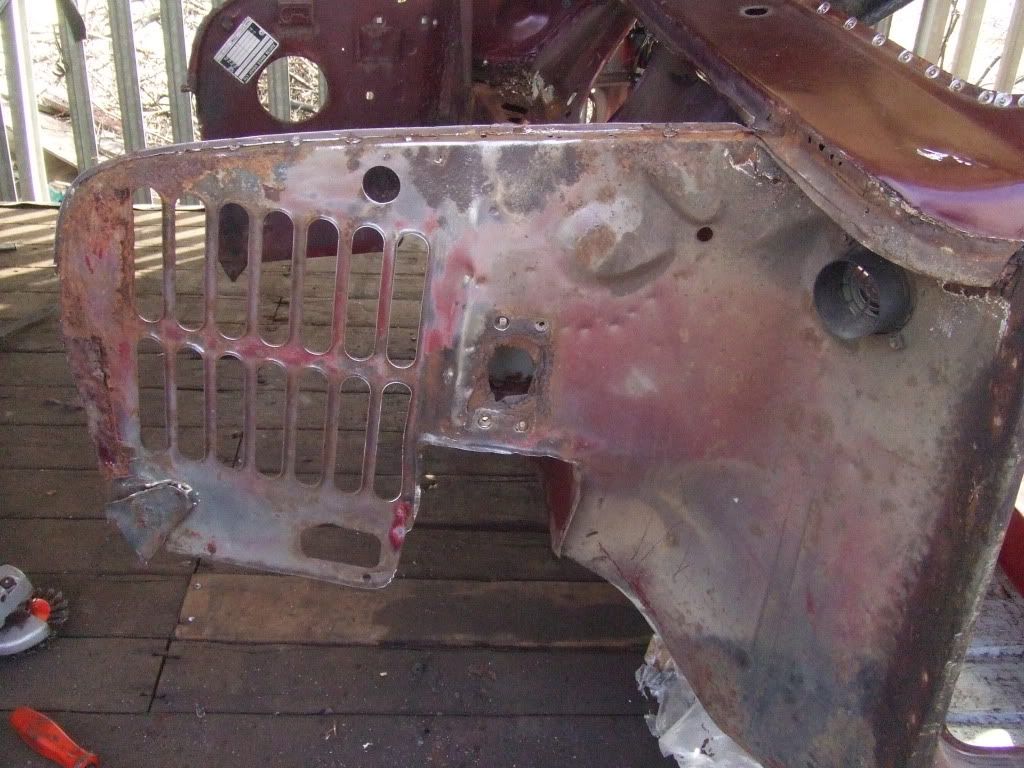
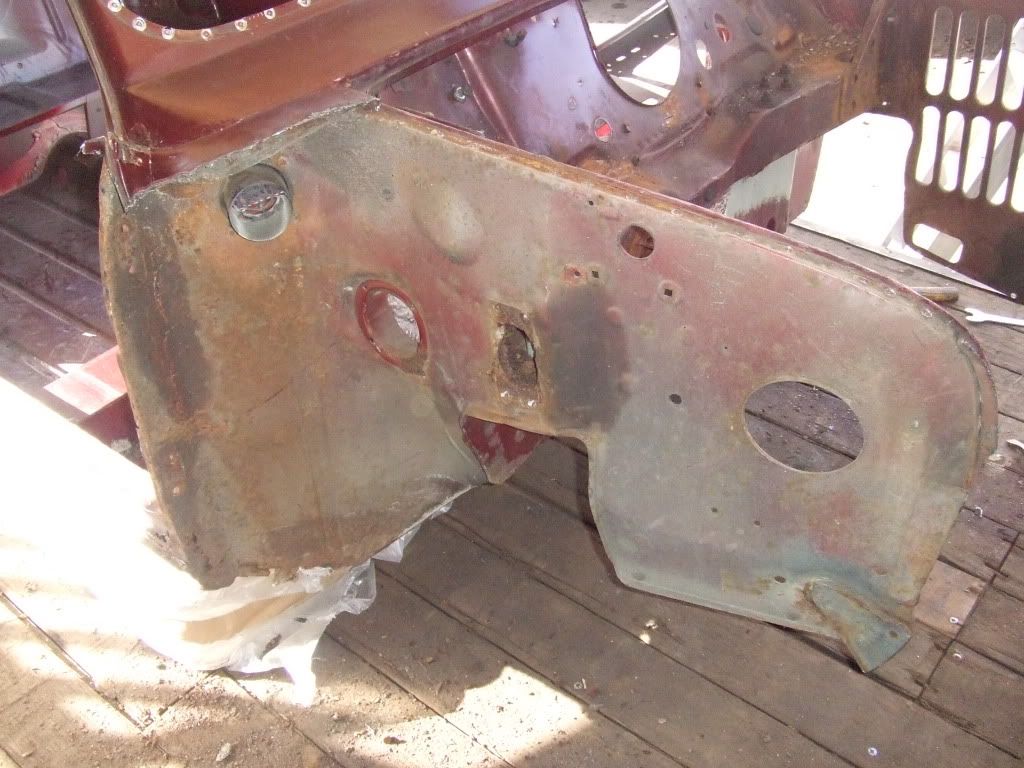
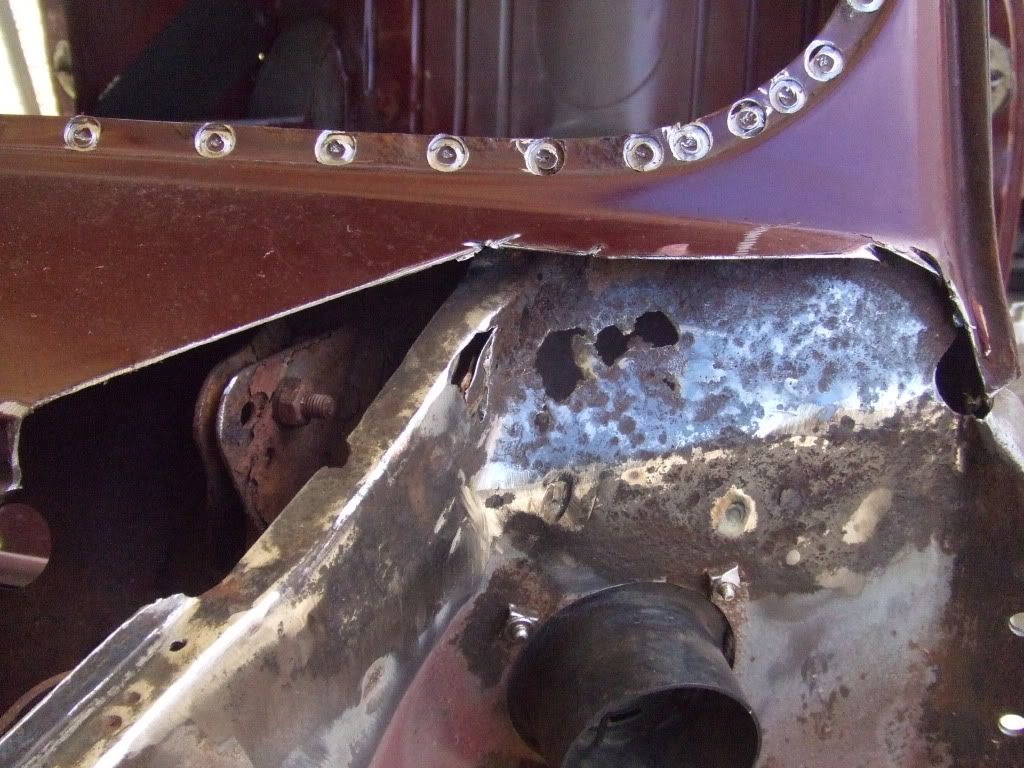
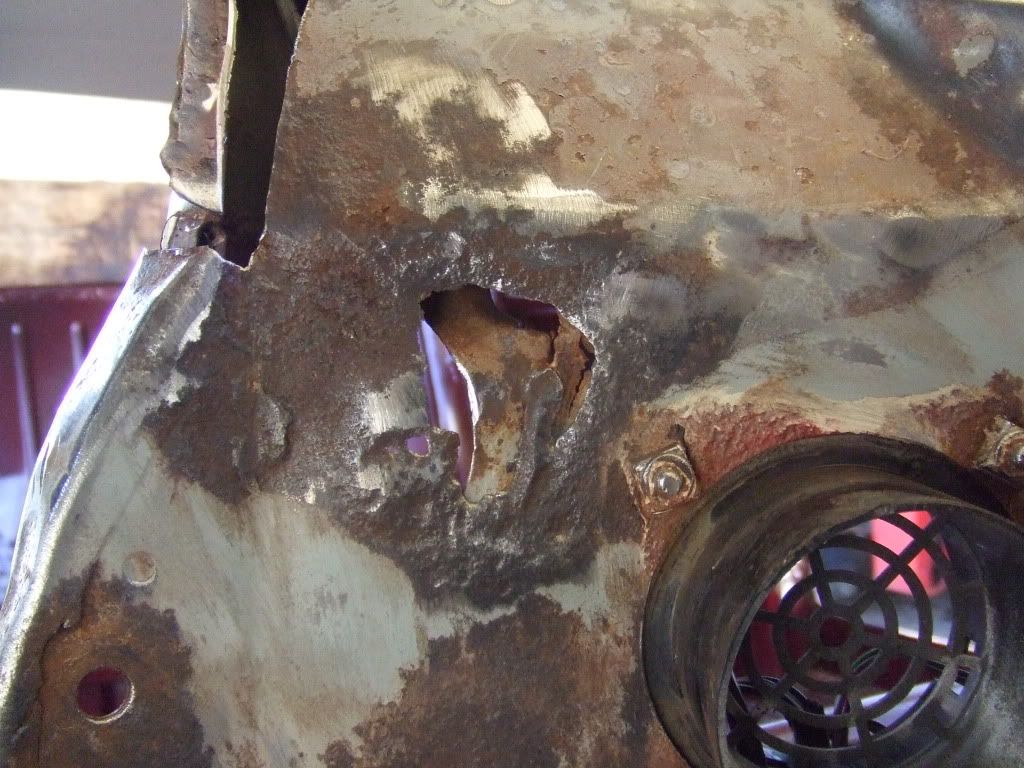
and the bad news kept coming...the metal behind the front shock mounts had de-laminated and i pushed my fingers through on both sides
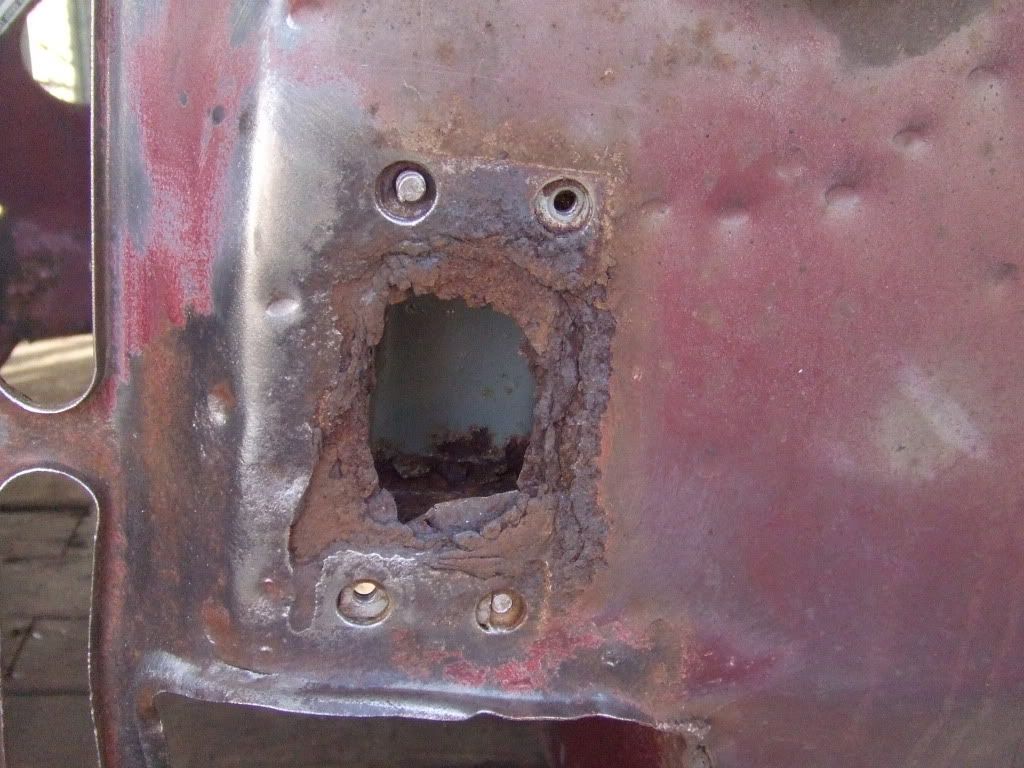
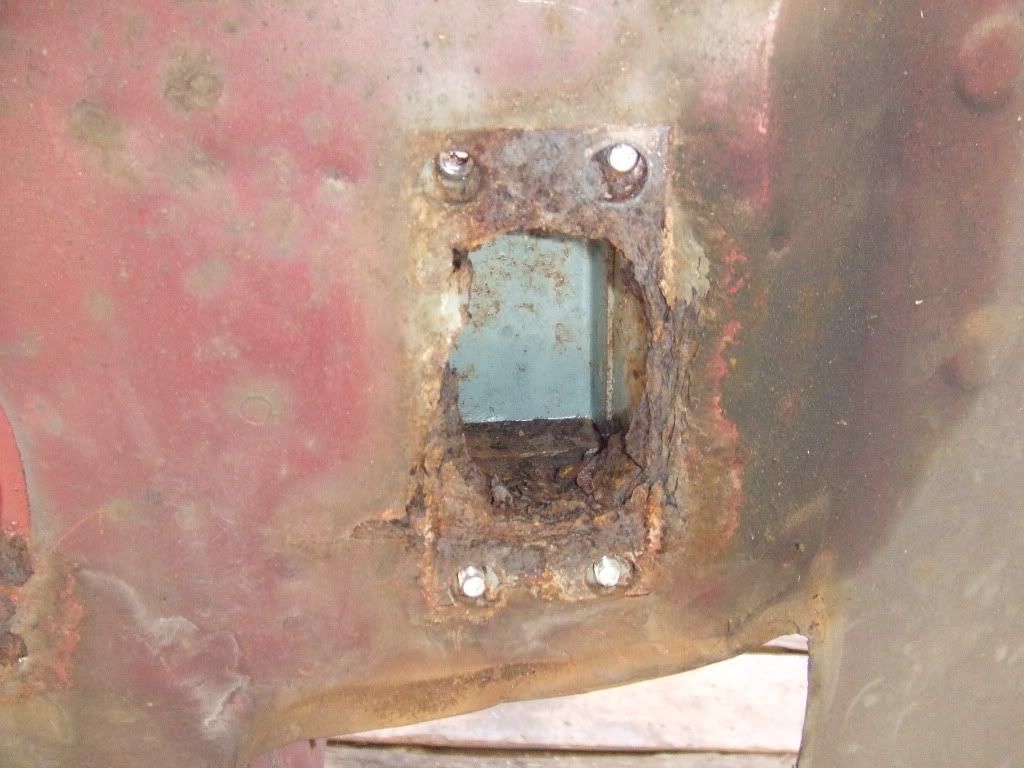
and the mounts have holes rusted through in the centre of them
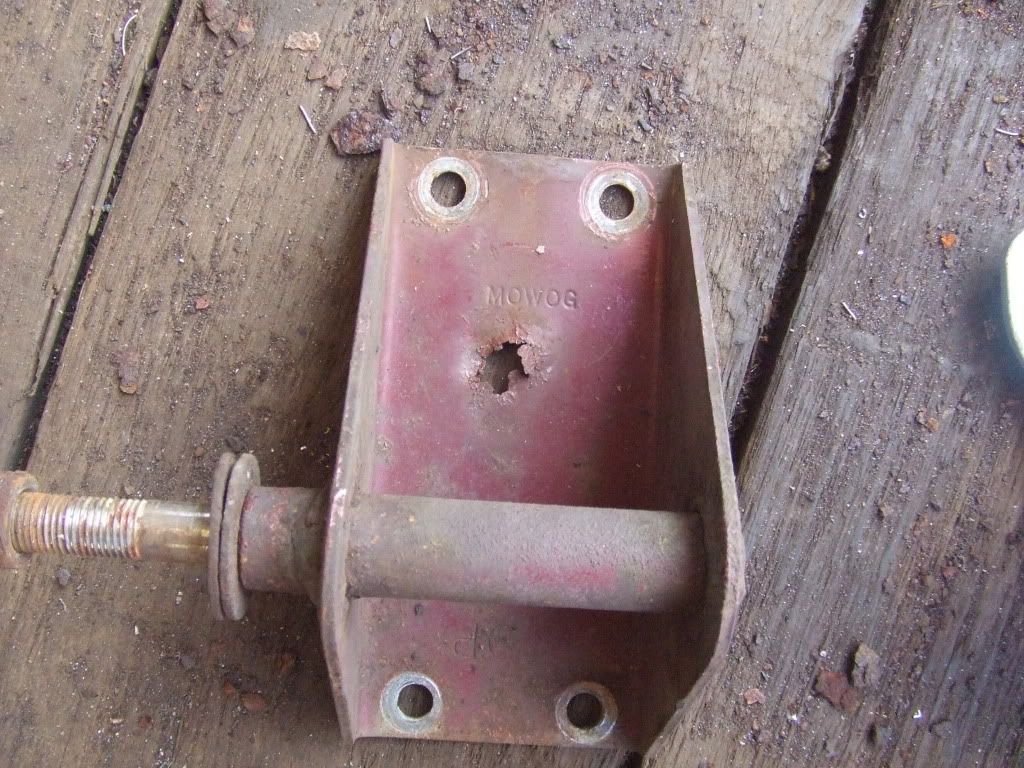
( the other mount has a larger hole in it but i forgot to take a photo )
Edited by TH3aRchit3ct95, 25 February 2012 - 05:27 PM.
#185

Posted 25 February 2012 - 05:32 PM
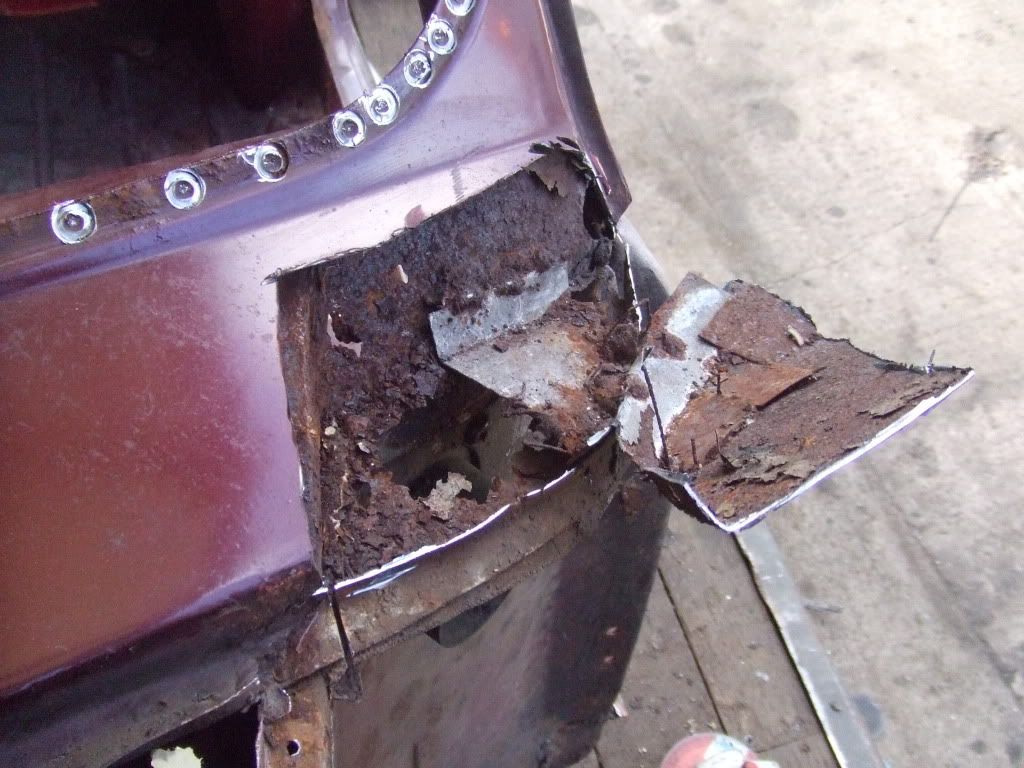
...to reveal more rust, the closure on the N/S has rusted away almost entirely
#186

Posted 25 February 2012 - 05:41 PM
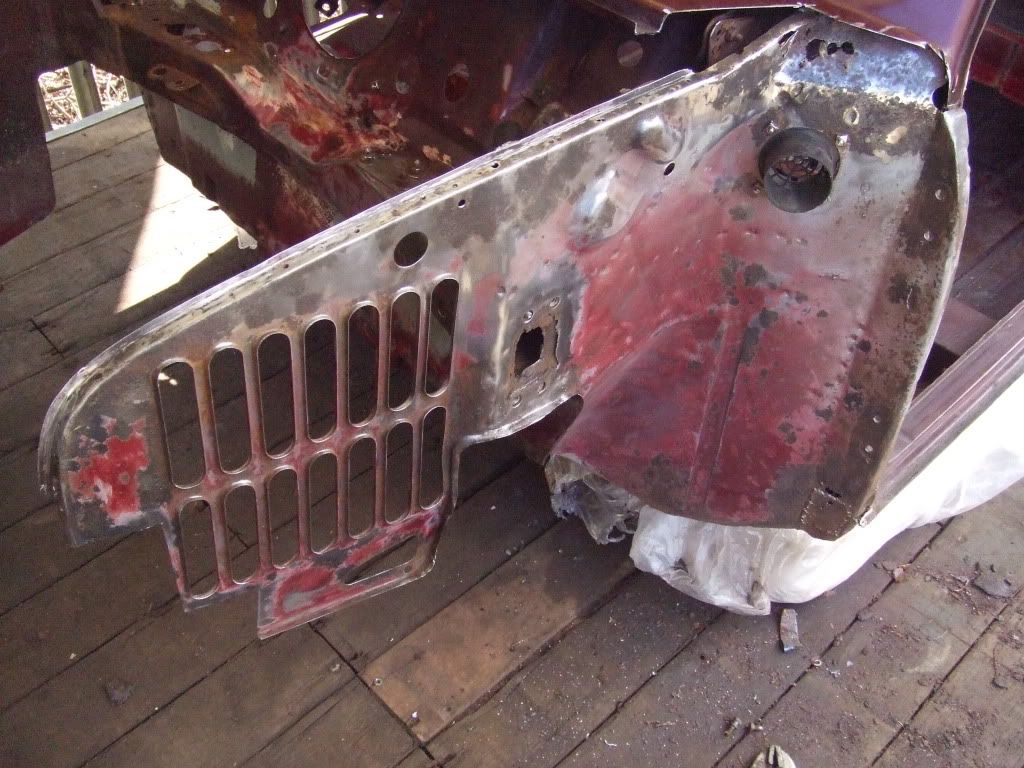
it turns out that it was mainly surface rust and that the inner wing is actually fairly solid
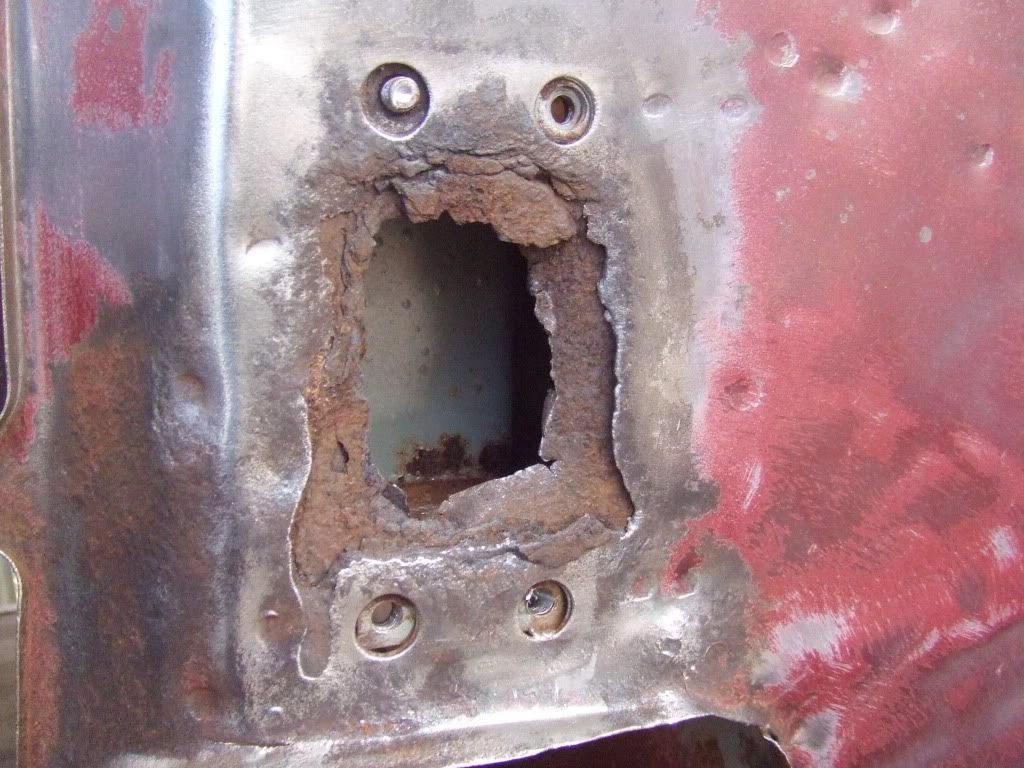
...one on the shock mount...
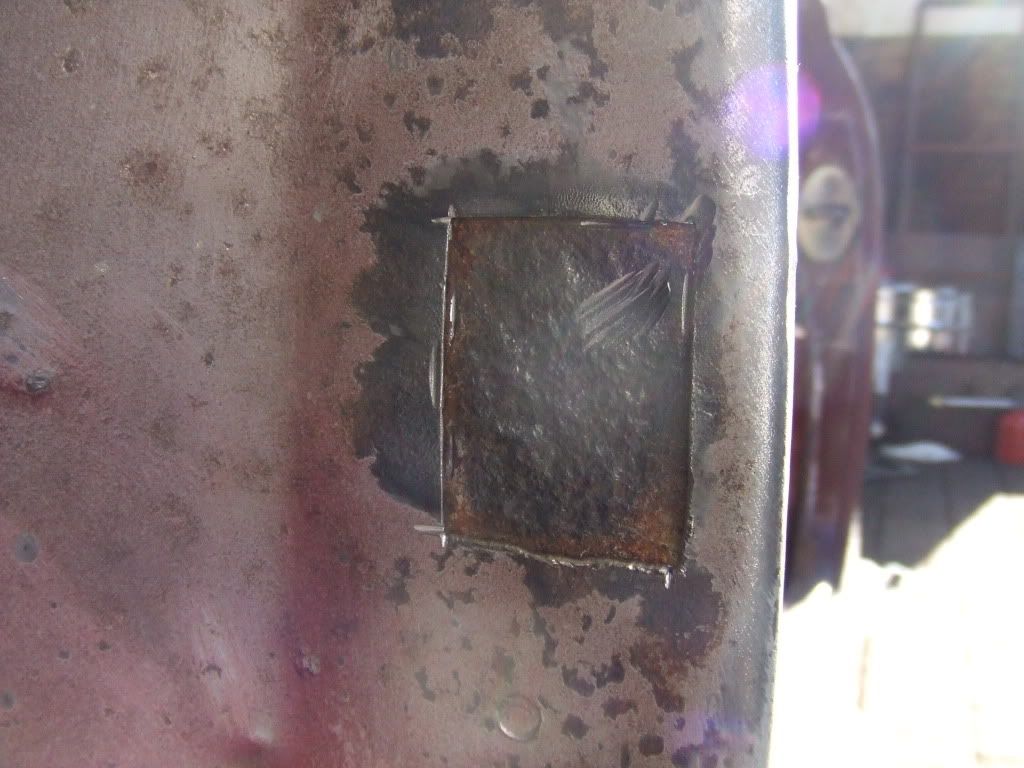
...a small patch half way down the flitch panel...
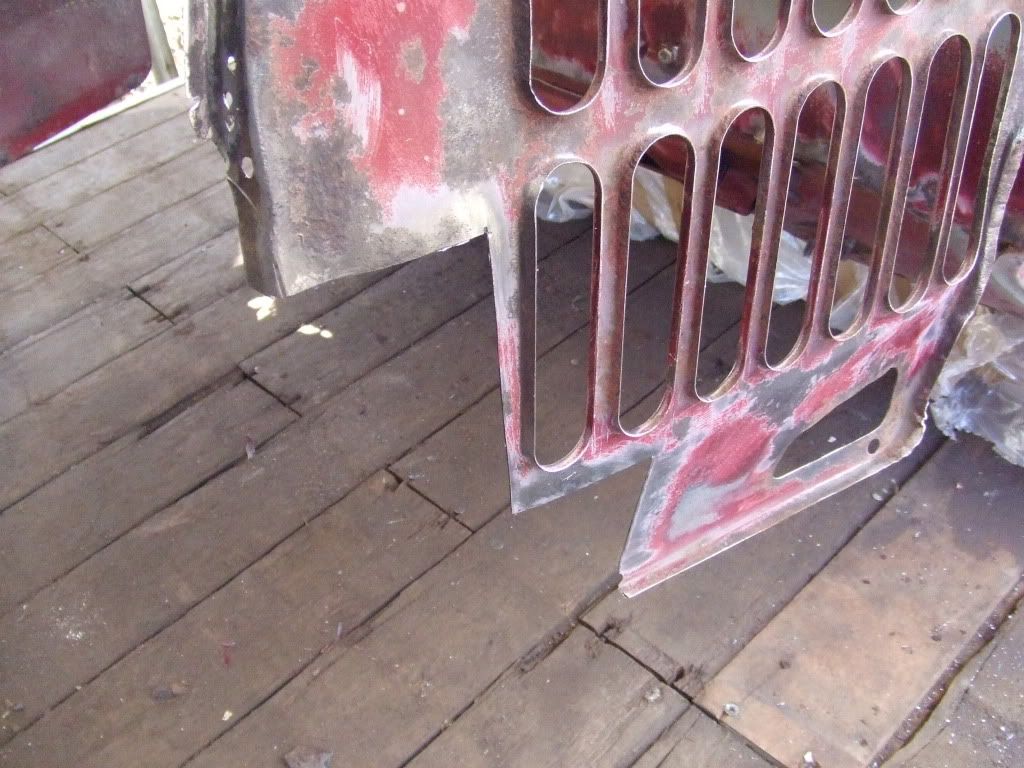
...a large repair to the front of the inner wing and one under the scuttle closure
#187

Posted 25 February 2012 - 05:49 PM
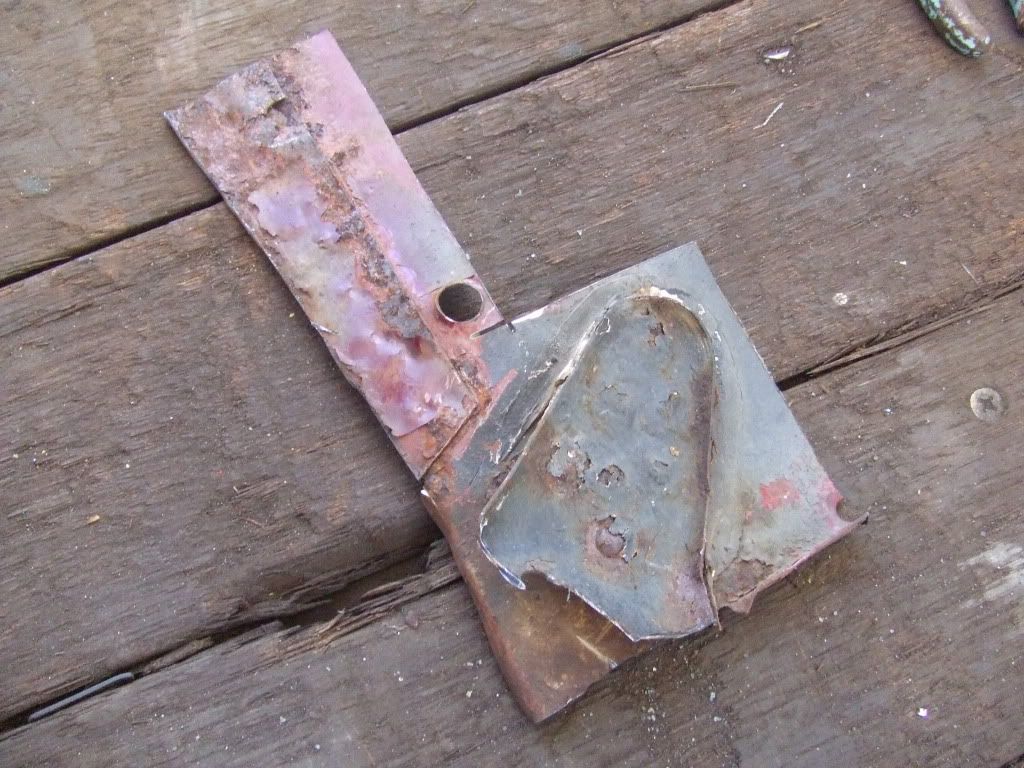
this is the first time i have ever attempted any fabrication so fingers crossed...
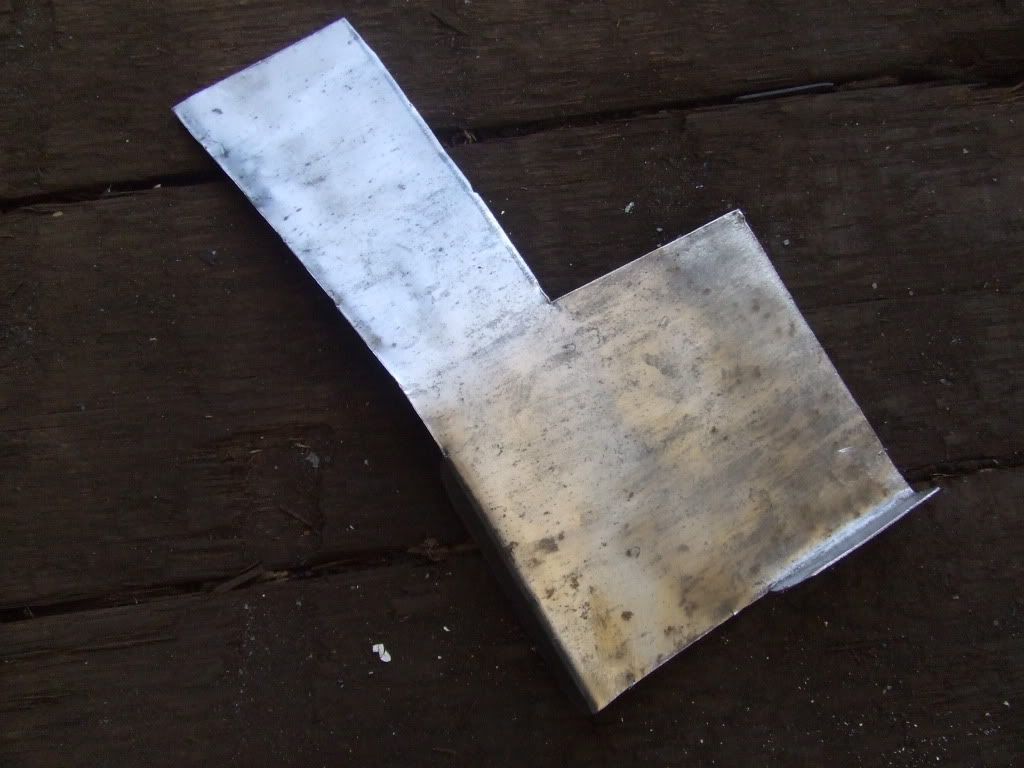
this is a repair patch for the front of the inner wing where it joins the front panel
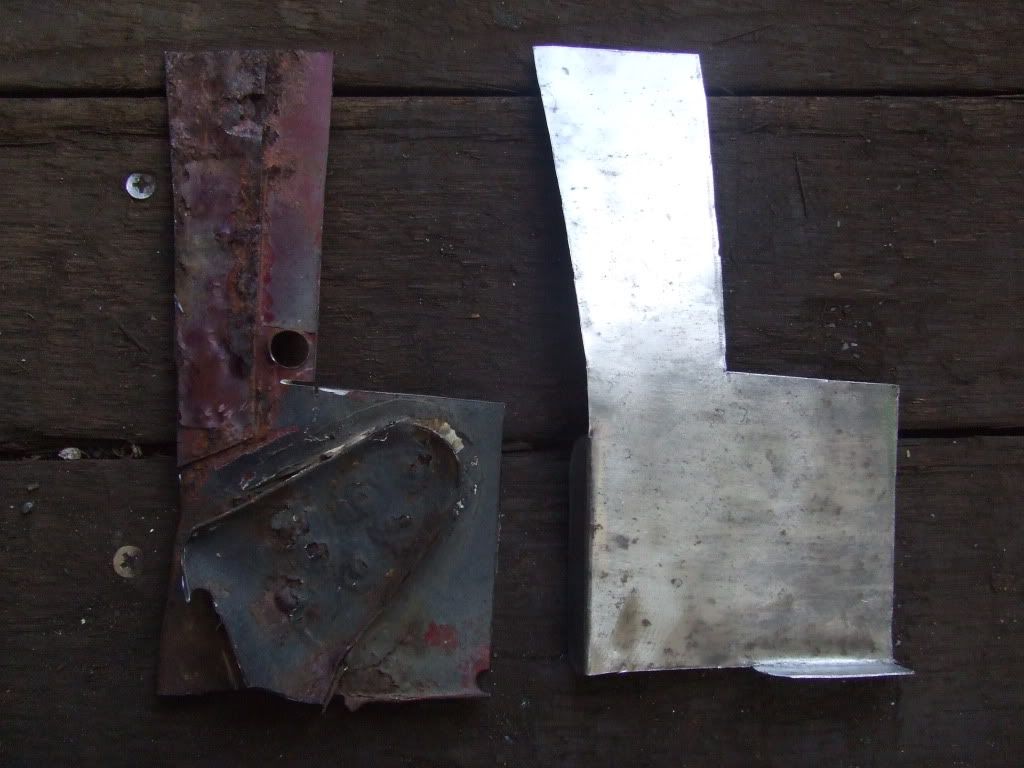
before and after...i think i made a fairly good job
#188

Posted 25 February 2012 - 06:01 PM
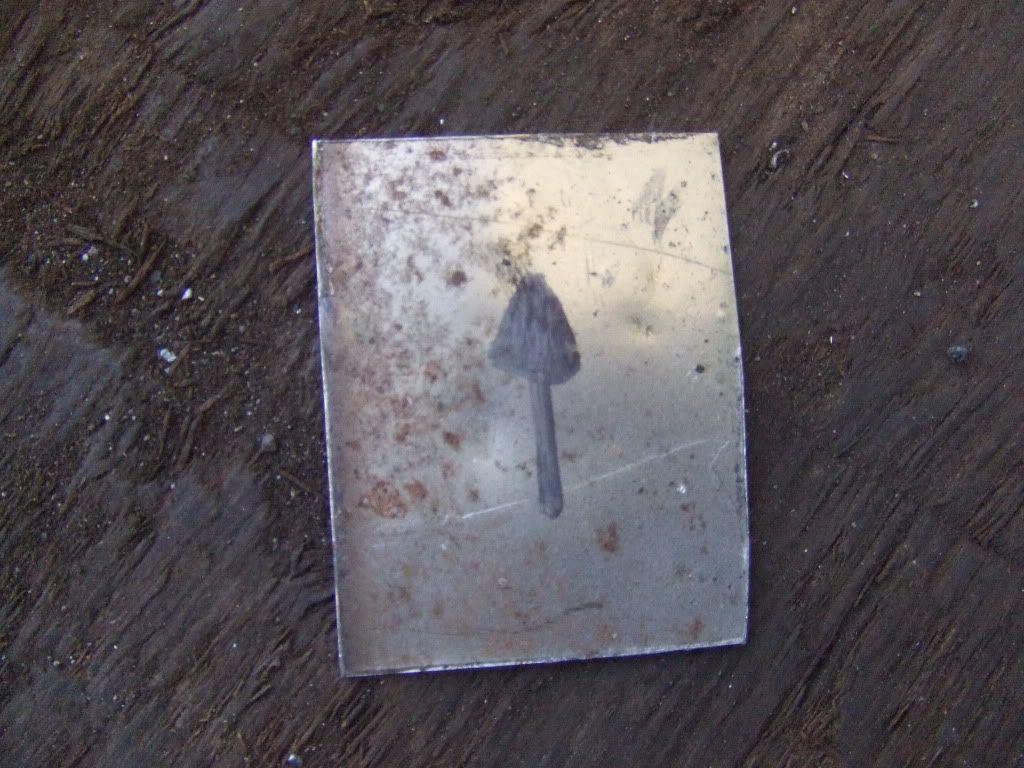
new backs for the shock mount brackets
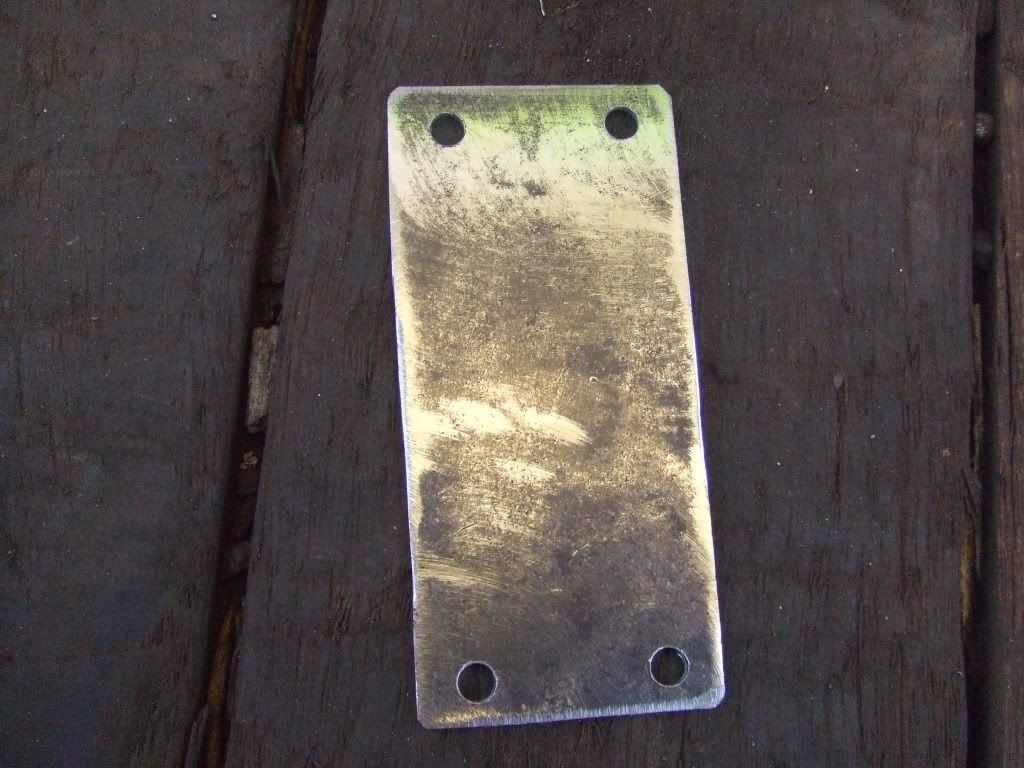
plates to repair the shock mounts
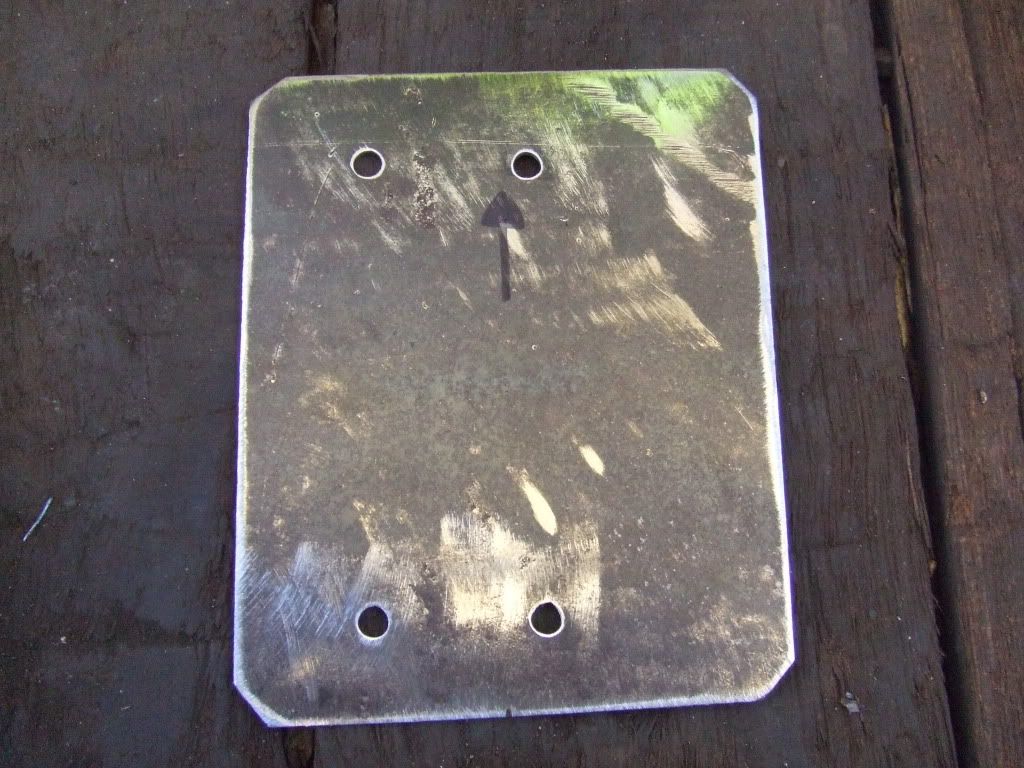
#189

Posted 25 February 2012 - 06:26 PM
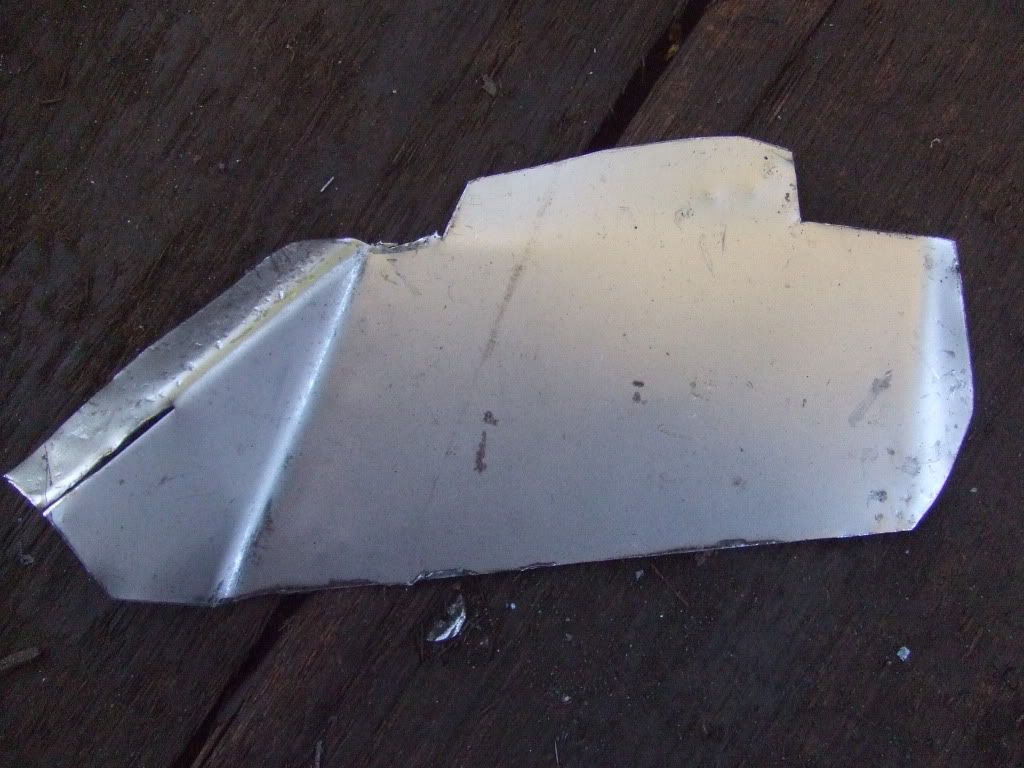
the other inner wing and flitch panel was slightly worse
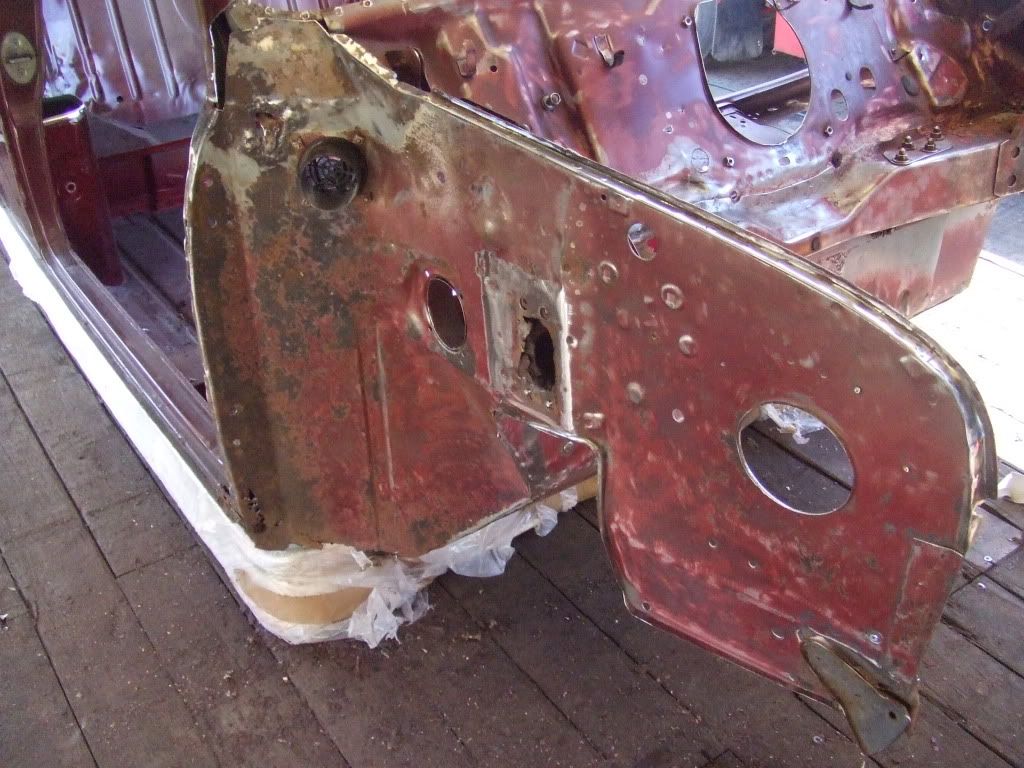
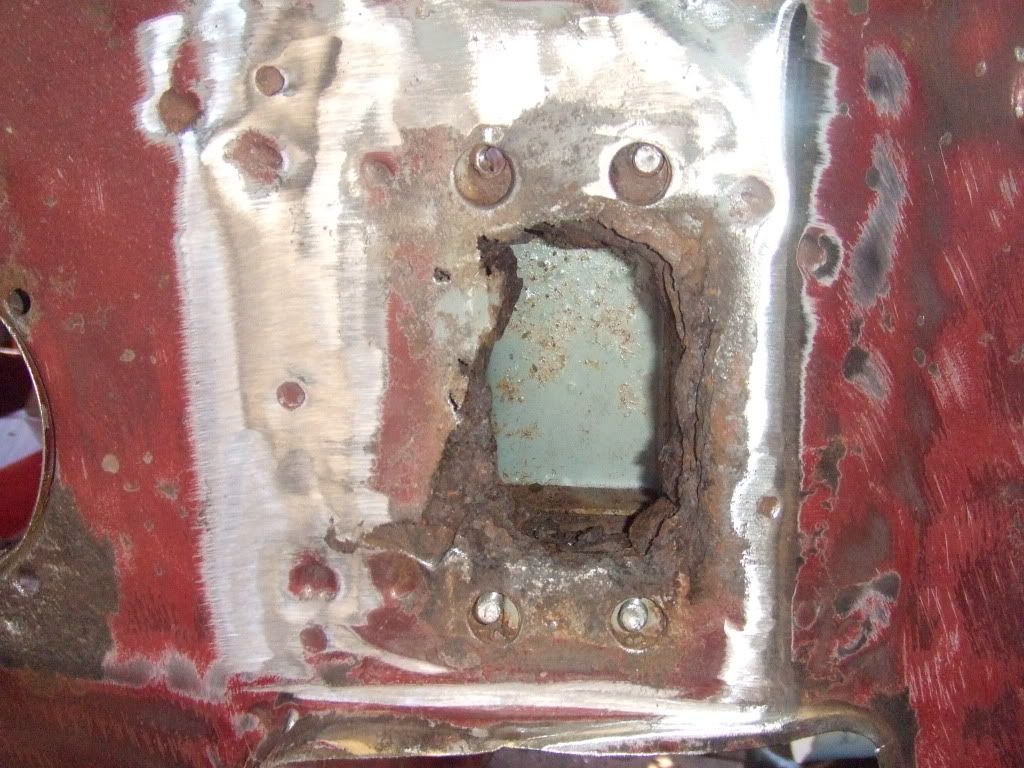
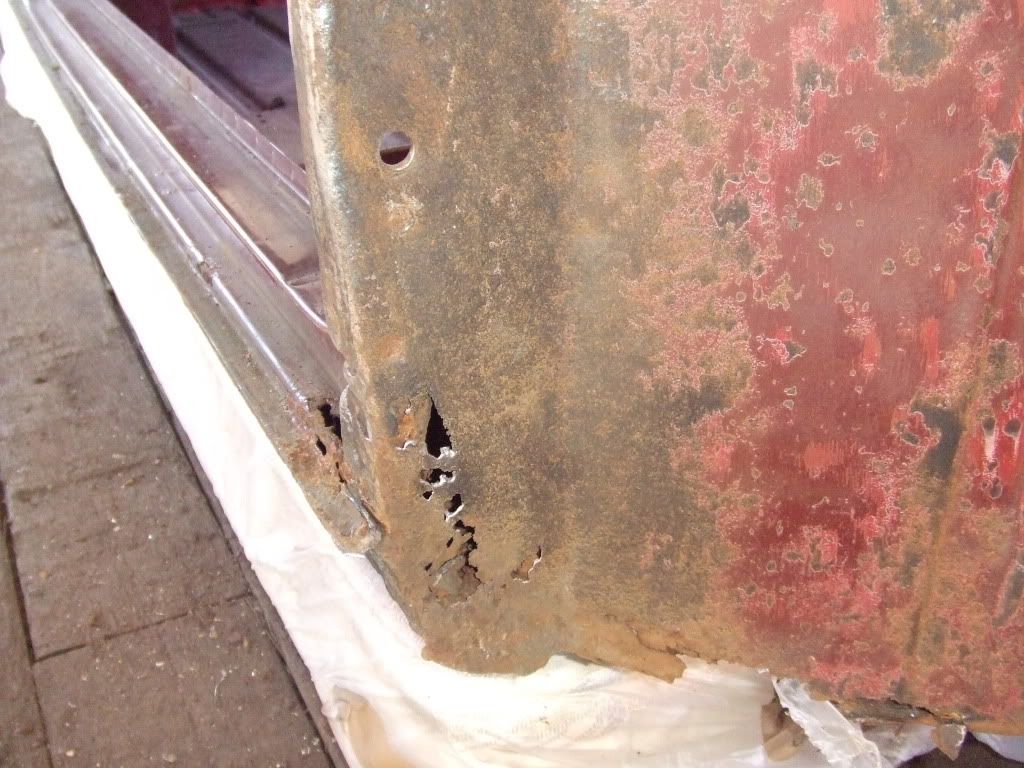
after we removed the scuttle and cleaned up the bulk head with the wire brush wheel, the rust in the centre of the wind screen doesn't look too bad and the upper dash rail is solid
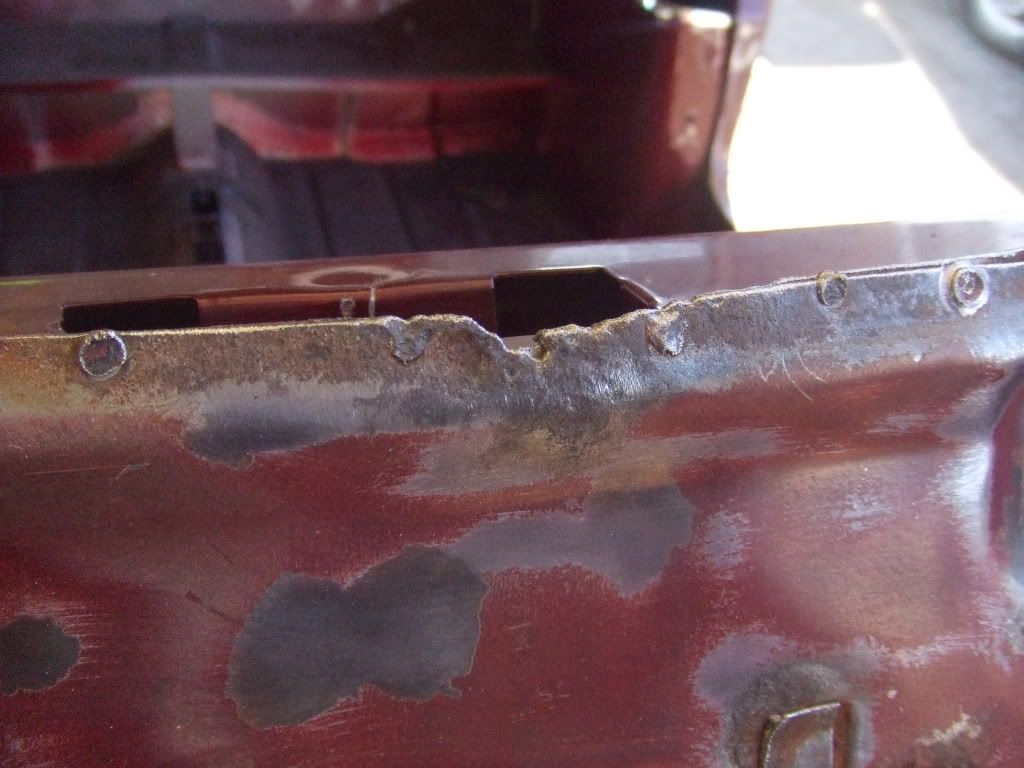
the bulk head needs a repair patch on the pedal box cross member but apart from that it is solid too
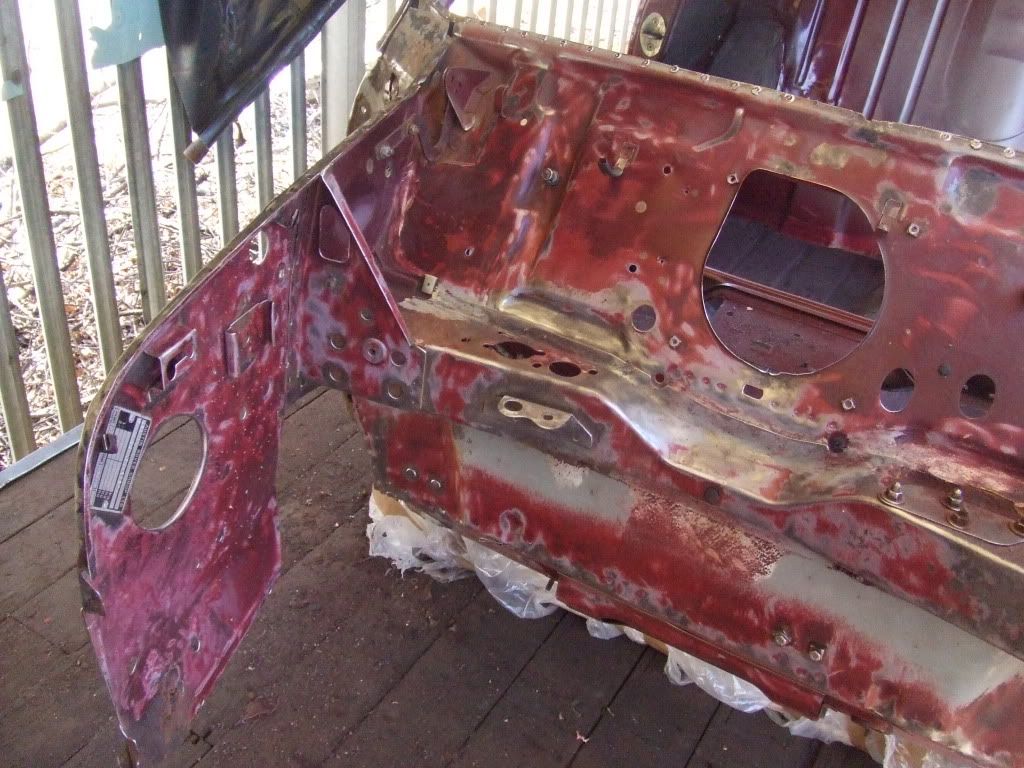
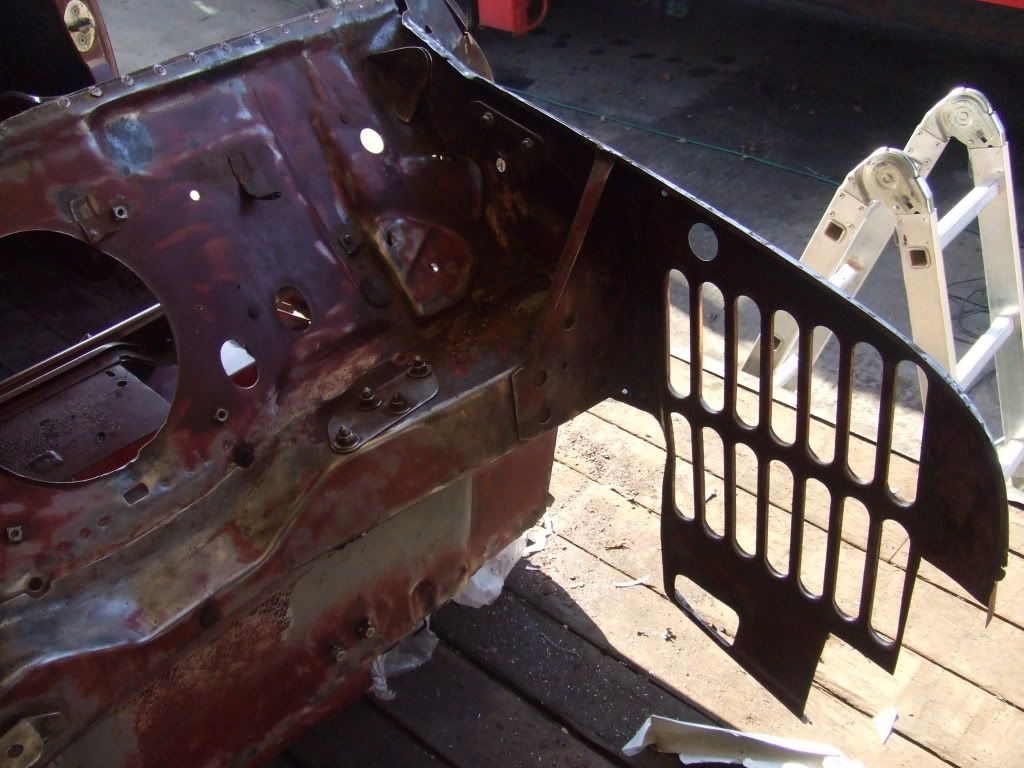
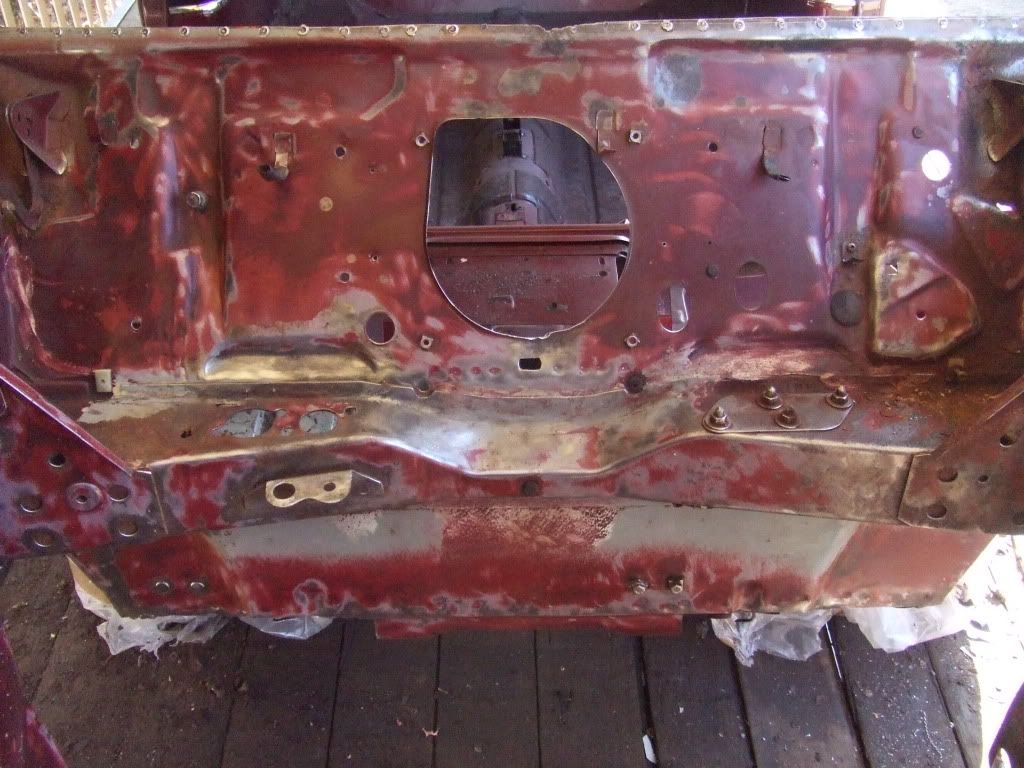
then we applied some form of rust reverter all over the front bulk head (inside and out), inner wings, flitch panels, bonnet hinges, upper dash rail, and door steps which we are going to leave it until Monday
#190

Posted 25 February 2012 - 06:31 PM
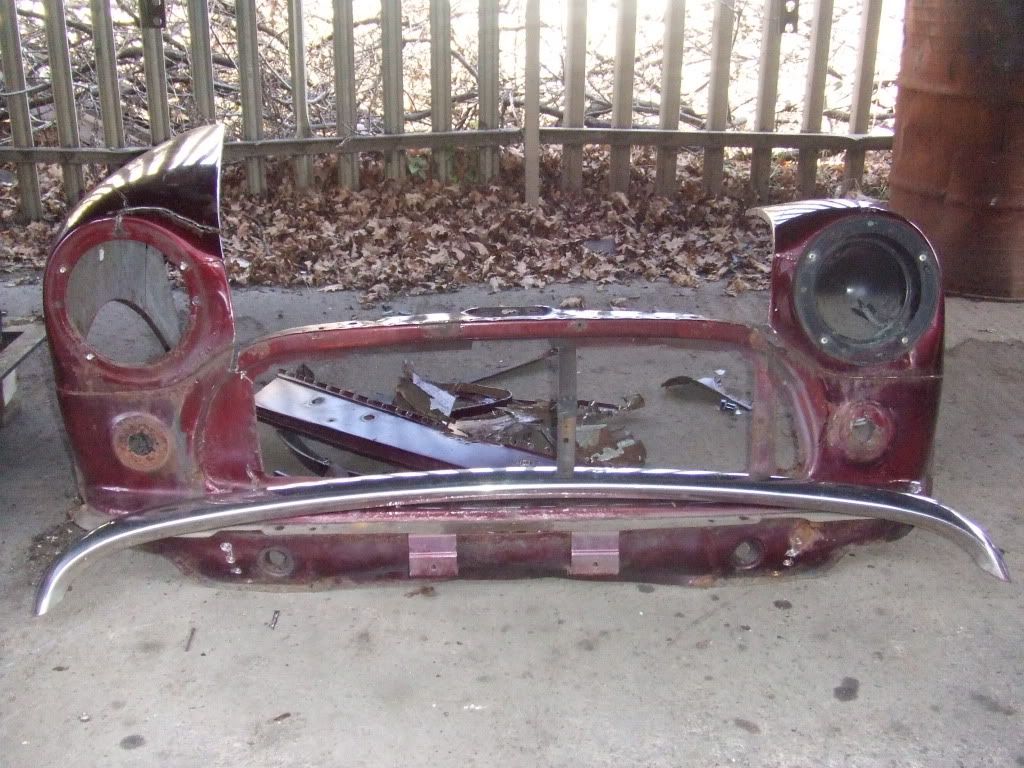
that's all the progress for today, i don't think we are going to be able to do any work on the shell tomorrow so there will be more progress monday
Cheers
Rhys
#191

Posted 26 February 2012 - 12:02 PM
Rhys
#192

Posted 26 February 2012 - 04:30 PM
I am about to start welding my new sills in. I took off the old oversills to reveal the originals and I was shocked at how bad it was! Put it this way, I ended up sweeping the old sills into a dustpan. They were that bad!
By the way, I keep looking at your project and it's making me jealous! lol
Good luck mate! Keep up the good work.
Joe
#193

Posted 26 February 2012 - 07:52 PM
Looking Good Rhys! I love your new workshop! It's amazing how both mine and yours Mini 30's have rusted in exactly the same places . Looking at your pictures makes me think they must be twins lol. I haven't had to renew the front panel on mine though as someone else has kindly already done it in the past.. They didn't paint the back of it though and left it bare metal! It cleaned up ok though! I think my car had a bit of a makeover in 2001 as I have found some stickers on some repair panels with this date on. Shame they werent welded in better, otherwise I wouldn't have to replace them. lol.
I am about to start welding my new sills in. I took off the old oversills to reveal the originals and I was shocked at how bad it was! Put it this way, I ended up sweeping the old sills into a dustpan. They were that bad!
By the way, I keep looking at your project and it's making me jealous! lol
Good luck mate! Keep up the good work.
Joe
Cheers joe, i have heard many bad things come from over sills...luckily mine hasn't had any panels replaced previously and so the original normal sills have remained. i am working on it every day this week and i think that tomorrow we are going to:
-finish repairing the inner wings and bulkhead
-remove rear valance + closures and clean up the boot floor
-weld on new valance + closures
-then start on sills, front floors and subby mounting
good luck with the rest of your project
Rhys
#194

Posted 27 February 2012 - 03:39 PM
Moving along now.
Where did you get the new few box from and is it just the same to wire in as the normal one or any different ?
i got it from a local electrical suppliers and i'm not sure how different it will be to wire in, it may require soldering new contacts on the end of the wires but nothing too challenging...i hope
Rhys
It definitely will be different to wire in. Old 4 Fuse Boxes can have 2 wires going in and 2 going out, where as the blade ones only have one in and one out, so you potentially will need 8 fuses instead of 4, plus any extras you want like spots or fogs etc...
Also blade fuse are rated differently. See below. I took this post from another thread.
I hope you all remembered that blade and cartridge fuses are labelled differently, if you used the same fuse ratings for the blades as the glass cartridges had for each circuit then your wiring is not adequately protected. Your car could end up in flames if you've done this. Glass cartridges are labelled with their blow current, blades are labelled with their continuous rated current, they blow at twice this. So for the 35 amp cartridge for example if you have used a light green, 30 amp blade (there is no 35) it won't blow 'till 60 amps. Your wiring could be very overloaded by a fault at that rating, especailly if all four main circuits were to go into a 100% overload. To split the existing circuits onto more fuses you will have to know the rated capacity of each wire and the demands of the circuit design. Don't mess with fuses without knowing what you're doing, they're there for a reason.
#195

Posted 27 February 2012 - 09:49 PM
Moving along now.
Where did you get the new few box from and is it just the same to wire in as the normal one or any different ?
i got it from a local electrical suppliers and i'm not sure how different it will be to wire in, it may require soldering new contacts on the end of the wires but nothing too challenging...i hope
Rhys
It definitely will be different to wire in. Old 4 Fuse Boxes can have 2 wires going in and 2 going out, where as the blade ones only have one in and one out, so you potentially will need 8 fuses instead of 4, plus any extras you want like spots or fogs etc...
Also blade fuse are rated differently. See below. I took this post from another thread.I hope you all remembered that blade and cartridge fuses are labelled differently, if you used the same fuse ratings for the blades as the glass cartridges had for each circuit then your wiring is not adequately protected. Your car could end up in flames if you've done this. Glass cartridges are labelled with their blow current, blades are labelled with their continuous rated current, they blow at twice this. So for the 35 amp cartridge for example if you have used a light green, 30 amp blade (there is no 35) it won't blow 'till 60 amps. Your wiring could be very overloaded by a fault at that rating, especailly if all four main circuits were to go into a 100% overload. To split the existing circuits onto more fuses you will have to know the rated capacity of each wire and the demands of the circuit design. Don't mess with fuses without knowing what you're doing, they're there for a reason.
thanks for this, i never would have known the difference so i will just leave it as the standard 4 box glass fuses...cliff could have ended up on fire
Cheers
Rhys
3 user(s) are reading this topic
0 members, 3 guests, 0 anonymous users


