1275Gt - Its A Mini Adventure!
#91

Posted 06 June 2012 - 08:45 PM
#92

Posted 22 June 2012 - 07:51 PM
fattail95, mini_in_progress, rich2, Notay, Thanks for looking and commenting guys, really appreciate it!
Been waiting for parts recently so not a great deal of progress since last post. However, here's what I've been up to:
Cut out the rot from the bonnet. The strengthener almost fell off!:
A bit of welding filling and sanding and a light coat of etch primer now just needs primed, flatted and painted:
The LH door skin had a little bit of rot so stripped it down. Luckily the frame only needed a couple of small patches:
Rust treated with some Fe123:
New skin in position. This is one of the cheap ones from Magnum. Really good fit and good value:
Back at post #51 I showed a picture of the sticky-out lower corner of the LH door so I put a cut in the frame to help me bend it to fit better. This let me bend the lower corner in by about 8mm which is about what I needed:
I fitted the skin as described elsewhere in this forum. No real drama doing this except that I left it loose until I fitted the door to the car. Once the door was on the car I was able to twist it until I got the best fit possible then clamped it into position with a couple of mole grips. While still on the car I tacked the skin to the frame with a couple of welds in key positions. Then took the door off and tightened down the skin. Here's the door fit now. Not perfect but far better. I don't think I needed to cut the frame since there's a lot of flex available with the skin removed:
Finally got all the bits needed (ball joints & shims) to finish off the front suspension. Also fitted all the brake lines and filled/bled the braking system:
I fitted a new oil pressure warning switch and pressure relief valve. Here's the old one:

I'd recommend that anyone who has a high mileage engine and/or suspects low oil pressure to change the relief valve before doing anything else. It only costs a few quid and is a 5 minute job.
Lastly, I fitted the arches:
The arches did not fit very well but they were only £14, so they'll do!
Next big jobs are to paint the doors, boot lid and bonnet, fit the headlining and glass. Then it should be nearly ready for its MoT!
Thanks for looking!
Edited by miniBrain, 17 August 2013 - 09:34 AM.
#93

Posted 24 June 2012 - 12:44 PM
#94

Posted 24 June 2012 - 04:55 PM
#95

Posted 03 July 2012 - 11:14 PM
Down&Out and Glyn, thanks for the comments, much appreciated!
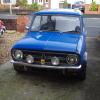
Well, here's the car virtually complete. Just needs interior sorting out, bumpers, finishers, seam covers, grille and other sundry items but its otherwise ready for its MoT (the image background is distorted on purpose):
I had the wheels restored at the Wheel Repair Center in Preston. Fantastic job considering the state they were in - they even fixed a dent due to kerb damage. Pricey at £220 but it was the least hassle for me and retains something of the original car:
Fitted to the car but unfortunately bought the wrong wheel nuts so using the rotten old ones at the mo:
I treated the internal sections to some Dinitrol cavity wax – cant rails along the roof, A & B pillars, rear valance closing panels, rear wheel arches, scuttle closers and of course the sills. Made sure that Dinitrol leaked out of all the drain holes:
Headlining, arrgh!! I bought the Newton Commercial headlining kit thinking it was top quality but when I unrolled the package I was extremely disappointed. My specific complaints are:
- Its straight cut into a simple rectangle – i.e. there's no attempt to profile the vinyl to fit the various contours of the car. It would have been so easy to build into the pattern some extra material, for example, to get a better fit round the top of the B pillar (its far too thin in this area!).
- It wasn't even a single piece of vinyl – it was made with two pieces stitched together roughly in the middle along one of the hoops. This meant when you cut through the hoop as per instructions the stitches started to unravel, so I had to reinforce the stitching to avoid it running.
Now I'm not blaming Newton for the poor fit that I managed to achieve - I've seen this headlining fitted very well. But £80 is far too much for what you get. £40 would still be too much. I'd be seriously attempted to make my own in future – the material would cost about £5!
Anyway, rant over, I did get it fitted eventually. I followed the instructions on this forum as best I could - I used about 70 bulldog clips and about another 70 clothes pegs to hold it taught while the glue dried. (Most were removed before taking this photo):
With the headlining out of the way, I could fit the glass starting with the windscreen. Fitted the rubber to the aperture first using a bit of tape and tie wraps to hold it up whilst fitting along the top:

Then the glass was slid into the bottom lip and the sides and top could be pushed out over the glass from the inside:

Before fitting the locking strip, I applied some butyl windscreen sealant from Wayside Adhesives inside the rubber. A locking strip tool is almost essential to fit the locking strip along with some silicone spray or washing up liquid as a lubricant. It takes a bit of effort to work the strip all the way around but goes in quite well and really firms up the windscreen installation:

Passenger door fitted for the last time – what a faff! Took ages to get the right size of spacers (that fit between the hinge and door post) and managed to scrape the paint off the front edge of the door where it clashed with the A panel. The door also needs a firm slam to shut it – but its now easing off as the door seals become compressed:
I'm disappointed with the gap between A panel and front edge of the door. Side-on its fine but not so good from this angle. I spent a long time trying to get this right and thought I had done a decent job. But a once you put some paint on things can look a lot different! Well its done now, so I'll have to live with it.
Boot lid fitted with new seals and gaskets and a pair of polished alloy hinges from W&P (number altered to protect the guilty!).
Everything in place in the engine bay at last (except the air scoops):
That's it for now, thanks for looking!
Edited by miniBrain, 17 August 2013 - 09:37 AM.
#96

Posted 04 July 2012 - 09:10 AM
And to think you have done it all in your garage is a big help to me.
#97

Posted 16 July 2012 - 09:44 AM
SAL821X - Thanks mate, appreciate the comments ![]()
Another milestone (millstone!) has been completed as it has now passed the MoT test. Thus my Mini Adventure is nearing its end – but I bet there will still be a few twists & turns on the way!
However, the MoT was not all plain sailing. I put it through first last Monday and it failed on the following:
- Headlamp Aim
- Windscreen Washers (pump failed)
- Lack of “Anti Slip” brake pedal covering (pedal rubbers not fitted)
- Directional tyres fitted wrong way round (just needed two wheels swapping over)
All of above was pretty easy to fix but driving back from the MoT station also revealed:
- Clutch pedal began to sag and eventually could not select any gears
- Brakes started to bind
Also, the engine smokes like a chimney on startup – valve seals obviously worn so will need to replace head in near future. But it otherwise it runs nicely and pulls stongly.
To fix the clutch I firstly changed the slave cylinder, more in hope than anything 'cause I couldn't face the prospect of changing the master. Of course the slave cylinder made little difference so I had to change the master – what a faff!
I was pretty sure I had a problem with the brake master also – but not the cylinder itself since it passed the efficiency test part of the MoT. The brake binding problem was the same as described here (post #4). I did not fit the gasket when I re-fitted the master cylinder (I used gasket compound instead) so I was pretty sure that the piston was not being allowed to return fully thus the port to the reservoir was not being opened to allow the fluid to return.
I removed the driver's seat and the seat brackets and covered the floor in cushions to make it slightly more comfortable getting access to the clevis pins on both master cylinders. I fitted a new (plastic) clutch master and re-fitted the brake master with the proper gasket in place. This fixed both the clutch and brake problems. I now know to always fit a gasket to the brake master!
I went to the local breaker's yard to see if there was anything available to replace my windscreen washer system (the original bottle was leaking as well as the (new) pump packing in). I found this little unit from a Corsa – fits nicely to the side of the engine bay:
And that was it for the MoT. I just need to get it taxed and will now finish it off on a “rolling resto” basis. I need an interior, bumpers, reconditioned cylinder head plus a number of other minor items:


Can you tell how much I love the cars from BMC/BL? I'll do a TR7 next maybe (always loved them) or maybe another Mini?
That's it for now and thanks for looking!
Edited by miniBrain, 17 August 2013 - 08:41 PM.
#98

Posted 16 July 2012 - 11:45 AM

Well I say mine it's actually my cousins but I get to abuse it more often then not
#99

Posted 16 July 2012 - 12:14 PM
Max
Edited by minimaxie, 16 July 2012 - 12:14 PM.
#100

Posted 16 July 2012 - 05:46 PM
#101

Posted 16 July 2012 - 08:25 PM
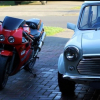
Would look lovely parked next to my other beast.
Well I say mine it's actually my cousins but I get to abuse it more often then not
That's a beauty - nice colour!
#102

Posted 16 July 2012 - 08:26 PM
wow! amazing build thread sir! Have just read this up to date now
an absolute credit to your work, you should be very proud of yourself!
Max
Thanks Max, appreciate it
#103

Posted 16 July 2012 - 08:28 PM
Different plates front + back?
You can do anything with Photoshop - number disguised to protect the guilty
#104

Posted 16 July 2012 - 08:47 PM
cheers
#105

Posted 16 July 2012 - 09:21 PM
1 user(s) are reading this topic
0 members, 1 guests, 0 anonymous users


