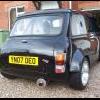
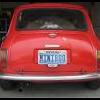
wont be long now!
PROJECT RAPID!!!!
#301

Posted 03 August 2007 - 06:53 PM
wont be long now!
#302

Posted 03 August 2007 - 07:29 PM
#303

Posted 04 August 2007 - 11:21 AM
Thanks for all your comments fellas its good to see them, they get you back on the job!
Edited by dean_chad, 04 August 2007 - 03:48 PM.
#304

Posted 11 August 2007 - 07:44 PM
Ive been using all the awesome weather to crack on after work. After a little umming and aring ive devised a way of fitting the front end so i dont have to make up brakets (well the front mounts anyway). By using locking panel plates i shaped them to fit in the apeture of the grp front end, I think this looks pretty smart and you dont get bits sticking out like the R-clip style fasteners........

...... The only problem with the position in the apeture is that on the other side is at a fair old angle. I didnt want to make a bracket so i cut some tube at an angle and attatched so that the threaded bar could be tightend at the angle needed, also it can be adjust sideways slightley to line up the front.


still need to clean up the tube but this is kind of the finished item......... now wobble and suprisingly secure

Best bit yesterday was when i picked up my dash and bits from the Trim shop In redditch. Really pleased wih is apart from around the gauge area... I soent 2 hours last night fettling the material into the corners so i got sharper lines. Having the evodash sat behing the dash ment that is ALLL on display so it had to be right!


one more

The Steering column (Just about see it in pics) and door cards have also been covered. The dash is going to have to stay in there now as ive put the last part of the role cage in. What and arse of a job that was, think i was really lucky not to damage the dash!!!!
More pics of the newly modified exhast tomoz as i cant be arsed to go back down the shed!!!!
Edited by dean_chad, 11 August 2007 - 08:01 PM.
#305

Posted 11 August 2007 - 09:24 PM
#306

Posted 11 August 2007 - 09:56 PM
#307

Posted 11 August 2007 - 10:41 PM
#308

Posted 12 August 2007 - 10:47 AM
Looking very nice is it flocked or suede? And we have all been there with the roll cage/dash thing.
The dash, steering column and door cards are Alcantara. Its a right mission to get at the back of the dash now but im just gonna have to deal with it becuase that dash is there for life!!!!
Here is the modification done to the exhaust so it doesnt fowl on the rear valance, I also had the rear tube widend and placed over the original piece, so back pressures arent altered.


I made up a bracket and coated it in a plasticoat paint found that very nearly maches the colour of the frame, although looking at the pictures, the brace bar needs a few more coats!!!!!! Its ideal where its position as the exhaust can be adjusted which ever way so that its central in the valance hole.
Im not sure how the have the finish cut of the exhaust, either have it so it follows the valance contour or just have it chopped of just a littlle shorter,...... what do you think people?


Edited by dean_chad, 12 August 2007 - 06:30 PM.
#309

Posted 12 August 2007 - 08:55 PM
looks good where youve cut the exhaust flush
#310

Posted 12 August 2007 - 08:57 PM
#311

Posted 12 August 2007 - 09:16 PM
hi dean,
looks good where youve cut the exhaust flush
I havent cut it yet, just had a little mess about on photoshop. Yeah i like it flush, it comes out on an angle so it will look sweet.
I had problems starting it earlier, turns out 1 of the coil leads (number 2) had corroded inside. Bought a full set from ebay for a tenner, BARGAIN!
#312

Posted 12 August 2007 - 09:21 PM
hi dean,
looks good where youve cut the exhaust flush
I havent cut it yet, just had a little mess about on photoshop. Yeah i like it flush, it comes out on an angle so it will look sweet.
I had problems starting it earlier, turns out 1 of the coil leads (number 2) had corroded inside. Bought a full set from ebay for a tenner, BARGAIN!
#313
 Guest_cooper_rsp_*
Posted 12 August 2007 - 09:23 PM
#314

Posted 13 August 2007 - 09:27 PM
#315

Posted 18 August 2007 - 04:52 PM
had to adjust the fuel sender a little. Turns out the range was outside what the evodash is design for. so the empty and fuel value couldnt be set.
in the empty position the sender is showing .3kohms and 20 ohms in the full positon. The dash will only read between 200-20 ohms. The full isnt the important position so i bent the float arm so it reaches the bottom before the resistance units reads above 200ohms. In the full position the arm contacts the topof the tank and the float sits 4 inches from the top. not a problem as far as i can see!

1 user(s) are reading this topic
0 members, 1 guests, 0 anonymous users


