Jump to content


Photo
- - - - -

1275 Basic Engine Rebuild Carried Over From Stupid Dumb Question


  • Please log in to reply
162 replies to this topic

#31 AndyMiniMad.

AndyMiniMad.

    Up Into Fourth

  • Members
  • PipPipPipPipPipPipPipPipPip
  • 3,295 posts
  • Location: Under The Bonnet.

Posted 04 November 2011 - 08:35 PM

I never used Hylomar on the oil pump gasket and its fine. I dialed my cam in uesing vernier timing gear...As Peter says its a lot more expensive than useing woodruff keys...but its easier to adjust as you dont have to keep removeing the timing chain and gears to adjust...
Posted Image

Err...Ok....so thats a train!!!

Posted Image

Yep...thats the pic I was looking for.. Sorry...

Edited by AndyMiniMad., 04 November 2011 - 08:36 PM.


#32 Cooperman

Cooperman

    Uncle Cooperman, Voted Mr TMF 2011

  • TMF+ Member
  • PipPipPipPipPipPipPipPipPipPipPip
  • 23,278 posts
  • Location: Cambs.
  • Local Club: MCR, HAMOC, Chelmsford M.C.

Posted 04 November 2011 - 11:51 PM

I time the cam in at 2 degrees advanced from nominal to allow for the initial chain stretch which happens during the first 1000 miles.
So, if it's a standard Rover cam the nominal is 110 degrees after top dead centre, so I set to 108 degrees - the figure is less because it's after top dead centre, not before. For a road engine I look for +/- 2 degrees tolerance. With competition engines go for +/- 0.5 degrees.
If you measure correctly in the first place, then fit the appropriate wodruff offset key, it then has the right settting within tolerance.
Remember, the measurement at the cam is 1/2 what you have as error at the crank as the cam goes at 1/2 engine speed. So, if max cam lift on 1 or 4 inlet lobe is measured as 114 degrees ATDC on the crank, you need to retard the cam by 2 degrees not 4 degrees to get 110 degrees at the crank. I would, therefore, fit a 3 degree key to obtain 108 degs of crank rotation for max cam lift.
A vernier kit does make it easy, but at a price, and once set it should not need altering unless a new cam is installed.

#33 firefox

firefox

    One Carb Or Two?

  • Members
  • PipPipPipPipPipPipPip
  • 1,102 posts
  • Location: Stockton-on-Tees
  • Local Club: will find one when on the road

Posted 05 November 2011 - 01:44 PM

Well got my engine painted yesterday nice red, managed to get the crankshaft fitted today lubed all the bearings and checked the end float which is still 3thou torqued the main bearings to 50 Ft Lbs and the 63, big ends tightend to 33 as haynes manual

Attached Files


Edited by firefox, 05 November 2011 - 01:52 PM.


#34 firefox

firefox

    One Carb Or Two?

  • Members
  • PipPipPipPipPipPipPip
  • 1,102 posts
  • Location: Stockton-on-Tees
  • Local Club: will find one when on the road

Posted 05 November 2011 - 02:12 PM

<p>Well got my engine painted yesterday nice red, managed to get the crankshaft fitted today&amp;nbsp;&amp;nbsp;lubed all the bearings and checked the end float which is still 3thou torqued the main bearings to 50 Ft Lbs and the 63, big ends tightend to 33 as haynes manual found another way of getting the oil gallery plugs out i didn&amp;#39;t fancy drilling the whole plug out as i dint want any swarf it the oilways, drill a 16th hole in the plug put a corse thead screw in lump of wood or a hammer shaft grab the screw head with a claw hammer and out they pop sweet, i cleaned all the oil galleries with turps and cotton cloth as cooperman explained,oiled the cam followers&amp;nbsp;maybe to much slippery little blighters, and fitted the cam shaft</p>
<p>after giving the cam bearing a good lube, i put Hylomar each side of the oil pump gasket just a thin layer to be sure to be sure, so will get the timing end done tomorrow and the clutch end i think ohh i forgot about the gearbox ha ha ha wouldnt get far would i need to get some sealant tomorrow rtv vtr&amp;nbsp;? memory going cant think</p>
<p>never mind catch up tomorrow &amp;nbsp;</p>

System said i do not have permission to alter this post who the hell wrote it is this system stupid

Edited by firefox, 05 November 2011 - 02:13 PM.


#35 Cooperman

Cooperman

    Uncle Cooperman, Voted Mr TMF 2011

  • TMF+ Member
  • PipPipPipPipPipPipPipPipPipPipPip
  • 23,278 posts
  • Location: Cambs.
  • Local Club: MCR, HAMOC, Chelmsford M.C.

Posted 05 November 2011 - 02:31 PM

Ah, you're working well then. It seems to be going together fine. Do the final cam timing before fitting the flywheel so that it's easy to rotate the crank by putting a screwdriver through the crank end slot. With end cover and flywheel on it's a lot more difficult. Always turn the engine clockwise looking from the timing cover end when getting ready to take measurements.
One more thing, before fitting the flywheel, lap it onto the end of the crank using 'fine' grinding paste. Then do the big bolt up FT (that's 'very' tight!).

#36 firefox

firefox

    One Carb Or Two?

  • Members
  • PipPipPipPipPipPipPip
  • 1,102 posts
  • Location: Stockton-on-Tees
  • Local Club: will find one when on the road

Posted 05 November 2011 - 02:51 PM

Ah, you're working well then. It seems to be going together fine. Do the final cam timing before fitting the flywheel so that it's easy to rotate the crank by putting a screwdriver through the crank end slot. With end cover and flywheel on it's a lot more difficult. Always turn the engine clockwise looking from the timing cover end when getting ready to take measurements.
One more thing, before fitting the flywheel, lap it onto the end of the crank using 'fine' grinding paste. Then do the big bolt up FT (that's 'very' tight!).

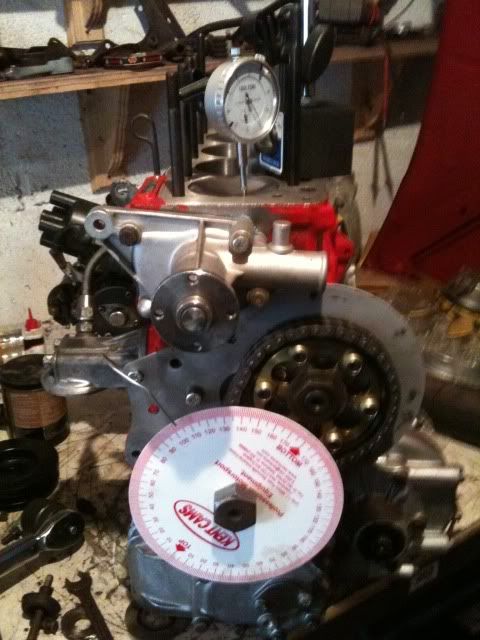
I thought it was ducking tight ha ha ha, yeah with the pistons fitted to the crank you need a screwdriver in the crank slot to turn the engine, does lapping the flywheel stop any clutch judder, dont know if you can see in the photo's the clutch taper has a few scars

Edited by firefox, 05 November 2011 - 02:54 PM.


#37 firefox

firefox

    One Carb Or Two?

  • Members
  • PipPipPipPipPipPipPip
  • 1,102 posts
  • Location: Stockton-on-Tees
  • Local Club: will find one when on the road

Posted 05 November 2011 - 02:59 PM

Peter are you saying i need a 3 degree offset woodruf key, in the haynes manual it says crank key at 12 o'clock and cam key at 2 o'clock with the 2 dots together, and just slip it in sorry, on O_O

Edited by firefox, 05 November 2011 - 03:01 PM.


#38 miniman92

miniman92

    One Carb Or Two?

  • Members
  • PipPipPipPipPipPipPip
  • 761 posts
  • Location: Winsford
  • Local Club: Crewes Missiles

Posted 05 November 2011 - 03:38 PM

Peter are you saying i need a 3 degree offset woodruf key, in the haynes manual it says crank key at 12 o'clock and cam key at 2 o'clock with the 2 dots together, and just slip it in sorry, on O_O


Thats your basic cam timing that haynes is explaining. Basically, lining the dots up "dot to dot" ensures the cam timing is accurate enough so that the engine will run. If you want to harness all of the power from the cam then youll need to find out how far out the basic cam timing is with a dti gauge and then change the cam woodruff key to one of (X) degrees that adjusts your cam timing to the manufacturers specs. Just how far out your cam timing is depends on a multitude of things, you really need to measure it as it is now and then get a woodruff key to suit. If its not going to be much of a performance motor then you might be ok just using the dot-to-dot timing, but I know some people on here have found their timing to be out by as much as 6 degrees.

Edited by miniman92, 05 November 2011 - 03:48 PM.


#39 firefox

firefox

    One Carb Or Two?

  • Members
  • PipPipPipPipPipPipPip
  • 1,102 posts
  • Location: Stockton-on-Tees
  • Local Club: will find one when on the road

Posted 05 November 2011 - 04:17 PM

I time the cam in at 2 degrees advanced from nominal to allow for the initial chain stretch which happens during the first 1000 miles.
So, if it's a standard Rover cam the nominal is 110 degrees after top dead centre, so I set to 108 degrees - the figure is less because it's after top dead centre, not before. For a road engine I look for +/- 2 degrees tolerance. With competition engines go for +/- 0.5 degrees.
If you measure correctly in the first place, then fit the appropriate wodruff offset key, it then has the right settting within tolerance.
Remember, the measurement at the cam is 1/2 what you have as error at the crank as the cam goes at 1/2 engine speed. So, if max cam lift on 1 or 4 inlet lobe is measured as 114 degrees ATDC on the crank, you need to retard the cam by 2 degrees not 4 degrees to get 110 degrees at the crank. I would, therefore, fit a 3 degree key to obtain 108 degs of crank rotation for max cam lift.
A vernier kit does make it easy, but at a price, and once set it should not need altering unless a new cam is installed.

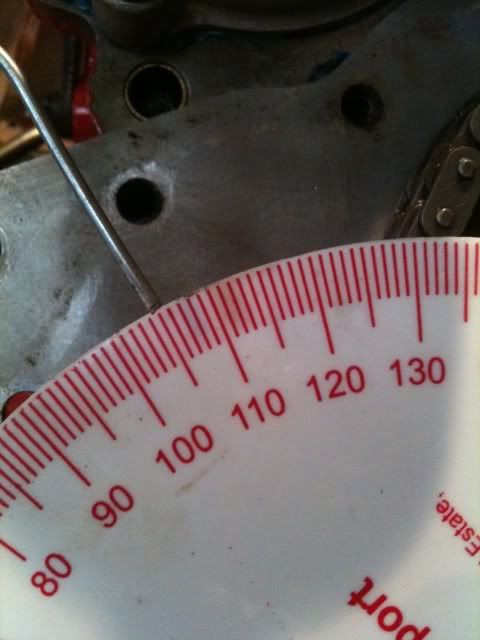
Peter i need a talk through for the timing please, i am not sure what to do, looking at the timing cogs which way is advance and retard i feel as if i am thick , and what gear do i need can i just use a protractor or do i need a dail gauge as well as andy's photo
i thought i would get stumped somewhere was going to easy

#40 Cooperman

Cooperman

    Uncle Cooperman, Voted Mr TMF 2011

  • TMF+ Member
  • PipPipPipPipPipPipPipPipPipPipPip
  • 23,278 posts
  • Location: Cambs.
  • Local Club: MCR, HAMOC, Chelmsford M.C.

Posted 05 November 2011 - 10:40 PM

OK, I've let all my fireworks off and the tele is crap this evening (as usual), so lets do some cam timing.

First of all linish the bores of the timing sprockets and lightly file the edges of the woodruff keys so that the crank and cam sprockets slide fairly easily on and off the crank and cam when lightly oiled. This just makes the job so much easier.
Now bring pistons 1 & 4 to absolute top dead centre (TDC). At this point the woodruff key in the crank should be vertical. Now, without the chain on, slide the crank sprocket onto the crank and the cam sprocket onto the cam.
On the front face of the cam and crank sprockets you will see a small indentation or 'dot' as we'll call it. If you were to draw a straight line from the centre of the crank through the 'dot' on the crank sprocket then the line, if continued, should pass through the centre of the cam sprocket. Check this first. Now turn the cam sprocket and hence the cam until the 'dot' on the cam sprocket is also on that theoretical line. Thus the two dots are close together and on a straight line through crank and cam centres. Use a 12" straight edge to check this by eye.
The position you have, known as 'dot-to-dot' timing, is now correct.
All you now have to do is to take the sprockets off, fit the chain, and re-fit the sprockets in exactly the same position and the cam is timed to standard tolerances. Check with your steel rule again to be sure it's correct.
If you are using a single chain, this in now the time to fit the tensioner. If it's a duplex, or double, chain, don't fit the tensioner at all.

However, the manufacturing tolerances of crankshaft, both sprockets and the camshaft can all add up to some amount of cam timing inaccuracy. In fact I've seen as much as 9 degrees which will have some impact on the power output, but it will still run.

To eliminate this error you can time it more accurately using either a vernier sprocket of an offset woodruff key.
To do this you need a dial test indicator (DTI) and a 360 degree protractor. AndyMiniMad has posted a photo of how to mount the protractor and the initial position of the DTI to check the accurate position of TDC.
So, establish the actual absolute TDC by putting the DTI plunger onto the top of a piston and turning the crank until you get the greatest DTI reading. Now back the crank until the DTI reads 3 thou (0.003") before TDC and then turn the crank until it's 3 thou after TDC. The position halfway between these two positions is absolute TDC. Mark TDC on the block against the protractor and set the TDC mark, or zero degrees on the protractor to this mark.
Now put a push rod into no.1 intake push rod hole. It's the second push rod hole from the front of the block. Ensure the push rod is fully down.
Re-position the DTI so that the plunger sits into the cup at the top of the push rod.
Rotate the crank clockwise until the push rod has moved to its highest position as shown by the DTI reading. Zero the DTI at this point. Rotate the crank anti-clockwise until the DTI has gone down by around 0.010", then rotate it forwards until it reads 0.005" below the figure at max. lift. Note the number of degrees on the DTI. Now rotate the crank clockwise until the DTI reaches zero then goes down again to exactly 0.005". Note the number of degrees. Add half the difference between the two figures in degrees to the lower figure. The is your actual cam timing which with a Rover cam should be 110 degrees ATDC and with a Kent cam should be 106 degrees. It is necessary to ensure that the push rod goes as far down as it can at all times as the cam follower can stick and give a false reading.
I usually do this measurement 3 times and take the average to get best accuracy.
So long as the figure is within 2 degrees either way, I normally leave it 'as is' for a road engine. More and I correct it with an offset key.

The angle measured was the crankshaft angle, but it's corrected at the camshaft. The cam rotates at 1/2 engine speed, so the offset needed is 1/2 the error measured at the crank. If the cam full lift is reached at less than the desired crankshaft angle, the cam must be turned fractionally anti-clockwise, so the offset key step must be offset clockwise, i.e. by moving the cam sprocket clockwise, this has the effect of moving the cam lobes anti-clockwise since the chain pitches are the same. I hope this is easy to follow, it's not as difficult as it sounds. Vice-versa if the cam full lift is reached at a greater angle of crank rotation than is required.
Once timed in accurately it will not be necessary to fit a different offset ley when you change the timing chain later on. Only if the sprockets and/or cam are changed will it be necessary to re-time to this accuracy. Just dot-to-dot will be fine in future.

That was a long 'missive' and I hope it's easy to follow.

Good luck with this,

Peter

#41 firefox

firefox

    One Carb Or Two?

  • Members
  • PipPipPipPipPipPipPip
  • 1,102 posts
  • Location: Stockton-on-Tees
  • Local Club: will find one when on the road

Posted 06 November 2011 - 11:37 AM

Hi Peter thanks for that, above and beyond the call of duty, i have bought a DTI with magnectic base off ebay and a Kent cam protractor, ( thanks for the photo Andy ) i should be able to sort with the above instructions, we will see, anyway
gearbox today and i should be able to get the engine the right way up tomorrow if my son visits to give me a lift
birthday yesterday let fireworks off HIC got a bit bored with them started taping them together and letting 4 off at a time
ha ha ha standard firworks have gone downhill from when i was a kid but the grandkids enjoyed them and this big kid

#42 AndyMiniMad.

AndyMiniMad.

    Up Into Fourth

  • Members
  • PipPipPipPipPipPipPipPipPip
  • 3,295 posts
  • Location: Under The Bonnet.

Posted 06 November 2011 - 12:14 PM

I used a bit of stiff wire wraped around one of the water pump bolts and then bent over to point at the protractor..its a good way of getting accurate readings without marking the block..needs to be quite stiff though so you dont move it when rotating the crank..I think its off an old wire coat hanger..

Posted Image

My cam needed to be timed in at 104 degrees...what cam profile are you fitting?

Edited by AndyMiniMad., 06 November 2011 - 12:19 PM.


#43 firefox

firefox

    One Carb Or Two?

  • Members
  • PipPipPipPipPipPipPip
  • 1,102 posts
  • Location: Stockton-on-Tees
  • Local Club: will find one when on the road

Posted 06 November 2011 - 12:33 PM

Havent got a clue its the one that was in the engine 12AH83AA metro 10.1 high comp 1275 11985/1986 the omly year it was produced

#44 firefox

firefox

    One Carb Or Two?

  • Members
  • PipPipPipPipPipPipPip
  • 1,102 posts
  • Location: Stockton-on-Tees
  • Local Club: will find one when on the road

Posted 06 November 2011 - 12:52 PM
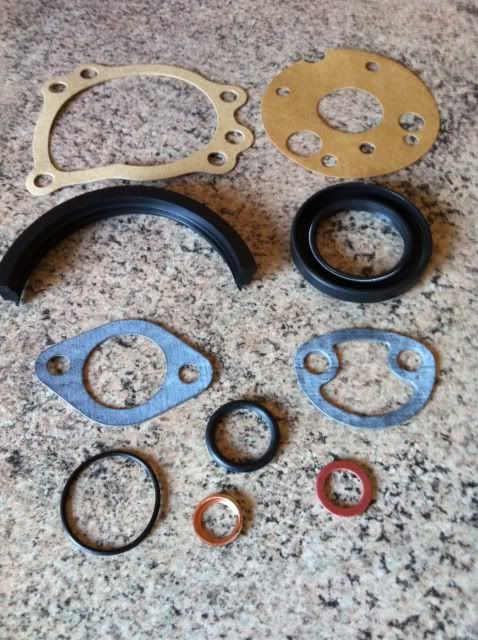
Hi Buds in the engine gasket set there is a little bag as below i know the 2 on the right Crankcase and timing cover oil seal but can you give me some idea what the others are for pleaseAttached File  Photo0050.jpg   979K   0 downloads the smallest one is copper or brass and it has a sort of ridge in it

Edited by firefox, 06 November 2011 - 12:54 PM.


#45 AndyMiniMad.

AndyMiniMad.

    Up Into Fourth

  • Members
  • PipPipPipPipPipPipPipPipPip
  • 3,295 posts
  • Location: Under The Bonnet.

Posted 06 November 2011 - 12:56 PM

I would just go with the dot to dot set up and forget about dialing it in...Its not a performance cam so wont really need to be set to this sort of accuracy..
Not sure what the small copper ring that comes with the gasket set is for...I placed mine very carefully into the bin!!

Posted Image

Edited by AndyMiniMad., 06 November 2011 - 01:08 PM.


1 user(s) are reading this topic

0 members, 1 guests, 0 anonymous users