Jump to content


Photo

How To Get Those Tight Door/bonnet /boot Gaps


  • Please log in to reply
73 replies to this topic

#31 dean

dean

    Mini Mad

  • Members
  • PipPipPipPip
  • 283 posts
  • Location: Eastbourne East Sussex
  • Local Club: EDMC

Posted 20 January 2013 - 03:41 PM

And doing boot , bonnent and door gaps brings back memory's. A pain in the arse , but well worth it. You really notice a car with badly fitted doors.

#32 scaffers

scaffers

    Speeding Along Now

  • Members
  • PipPipPipPipPip
  • 476 posts
  • Location: London

Posted 29 January 2013 - 09:20 PM

Great thread,

Just 1 question what dd you use to "melt" the gas rods.


Thanks

#33 sonikk4

sonikk4

    Twisted Paint Polisher!!!

  • Admin
  • PipPipPipPipPipPipPipPipPipPipPip
  • 15,971 posts
  • Name: Neil
  • Location: Oxfordshire

Posted 29 January 2013 - 09:30 PM

You weld them in place. I used the pulse welding method on both sides of the rods.

#34 scaffers

scaffers

    Speeding Along Now

  • Members
  • PipPipPipPipPip
  • 476 posts
  • Location: London

Posted 29 January 2013 - 09:41 PM

With an arc welder ?


.

#35 sonikk4

sonikk4

    Twisted Paint Polisher!!!

  • Admin
  • PipPipPipPipPipPipPipPipPipPipPip
  • 15,971 posts
  • Name: Neil
  • Location: Oxfordshire

Posted 11 February 2013 - 11:34 AM

With an arc welder ?


.


God no its done by MIG welding. Unless you are a welding expert with Arc all you will do is blow it apart.

#36 Tarks

Tarks

    One Carb Or Two?

  • Members
  • PipPipPipPipPipPipPip
  • 727 posts
  • Location: At the lockup resoring the mk2 cooper
  • Local Club: is there a local club? lol

Posted 23 July 2013 - 07:02 PM

A simple gap tip prior to paint make sure your gaps are a £1 coin tight gap. As after your paint they will look perfect and give the closures room for movement as we all know the mini does flex n twist a little.


Just my two pennies(or £) worth on a great thread


Tarks


#37 Daz1968

Daz1968

    Up Into Fourth

  • Members
  • PipPipPipPipPipPipPipPipPip
  • 2,058 posts
  • Location: Dudley

Posted 22 August 2013 - 09:25 PM

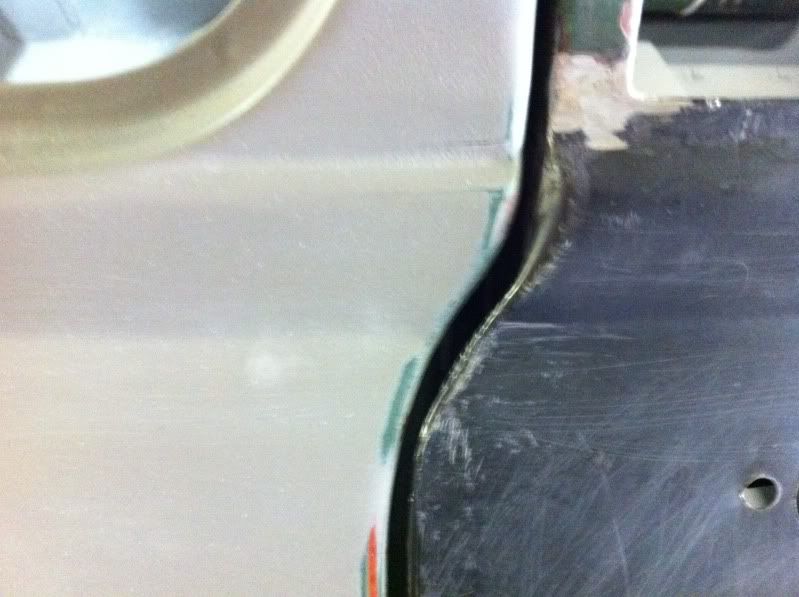
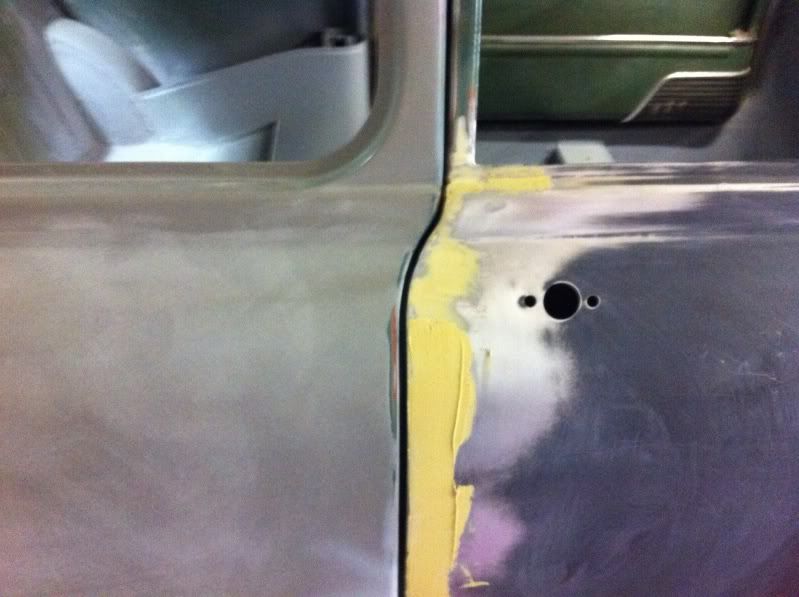
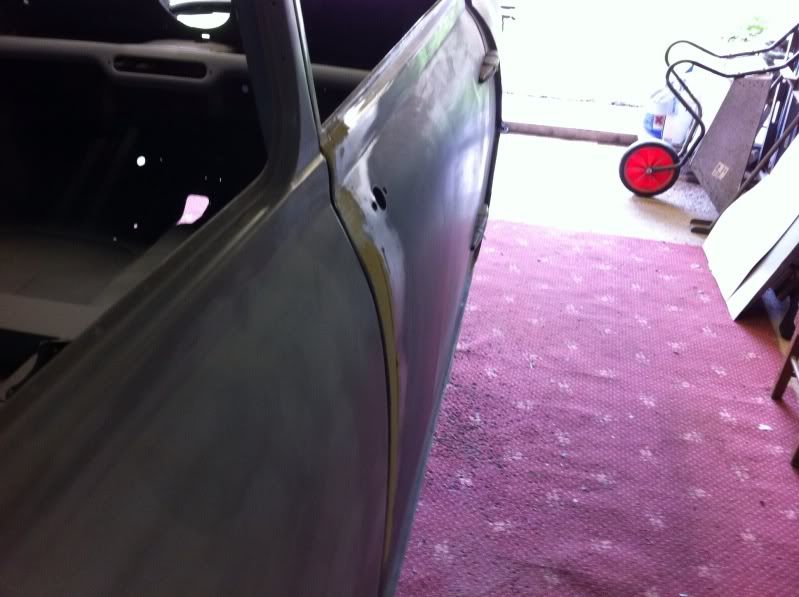
I just ran a bead of weld down the edge of the door and ground and 80 grit sanded it to improve a not perfectly shaped door skin might be able to see on this pic, not sanded the filler though yet.
Before
CF07D7F3-22F6-45D0-BE01-8EC59127FACA-309
After
null.jpg
Side view
null-1.jpg
Just need to finish flatting them now

Edited by Daz1968, 22 August 2013 - 09:26 PM.


#38 sonikk4

sonikk4

    Twisted Paint Polisher!!!

  • Admin
  • PipPipPipPipPipPipPipPipPipPipPip
  • 15,971 posts
  • Name: Neil
  • Location: Oxfordshire

Posted 22 August 2013 - 09:29 PM

I use that technique as well but for long lengths the welding rod is far better to use. I will be using both methods on Will's special when i reskin the doors on that. 


#39 domdee

domdee

    Formally known as dominicdee

  • Members
  • PipPipPipPipPipPipPip
  • 1,183 posts
  • Location: hull
  • Local Club: hull clubs on FB

Posted 21 March 2014 - 03:23 PM

What a thread. only just discovered it!


#40 foxon77

foxon77

    Starting My Mini Up

  • Noobies
  • Pip
  • 1 posts

Posted 15 April 2014 - 10:16 AM

I know this is a few years old now but I'm suffering the same problems especially with the bonnet to wing gap. I am struggling to see how you have managed to close the gap without widening the width of the bonnet as you have previously stated....is it me being thick? Do you mind explaining again please 😀

Edited by foxon77, 15 April 2014 - 10:18 AM.


#41 sonikk4

sonikk4

    Twisted Paint Polisher!!!

  • Admin
  • PipPipPipPipPipPipPipPipPipPipPip
  • 15,971 posts
  • Name: Neil
  • Location: Oxfordshire

Posted 15 April 2014 - 11:23 AM

If you have not welded the wings on then you may need to trim some of the wing mounting flange off and then get quite hard core with the wing.

Use some self tapping screws and some pre drilled holes in the wing flange for them.
Now fit the wing and force it over as far as you can go without damaging the wing. Using the holes you have drilled in the wing flange drill through these and then fit the self tappers. Now try the bonnet gap to see how bad or good it is. The same process needs to. Be applied to the other side. Keep doing this until you are happy.

#42 KEV@POWARTEK

KEV@POWARTEK

    Mini Mad

  • Traders
  • PipPipPipPip
  • 163 posts
  • Location: Teesside or Hampshire depending on the day

Posted 05 June 2014 - 08:07 PM

Excellent guide, can you tell me what size in mm you kept for the gaps?

#43 sonikk4

sonikk4

    Twisted Paint Polisher!!!

  • Admin
  • PipPipPipPipPipPipPipPipPipPipPip
  • 15,971 posts
  • Name: Neil
  • Location: Oxfordshire

Posted 05 June 2014 - 08:11 PM

Excellent guide, can you tell me what size in mm you kept for the gaps?


Mmm good question, the gaps i have on Erm are approx 4 mm. Cant check at the mo as the car is covered in the garage and my clubby is next to it. A £1 coin thickness would be about right though.


#44 KEV@POWARTEK

KEV@POWARTEK

    Mini Mad

  • Traders
  • PipPipPipPip
  • 163 posts
  • Location: Teesside or Hampshire depending on the day

Posted 07 June 2014 - 09:25 PM

Thanks mate, this is my next task!

#45 zinzan

zinzan

    Speeding Along Now

  • Just Joined
  • PipPipPipPipPip
  • 373 posts
  • Location: deep in the Canadian wilderness
  • Local Club: me and my imaginary friend

Posted 09 June 2014 - 02:44 AM

Thanks for this thread, folks.  Put new set of doors on the Mini this weekend and discovered a large gap at the top.  Figured something awful wrong with the doors or the car itself.  Now I know...and how to fix it.


7 user(s) are reading this topic

0 members, 7 guests, 0 anonymous users