keep up the good work

Leyland Mini 1000 1980 Restoration Project
#166

Posted 14 March 2012 - 03:59 PM
keep up the good work
#167

Posted 15 March 2012 - 08:34 PM
Hi minimuk, to clean the gutter, or whats left of the roof, I've been gently using a 2 mm cutting disc on an angle grinder to grind down through the spot welds and then peel off the old metal with a pair of side cutters. There are too many spot welds to drill out (roller welded). You have to be very carefull not to grind through the lower lip. However, the majority of the lip on both sides of the shell has rotted out on the inside of the rolled edge and so some major surgery is required. The front and rear aren't too bad but still need their share of surgery too.
This was the gutter after the roof was removed.
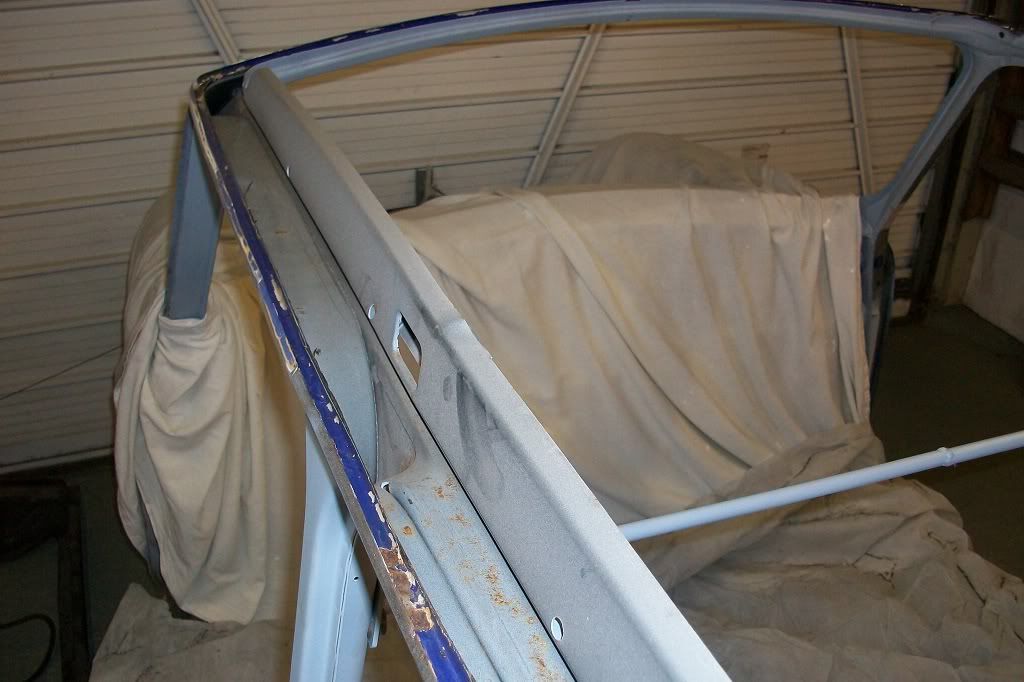
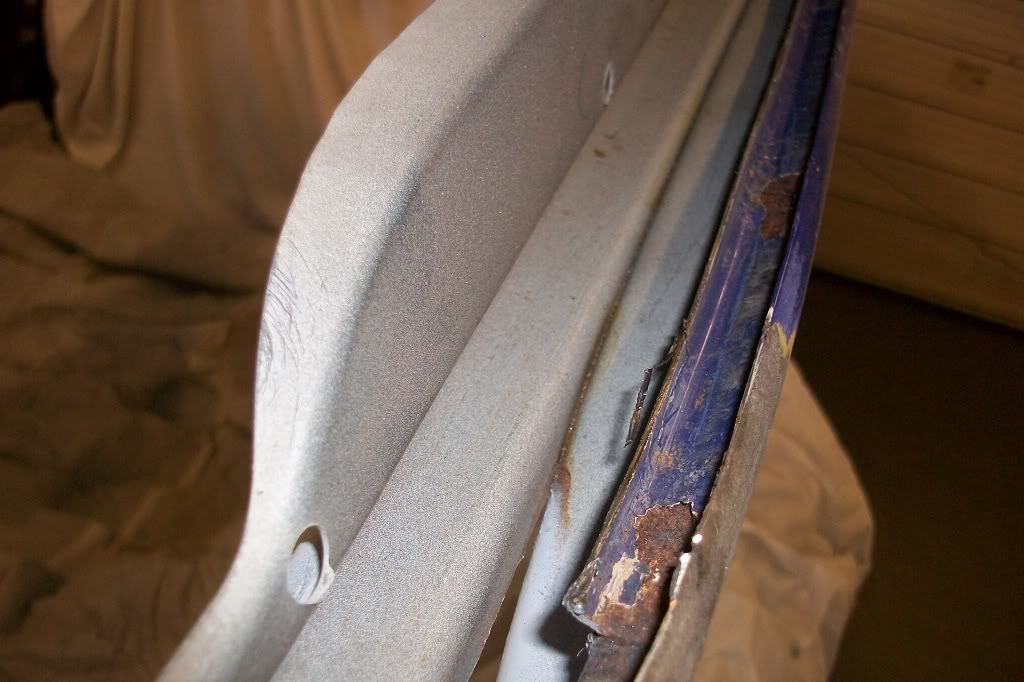
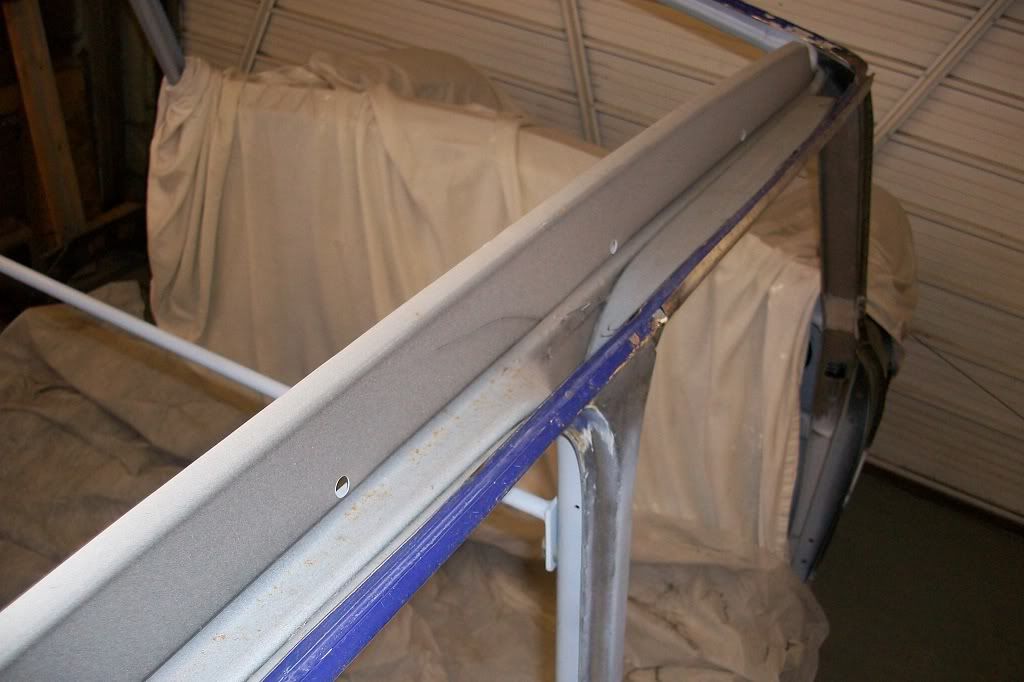
Here is one of the rotten areas that needs repair. I decided to use this as a test area to see how hard or easy it would be to repair the gutter.
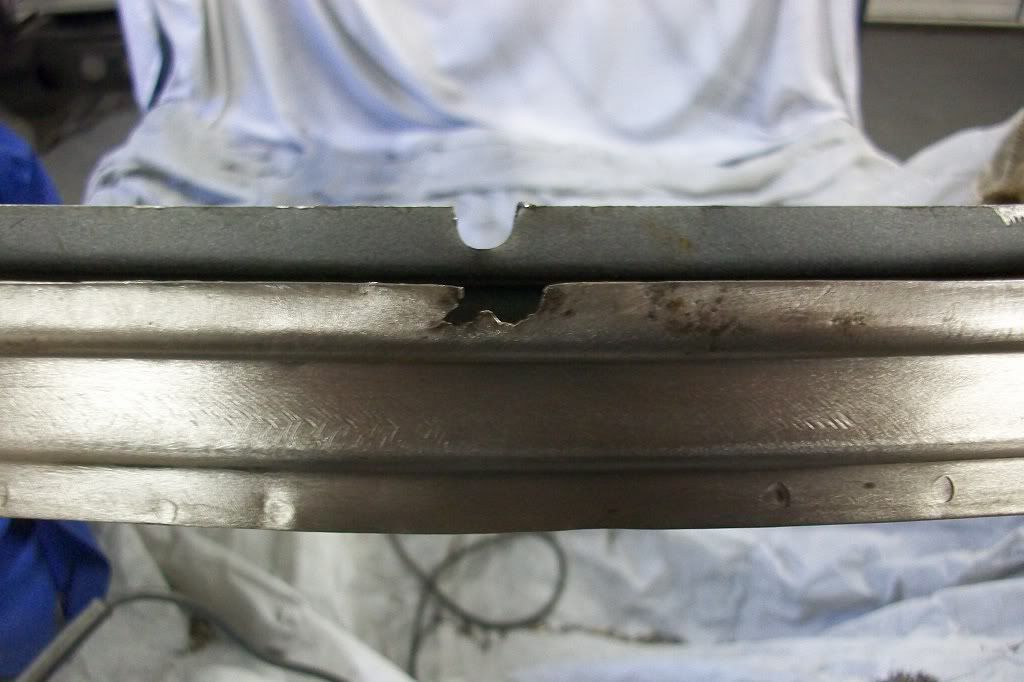
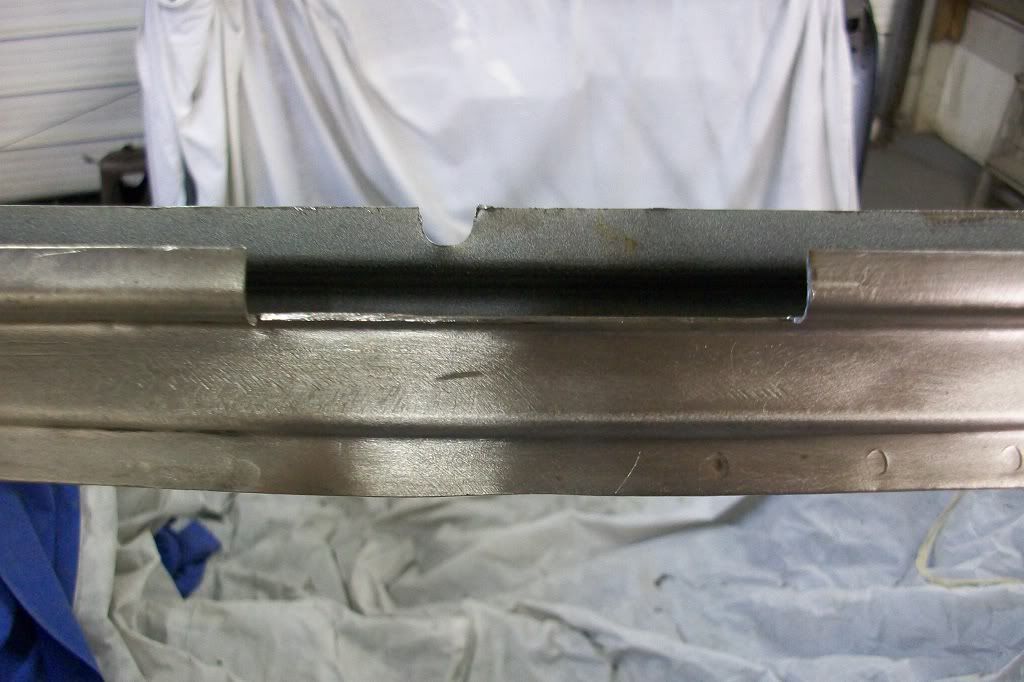
Cut out the rotten area. The amount cut out looks more than required as the rot on the rear of the lip had spead further along.
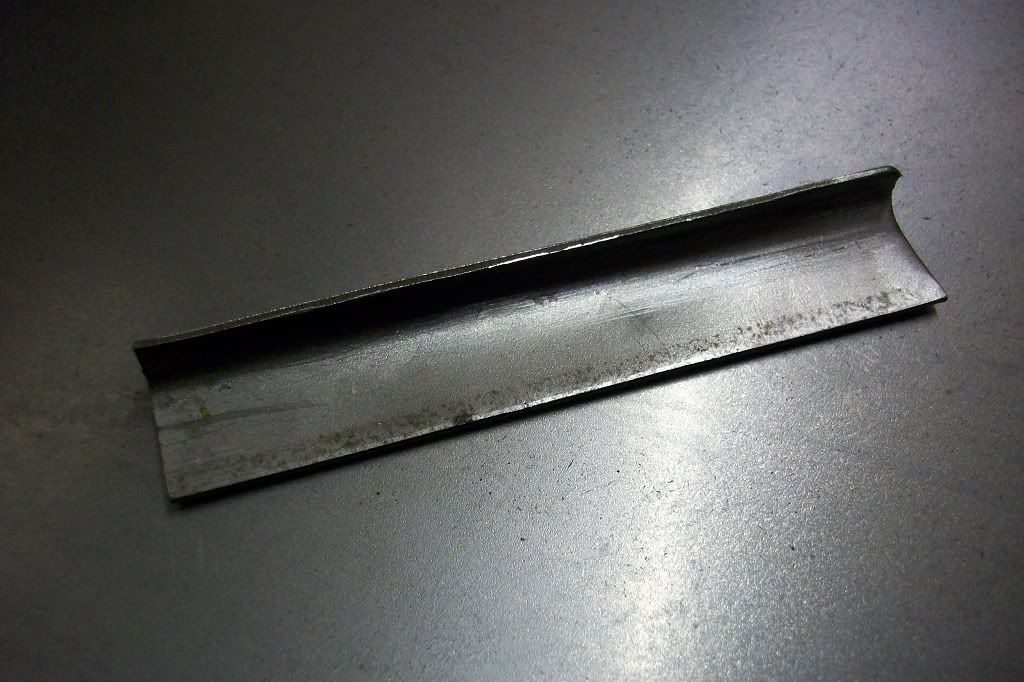
Made this repair piece by taking a piece of 6mm round bar and gently curving to the shape of the gutter. Then welded the round bar to a piece of 5mm flat bar, to allow a piece of metal to be clamped to it in a vice and knocked over the round edge with a hammer. I'll show this in another post.
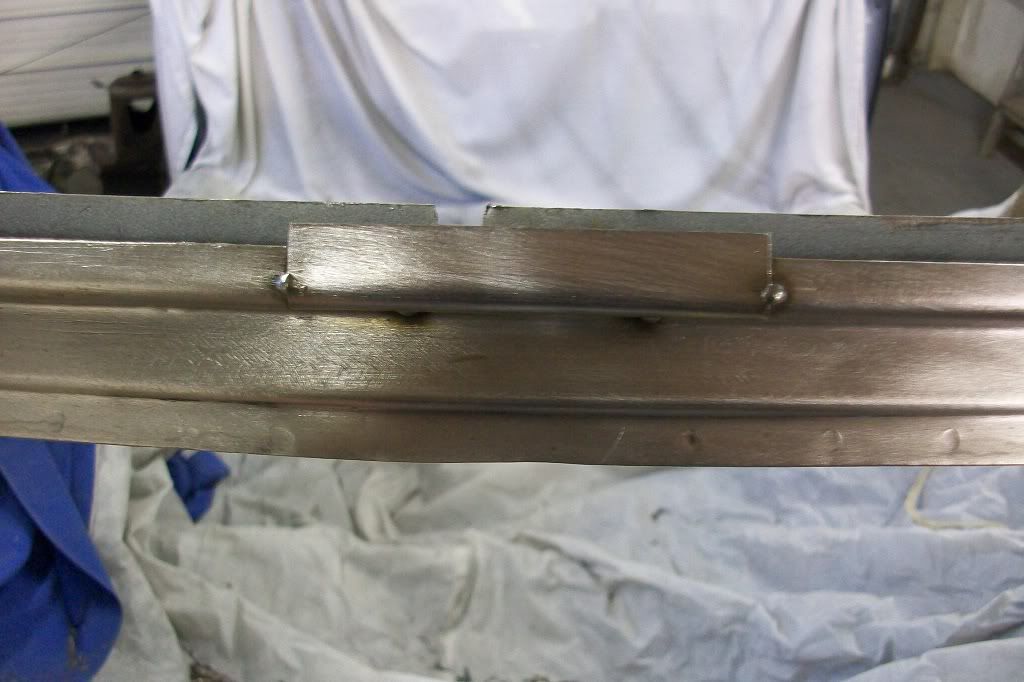
Tacked in.
Used a piece of copper to prevent blowing holes through when welding at the top of the lip.
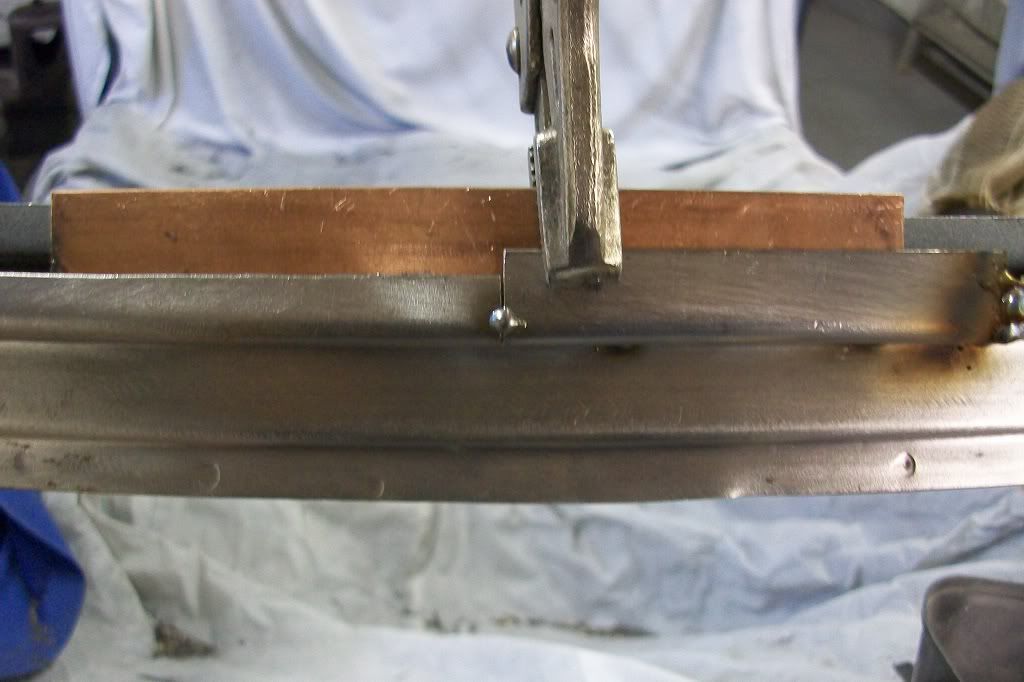
Welded up.
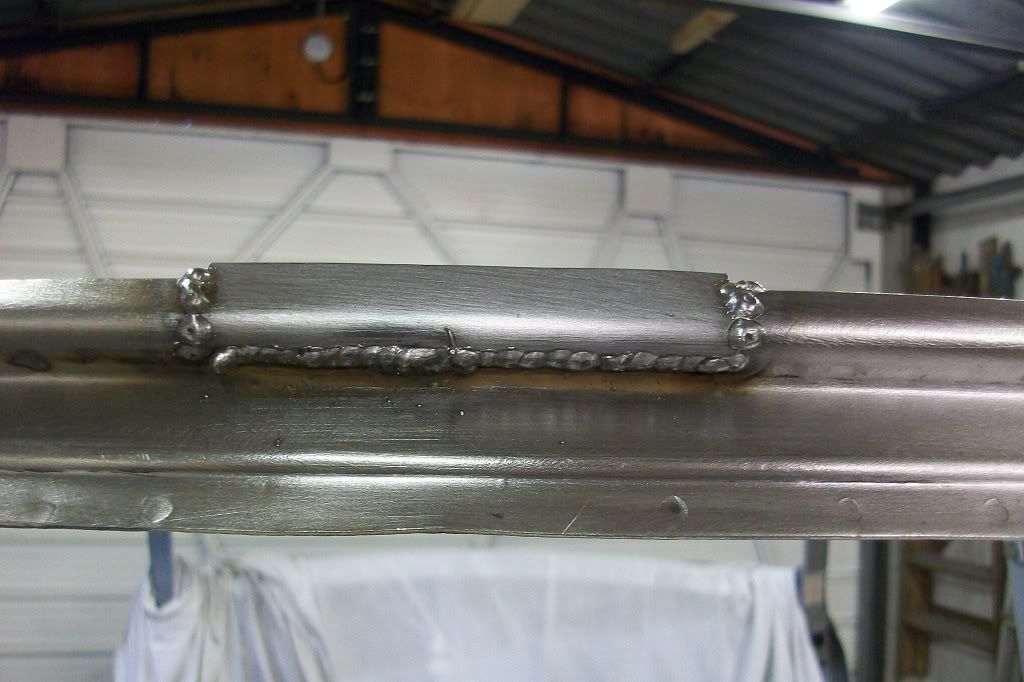
And finished off by grinding down gently with a 40 grit flap disc, but not right down. Then using a fine file to file back level. I found this was the best way to ensure a good flat metal finish that blends together well (don't really want to use any filler on this area if possible as it could easily get chipped off). Then finished blending with 80 grit paper on a DA sander.
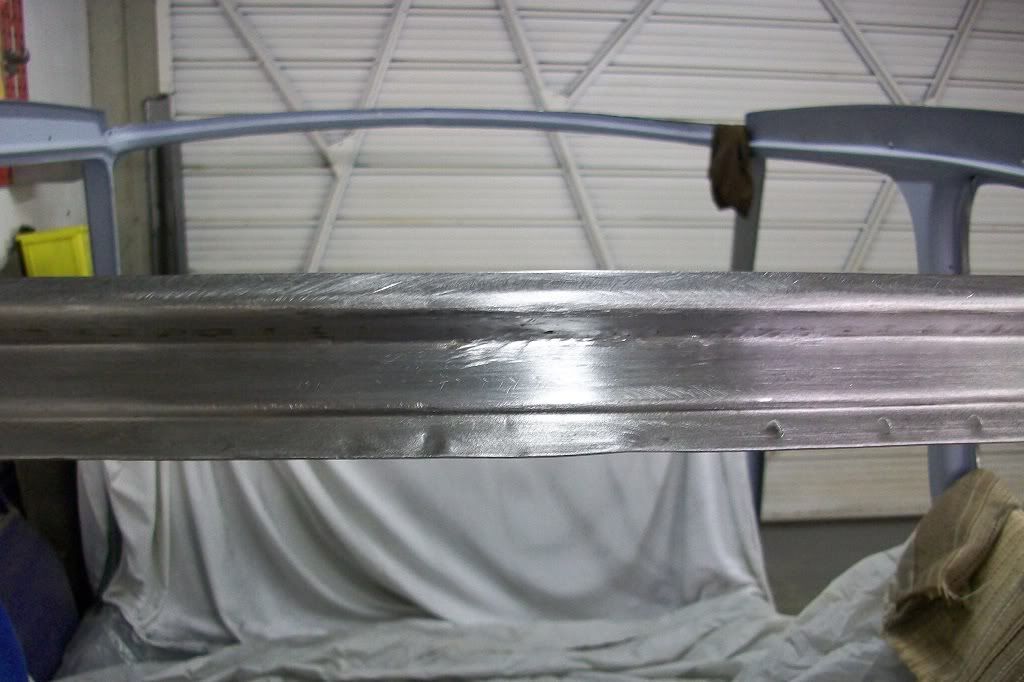
Its turned out quite well but there is a lot to do and some are even more curved so will have to figure out how to do those.
I'll get some pictures of the formers I made up soon but they're nothing special.
Thanks for looking.
Edited by minifcd, 15 March 2012 - 08:39 PM.
#168

Posted 15 March 2012 - 10:23 PM
#169

Posted 15 March 2012 - 10:48 PM
#170

Posted 15 March 2012 - 11:15 PM
#171

Posted 15 March 2012 - 11:20 PM
#172

Posted 16 March 2012 - 12:14 PM
I knew it was the same repair, it's just so bloody good !!!
#173

Posted 16 March 2012 - 12:58 PM
Hugh
#174

Posted 16 March 2012 - 07:59 PM
#175

Posted 17 March 2012 - 05:52 PM
Cracking job!
#176

Posted 17 March 2012 - 10:38 PM
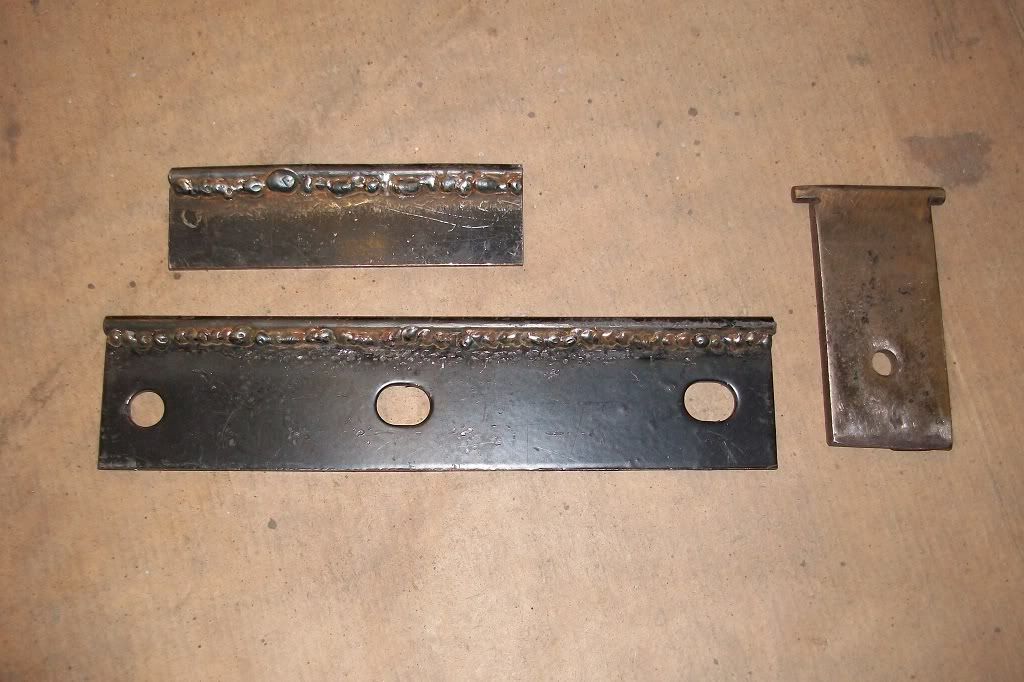
These are the basic formers I made to make the roof gutter. The one at the top is slightly curved. The bottom one is flat and the one on the right is one I made for previous jobs.
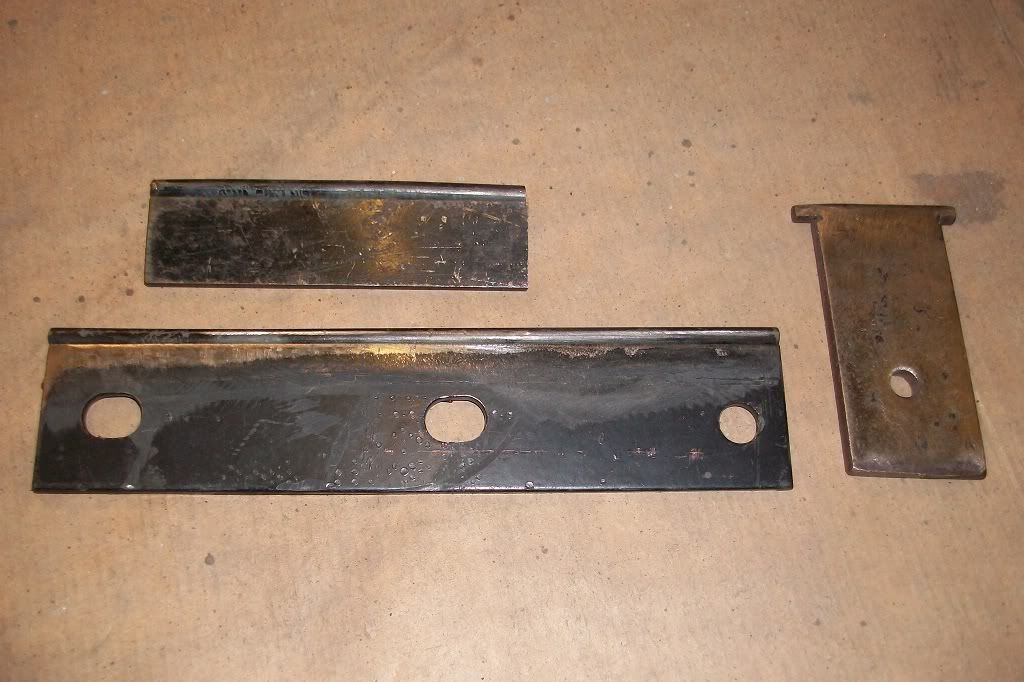
The welding is nothing special as I rushed them a bit. The smaller curved one at the top was the one I made for the rear gutter repair in the last update.
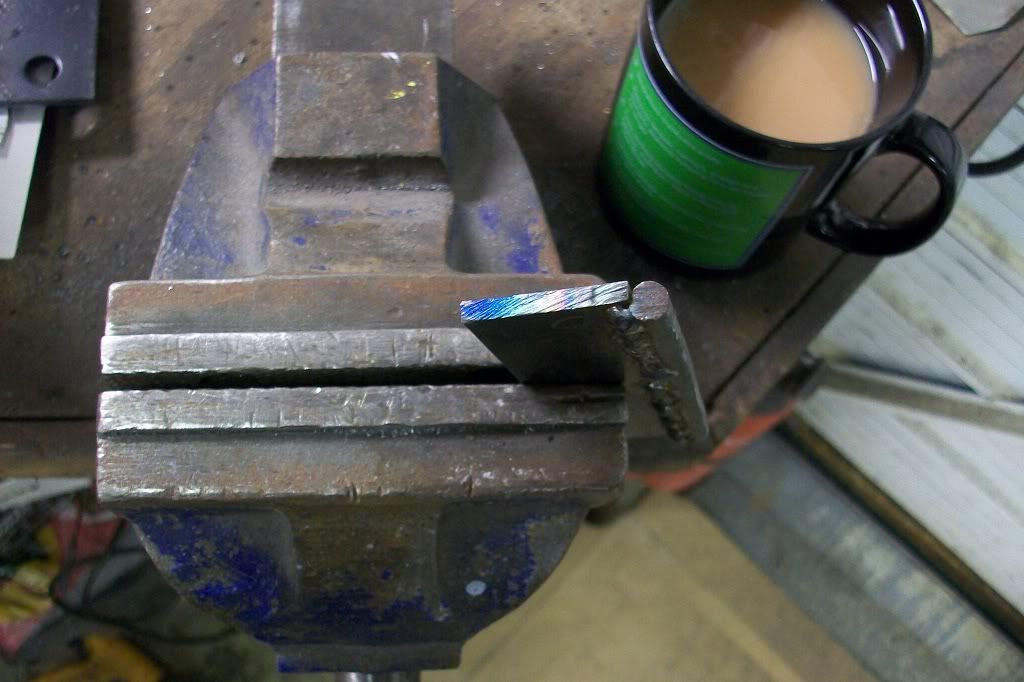
Here you can see how the round bar is offset to bring it level with the back of the flat bar.
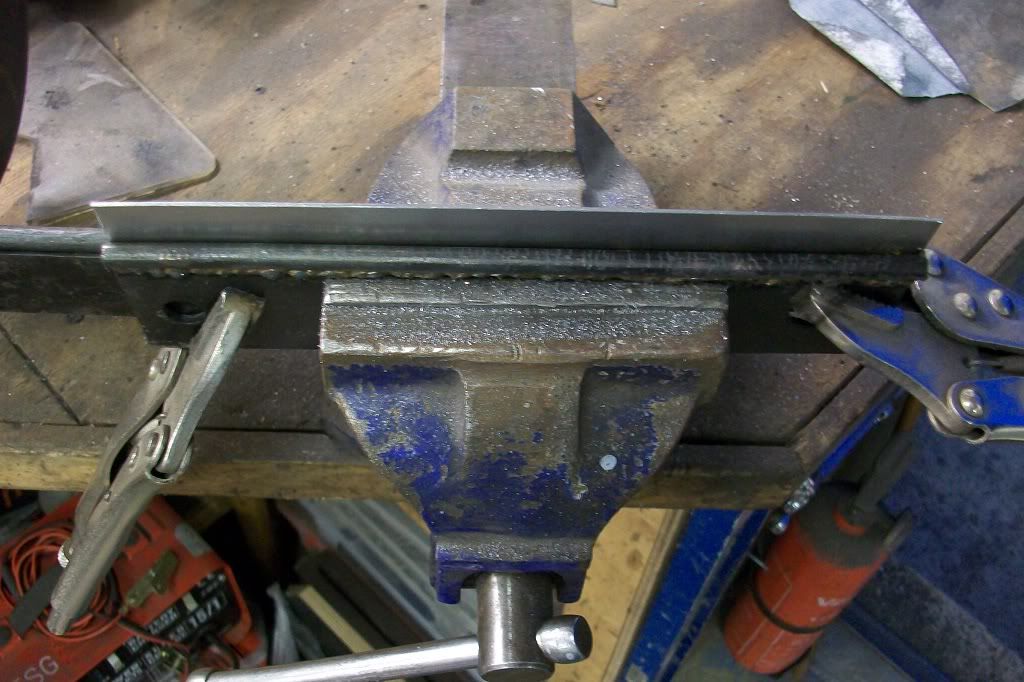
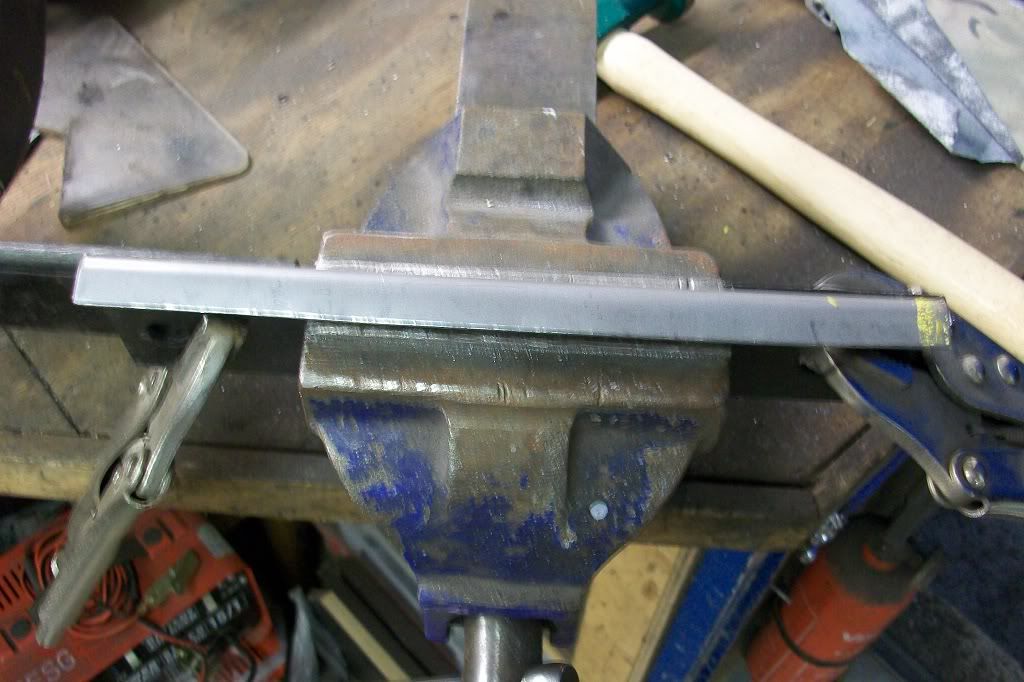
Forming a gutter repair piece. Metal clamped in vice behind former.
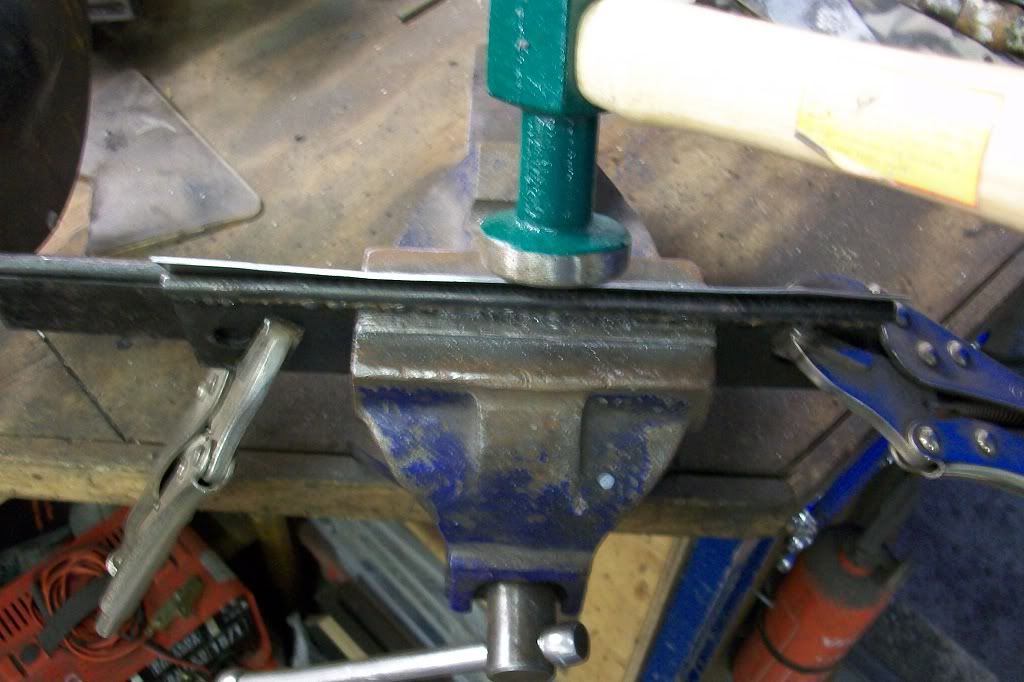
Hammer it over gently going all the way along evenly.
The finished piece.
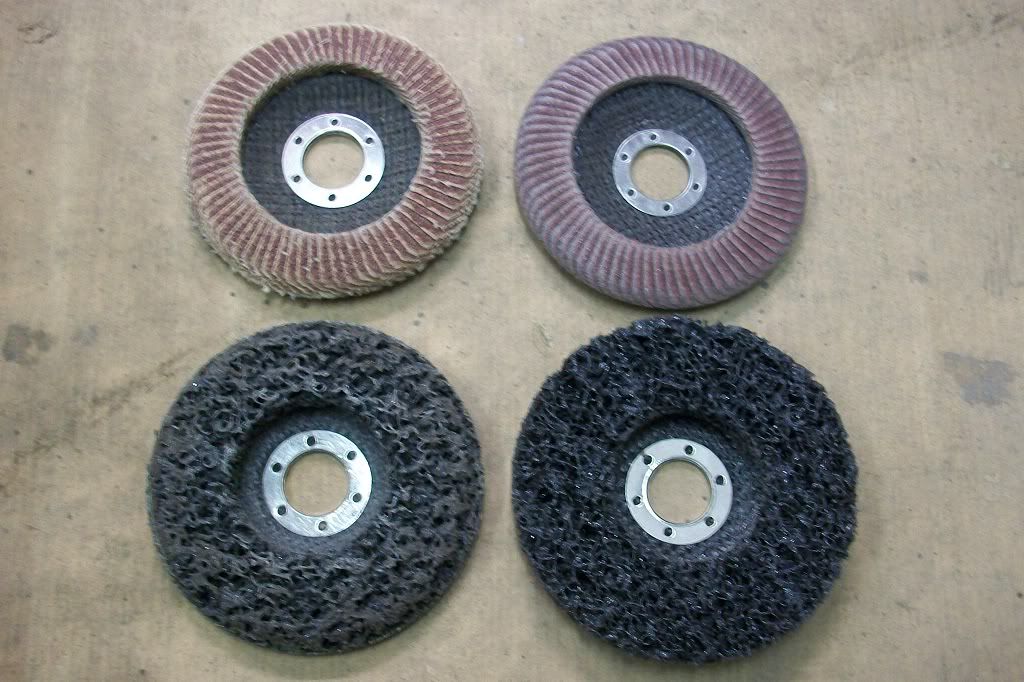
Some pictures of what I use to clean and grind metal. Top left 40 grit flap disc and right 80 grit flap dicsc. The best I have at the moment. I need to get some new ones but these are what I use to grind down welds. The bottom two are strip and clean discs for removing paint. One new and one used. The used one cleaned the seat back down, the floors inside and parts of the upper and lower dash rails and is still good (very light pressure does the job).
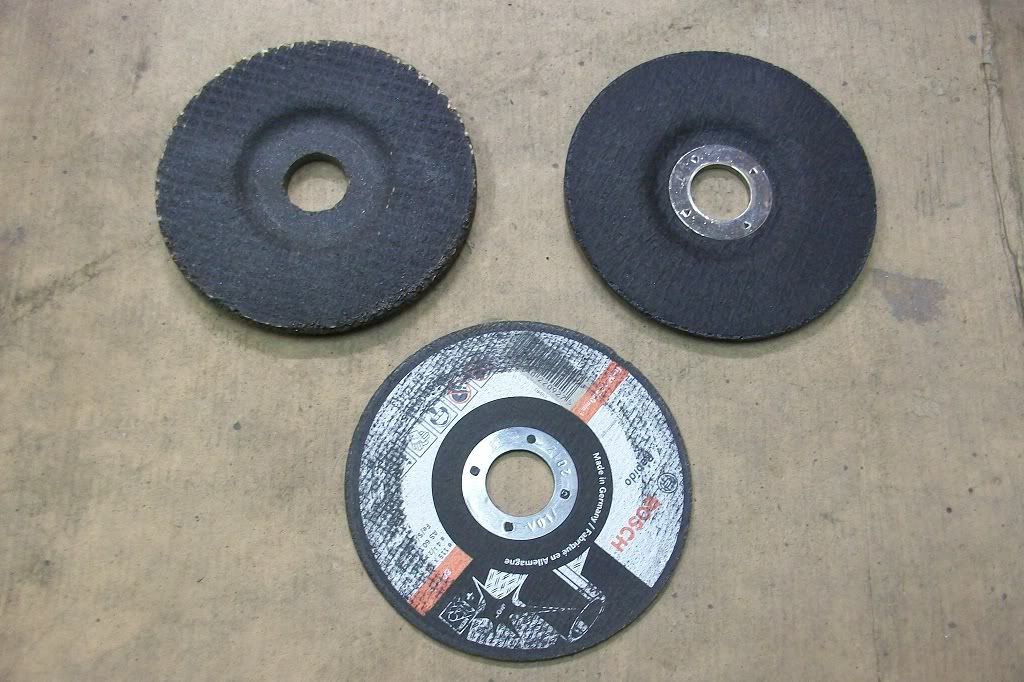
Top left, grinding disc. Top right is a 3mm cutting disc and bottom is a 1mm cutting disc. I don't tend to use the grinding disc much but 1mm cutting discs get a lot of use.
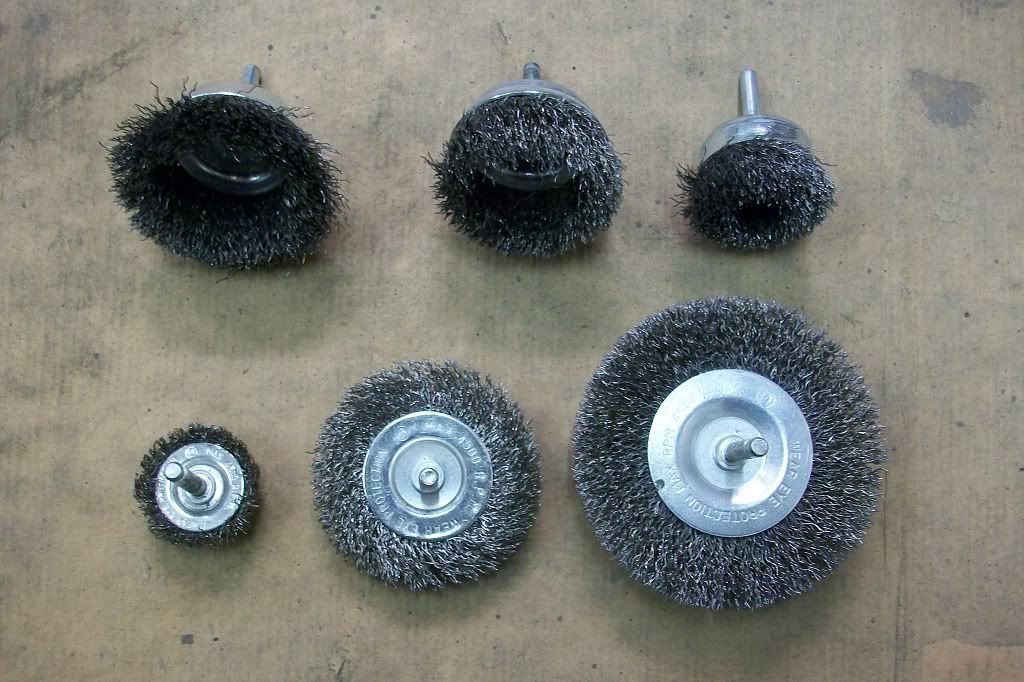
Various wire brushes generally used to clean down paint around gutter, windows etc. The small worn out one is the one I used to clean the grooves in the rear seat back, followed by the strip and clean disc on the larger areas.
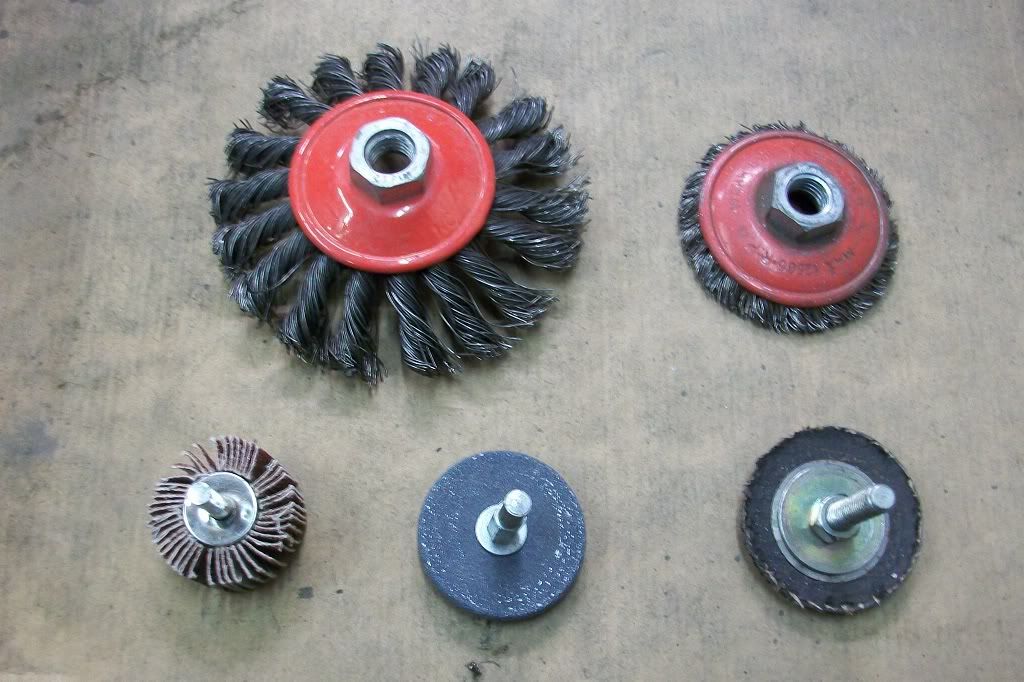
Top left, twist knot wire brush for the angle grinder and top right is the same but has seen some action!! I only really use these on heavy rust and on the subframes. Must wear eye protection (preferably a face visor) as bits of wire fly out and can stick in your clothes or arms!! Bottom, from the left, 40 grit flap disc for drill, grinding stone and on the right is a home made grinding disc for use on the drill that makes use of worn out cutting discs, that are too small for the angle grinder. This is what I'm using to grind inside the gutter and in other hard to get to areas and works really well.
Thanks.
#177

Posted 17 March 2012 - 10:53 PM
#178

Posted 17 March 2012 - 11:06 PM
#179

Posted 17 March 2012 - 11:15 PM
Thanks minimuk. I found if you need a slight curve then put a small piece of 1mm thick metal in the centre between the round bar and the flat bar and pull the ends of the round bar down to the flat bar. Then weld each end and either side of the 1mm piece. Remove the 1mm piece and then fully weld all along. That give you a slight curve for jobs like the gutter. When forming the gutter pieces, the bit you hammer over is the lip that points up. The bit that's clamped in the vice is the horizontal piece you weld to the original panel.
cheers I will give it a go, the round bar is 6mm or 10mm?
#180

Posted 17 March 2012 - 11:58 PM
1 user(s) are reading this topic
0 members, 1 guests, 0 anonymous users


