Nice one. Good to see you back on it. The air tube thingy has 4 small nuts accessible under the dash rail. Good luck

1978 Leyland 1275Gt Project
Started by
Daviewonder
, Aug 12 2011 08:53 PM
134 replies to this topic
#91

GT Jimmy
-

- TMF+ Member
-

- 1,642 posts
Camshaft & Stage Two Head
- Location: manchester
- Local Club: S.U.N.M.C
Posted 13 October 2018 - 08:00 PM
#92
Daviewonder
-
- TMF+ Member
-
- 1,018 posts
Needs an extra inch!!
- Location: England
Posted 13 October 2018 - 08:03 PM
Nice one. Good to see you back on it. The air tube thingy has 4 small nuts accessible under the dash rail. Good luck
Ah, brilliant. Thanks Jimmy. 
#93
alex-95
-

- Members
-
- 6,025 posts
I am THE CLAMP MAKER
- Location: l
Posted 13 October 2018 - 08:32 PM
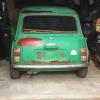
The inner wings look in good condition, maybe a little bit of welding on the passenger side under the shock mount?
The air duct has 4 bolts on it should be able to see it inside roughly where the throttle pedal mounts. (oops didn't notice there was another page)
Was it originally the dark gold colour in the engine bay.
Edited by alex-95, 13 October 2018 - 08:33 PM.
#94
Daviewonder
-
- TMF+ Member
-
- 1,018 posts
Needs an extra inch!!
- Location: England
Posted 13 October 2018 - 08:37 PM
The inner wings look in good condition, maybe a little bit of welding on the passenger side under the shock mount?
The air duct has 4 bolts on it should be able to see it inside roughly where the throttle pedal mounts. (oops didn't notice there was another page)
Was it originally the dark gold colour in the engine bay.
Thanks Alex. Yeah it was originally that colour. Reynard Metallic. I hope to get it back in the original colour, if I ever get that far.
#95
alex-95
-
- Members
-
- 6,025 posts
I am THE CLAMP MAKER
- Location: l
Posted 13 October 2018 - 08:48 PM
The inner wings look in good condition, maybe a little bit of welding on the passenger side under the shock mount?
The air duct has 4 bolts on it should be able to see it inside roughly where the throttle pedal mounts. (oops didn't notice there was another page)
Was it originally the dark gold colour in the engine bay.
Thanks Alex. Yeah it was originally that colour. Reynard Metallic. I hope to get it back in the original colour, if I ever get that far.
Oh nice, don't see many that colour.
#96
Daviewonder
-
- TMF+ Member
-
- 1,018 posts
Needs an extra inch!!
- Location: England
Posted 13 October 2018 - 08:51 PM
Oh nice, don't see many that colour.
I believe it was a limited edition colour for the Queens Jubilee in 1977.
#97
Verderad
-

- Members
-
- 411 posts
Speeding Along Now
- Location: Porthcawl
Posted 13 October 2018 - 11:05 PM
Good luck with the GT, will be following your thread. Love the vinyl seats you got originally and the broiwn stripes ones are good.
These things take time, I get Saturdays on mine whilst the wife is at work. Going to take years if I can only get 4 foot of weld and grinding done in a day.
#98
ryomini
-

- Members
-
- 583 posts
Super Mini Mad
- Location: Hiroshima
Posted 14 October 2018 - 11:11 PM
Started off really well
lots of rust to take care of though - keep at it !
#99
Vinay-RS
-

- Members
-
- 2,115 posts
Put's foolish ideas in peoples heads
- Location: Cape Town
Posted 20 October 2018 - 12:35 PM
Just read through your thread, I love all the original parts you've been getting for your car, like the Rostyles, the seats and the louver.
#100
Daviewonder
-
- TMF+ Member
-
- 1,018 posts
Needs an extra inch!!
- Location: England
Posted 21 October 2018 - 06:32 PM
Good luck with the GT, will be following your thread. Love the vinyl seats you got originally and the brown stripes ones are good.
These things take time, I get Saturdays on mine whilst the wife is at work. Going to take years if I can only get 4 foot of weld and grinding done in a day.
Thanks. I like the vinyl seats too but I think the brown cloth ones will go better with the finished bronze colour.
Yeah everything takes longer than you think it will, but there comes a point when you suddenly realise you've actually accomplished loads.
Started off really well
lots of rust to take care of though - keep at it !
Will do, thanks.
Just read through your thread, I love all the original parts you've been getting for your car, like the Rostyles, the seats and the louver.
Thanks. Yeah the idea is to keep everything from that era
Only got a little bit done this weekend due to the Mrs' work shifts and doing Dad stuff. Most of my time was taken up removing the indicators/sidelights and bumper while trying not to sheer the studs and bolts. I got them off in the end with only one stud on each sidelight snapping. I don't think this will be an issue though as it looks like I can drill it out and replace it with a nut and bolt.
I removed the headlights too, except for one of the bowls, as the screws were badly corroded on one of them. Going to have to cut them off next time. I'll be doing away with the sealed beam units when I come to putting the car back together, and plan on replacing all the fittings too.
Anyway here is how it stands at the moment. Slow and steady progress.

Hopefully some more next week.
#101
Daviewonder
-
- TMF+ Member
-
- 1,018 posts
Needs an extra inch!!
- Location: England
Posted 24 March 2019 - 08:42 PM
First update of the year!
Well it's been a sunny weekend and I've had a few hours in the garage. I've finally made a start on the body in the form of removing the left hand front wing.
My first attempt at drilling out spot welds went ok.

In my head I'd stroll on in, drill out a few spot welds and Bob's your Uncle, the wing would drop off. Nothing could be further from the truth. It must have taken me about 7 hours to get the damn thing off! The slam panel was corroded on the end which made things a bit easier.


Under the wing didn't look too bad at first.

Then I removed the old gusset panel and found a rust hole.

Well that's all I managed to get done but I'm pleased I've done something. I guess the next step would be to clean up the inner wing and arch and sort out the rust.
Thanks for following.
#102
GT Jimmy
-
- TMF+ Member
-
- 1,642 posts
Camshaft & Stage Two Head
- Location: manchester
- Local Club: S.U.N.M.C
Posted 24 March 2019 - 08:57 PM
Nice one, good to see you back on it
#103
mini_in_progress
-

- Members
-
- 641 posts
Super Mini Mad
Posted 24 April 2019 - 10:27 AM
Nice to see someone else who leaves it a few years and returns to it again. I may get time to cut my front end off and remove the doors this weekend too... i just want to promise myself not to push it back into the garage for a few years when i see whats lurking under the wings....haha
Keep up the good work bud, i need some inspiration
#104
Daviewonder
-
- TMF+ Member
-
- 1,018 posts
Needs an extra inch!!
- Location: England
Posted 27 April 2019 - 04:44 PM
Nice one, good to see you back on it
Thanks Jimmy. Trying my best to fit in a few hours here and there. Still got a way to go before I catch you up. 
Keep up the good work mate.
Nice to see someone else who leaves it a few years and returns to it again. I may get time to cut my front end off and remove the doors this weekend too... i just want to promise myself not to push it back into the garage for a few years when i see whats lurking under the wings....haha
Keep up the good work bud, i need some inspiration
Yeah I must admit to doing that a few times. Life keeps getting in the way. Did you get anything done on yours this weekend?
Anyway people, I've got a few more bits done over the past week. The shell is now sitting on a couple of pallets with casters so is nice and easy to move about the garage and I've managed to get pretty much everything stripped off the shell. The only things really left to remove now are the loom and the cold air vents.


On inspection the front floors are in a bit of a state and the inner sills are rusty on the ends. The bottoms of the inner wings are holed too, as well as the tops of them by the vents. Also the A post stiffener panels need attention at the bottom. I'd imagine there's more to find but I've not had a chance to investigate further yet. I'm really looking forward to starting the bodywork if I'm honest.
I've also been to my local metal supplier and picked up some supplies. I've got some 0.9mm sheet steel and some 1.2mm sheet steel. I've also got some small box section for bracing the shell and some large box section for when I make a spit.


Glad to have got a bit more done. Hope to report back soon.
#105
mini_in_progress
-
- Members
-
- 641 posts
Super Mini Mad
Posted 27 April 2019 - 05:55 PM
Not too much mate, ill update my thread, but don't get too excited.
Looks like some progress has been made with yours tho, What size box did you go for bud been looking at 25 x 25 x 2.5mm or 3mm for bracing my doors


2 user(s) are reading this topic
0 members, 2 guests, 0 anonymous users


