 Shall use yours for inspiration


Road Rally Mini Project
Started by
minisi35
, Jun 11 2011 03:24 PM
609 replies to this topic
#511

Archived4
-

- Archived
-

- 822 posts
One Carb Or Two?
Posted 16 June 2013 - 08:28 PM
Wicked! I'm starting on my build in 2 weeks! Shall use yours for inspiration
Shall use yours for inspiration
#512
keefr22
-

- Members
-
- 591 posts
Super Mini Mad
Posted 17 June 2013 - 06:07 AM
Oooo! I like the look of those bulkhead heater pipe fittings...can ask where I can buy some?
Oooo! I like the look of those bulkhead heater pipe fittings...can ask where I can buy some?
Lol I will have to start making some more lol.....
I think there's a few things on this build that you could make some money out of if you made more of them!
Good news about the motor!
#513
minisi35
-
- Members
-
- 723 posts
One Carb Or Two?
- Local Club: british mini club shropshire
Posted 17 June 2013 - 08:55 AM
Thankyou both, im humbled
#514
miniweights
-

- Members
-
- 199 posts
Mini Mad
- Location: Cornwall
Posted 17 June 2013 - 11:24 AM
Oooo! I like the look of those bulkhead heater pipe fittings...can ask where I can buy some?
Oooo! I like the look of those bulkhead heater pipe fittings...can ask where I can buy some?
Lol I will have to start making some more lol.....
I think there's a few things on this build that you could make some money out of if you made more of them!
Good news about the motor!
Agreed! There's some really nice touches made to this car...Keep up the inspiring good work
#515
minisi35
-
- Members
-
- 723 posts
One Carb Or Two?
- Local Club: british mini club shropshire
Posted 19 June 2013 - 10:25 PM
Had a few teething problems.....
First of all I been rebuilding the hubs and the o/s one was way to dodgy to put back on so while Minispares had them cheap a friend picked one up for me( thanks jules). That was the last part of the suspension needed so that is all fitted and done.
Then the brakes still felt spongy so they've been bled 2 or 3 times .
Then with the engine running I noticed a drip of oil under the car. Could see the rocker cover gasket was leaking so new gasket on and oil tight now . Ran it a bit more and there was a noticeable patch of oil underneath. The offending part is the timing case seal so that's all apart waiting for the seal
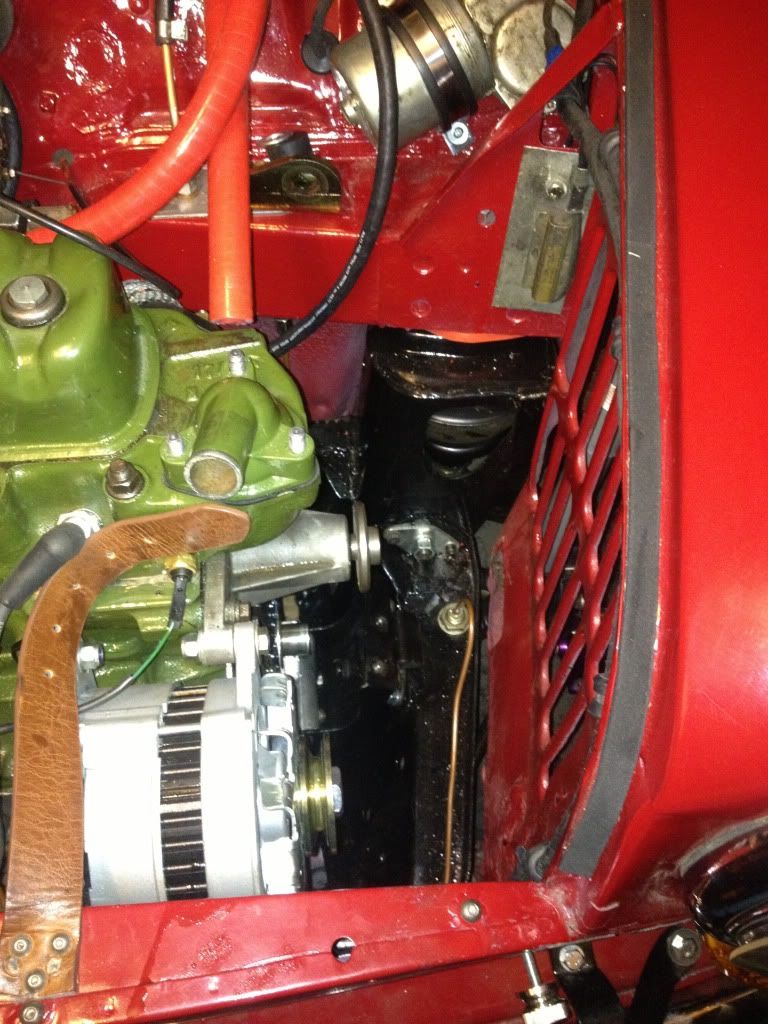
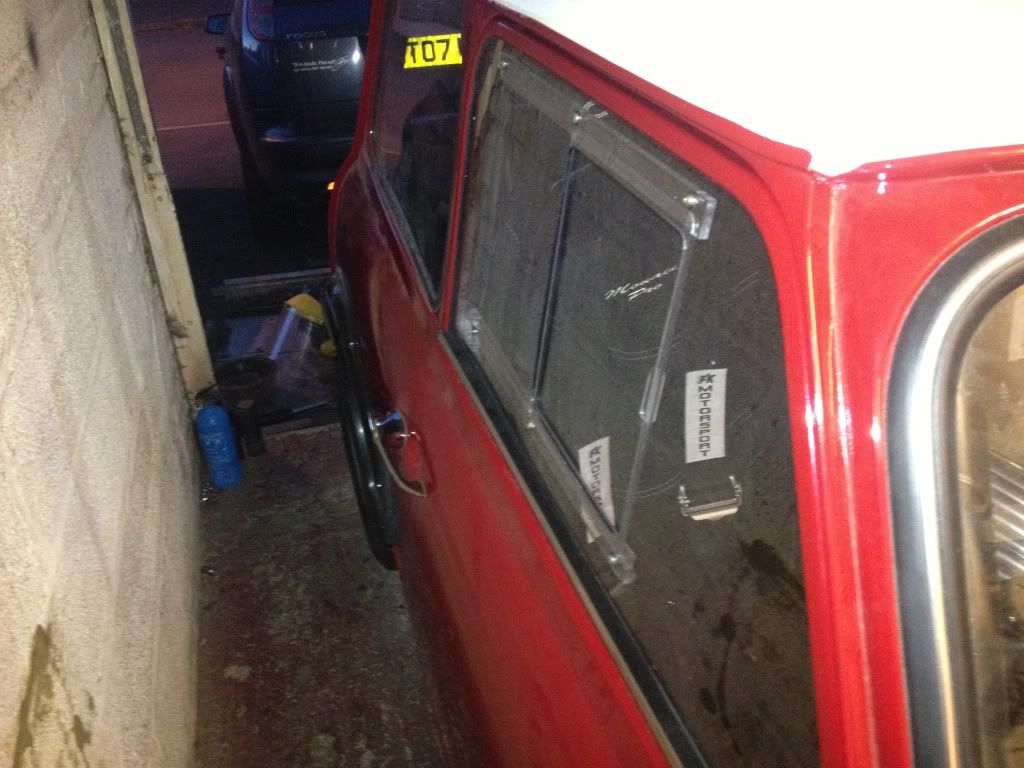
So I fitted the drivers door and window slider then called it a night !
First of all I been rebuilding the hubs and the o/s one was way to dodgy to put back on so while Minispares had them cheap a friend picked one up for me( thanks jules). That was the last part of the suspension needed so that is all fitted and done.
Then the brakes still felt spongy so they've been bled 2 or 3 times .
Then with the engine running I noticed a drip of oil under the car. Could see the rocker cover gasket was leaking so new gasket on and oil tight now . Ran it a bit more and there was a noticeable patch of oil underneath. The offending part is the timing case seal so that's all apart waiting for the seal
So I fitted the drivers door and window slider then called it a night !
#516
minisi35
-
- Members
-
- 723 posts
One Carb Or Two?
- Local Club: british mini club shropshire
Posted 21 June 2013 - 07:58 AM
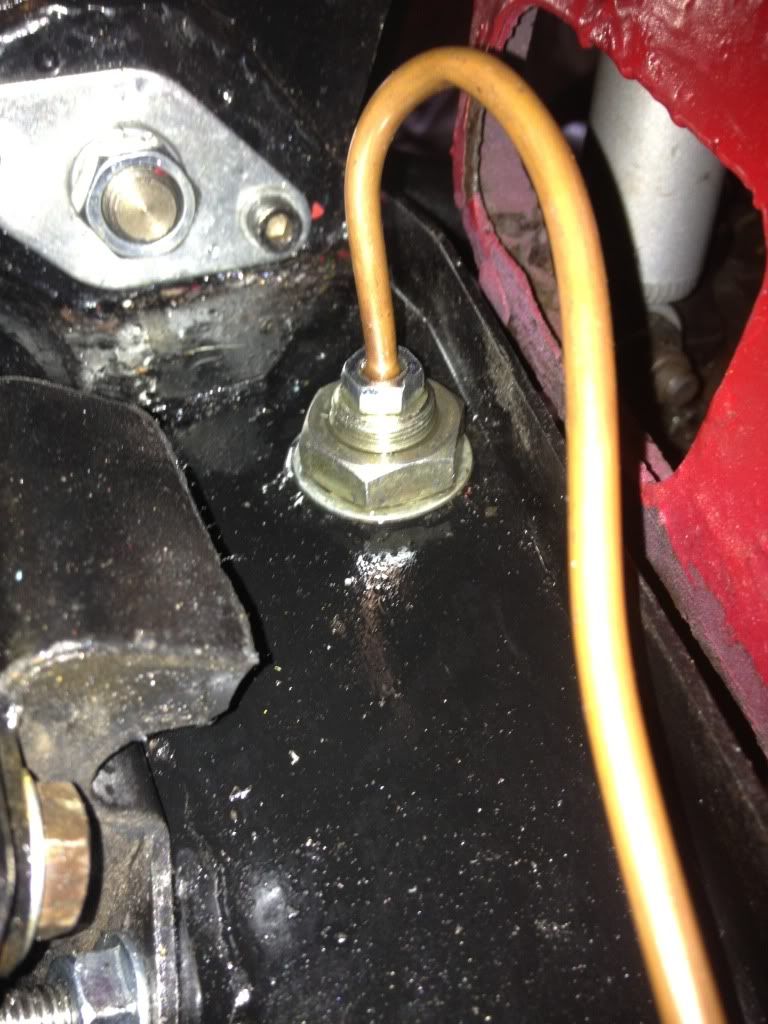
problems and solutions....
Thanks to my friend rob who spotted these
The reason for the huge oil leak was there was a crack in the fan belt pulley, looked quite an old crack but we hadn't spotted it on first fitting. Secondly he noticed the thread on the brake pipe union had bottomed out so a longer one is required and now on order
[URL=http://s1123.photobucket.com/user/minisi35/media/815FEB96-A23A-40D9-A32A-2B19788BB034-277-0000001CB6F9D362_zps6f6b32c8.jpg.html]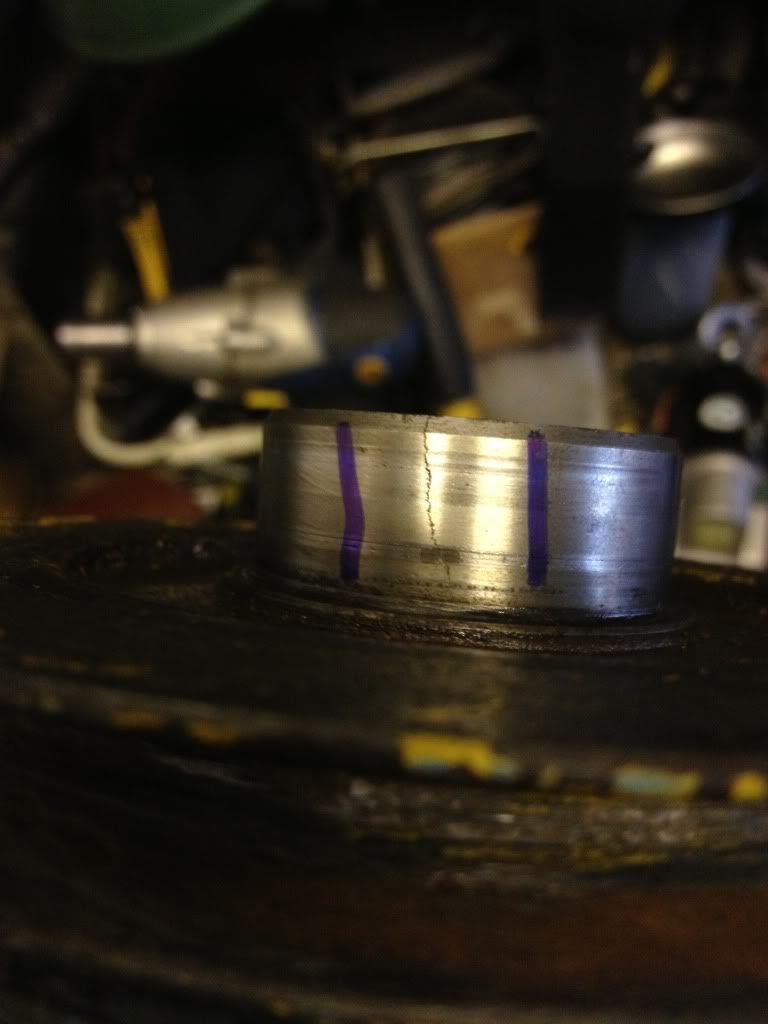
Edited by minisi35, 21 June 2013 - 08:06 AM.
#517
rally1380
-

- Members
-
- 1,893 posts
Camshaft & Stage Two Head
- Location: Cheshire
Posted 21 June 2013 - 08:14 AM
Better finding these things out now rather than when on an event eh?
All looking very smart and very close to finish
#518
minisi35
-
- Members
-
- 723 posts
One Carb Or Two?
- Local Club: british mini club shropshire
Posted 21 June 2013 - 10:40 AM
i know!!, just this to sort then its done!!!
#519
minisi35
-
- Members
-
- 723 posts
One Carb Or Two?
- Local Club: british mini club shropshire
Posted 28 June 2013 - 03:19 PM
Had a few more problems with the new pulley as the inner metal part was catching the timing case cover. So once again it came apart and that was adjusted with a metal tool!!!
So now the car is done and ready for mot Monday, Ive driven it round the block and the brakes are a bit spongy but a good friend is having it in his garage to check it out and sort any issues before hand.


#520
keefr22
-
- Members
-
- 591 posts
Super Mini Mad
Posted 28 June 2013 - 04:04 PM
That looks lovely, great job!! Fingers crossed for the mot!
What are the two little 'bolts' (can't make them out properly) on the top of the front wings?
#521
rally515
-

- Members
-
- 3,848 posts
Up Into Fourth
- Location: ask!
Posted 28 June 2013 - 04:05 PM
That looks lovely, great job!! Fingers crossed for the mot!
What are the two little 'bolts' (can't make them out properly) on the top of the front wings?
Headlamp stone chip cover mounts ?
#522
minisi35
-
- Members
-
- 723 posts
One Carb Or Two?
- Local Club: british mini club shropshire
Posted 29 June 2013 - 07:49 AM
Thanks keef, they are for this


#524
minisi35
-
- Members
-
- 723 posts
One Carb Or Two?
- Local Club: british mini club shropshire
Posted 30 June 2013 - 07:17 PM
Works stylee lol
#525
keefr22
-
- Members
-
- 591 posts
Super Mini Mad
Posted 30 June 2013 - 07:59 PM
Well, most of their style was very neat...!!


1 user(s) are reading this topic
0 members, 1 guests, 0 anonymous users


