Thanks Evan, im pleased with the look though not pleased with my prep on the boot around the handle, theres a little dent i hadnt noticed, but hey it was never meant to be a concours car, just strong!!That rear picture is just perfect. You have the rally look going on :) I need to get mine a mk1/2 bootlid to make it look more authentic. Very nice work though! can't wait to see it finished.
Evan.


Road Rally Mini Project
Started by
minisi35
, Jun 11 2011 03:24 PM
609 replies to this topic
#211

minisi35
-
- Members
-

- 723 posts
One Carb Or Two?
- Local Club: british mini club shropshire
Posted 07 July 2012 - 08:48 AM
#212
Italianjoblofty
-

- Members
-
- 225 posts
Mini Mad
Posted 07 July 2012 - 09:36 AM
The only time I've driven on 13" and I found exactly the same , ive always run on 12"s as I've loads of tyres to use. Put a post on the technical forum and you may get a bit more feedback and advice. Have you any events lined up yet?
Hey mate yer i think i'll ask about because its really uncontrolable at the moment lol...sounds amazing though will have to post a little vieo up for ya
 I've not got any rallies lined up as its going to be too expensive for me this year but i am going to prescot hill climb on august the 19th. Its nothing major only costing me £40 for the day with as many runs as i can fit it, but its good prep for me to get the car set up and running well. How far off is yours now then mate you got any time scales?
#213
minisi35
-
- Members
-
- 723 posts
One Carb Or Two?
- Local Club: british mini club shropshire
Posted 07 July 2012 - 10:00 AM
well i would like to get it on the road by the uttoxeter mini show in september, then try and run it in for a couple of months doing navigational rallies. Will save my money for next years events so until them im navigating for other people which im quite enjoying the challenge of map reading! 
#214
minisi35
-
- Members
-
- 723 posts
One Carb Or Two?
- Local Club: british mini club shropshire
Posted 07 July 2012 - 01:07 PM
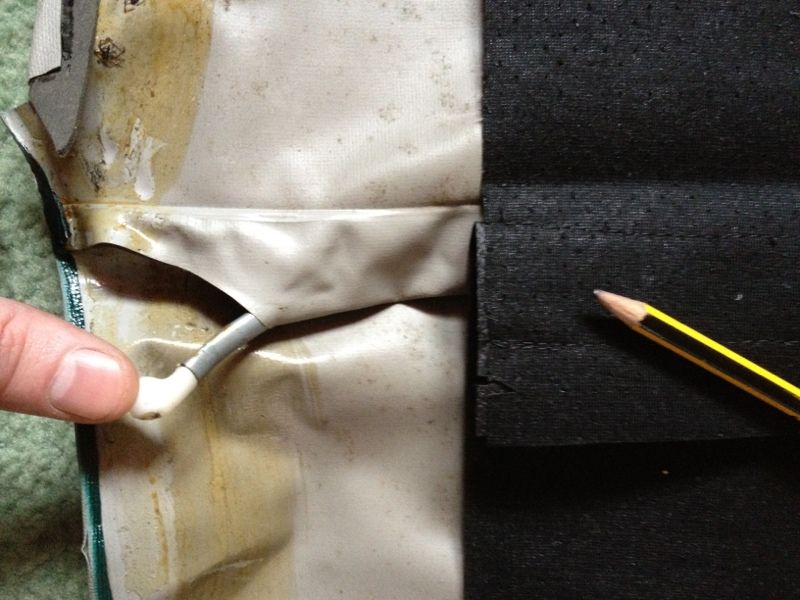
First job on the interior is to fit a new headlining, this is the old one with the bars still in. left hand side of the pic is the back
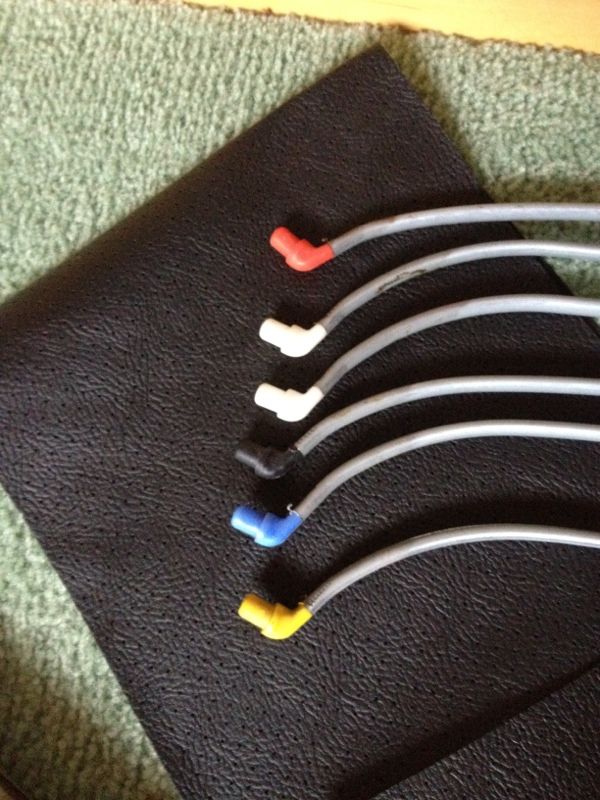
Then removed the bars. Red is the front and yellow the rear
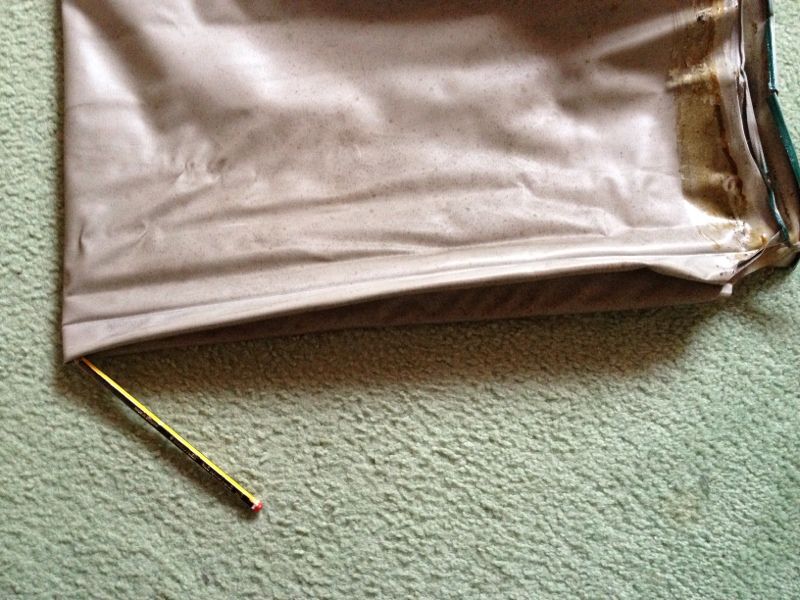
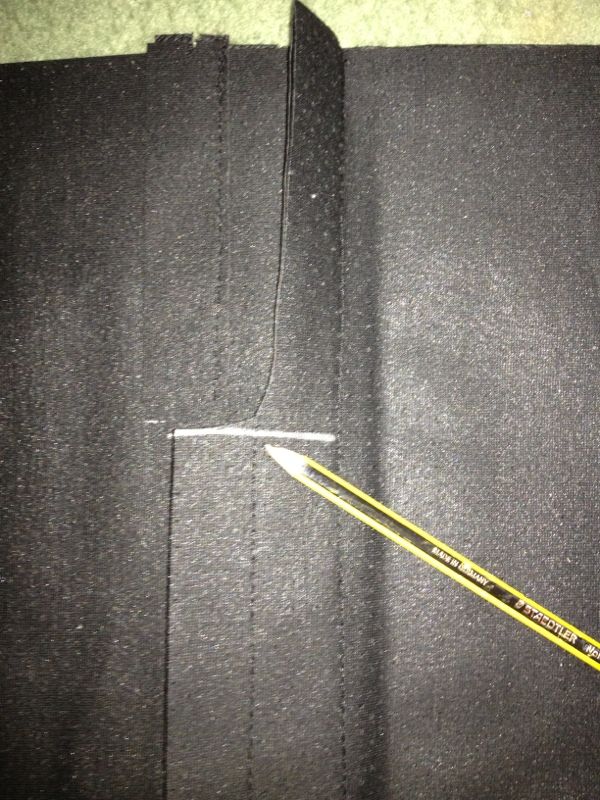
Then the headlining was folded in half making sure the to end where the bar slides into matched. Where the pencil is where i marked the centre line

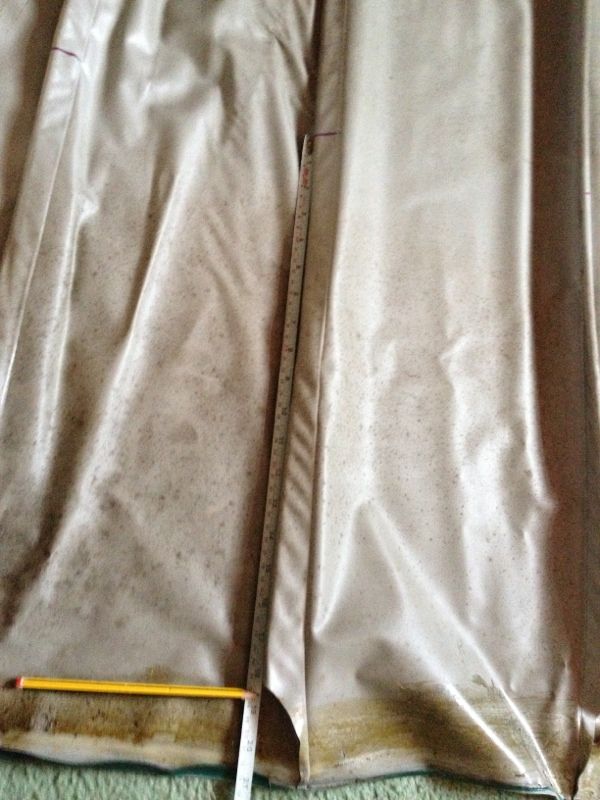
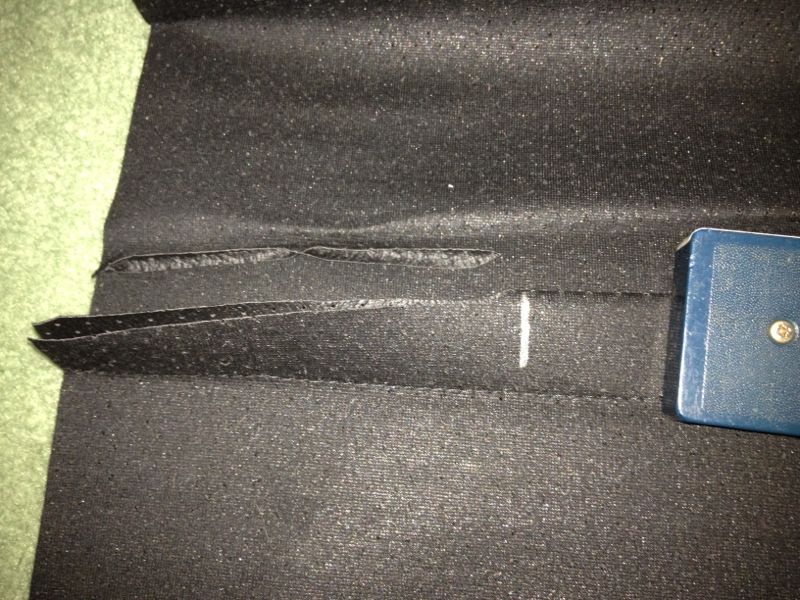
Then each "rib" sleeve was measured from the centre mark to the sleeve end and marked down in order
Then the new headlining was folded in the same way
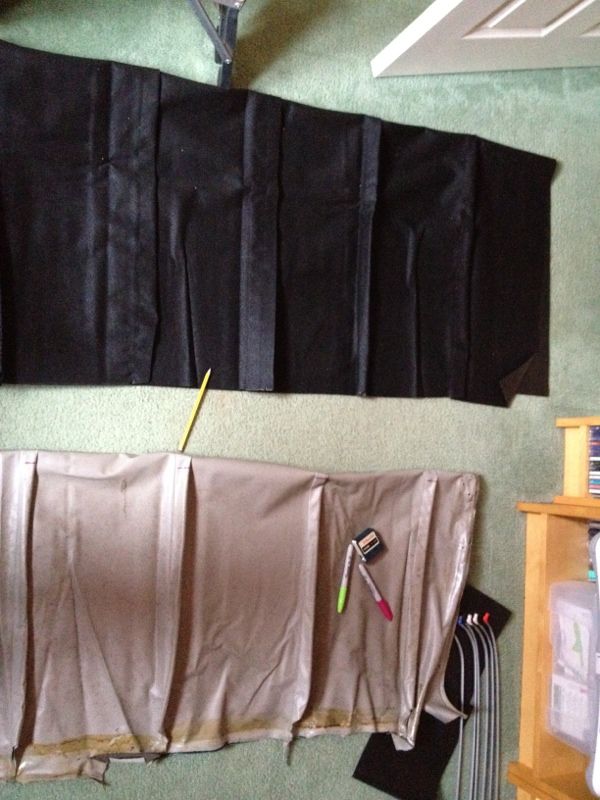
you can see from these next 2 pics why you have to trim the new headlining so where the bars come out match in length

Then mark from the centre line the measurements from the old headlining onto the new one and trim to the line. You may find on one of the ribs is a double seam which is in the second picture. In the instuctions it tells you to cut up to the stiching then superglue but i sewed it to be 100% safe
One matched and trimmed headlining with the bars back in ready to fit

Then removed the bars. Red is the front and yellow the rear
Then the headlining was folded in half making sure the to end where the bar slides into matched. Where the pencil is where i marked the centre line
Then each "rib" sleeve was measured from the centre mark to the sleeve end and marked down in order
Then the new headlining was folded in the same way
you can see from these next 2 pics why you have to trim the new headlining so where the bars come out match in length
Then mark from the centre line the measurements from the old headlining onto the new one and trim to the line. You may find on one of the ribs is a double seam which is in the second picture. In the instuctions it tells you to cut up to the stiching then superglue but i sewed it to be 100% safe
One matched and trimmed headlining with the bars back in ready to fit
#215
minisi35
-
- Members
-
- 723 posts
One Carb Or Two?
- Local Club: british mini club shropshire
Posted 08 July 2012 - 05:46 PM
Right got the roof lining in, firstly fitted it into place with the bars located and stretched and clamped it roughly in place

Then glued the sides into place using contact adhesive and cut up some old sections of door seal to help keep it tight while the glue went off

Found it easier to shape round the corners doing this

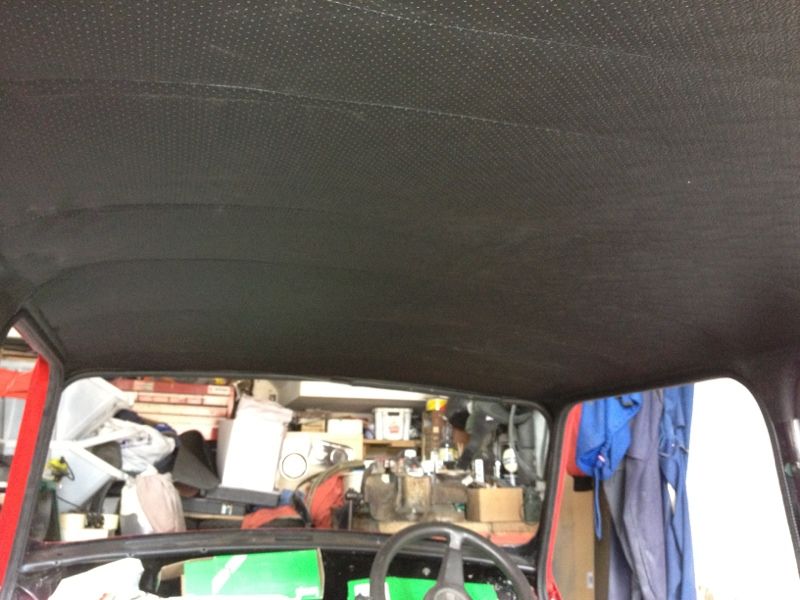
Then left it overnight before tackling the front and back in the same way, and this is the finished item!
Then glued the sides into place using contact adhesive and cut up some old sections of door seal to help keep it tight while the glue went off
Found it easier to shape round the corners doing this
Then left it overnight before tackling the front and back in the same way, and this is the finished item!
#216
minisi35
-
- Members
-
- 723 posts
One Carb Or Two?
- Local Club: british mini club shropshire
Posted 10 July 2012 - 10:56 AM
my perspex windows came today!!!
#217
brad-the-bear
-

- Members
-
- 1,114 posts
One Carb Or Two?
- Location: under the bonnet
Posted 10 July 2012 - 07:42 PM
please can you post how you fit them? ![=]](https://www.theminiforum.co.uk/forums/public/style_emoticons/default/sideways.gif) i was contemplating a set
i was contemplating a set
i was contemplating a set
#218
minisi35
-
- Members
-
- 723 posts
One Carb Or Two?
- Local Club: british mini club shropshire
Posted 11 July 2012 - 08:06 AM
please can you post how you fit them?
oh will do Brad, the backs and the sides should be ok , fronts will take some figuring out
#219
brad-the-bear
-
- Members
-
- 1,114 posts
One Carb Or Two?
- Location: under the bonnet
Posted 11 July 2012 - 06:25 PM
yeah its the front ones i want to find out about. 
cheers pal!!
cheers pal!!
#220
minisi35
-
- Members
-
- 723 posts
One Carb Or Two?
- Local Club: british mini club shropshire
Posted 12 July 2012 - 08:53 AM
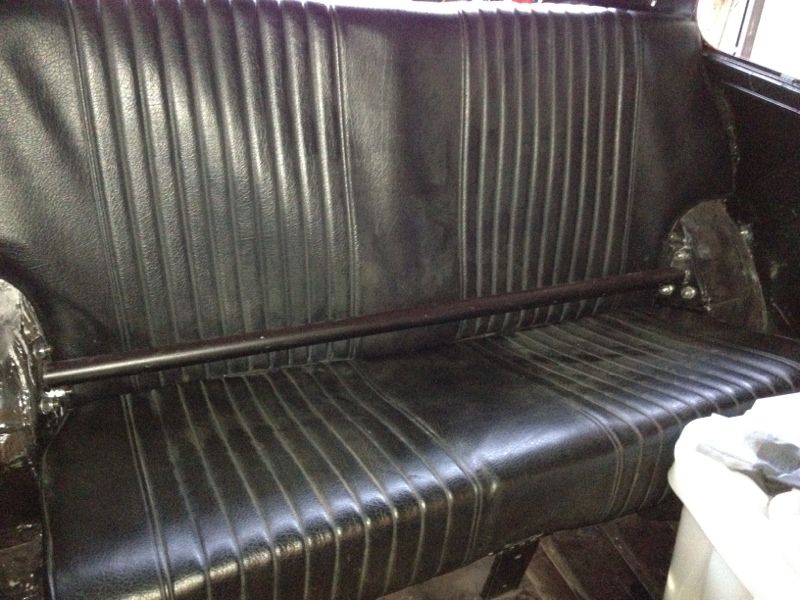
busy couple of nights, got the back seat fitted but changed it from the self tapper and spire clip, to a bolt and wing nut for easier removal without tools


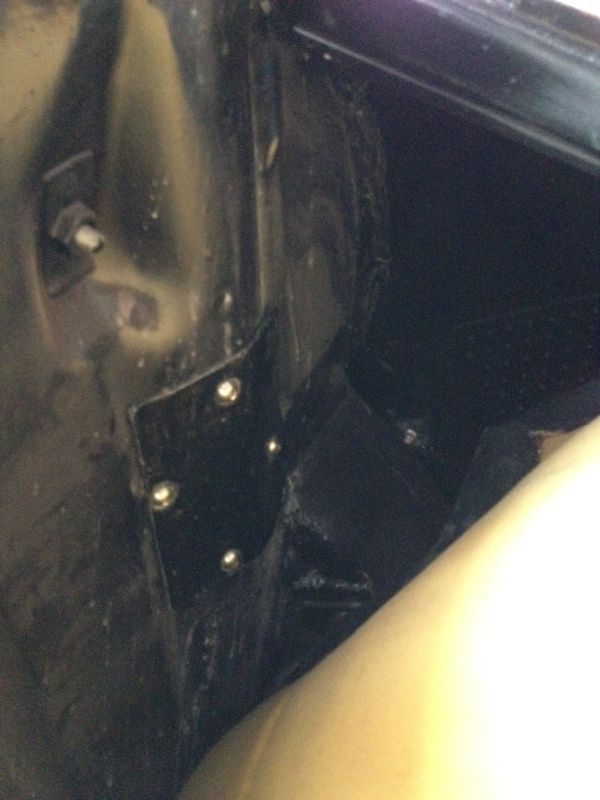
Almost forgot the blanking plate for n/s/r shock absorber which fits behind the seat so you dont have to remove the tank to change the shock absorber
back fitted and the base just put into place, i have an idea of how to secure the base so thats the next step
Almost forgot the blanking plate for n/s/r shock absorber which fits behind the seat so you dont have to remove the tank to change the shock absorber
back fitted and the base just put into place, i have an idea of how to secure the base so thats the next step
#221
minisi35
-
- Members
-
- 723 posts
One Carb Or Two?
- Local Club: british mini club shropshire
Posted 13 July 2012 - 01:40 PM
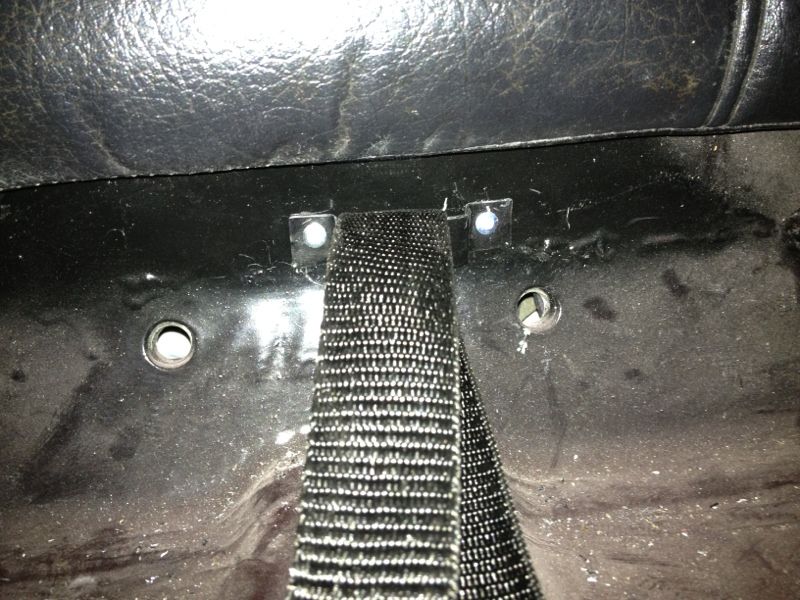
Back seat sorted, i cut 2 slits into the remaining piece of the old seat base and threaded through the strap
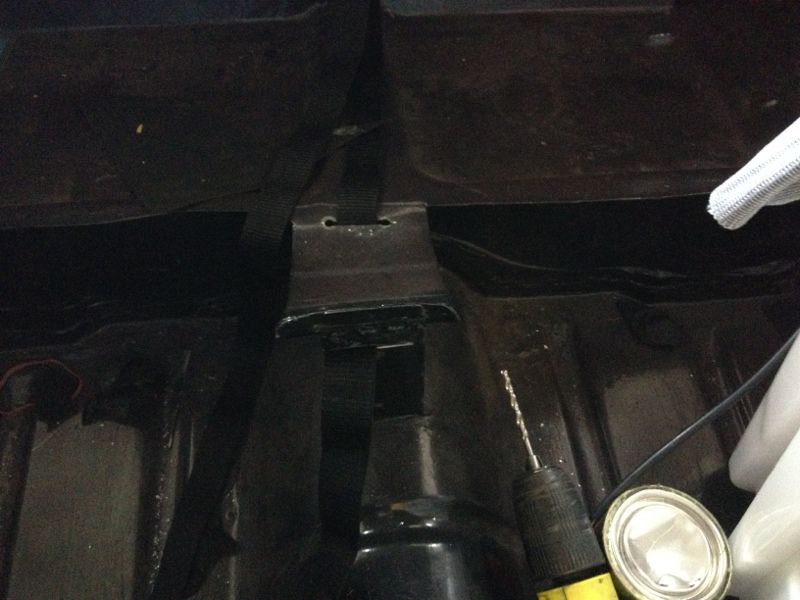
this didnt hold it securely enough so i added an extra bracket to the rear seat squab
 +
+
Now the seat wont slide

this didnt hold it securely enough so i added an extra bracket to the rear seat squab
+Now the seat wont slide
#222
minisi35
-
- Members
-
- 723 posts
One Carb Or Two?
- Local Club: british mini club shropshire
Posted 16 July 2012 - 08:19 AM
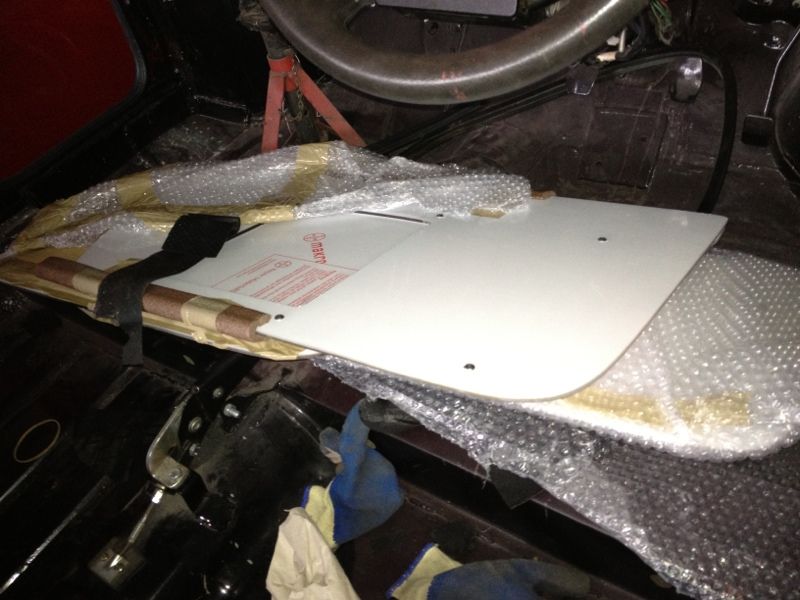
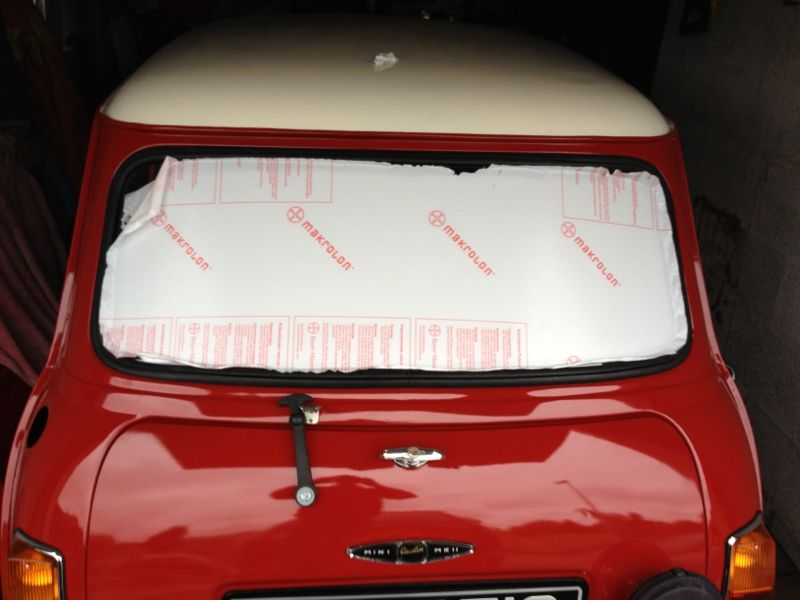
more progress, got the polycarbonate back window in

#223
Italianjoblofty
-
- Members
-
- 225 posts
Mini Mad
Posted 18 July 2012 - 09:36 AM
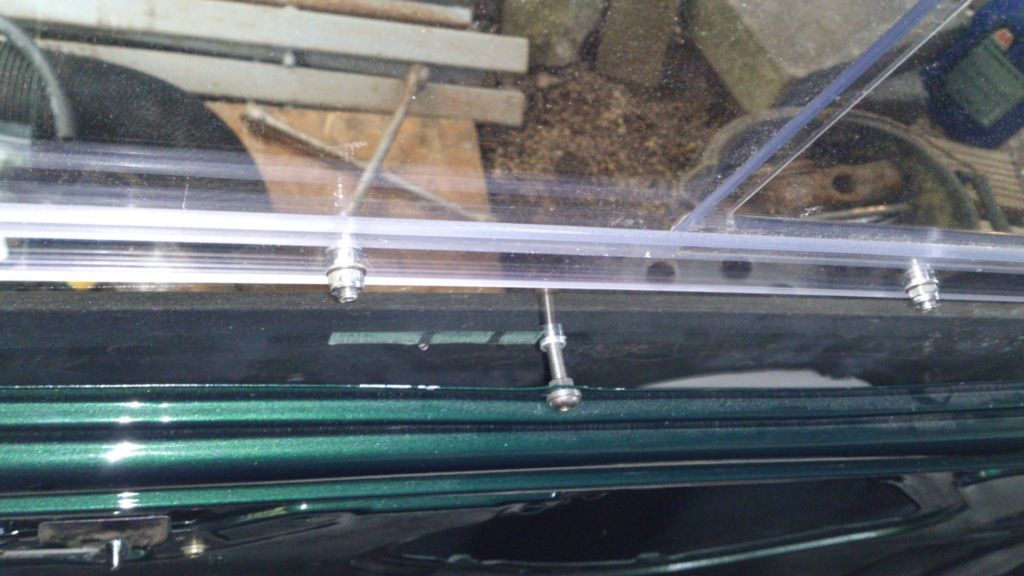
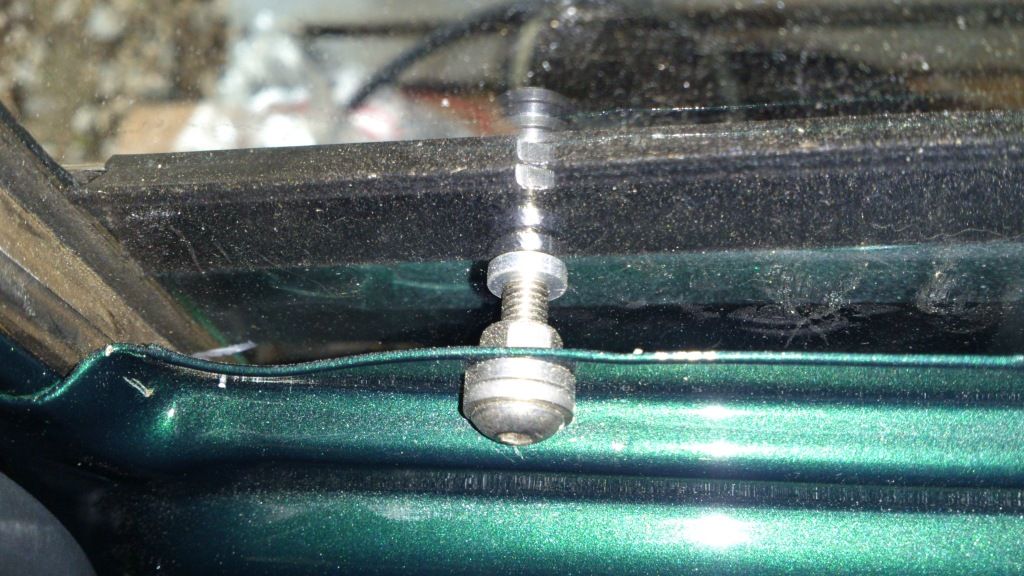
Hey dude its all coming along now well done! Not sure if this helps but here is some pics of how i fitted my front polycarb windows. Its prob not the correct way but it doest the job and pushed the window out onto the weather strip forming a permenant seal
#224
minisi35
-
- Members
-
- 723 posts
One Carb Or Two?
- Local Club: british mini club shropshire
Posted 18 July 2012 - 04:17 PM
Hey dude its all coming along now well done! Not sure if this helps but here is some pics of how i fitted my front polycarb windows. Its prob not the correct way but it doest the job and pushed the window out onto the weather strip forming a permenant seal
I have been putting off doing the fronts but i think you have given me the shove to get them sorted, yours look good,have you got any device to stop someone opening them from the outside?
#225
minisi35
-
- Members
-
- 723 posts
One Carb Or Two?
- Local Club: british mini club shropshire
Posted 20 July 2012 - 04:18 PM
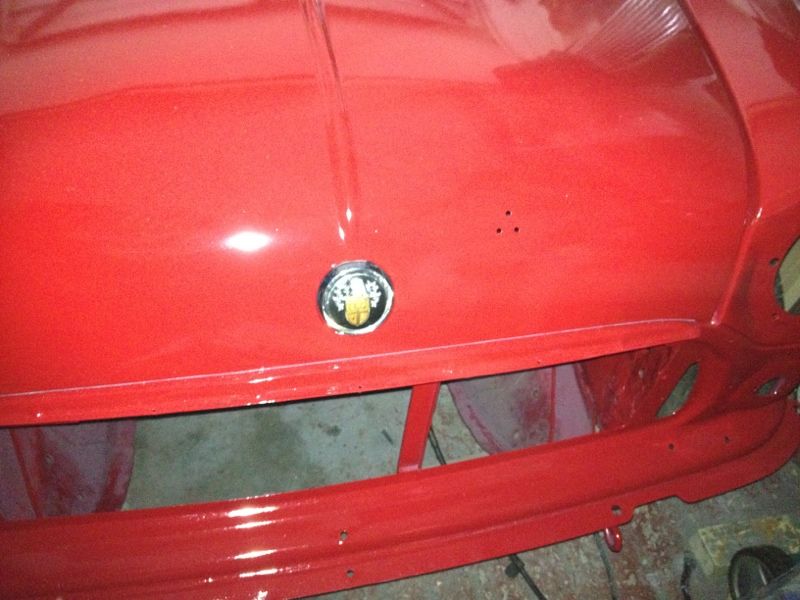
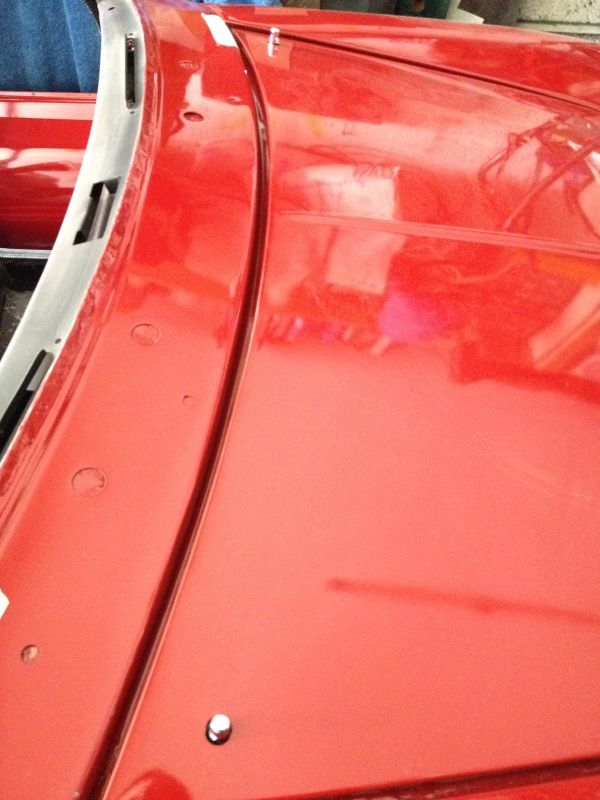
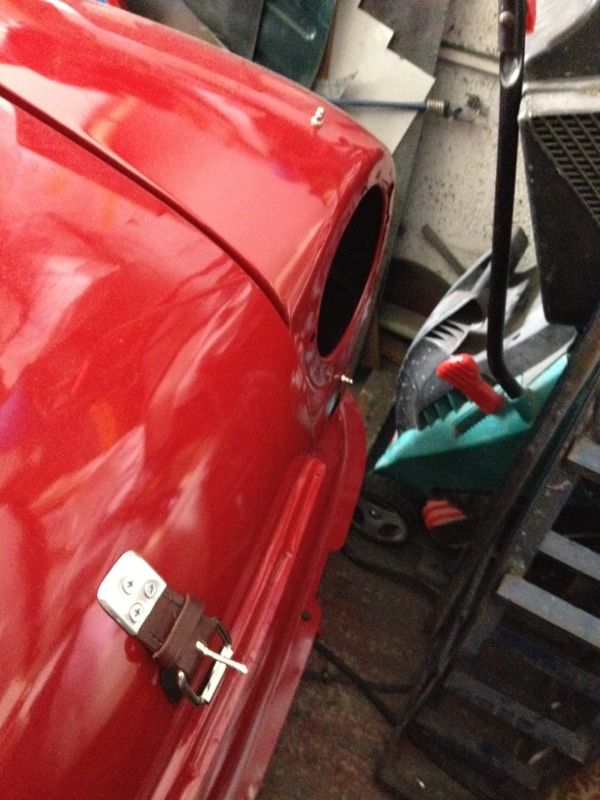
Not alot to report as ive been taking out the roll cage out of my other car, couple of small jobs are
bonnett pins on
leather bonnet strap and the "lift the dots" for the headlamp covers
bonnett pins on
leather bonnet strap and the "lift the dots" for the headlamp covers


1 user(s) are reading this topic
0 members, 1 guests, 0 anonymous users


