Jump to content


Photo

The 'as And When' Hornet Project


  • Please log in to reply
48 replies to this topic

#1 george66

george66

    On The Road

  • Noobies
  • PipPip
  • 49 posts
  • Location: Bedfordshire

Posted 07 June 2011 - 10:22 PM

Evening all,
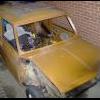
only registered here today, just over a week ago I bought a '67 - '68 Hornet.
Engine was seized when I bought it, but managed to free it and actually had it running for approx 30 secs, won't be run anymore until it's been out and had a look at.
This is my 1st attempt at anything this bad

This will be done 'as and when' I can, but hopefully within a year

as and when I can afford to spend money on it
as and when I can spare the time
as and when I feel like tinkering with it
as and when I can find some good metal to weld to

A few pictures for you
Posted Image

Posted Image

Posted Image

Posted Image

Boot
Posted Image

O/S/R window
Posted Image

N/S/R Floor
Posted Image

N/S/F floor
Posted Image

N/S vent - Flitch, O/S is same condition
Posted Image

O/S/R floor
Posted Image

O/S/F floor
Posted Image

Rear seat base
Posted Image


N/S inner wing
Posted Image

Edited by george66, 07 June 2011 - 10:25 PM.


#2 minidream94

minidream94

    One Carb Or Two?

  • Members
  • PipPipPipPipPipPipPip
  • 1,233 posts

Posted 07 June 2011 - 10:29 PM

JESUS CHRIST :D you have one heck of a project on yoru hands there fella, but good luck >_<

#3 Amy_Green11

Amy_Green11

    Passed Test

  • Noobies
  • PipPip
  • 31 posts
  • Location: Edinburgh

Posted 07 June 2011 - 10:35 PM

You are one brave man!

#4 sonikk4

sonikk4

    Twisted Paint Polisher!!!

  • Admin
  • PipPipPipPipPipPipPipPipPipPipPip
  • 15,998 posts
  • Name: Neil
  • Location: Oxfordshire

Posted 07 June 2011 - 10:52 PM

MMMmm i can see rust but no Hornet. I think there won't be much left of the original car left by the time this little beauty is finished. Good luck with it i hope you can weld??

#5 v21ash

v21ash

    Speeding Along Now

  • Members
  • PipPipPipPipPip
  • 421 posts
  • Local Club: HumbersideMiniClub.co.uk

Posted 07 June 2011 - 10:54 PM

Looks like you've got your hands full with that one :D Look forward to seeing the progress.

Mine started out as a 'as and when' project, 3 years later i'm still at it >_<

Welcome to TMF by the way.

#6 olds_kool_lews

olds_kool_lews

    Up Into Fourth

  • Traders
  • PipPipPipPipPipPipPipPipPip
  • 3,601 posts

Posted 07 June 2011 - 10:55 PM

im actually thinking of doing one of these for my next project! good luck with it!

#7 mk3 Cooper S

mk3 Cooper S

    Crazy About Mini's

  • Members
  • PipPipPipPipPipPipPipPipPipPip
  • 5,569 posts

Posted 07 June 2011 - 10:59 PM

Interesting project,
How did you unsieze the engine, oil down the bores?

#8 george66

george66

    On The Road

  • Noobies
  • PipPip
  • 49 posts
  • Location: Bedfordshire

Posted 08 June 2011 - 08:09 AM

Interesting project,
How did you unsieze the engine, oil down the bores?


Not oil, but diesel, in hindsight, I should've used something thinner, maybe paraffin or penetrating oil.
Left it to soak for 3 days, then tried to free with a large spanner on the crankshaft, prybar through starter motor hole - it wouldn't budge
so off came the head, and a piece of 3x2 wood was shaved down to fit inside the bores, and struck a few times with a club hammer,
once the seal had been broken, more diesel in the bores over another 2 nights, while head was taken to local engineering place to have valve seats recut due to pitting.
A cheap headset - £8 +vat was bought to fire engine up for 1st time.
Head will need to come off again as it will need new valves, again due to corrosion around the stems.

I have access to a similar year Elf that is being broke, will try to use as much as I can, to keep as much originality as possible

#9 george66

george66

    On The Road

  • Noobies
  • PipPip
  • 49 posts
  • Location: Bedfordshire

Posted 12 June 2011 - 12:45 PM

Got a bit further
Engine and subframe out

Front panels cut off
Posted Image

Posted Image

Subframe - seems to be in good condition, will find out after a good clean up
Posted Image


Edit:
Pictures resized

Edited by george66, 12 June 2011 - 02:26 PM.


#10 minimikej

minimikej

    Speeding Along Now

  • Members
  • PipPipPipPipPip
  • 347 posts
  • Location: Derbyshire

Posted 12 June 2011 - 05:20 PM

Looks like a good 'clean' project; you know where you are with this one.

I always loved Elves and Hornets - for some reason when they're done up all sporty they look a lot harder than Minis. If you go for replacing panels en masse, my advice is to go for original (Rover/NOS, BMH or M-Machine) where you can. Magnum panels just don't seem to fit...

#11 george66

george66

    On The Road

  • Noobies
  • PipPip
  • 49 posts
  • Location: Bedfordshire

Posted 23 June 2011 - 03:17 PM

Finally managed to get it on a homemade rollover, a couple of builder's trestle's and scaffold pole, just need to widen the footprint of the trestle's a bit and maybe weld the scaffold clips as when they're tight, there is still quite a bit of movement in the clip joints.

Homemade spit
Posted Image

Made some templates for replacing the toeboard, there are 2 bolts at the top going through 2 holes either side, just below the crossmember.
Posted Image

Rear subframe removed, fit for the scrapheap
Posted Image

Awaiting delivery of gas tomorrow so I can brace door shuts etc etc

Edited by george66, 23 June 2011 - 03:18 PM.


#12 998dave

998dave

    998cc's Of Dave Goodness

  • TMF+ Member
  • PipPipPipPipPipPipPipPipPip
  • 4,566 posts
  • Name: Dave
  • Location: Essex

Posted 23 June 2011 - 03:29 PM

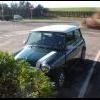
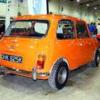
Cor good start - and it's a mark three, you doing it back in it's original colours.

I have to get mine started, waiting for my bonus to pay for panels and welding, just got to decide which one to do first!

Posted Image

or the cabrio...

Good luck! The hard bits to find are front panel, rear valence and bonnet!

Dave

#13 george66

george66

    On The Road

  • Noobies
  • PipPip
  • 49 posts
  • Location: Bedfordshire

Posted 23 June 2011 - 04:33 PM

Cor good start - and it's a mark three, you doing it back in it's original colours.

I have to get mine started, waiting for my bonus to pay for panels and welding, just got to decide which one to do first!

Posted Image

or the cabrio...

Good luck! The hard bits to find are front panel, rear valence and bonnet!

Dave


Hello,
yes I'll be doing it in original colours, I have access to an Elf that has very good front panels and will be using those, I'll also be keeping the remains of my front panel as the center section appears to be in good condition, my bonnet is good condition, rear valance and supports are no good at all, there was a seller on ebay (rupert_fish) who does the rear valance that goes for around £120, I have sent him a message to see if he will be relisting them

#14 george66

george66

    On The Road

  • Noobies
  • PipPip
  • 49 posts
  • Location: Bedfordshire

Posted 18 March 2013 - 11:06 PM

Eighteen months after buying it, I've finally got the majority of panels I need to make a start, purchased from Mini Spares.
New panels include
N/S and O/S heritage inner wings
Radiator Cowl
N/S and O/S heritage Door Step and A Pillar repair
Boot Floor
O/S wing
Seat Crossmember
Scuttle repair ends
Various window seals, screen rubbers.
These are to add to other panels that I've already got, floor halves, arch's, companion bins etc, from M-Machine etc
After reading Tupers thread "Another Big One, '68 Hornet @ Mintec", it's just the kick up the rear end I need to get me going, there's no way I'll be able to keep up with him though.
Hoping to update this at least once a week

#15 domdee

domdee

    Formally known as dominicdee

  • Members
  • PipPipPipPipPipPipPip
  • 1,183 posts
  • Location: hull
  • Local Club: hull clubs on FB

Posted 20 March 2013 - 12:43 PM

cant wait to see the progress of this build


1 user(s) are reading this topic

0 members, 1 guests, 0 anonymous users