
Edited by Pete93, 05 June 2011 - 10:13 AM.

Mini Mad

Posted 05 June 2011 - 10:13 AM
Edited by Pete93, 05 June 2011 - 10:13 AM.
One heck of a member
Posted 05 June 2011 - 10:48 AM
Been looking for those indicator lens inserts everywhere! may i ask were you bought them from? sorry for being random :s
thankss
Great advice, might go to a hardware store and have a look at the strength of the magnets they have, as my screws on the hinges arent completely flush, so the glove box lid only closes fully if pushed a bit.. maybe I can counter sink the hinge screw holes some more to make it shut flush...Can I offer some advice from experience and say that magnet catches are a hundred times better (and stronger) than any others.
Reason is that dashboards twist, budge and refuse to fit straight when they are actually tied into the car (no matter how you do it), they move over time
and bounce about (even if only fractionally) the whole time the car is on the road. A socket catch (like the one pictured) needs an almost perfect match to
"mate" perfectly and hold fast whereas a magnet catch will always work (and hold fast) irrespective of the fit / bounce / wobble or warp over time.
Another tip I love is to put draft excluder tape (that 3mm spongey grey stuff) around the back of the dash to reduce the bounce and wobble
before you actually fit it (I learned this trick from a well respected trim and finish trader on this forum). When I fitted my dash (for the third time) this made a
HUGE difference and stopped the gauges wobbling in their mounts, the glove box lid falling open (until I learned about magnets) and stopped the annoying
squeaking of the fabric rubbing against the metal of the dash rails. He calls it "dash suspension" and he's right.
Last, and just for fun, if I were building a new dash (which this thread has more or less inspired me to get on with) I would put a couple of 12v sockets in the right
hand side (inside) the glove box, a hinged pop-up mirror (for girly make up) on the inside of the glove box lid and a very secret battery cut off switch in a secret compartment...
Love the way you've got on and done this.
Look forward to seeing the pics of it finished and fitted.
One heck of a member
Posted 05 June 2011 - 07:47 PM

Learner Driver

Posted 05 June 2011 - 08:22 PM
Glove box ended up being a rubbish fit, but the gap you can see, is because of light, it'll be dark behind the dash, so hopefully it won't show as much
Just need a knob for the glovebox, a magnet catch, and then wire everything up and mount in the mini
One heck of a member
Posted 05 June 2011 - 08:29 PM
Glove box ended up being a rubbish fit, but the gap you can see, is because of light, it'll be dark behind the dash, so hopefully it won't show as much
Just need a knob for the glovebox, a magnet catch, and then wire everything up and mount in the mini
That looks really good, very impressed. I asked the question before about the glovebox as I was thinking of doing the same and I thought i would create a template of the door and user a router with a thin bit to cut the opening.
One Carb Or Two?

Posted 05 June 2011 - 08:58 PM

 i need a glove box door i think everything just falls out of mine !
One heck of a member
Posted 05 June 2011 - 09:04 PM
thank you so much can finally Finnish my very long term dash project
yours is much nicer tho
I'm sure yours looks fine One Carb Or Two?

Posted 05 June 2011 - 09:08 PM
Camshaft & Stage Two Head

Posted 05 June 2011 - 09:35 PM
Glove box ended up being a rubbish fit, but the gap you can see, is because of light, it'll be dark behind the dash, so hopefully it won't show as much
Just need a knob for the glovebox, a magnet catch, and then wire everything up and mount in the mini

Mini Mad

Posted 06 June 2011 - 09:11 AM
One heck of a member
Posted 06 June 2011 - 09:28 AM
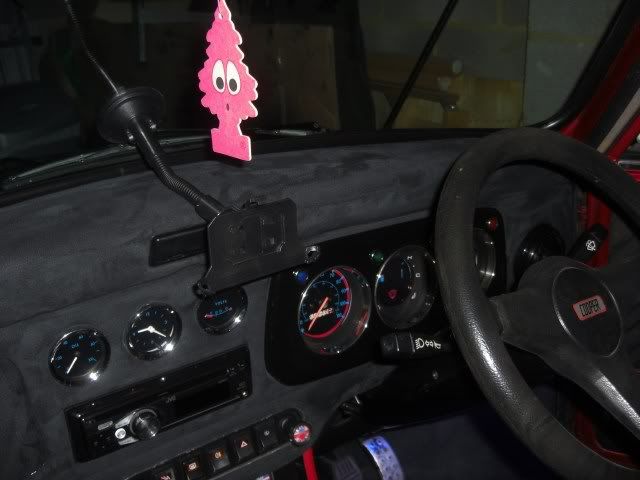
That looks really good! Love the guages in the middle and the smallness of the speakers too. Good job!
I'm happy with it Yeh, the speakers should be pretty good right at the front too TOP JOB.
Two things for you:
1) Magnet catch from B&Q (three quid). The magnet goes on the inside of the "hole" for the glove box,
the brass bit goes on the inside of the lid.
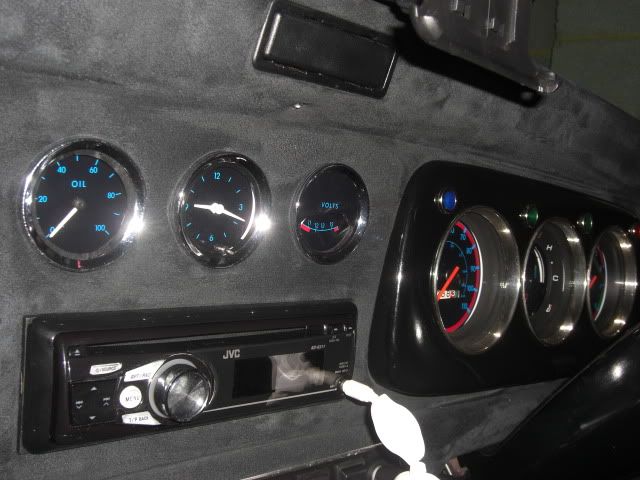
2) Click my sig and check out the clock faces I do - if you fancy some you qualify for a freebie
Those Sunpro jobs look new so maybe I could do you a speedo / fuel combo to match them ?
Could be a nice finishing touch. Let me know.
Best wishes
Monty
I'll take you up on that, thankyou very much, I know it would be better matching the sunpro gauges, but I do quite like the futurama black... Hi Ross all that hard work has paid off the dash looks the buisness you should be proud
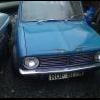
I would take Monty up on his kind offer as I had cream dials and black gauges as you can see in my previous picture but after getting a new set of faces from Monty and fitting them last weekend it has brought it all together, here is a pic so you can see the difference--------> [snip]
I wish I had gone with a raised 2 clock set up, but I kinda of like the simplicity of mine..
Mini Mad
Posted 06 June 2011 - 09:29 AM
One heck of a member
Posted 06 June 2011 - 09:37 AM
im about to embark on a similar dash build... how do you then fix that board in place in the car? does it have some sort of fixing brackets on the back?
Mini Mad
Posted 06 June 2011 - 10:48 AM
im about to embark on a similar dash build... how do you then fix that board in place in the car? does it have some sort of fixing brackets on the back?
I'm going to offer it into place, and see where it could be mounted using brackets and what not...
But you can buy a kit
http://cgi.ebay.co.u...=item4cf79256c7
Up Into Fourth
Posted 06 June 2011 - 10:53 AM


0 members, 1 guests, 0 anonymous users


