Jump to content


Photo

1977 Clubman Estate


  • Please log in to reply
44 replies to this topic

#16 icedaddyuk

icedaddyuk

    Speeding Along Now

  • Members
  • PipPipPipPipPip
  • 364 posts

Posted 18 June 2011 - 04:49 PM

A really good morning on the rolling road at Fast Parts today.

Three well spent hours saw my charging issue found (ignition bulb), carb jet swapped to non-waxstat, points gap sorted, timing and fuel adjusted.

Then a couple of quick runs on the RR, topping a massive 53BHP on the final run :proud:

Posted Image

Posted Image

Posted Image

#17 icedaddyuk

icedaddyuk

    Speeding Along Now

  • Members
  • PipPipPipPipPip
  • 364 posts

Posted 20 June 2011 - 02:35 PM

Before ......

Posted Image

After .....

Posted Image

#18 icedaddyuk

icedaddyuk

    Speeding Along Now

  • Members
  • PipPipPipPipPip
  • 364 posts

Posted 21 June 2011 - 09:12 PM

Not a good couple of hours on the Mini tonight.

I'm no Einstein but even I know these tow should be connected, saw it whilst changing the cone of the front passenger side.

Posted Image

This will be why I was running low on that side

Posted Image

Then I got stuck with the Minispares metric cone compressor, this nut on the end will now not come off, I'll call them tomorrow and see if I can get it swapped

Posted Image

And one more thing, how do I tighten this nut at the end of the top arm without the bolt turning?

Posted Image

#19 fixinbob

fixinbob

    Learner Driver

  • Noobies
  • PipPip
  • 11 posts

Posted 21 June 2011 - 09:19 PM

Just jack up the hub so the ball joint fits tight up into the top arm and it should tighten up ok.

#20 MiniJosh92

MiniJosh92

    Camshaft & Stage Two Head

  • Traders
  • PipPipPipPipPipPipPipPip
  • 1,705 posts
  • Location: Nr Ashford, Kent

Posted 21 June 2011 - 09:22 PM

Gorgeous estate! Floor mounts & cones will transform the ride & handling when done. You are doing both front cones aren't you?

#21 icedaddyuk

icedaddyuk

    Speeding Along Now

  • Members
  • PipPipPipPipPip
  • 364 posts

Posted 21 June 2011 - 09:30 PM

Thanks.

Done the other front cone as access is much easier.

On this side I've removed the drained the coolant and removed the radiator as I'm going to be swapping that after payday so found it much easier to remove the top arm without it.

#22 icedaddyuk

icedaddyuk

    Speeding Along Now

  • Members
  • PipPipPipPipPip
  • 364 posts

Posted 22 July 2011 - 07:33 AM

A couple of cool retro additions added recently :)

Posted Image

Posted Image

#23 icedaddyuk

icedaddyuk

    Speeding Along Now

  • Members
  • PipPipPipPipPip
  • 364 posts

Posted 18 December 2011 - 12:05 PM

So the estate has been off the road now since the tax ran out at the end of October as I want to be getting on with some jobs over the winter.

I've re-built the rear brakes with new drums, shoes and springs. Just need to adjust the correctly now. Also fitted new shoes and springs to the fronts but couldn't fit the new drums over the shoes, even with them adjuster wound as far back as possible. Still need to adjust these also.

The exhaust has been re-fitted and lengthened (welded) to fit the LWB better than before, was a bodge really. This should allow me to navigate speed bumps more comfortably. I need to sort the rear ride height now this is done.

I've spent most of my time in the interior. It started off like this, black vinyl front seats, blue material rear bench with tatty carpets.

Posted Image

Posted Image

Posted Image

So I stripped out the old carpets thinking I would find the dreaded brown stuff but a pleasant surprise there will only very little surface rust. This was rubbed down and the whole floor painted with black hammer paint and covered with a little sound deadening to reduce panel resonance. All floor holes were plugged and sealed.

Posted Image

Posted Image

I randomly found what looks like carpet underlay in the garage which must have come from my old project, this was trimmed and fit the floor perfectly. Hopefully this should reduce the road noise.

Posted Image

Posted Image

Posted Image

Then it was time to fit the brand new carpet set I won on eBay months ago for £15 :) 
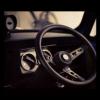
I thought it will be a perfect fit but did require quite a lot of adjustment. It's not perfect but much better quality than the old one and looks good enough for me. the pictures don't do it justice.

Posted Image

Posted Image

The rest of the interior plans are:

New front and rear black door cards in vinyl
New dash in vinyl
New steering wheel
New gear shift and handbrake gaiter
Re-trim the spare rear bench I have in vinyl
New locking seat belts
New boot liner

Then other jobs such as:

Front and rear subframe mount replacement
Brake adjustment
Steering rack replacement
Changing the rear window seals
Etc.
Etc.

#24 matthew_leech

matthew_leech

    Speeding Along Now

  • Members
  • PipPipPipPipPip
  • 428 posts
  • Location: Newark/Derby
  • Local Club: Clubless

Posted 20 December 2011 - 12:20 PM

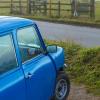
Keeping it original or blinging it out like every other estate out there...?


mine isnt 'blinged out' subtly modified is the way forward. Keep it on the 10s with cooper s 7.5" brake set up. Personally 12s n 13s look silly on the estates!

Either way its looking very nice :) Top Job!

#25 icedaddyuk

icedaddyuk

    Speeding Along Now

  • Members
  • PipPipPipPipPip
  • 364 posts

Posted 04 January 2012 - 12:42 PM

So I started to write a list of jobs that I've done since I had it so I don't forget at a later date.

New silver plastic rear registration plate lights
New mild steel RC40 full length exhaust
New mild steel exhaust manifold
New rear window sliders/seals
Rebuilt rear brakes - drums, shoes, springs, cylinders
Floor painted with black hammer paint and drain holes sealed
New carpets
2nd hand vinyl low back buckets
New alloy door furniture
2nd hand 10" steering wheel
MPi dash trimmed in black vinyl
2nd hand voltage gauge fitted
2nd hand oil pressure gauge fitted
Small patch welded on drivers sill
10" steel wheels changed for 10" alloys
Front brakes rebuilt - shoes, springs, cylinders
New braided brake hoses all round
New lucas coil
New 70amp alternator
Engine bits painted matt black
New heater valve
Full service of oil, filter, air filter, spark plugs, ht leads, coolant, thermostat
New inlet manifold
New carb needle
New non-waxstat carb jet
2nd hand 5mm spacers on rear
New wiper arms and blades
New 3 pin hazard/indicator relays
2nd hand rev counter
2nd hand Monte Carlo roof rack
2nd hand slash guard
New windscreen washer pump
Brake switch changed to electric
New rubber suspension cones all round
2nd hand hi-los fitted all round
New knuckles all round
2nd hand Gmax shocks all round
New Wipac headlight conversion
2nd hand sump guard
New front subframe rear mounts
2nd hand locking seat belts


I dread to think how much that little lot cost!

#26 icedaddyuk

icedaddyuk

    Speeding Along Now

  • Members
  • PipPipPipPipPip
  • 364 posts

Posted 22 January 2012 - 09:45 AM

Couple more jobs done today although didn't all go to plan!

Replaced the front subframe front mounts
Finished rebuilding the front brakes

Then I started on change the tie bar bushes. Began with the passenger side, no problems at all, but with the drivers side the bolt that holds the tie bar to the lower arm is well and truly f##ked. The bolt is stuck within the lower arm and is also threaded.

I've tried heat and force, neither budged.

Any ideas on getting it out?

#27 ryan22_lgm

ryan22_lgm

    One Carb Or Two?

  • Traders
  • PipPipPipPipPipPipPip
  • 1,478 posts
  • Location: woolacombe, north devon
  • Local Club: north devon mini register

Posted 22 January 2012 - 10:01 AM

weld the nut to the bar at the top then cut the bar in half so you can use some leaverage to move the tie rod back and forward. the once loose enough angle grind the bottom were the nut goes through and the arm will slide out. replace with new tie bar + bushes :)

#28 icedaddyuk

icedaddyuk

    Speeding Along Now

  • Members
  • PipPipPipPipPip
  • 364 posts

Posted 22 January 2012 - 12:23 PM

I was planning to take off the whole lower arm (as I need to change the bushes also) so was going to try and get it off whilst not of the car, should be much easier that way.

Would it be worth upgrading to adjustable tie bars if I do have to replace? what would be the advantage?

#29 icedaddyuk

icedaddyuk

    Speeding Along Now

  • Members
  • PipPipPipPipPip
  • 364 posts

Posted 26 January 2012 - 04:51 PM

Managed to get it off just now.

With the whole lower arm removed it was much easier to use my persuasive tool without worrying about any damage.

The lower arm bushes definitely needed changing! Old and new.

Posted Image

#30 icedaddyuk

icedaddyuk

    Speeding Along Now

  • Members
  • PipPipPipPipPip
  • 364 posts

Posted 06 February 2012 - 10:55 AM

A good weekend this weekend even with the snow, gave me a good excuse to spend all day Sunday in the garage :-)

Finished all the front bushes including tie bars, lower arms and replaced the top sub-frame mounts with poly and the rear sub-frame mounts with rubber.

Finally got her back down on all four wheels and tightened all nuts up suitably.

Bought a set of single bolt bump stops for the front as it's a '77 but realised it's a twin bolt so had to return those.

Next up is all the bushes, nuts and bolts on the rear sub-frame and hopefully fitting re-con radius arms if I have the cash.


1 user(s) are reading this topic

0 members, 1 guests, 0 anonymous users