Jump to content


Photo
- - - - -

1982 Austin Mini - Project Who?


  • Please log in to reply
852 replies to this topic

#391 JonnyAlpha

JonnyAlpha

    Up Into Fourth

  • Members
  • PipPipPipPipPipPipPipPipPip
  • 2,748 posts
  • Location: North Devon
  • Local Club: Exmoor Minis

Posted 29 December 2015 - 06:03 PM

Well finally a day off with no other commitments and good weather coincided!! Its been a while so I thought if I am going to have any chance of meeting my June deadline I'd better get out into the garage.


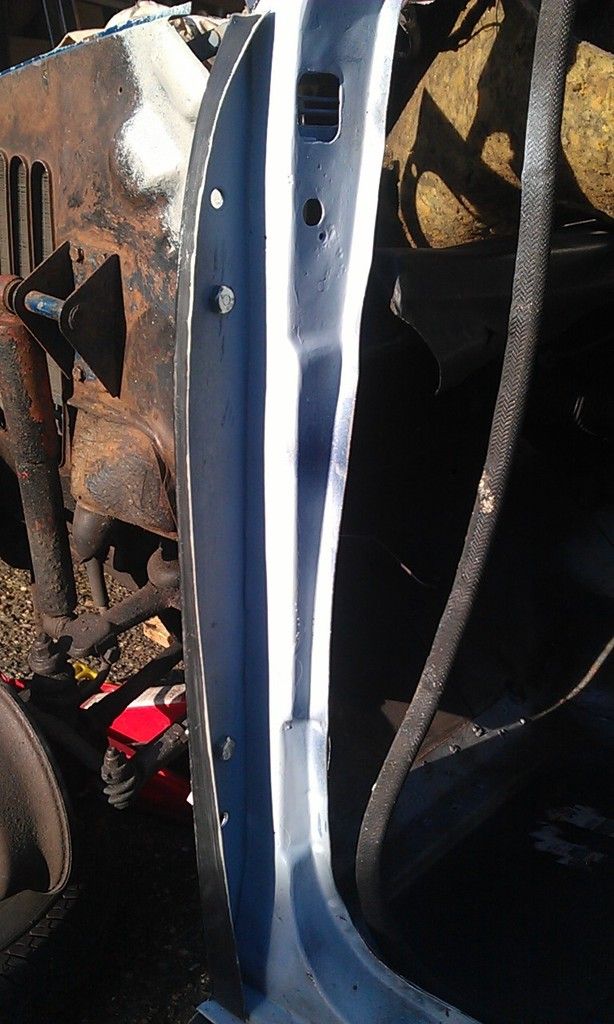
Target for today was to get the LF Flitch panel welded in.


First of all I needed to dress down the welds from the last piece of work I did welding in the A Post Stiffener.
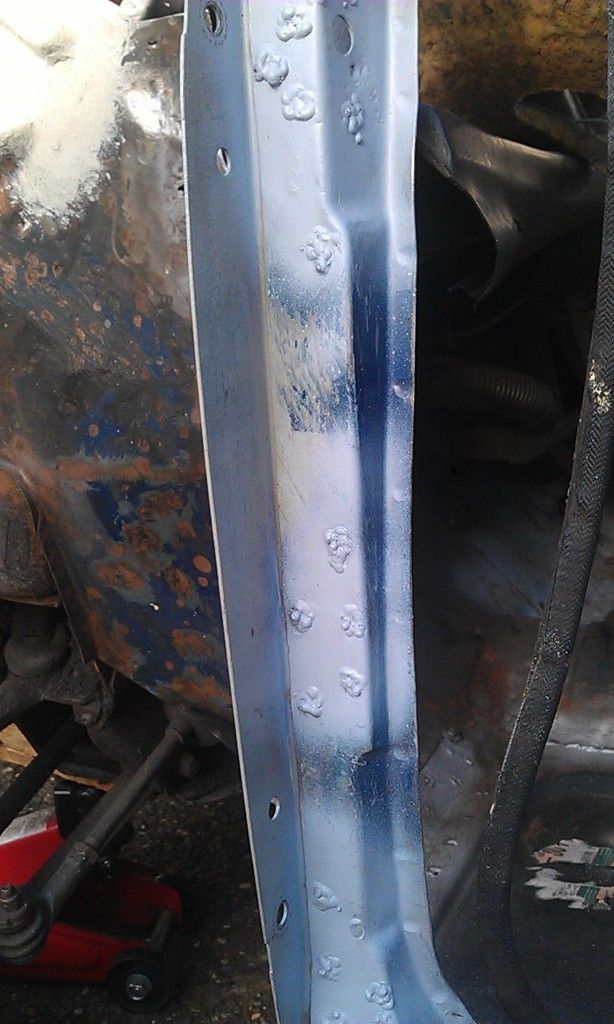
 

IMAG1056_zpsjz8dtihr.jpg


Did that but it will need some filler before I paint it properly, so for now some Acid Etch.
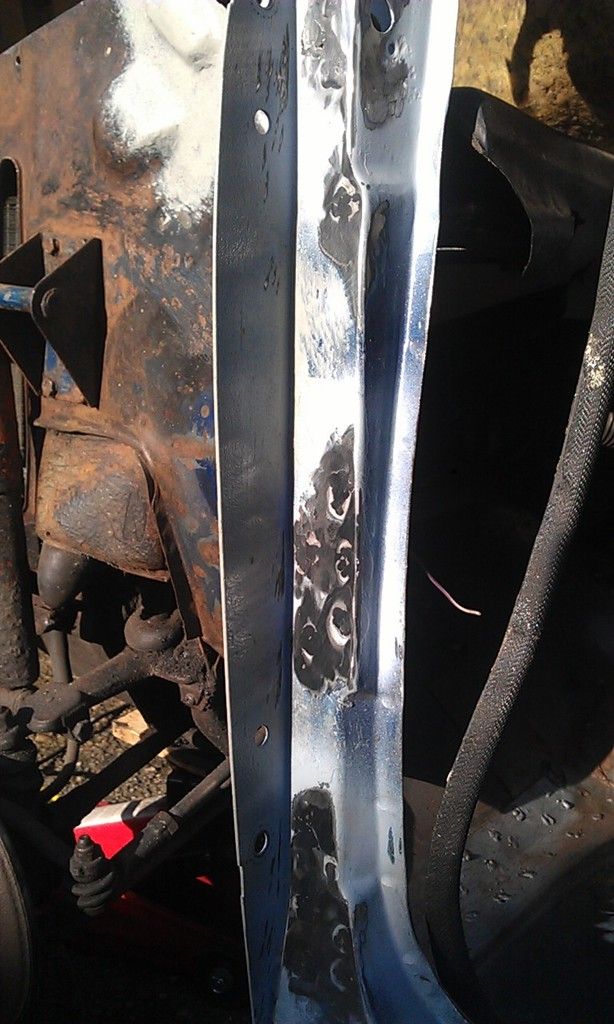
 

IMAG1057_zpsu3bdahxo.jpg


IMAG1058_zpshudefp8w.jpg


Next job was to mark, drill and clean up all of the various plug weld locations and apply some weld through primer between all of the overlapping joints.
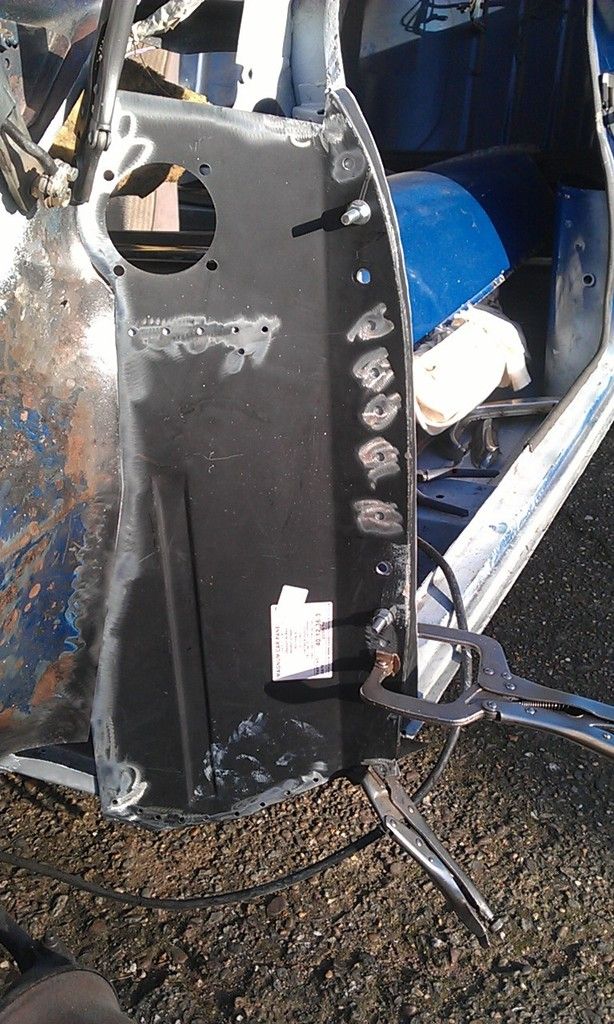
 

IMAG1059_zpsnn15gtaq.jpg


Then I was finally ready to tack it in place, all the testing and fettling took the best part of two hours, must be out of practice!!
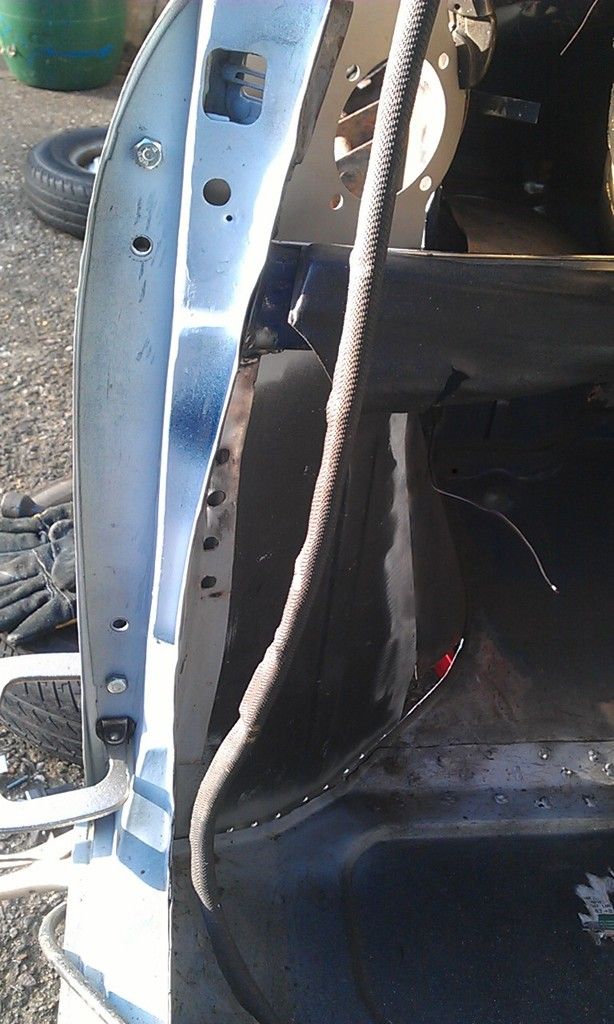
 

IMAG1060_zpsudt1fq5v.jpg


After a tea break here it is tacked and part welded in place:
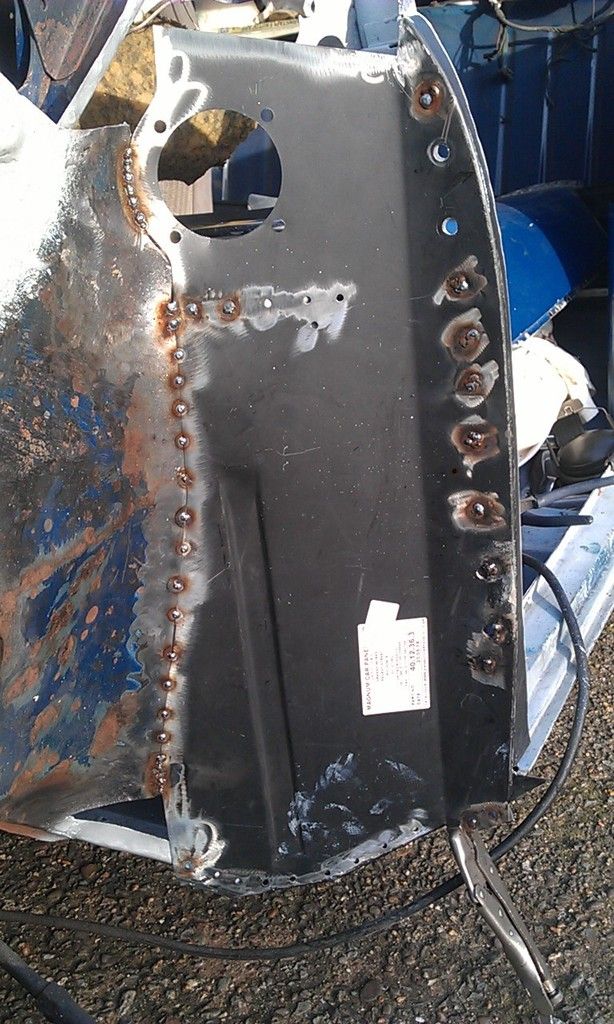
 

IMAG1061_zps2nr9i77d.jpg


Then a late lunch and back to weld it all up, the welding went pretty quick to be honest, no real snags.
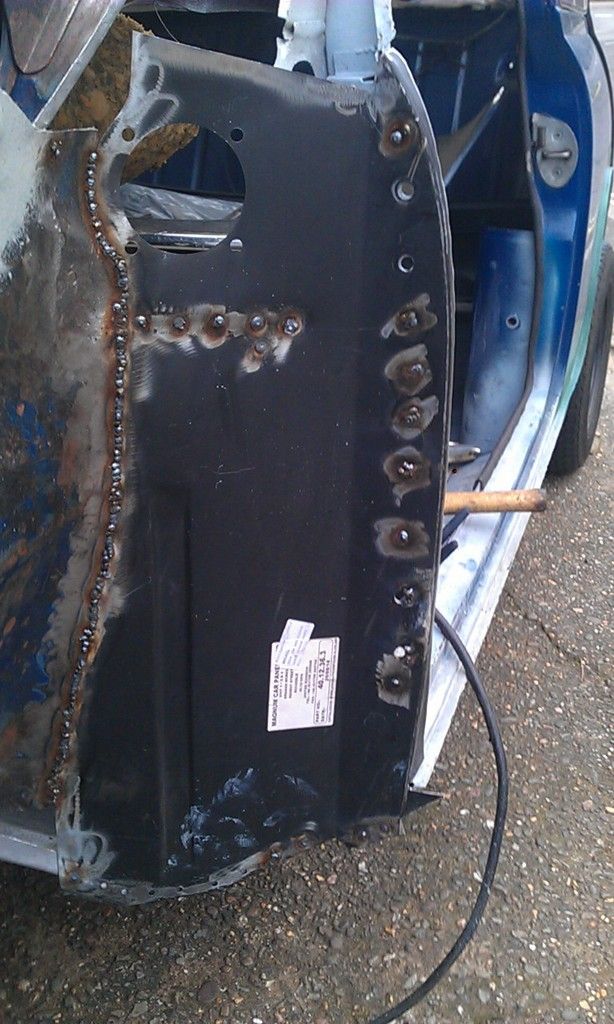
 

IMAG1062_zpszzlmms4s.jpg


Apart from a couple of tacks I didn't do the bottom flange as time ran out and it needed some cutting and shaping.


All dressed down (well roughly).
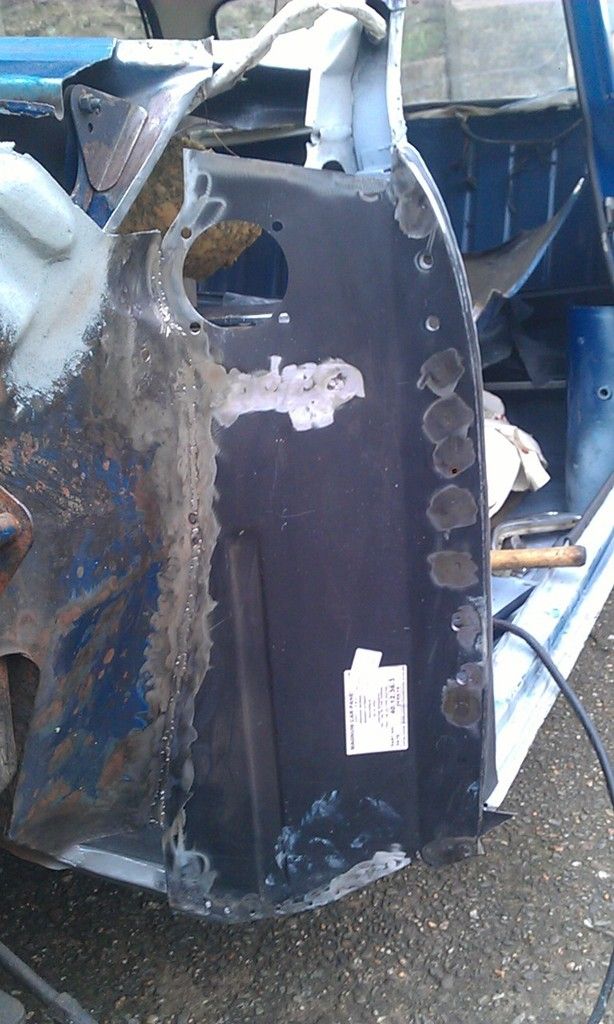
 

IMAG1063_zpswxtwptra.jpg


And some etch primer to protect it for now and job done.
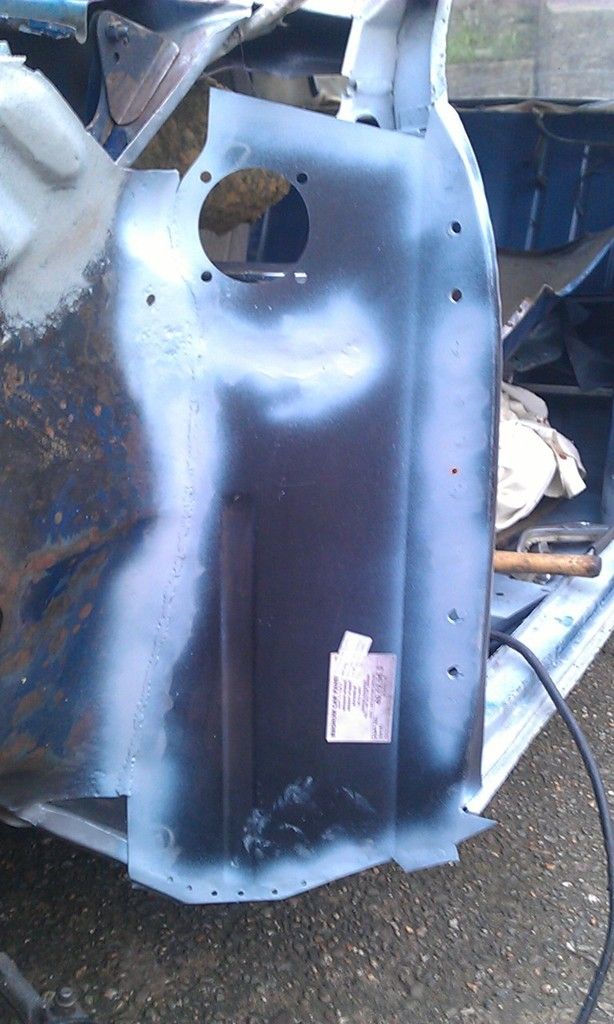
 

IMAG1064_zps0jrykhmd.jpg


Then I flitted the door and it went on nice and snug.
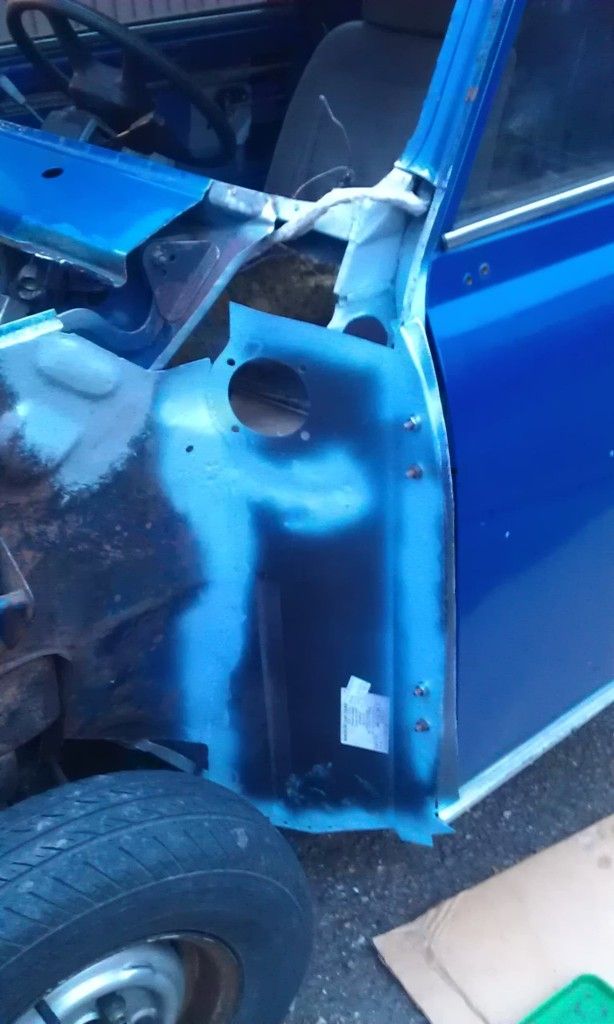
 

IMAG1066_zpsguhljdd0.jpg


Light was failing but time for a couple of motivation shots (came out a little out of focus sadly :-( )
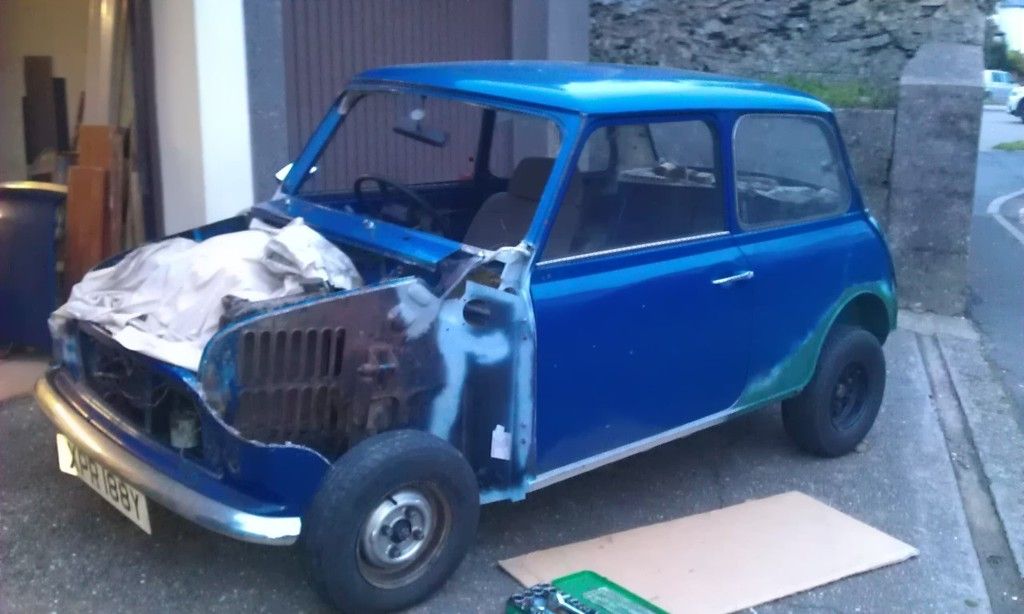
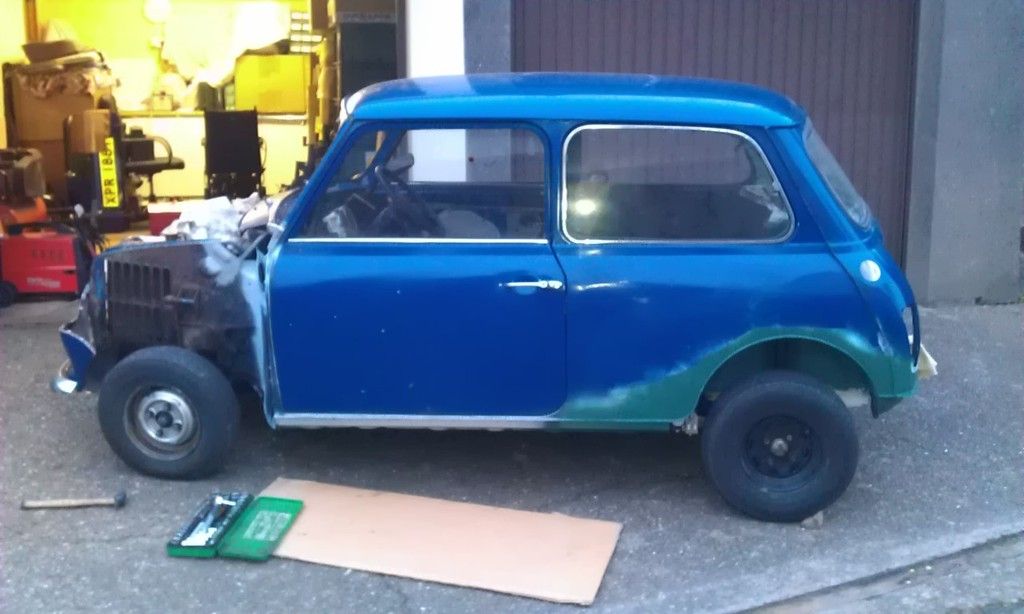
 

IMAG1068_zpsmb8tzyfu.jpg


IMAG1069_zpsok1a3wea.jpg


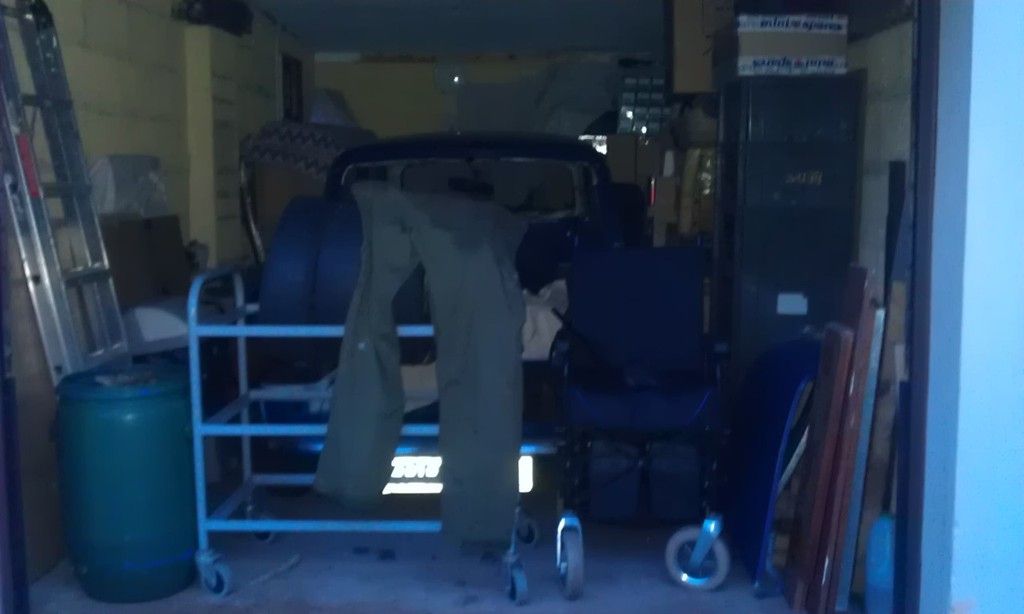
And tucked up back in the garage!!


IMAG1070_zpsxn7q7n1h.jpg


Hopefully the weather will improve and i'll get some more done this weekend?


Edited by JonnyAlpha, 29 December 2015 - 06:06 PM.


#392 ClassicBRG

ClassicBRG

    Stage One Kit Fitted

  • Noobies
  • PipPipPip
  • 76 posts
  • Location: The Netherlands

Posted 29 December 2015 - 07:23 PM

That is a nice welding job you have done.  :mrcool:


#393 ryan22_lgm

ryan22_lgm

    One Carb Or Two?

  • Traders
  • PipPipPipPipPipPipPip
  • 1,478 posts
  • Location: woolacombe, north devon
  • Local Club: north devon mini register

Posted 29 December 2015 - 10:01 PM

Good job mate! Motivation shots look very good too makes me think I should get mine rolling first before I finish filler work. Looking forward to the weekend!

#394 Ben_O

Ben_O

    Mill Road Garage

  • Paint Doctor
  • PipPipPipPipPipPipPipPipPipPip
  • 9,785 posts
  • Location: Isle of Wight

Posted 29 December 2015 - 11:15 PM

wahay! an update.


Looking good pal!


#395 JonnyAlpha

JonnyAlpha

    Up Into Fourth

  • Members
  • PipPipPipPipPipPipPipPipPip
  • 2,748 posts
  • Location: North Devon
  • Local Club: Exmoor Minis

Posted 30 December 2015 - 12:14 PM

That is a nice welding job you have done.  :mrcool:


Thanks - how is Holland, I miss driving through and stopping for a Coffee on my way home, always confusing though as I could not speak Dutch :-)


Good job mate! Motivation shots look very good too makes me think I should get mine rolling first before I finish filler work. Looking forward to the weekend!


Thanks Ryan - hoping to have it finished for the National Mini Cooper Register at Beaulieu in June, oh and Braunton Wheels of course :-)


wahay! an update.


Looking good pal!


Thanks Ben - how is your's coming along?


#396 Ben_O

Ben_O

    Mill Road Garage

  • Paint Doctor
  • PipPipPipPipPipPipPipPipPipPip
  • 9,785 posts
  • Location: Isle of Wight

Posted 30 December 2015 - 03:21 PM


wahay! an update.


Looking good pal!


Thanks Ben - how is your's coming along?


Basically, its not :(


Currently it is sat out on the driveway under a tarp and has been for months.


Nowhere to work on it sadly.


I have just started a new job recently working in a body shop restoring classic cars.

I have just done an MPI for a fellow TMF'er


Seems i will be restoring other peoples classics but not my own :(


I hope some day soon that i will be able to get back on with it.


Ben


#397 ClassicBRG

ClassicBRG

    Stage One Kit Fitted

  • Noobies
  • PipPipPip
  • 76 posts
  • Location: The Netherlands

Posted 30 December 2015 - 08:30 PM


That is a nice welding job you have done.  :mrcool:


Thanks - how is Holland, I miss driving through and stopping for a Coffee on my way home, always confusing though as I could not speak Dutch :-)


Good job mate! Motivation shots look very good too makes me think I should get mine rolling first before I finish filler work. Looking forward to the weekend!


Thanks Ryan - hoping to have it finished for the National Mini Cooper Register at Beaulieu in June, oh and Braunton Wheels of course :-)


wahay! an update.


Looking good pal!


Thanks Ben - how is your's coming along?


Holland is getting ready for new years eve, temperatures feel like summer but that's also the fact in GB and the rest of the northern hemisphere I believe.   

Most people in Holland do speak a few words english, so I think ordering coffee will be no problem.   :D


Edited by ClassicBRG, 31 December 2015 - 08:51 AM.


#398 JonnyAlpha

JonnyAlpha

    Up Into Fourth

  • Members
  • PipPipPipPipPipPipPipPipPip
  • 2,748 posts
  • Location: North Devon
  • Local Club: Exmoor Minis

Posted 17 January 2016 - 06:55 PM

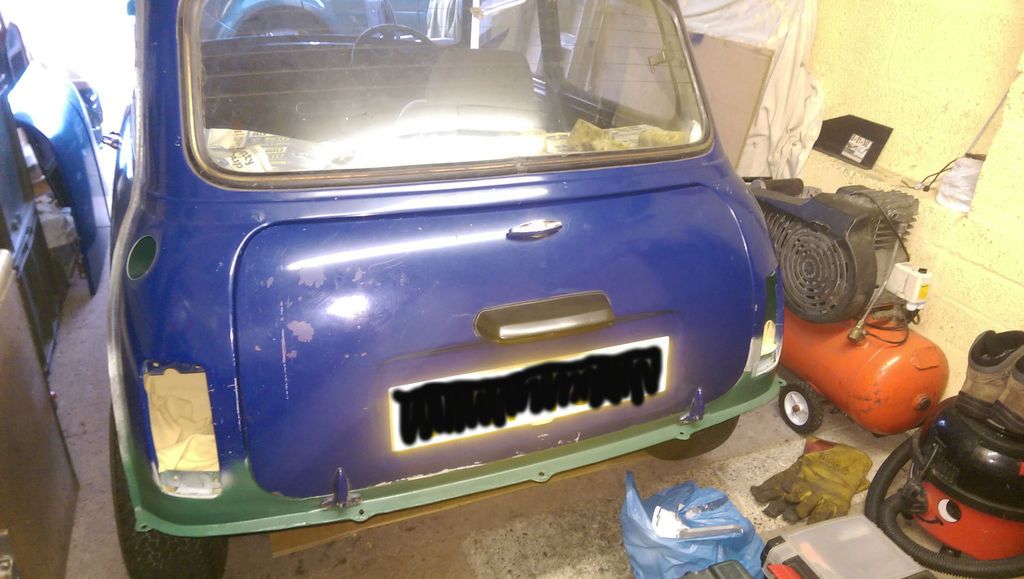
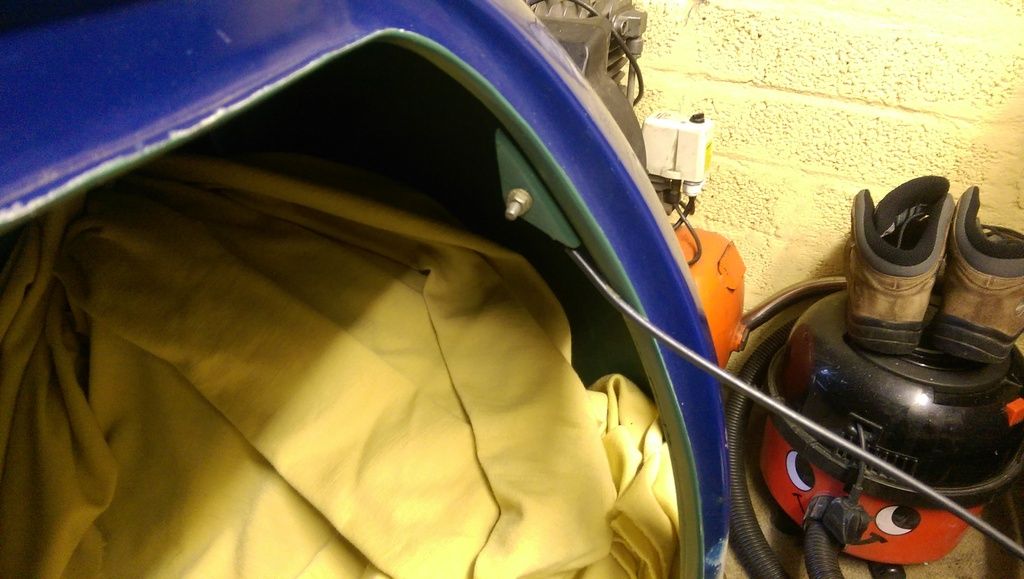
Well the weather stayed dry today but too cold to really get on with anything, didn't have a great deal of time anyway. All I managed to do was tidy up the garage and put the boot on (it's not been painted or anything it's just that it's been lying around in the way.


IMAG3223Edit_zpsgz6litav.jpg


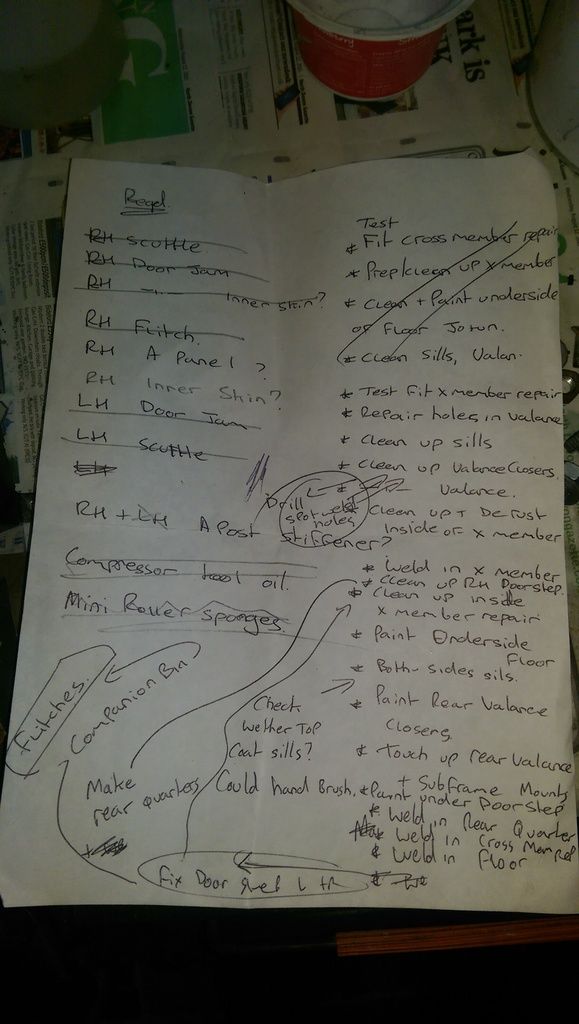
Whilst tidying up I came across this list of jobs to do and what's best they have all now been done :-)


IMAG3222_zpsvng86jgl.jpg


Couple of questions:


Which is the proper way to fit the Boot Straps? I have put the cable on the inside for now?


IMAG3225_zpsdezphaof.jpg


Also I noticed on the front the wiring loom will sit under the RH scuttle repair panel that I will be fitting, this brings up a couple of questions:


1. Is it supposed to be here?


2. How should I protect this when welding the panel on?


#399 Daz1968

Daz1968

    Up Into Fourth

  • Members
  • PipPipPipPipPipPipPipPipPip
  • 2,058 posts
  • Location: Dudley

Posted 17 January 2016 - 07:34 PM

Looking good, as for protecting wiring the pads used for soldering are quite cheap and effective for shielding heat, maybe pick one of those up, or remove the loom and fit after welding. I like to remove everything from any area I am working to prevent any accidents and expense in replacing things damaged

#400 alex-95

alex-95

    I am THE CLAMP MAKER

  • Members
  • PipPipPipPipPipPipPipPipPipPip
  • 6,019 posts
  • Location: l

Posted 17 January 2016 - 08:02 PM

Good work, As above I would move the loom out of the way just in case, will be much easier than rewiring. As for the boot cable, they go on opposite to yours.


#401 domdee

domdee

    Formally known as dominicdee

  • Members
  • PipPipPipPipPipPipPip
  • 1,183 posts
  • Location: hull
  • Local Club: hull clubs on FB

Posted 20 January 2016 - 09:51 PM

Just read from start to finish! (Well looked at pictures and read snippets) what a great build. Nice repairs

#402 Coxie

Coxie

    Speeding Along Now

  • Members
  • PipPipPipPipPip
  • 461 posts
  • Location: North devon

Posted 19 February 2016 - 07:22 AM

Just a little reminder that you only have 113 days to get this finished. Chop chop old chap

#403 Coxie

Coxie

    Speeding Along Now

  • Members
  • PipPipPipPipPip
  • 461 posts
  • Location: North devon

Posted 19 February 2016 - 07:31 AM

Just thinking, if you wanted to get the doors bonnet and boot prepped and ready for paint you can always bring them over to my workshop and do them there. Plenty of room, spray gear and infra red lamp to get them cured.
I can even grab them in my van if you like.
Just a thought.

#404 JonnyAlpha

JonnyAlpha

    Up Into Fourth

  • Members
  • PipPipPipPipPipPipPipPipPip
  • 2,748 posts
  • Location: North Devon
  • Local Club: Exmoor Minis

Posted 19 February 2016 - 01:02 PM

Looking good, as for protecting wiring the pads used for soldering are quite cheap and effective for shielding heat, maybe pick one of those up, or remove the loom and fit after welding. I like to remove everything from any area I am working to prevent any accidents and expense in replacing things damaged


Good work, As above I would move the loom out of the way just in case, will be much easier than rewiring. As for the boot cable, they go on opposite to yours.


I can see that the loom is joined on the passenger side in the engine compartment, the connections are really stiff!! If I do get them off I had a quick look under the front headlining at the front and it would seem that the loom runs inside the skin between the roof and the side wall into the boot.


If I did manage to pull it through (I guess into the boot) How on earth are you supposed to re thread it back into the engine compartment once all the welding is done??


#405 JonnyAlpha

JonnyAlpha

    Up Into Fourth

  • Members
  • PipPipPipPipPipPipPipPipPip
  • 2,748 posts
  • Location: North Devon
  • Local Club: Exmoor Minis

Posted 19 February 2016 - 01:03 PM

Just read from start to finish! (Well looked at pictures and read snippets) what a great build. Nice repairs


Thanks Dom :-)


1 user(s) are reading this topic

0 members, 1 guests, 0 anonymous users