Jump to content


Photo
- - - - -

1982 Austin Mini - Project Who?


  • Please log in to reply
852 replies to this topic

#256 JonnyAlpha

JonnyAlpha

    Up Into Fourth

  • Members
  • PipPipPipPipPipPipPipPipPip
  • 2,748 posts
  • Location: North Devon
  • Local Club: Exmoor Minis

Posted 16 May 2015 - 08:42 PM

Had a long hard day in the garage, slow progress again but progress none the less.


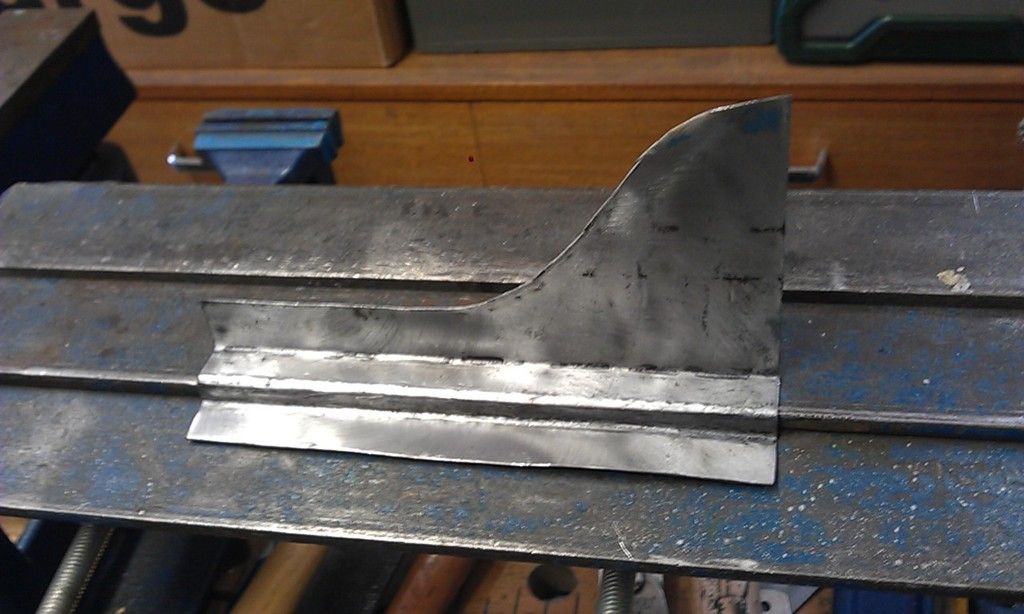
I needed to make and weld in a repair piece for the bottom front corner of the RH door surround, the LH one will also need doing.


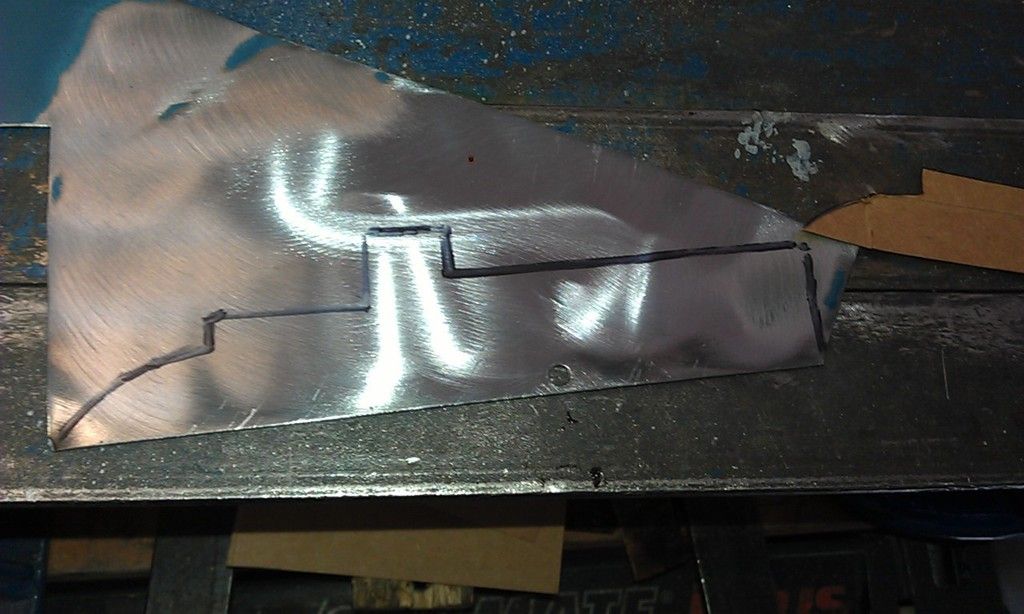
I knocked up a template using a Thatchers Cider Box that we had recently emptied :-) and cut out and marked a piece of sheet steel.


The first bend was easy and luckily I was able to make the next tight bend using the edge of my home made bending vice:
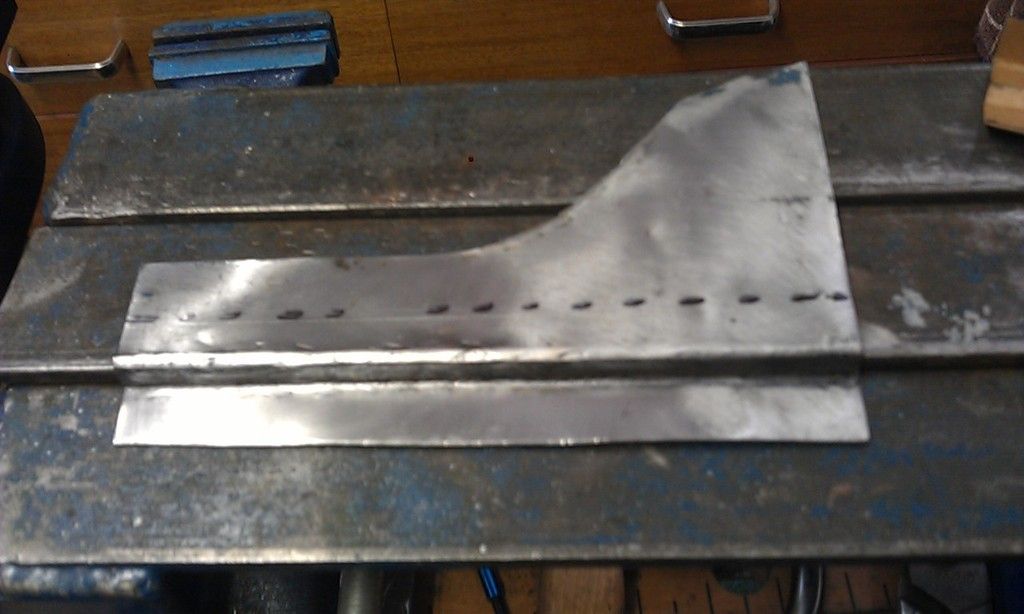
 

IMAG0434_zpsamtu04wj.jpg


The next bend was made by turning it upside down and using the bender:

Started bending it the wrong way at first, but then corrected myself :-)


IMAG0435_zpsjac2txmk.jpg


On test fitting (after a little correction, it was a pretty good fit:
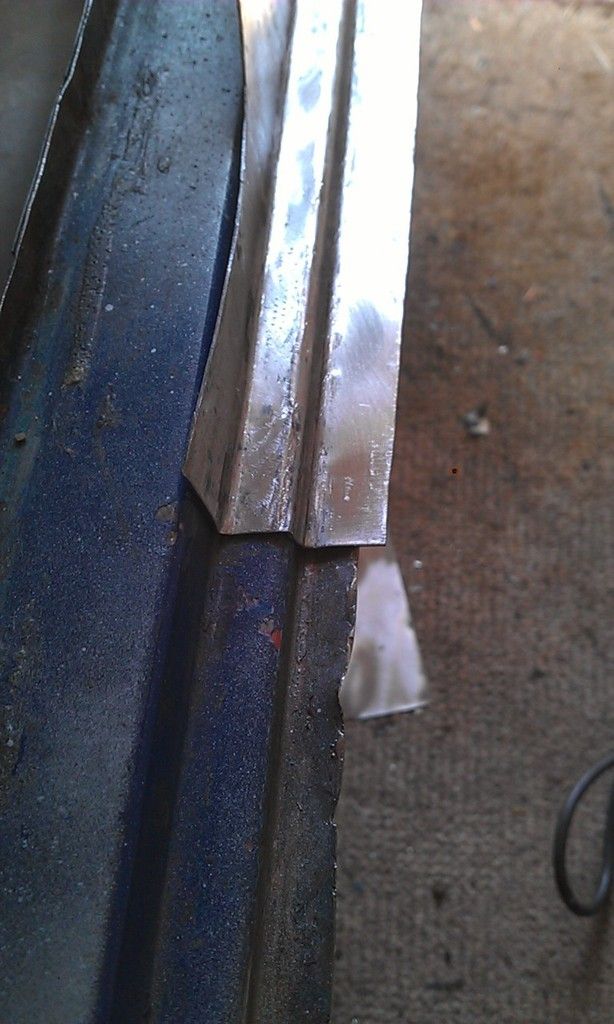
 

IMAG0436_zpsazt38smx.jpg


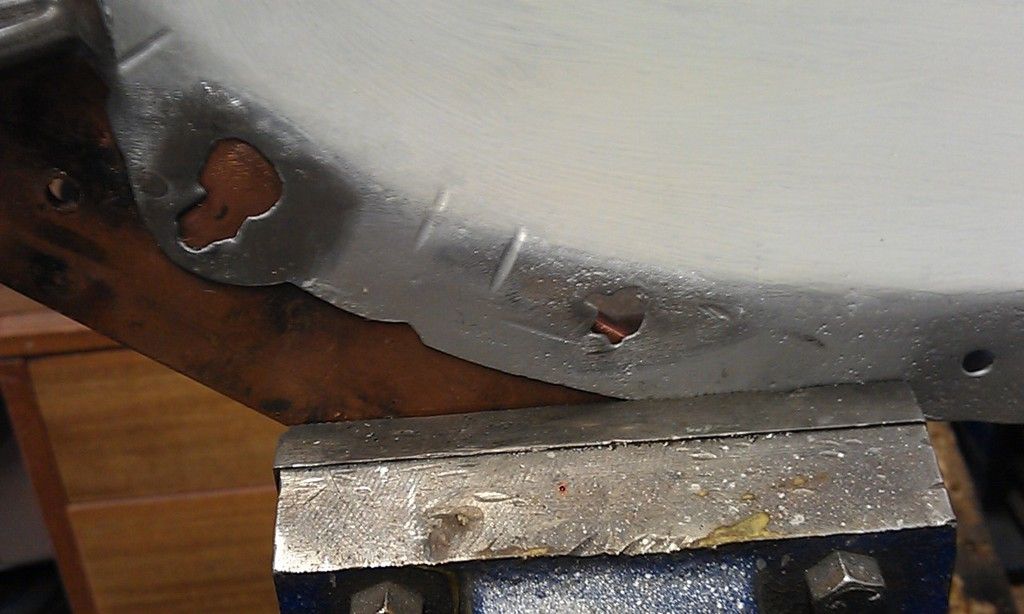
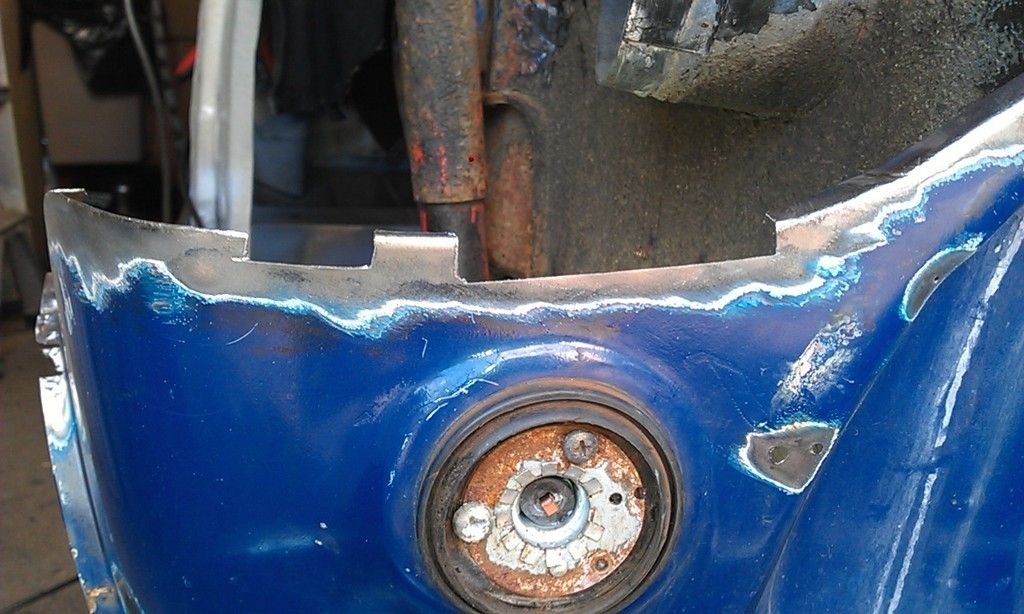
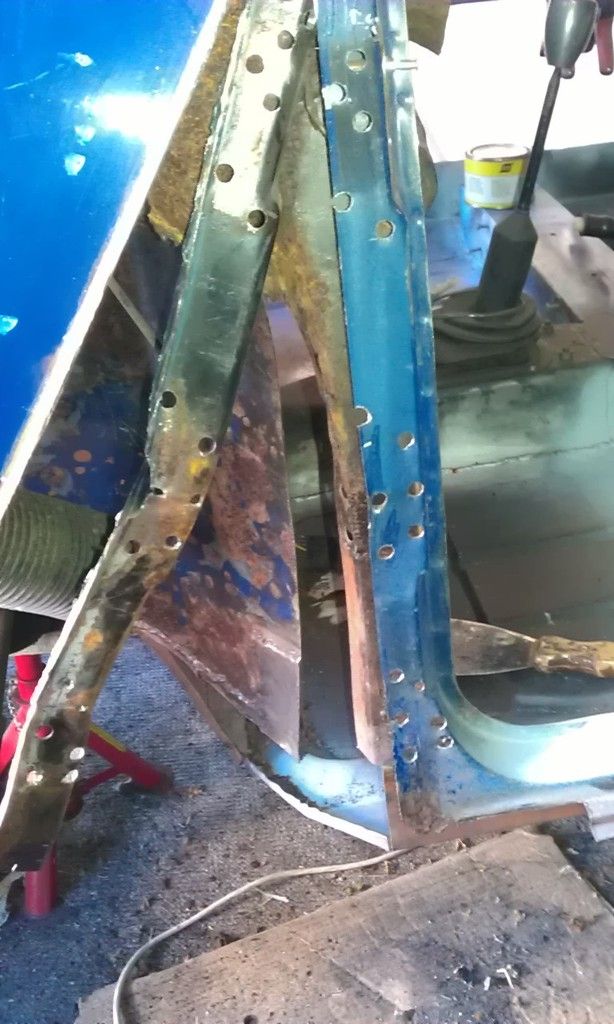
At this  point I was still contemplating how to proceed as initially I was just going to plug weld the holes you can see in the inner edge:
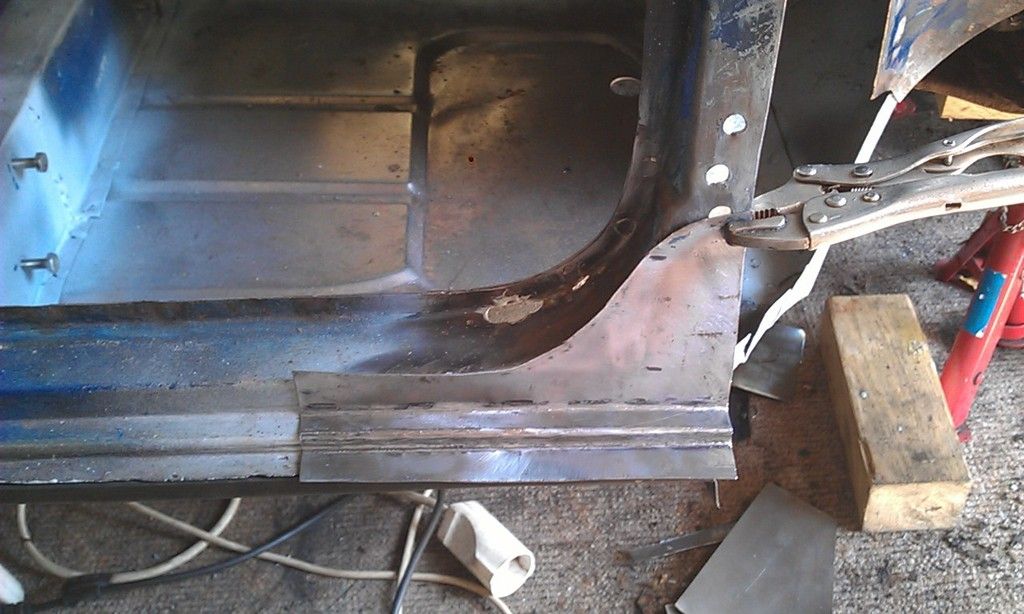
 

IMAG0437_zpsgpabizcq.jpg   

First I cut them out with a 1mm cutting disc but then after spotting some pitted rust on the underside I decided to cut the whole lot out!! 

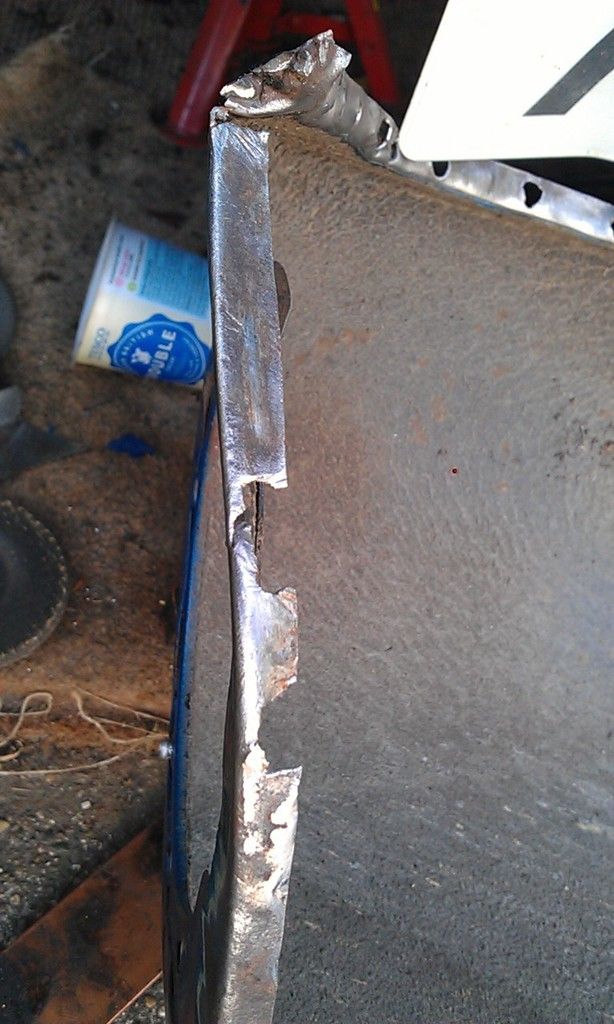
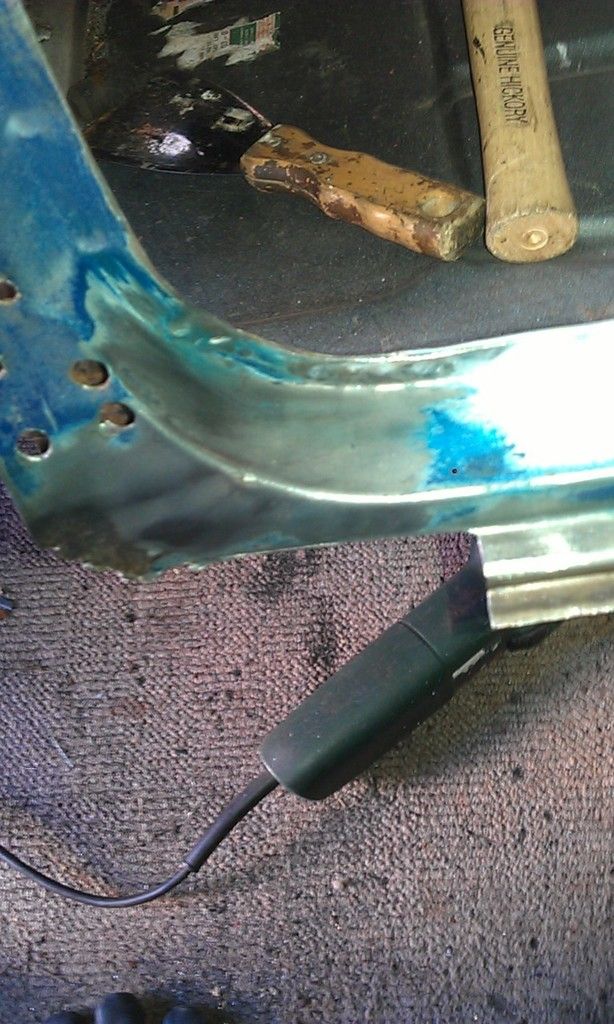
Due to the complexity of this piece (it has a few reverse folds and curves) I decided to make it in two pieces. I trimmed up the outer edge piece and formed the curved edge.
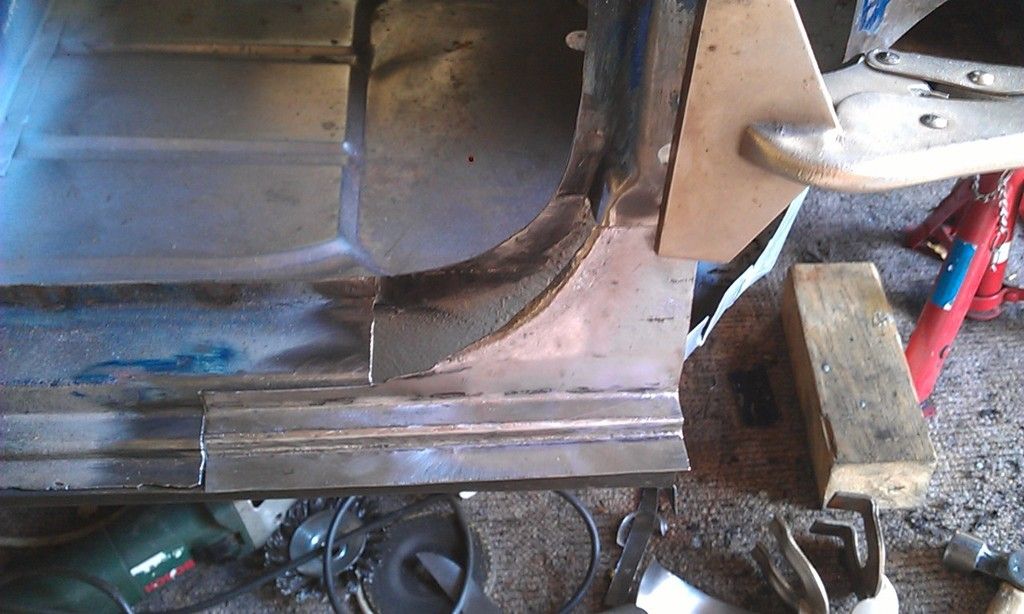
 

IMAG0438_zpsh29prcmc.jpg


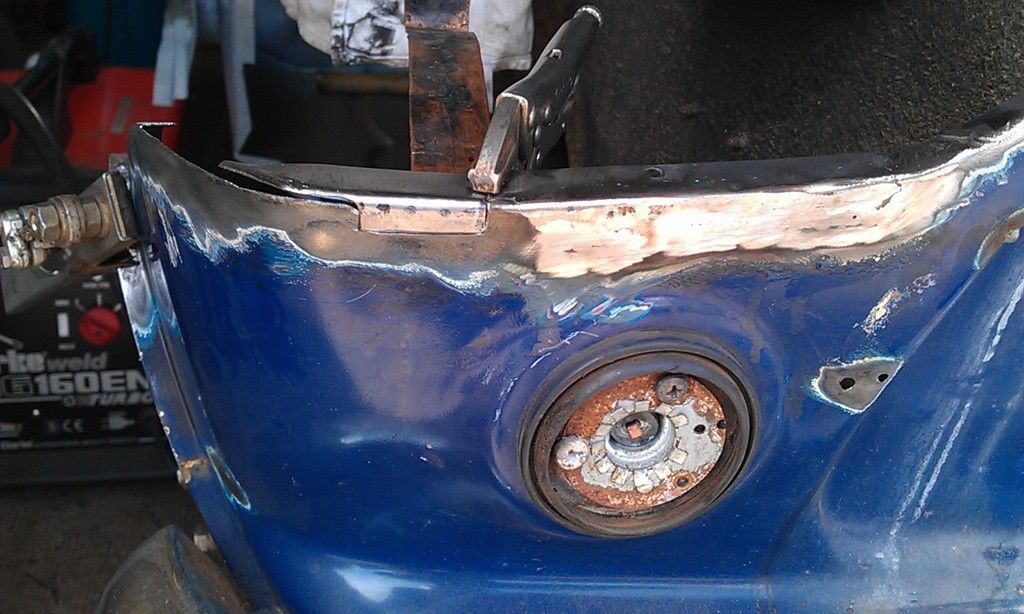
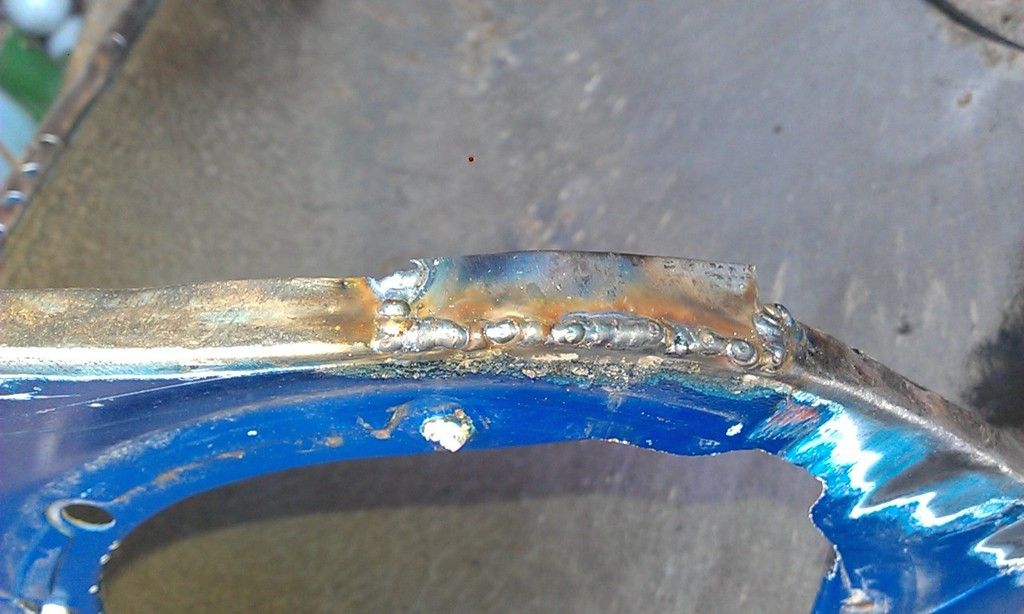
To help with making the inner piece I welded the first piece in place. I had the welder set higher than I anticipated but it worked well so I left it.
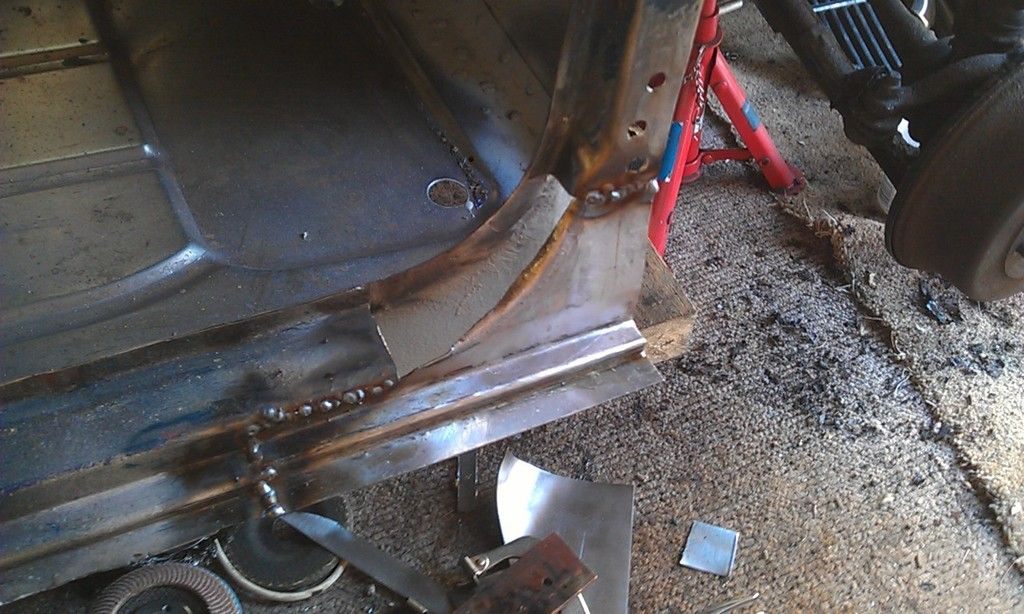
 

IMAG0440_zpsw1ihchjf.jpg


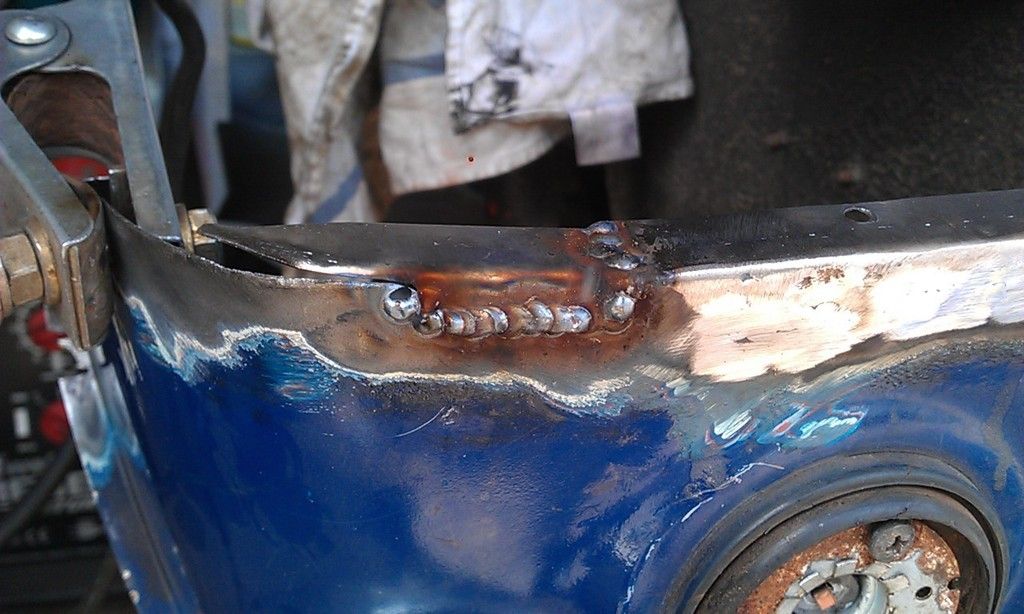
I made the inner piece and made several cuts along the flange to make life easier, I then welded these up. Before welding them up I first made sure that the piece fitted exactly and only put a spot of weld on each cut before test fitting it again. This was to ensure that whilst welding the piece would still fit. Once I was happy I welded up the cuts in the flange. 
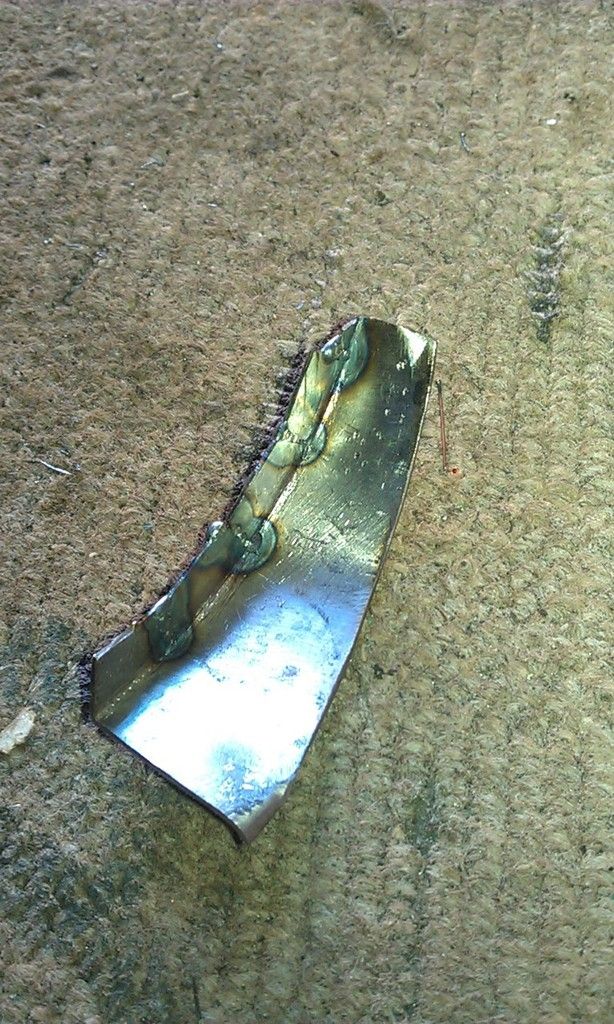
 

IMAG0443_zpsaah75iy0.jpg


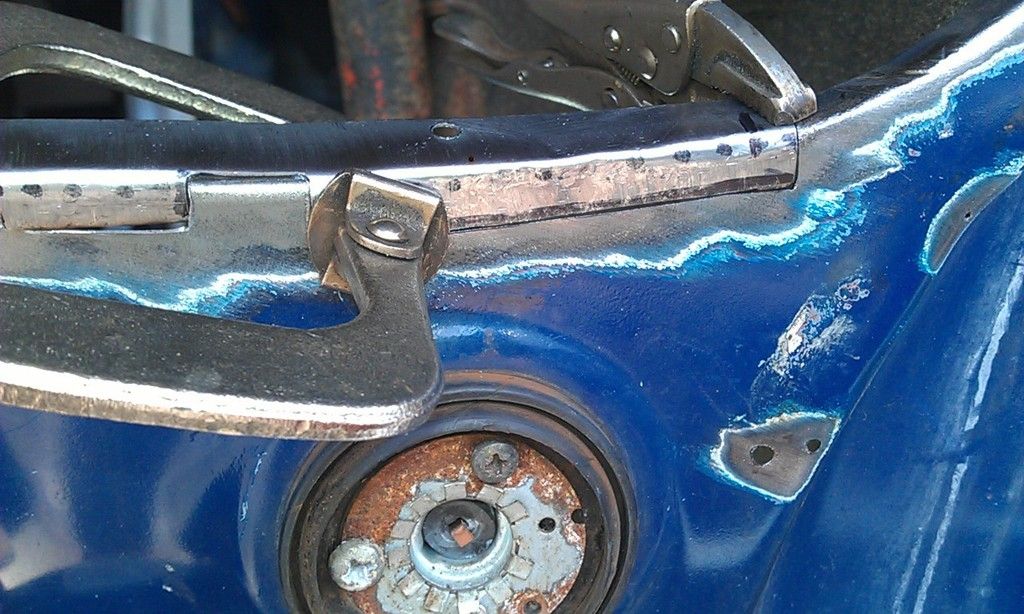
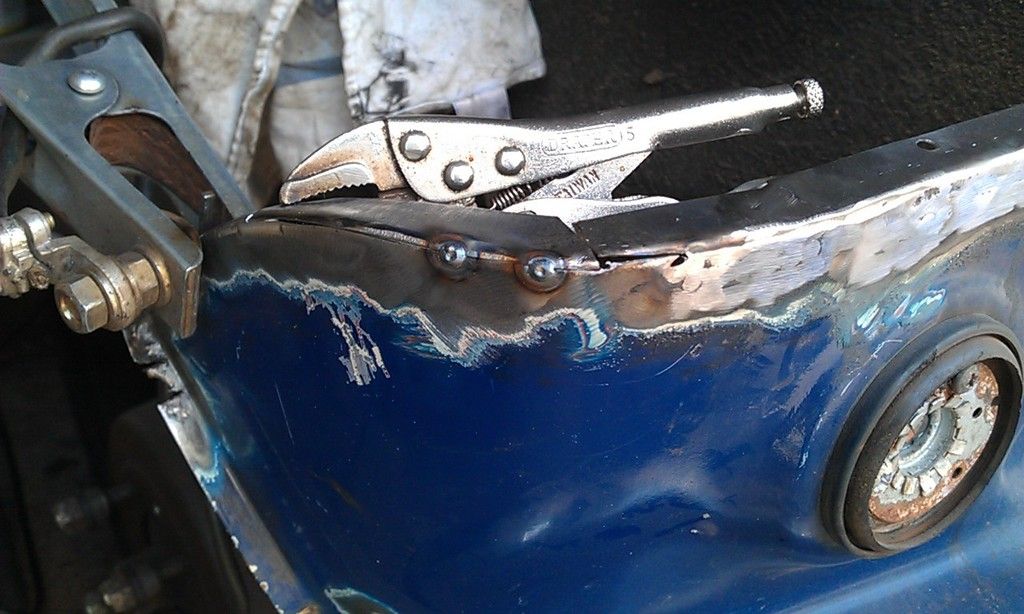
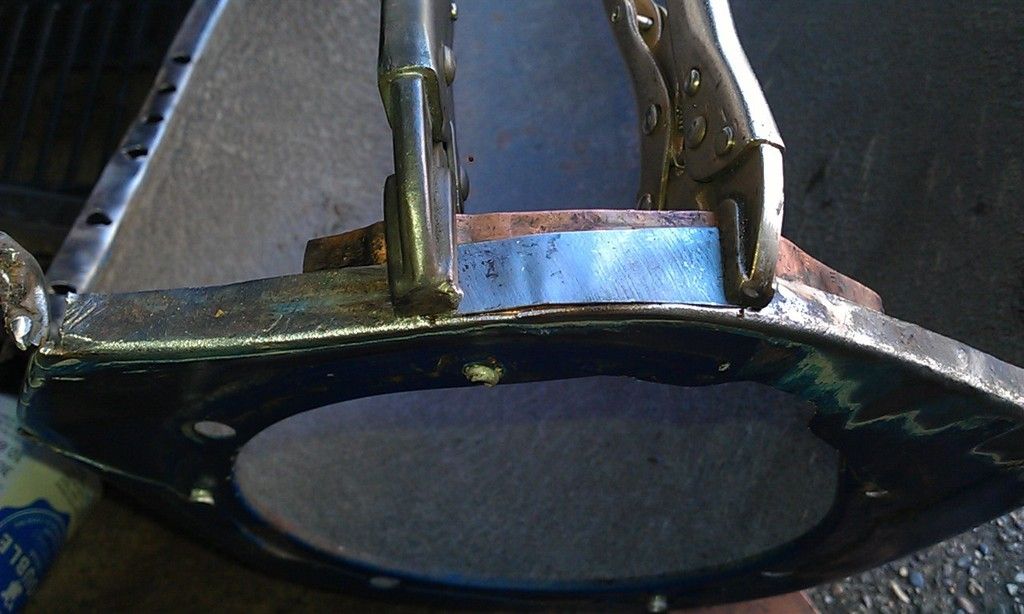
Here it is held in place and fitting snug:
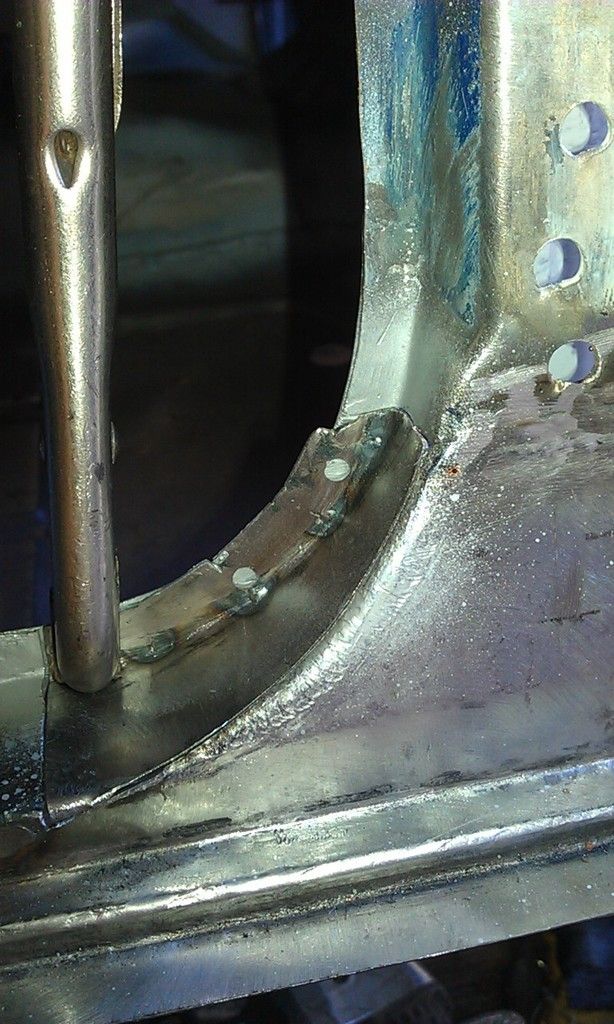
 

IMAG0444_zpstruh6twt.jpg


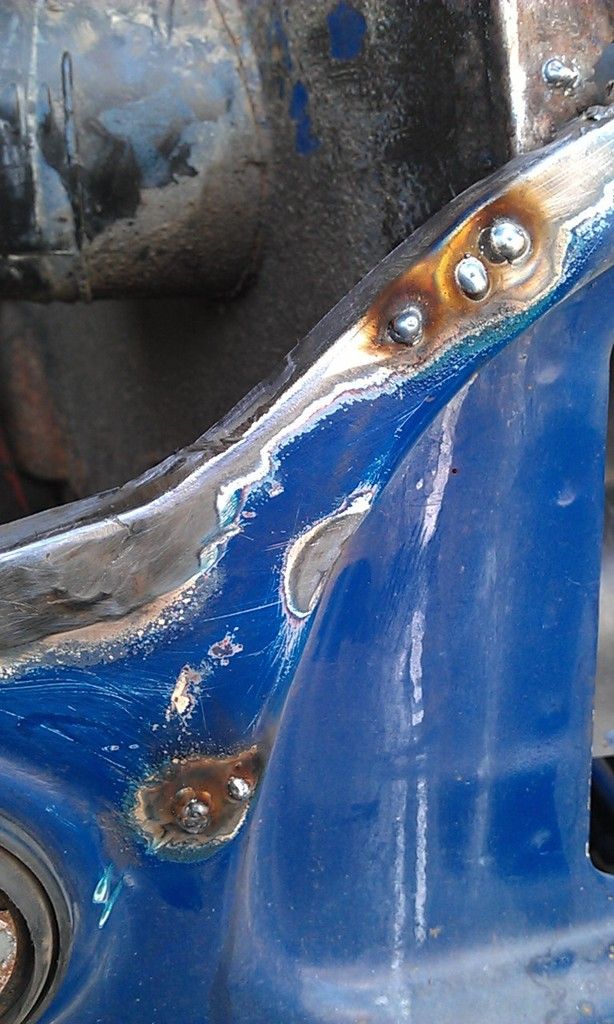
I also drilled three plug weld holes.

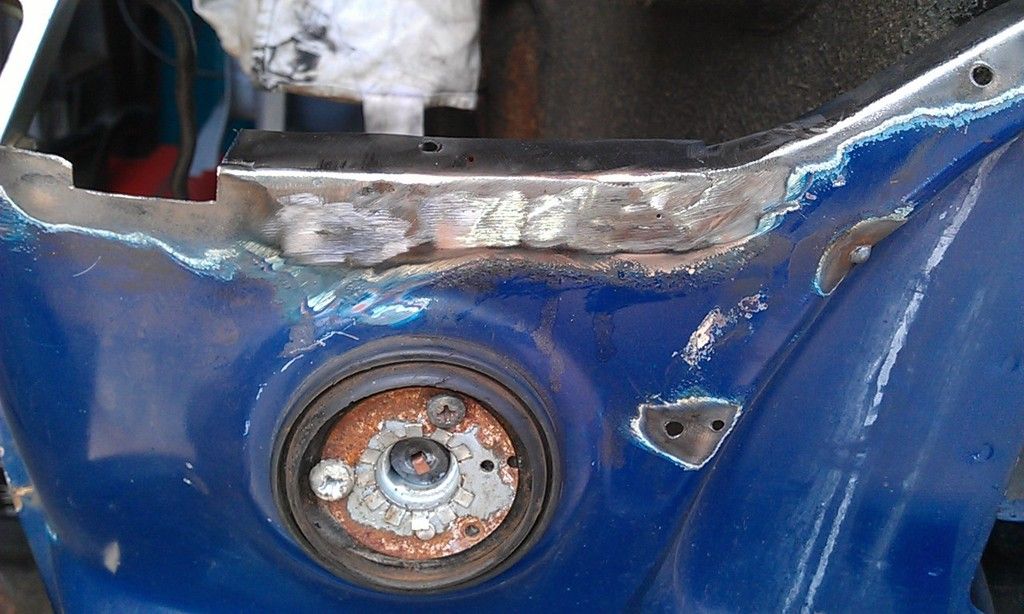
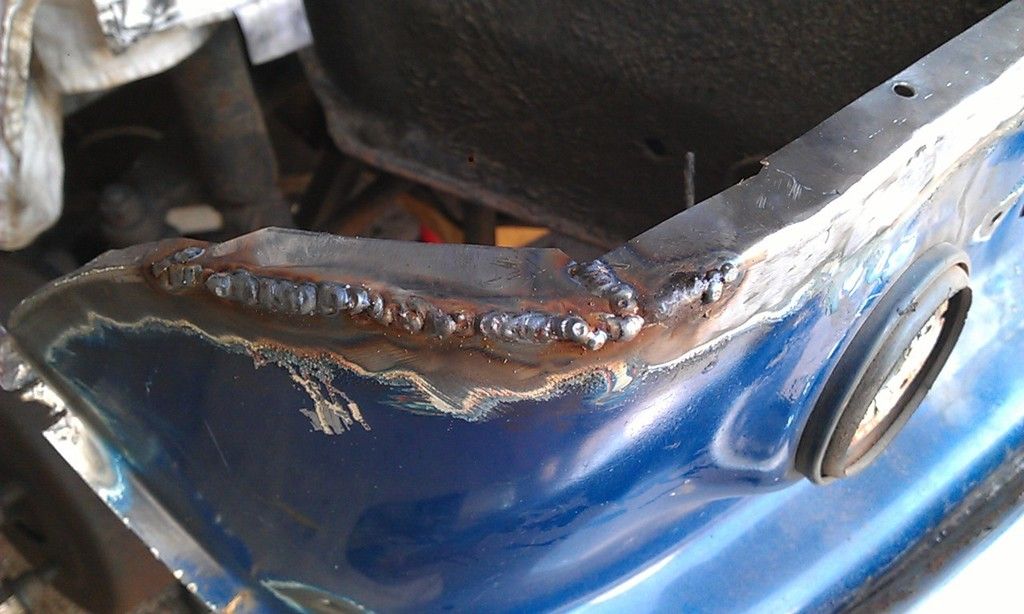
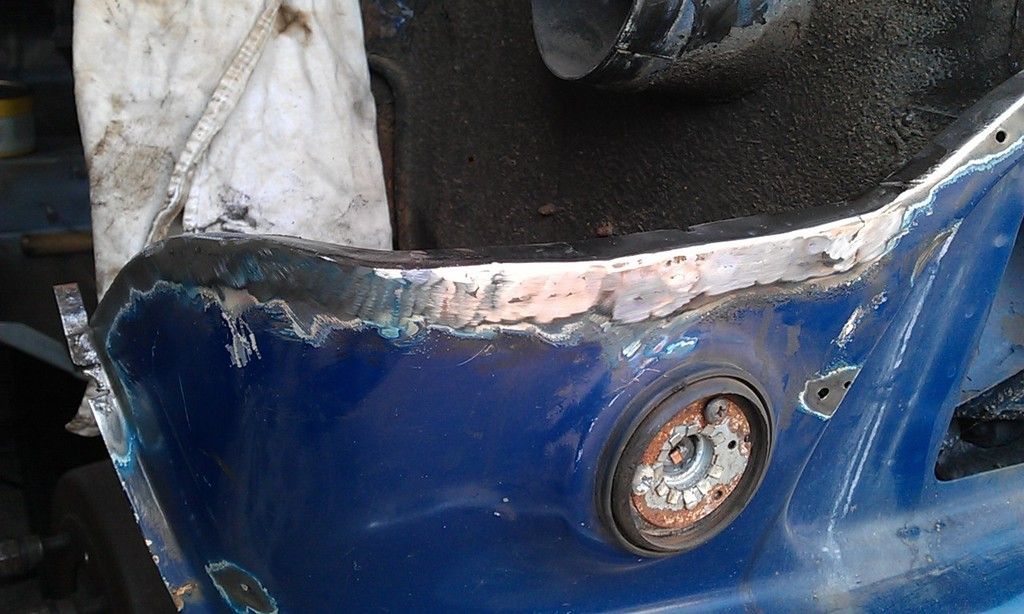
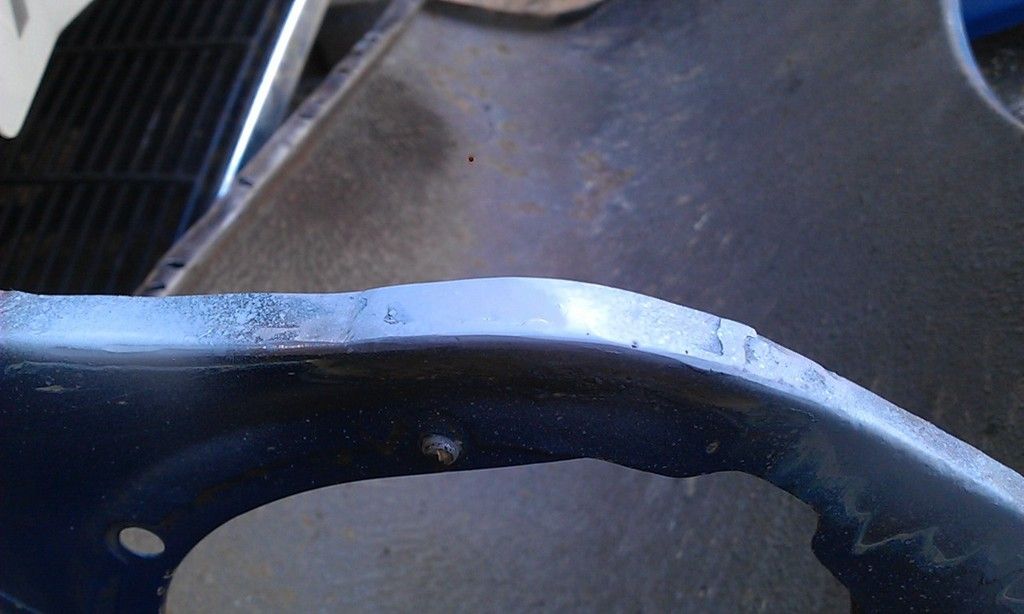
And here it is finished, took forever but very please with the result. I need to adjust the front profile a little as the Door Check was a little tight.
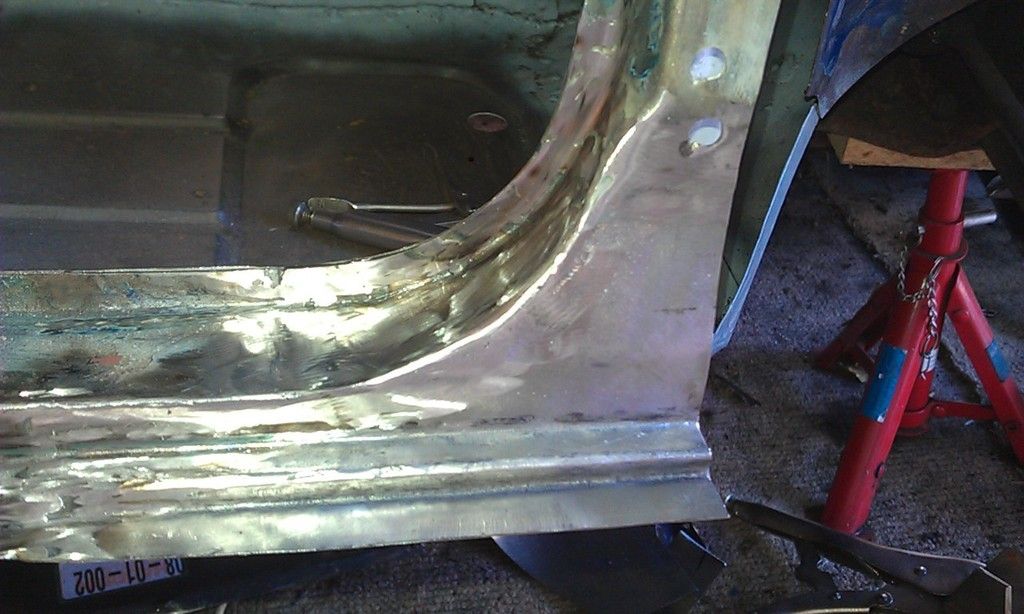
 

IMAG0445_zpsedfwjmlt.jpg


No time to Epoxy today so I flashed a bit of Etch Prime over it to preserve it for now.


I could clean up and repair the front wing but I really need to get the back wheels on so I am contemplating fitting both Sills, Rear Valance Closer and Rear Valance so the I can paint the rear underside and fit the Subframe? 


Or I crack on with the Inner and Outer Wing and Flitch on the Left and then move to the right hand side? 


Mmmm decisions, decisions :-)


#257 ryan22_lgm

ryan22_lgm

    One Carb Or Two?

  • Traders
  • PipPipPipPipPipPipPip
  • 1,478 posts
  • Location: woolacombe, north devon
  • Local Club: north devon mini register

Posted 16 May 2015 - 09:49 PM

Proper job mate! I just don't have the patience to make my own panels just end up wasting all my money on them :( Looking foreword to the next update!

#258 JonnyAlpha

JonnyAlpha

    Up Into Fourth

  • Members
  • PipPipPipPipPipPipPipPipPip
  • 2,748 posts
  • Location: North Devon
  • Local Club: Exmoor Minis

Posted 16 May 2015 - 10:48 PM

Proper job mate! I just don't have the patience to make my own panels just end up wasting all my money on them :( Looking foreword to the next update!


Thanks - I know what you mean, the problem is you cannot buy just a door step corner, I think the smallest panel I have found is the complete lower section which includes the panel that covers the Subframe Mounts. 


If I could claw back the time spent fabricating and spent more (that I don't have) on panels I would have finished this years ago :-)


#259 Ben_O

Ben_O

    Mill Road Garage

  • Paint Doctor
  • PipPipPipPipPipPipPipPipPipPip
  • 9,785 posts
  • Location: Isle of Wight

Posted 17 May 2015 - 06:44 AM

Lovely repair there. Very neat.


Ben


#260 JonnyAlpha

JonnyAlpha

    Up Into Fourth

  • Members
  • PipPipPipPipPipPipPipPipPip
  • 2,748 posts
  • Location: North Devon
  • Local Club: Exmoor Minis

Posted 18 May 2015 - 06:46 PM

Lovely repair there. Very neat.


Ben

Thanks Ben, 1000% better than it was too :-)


#261 JonnyAlpha

JonnyAlpha

    Up Into Fourth

  • Members
  • PipPipPipPipPipPipPipPipPip
  • 2,748 posts
  • Location: North Devon
  • Local Club: Exmoor Minis

Posted 19 May 2015 - 07:36 PM

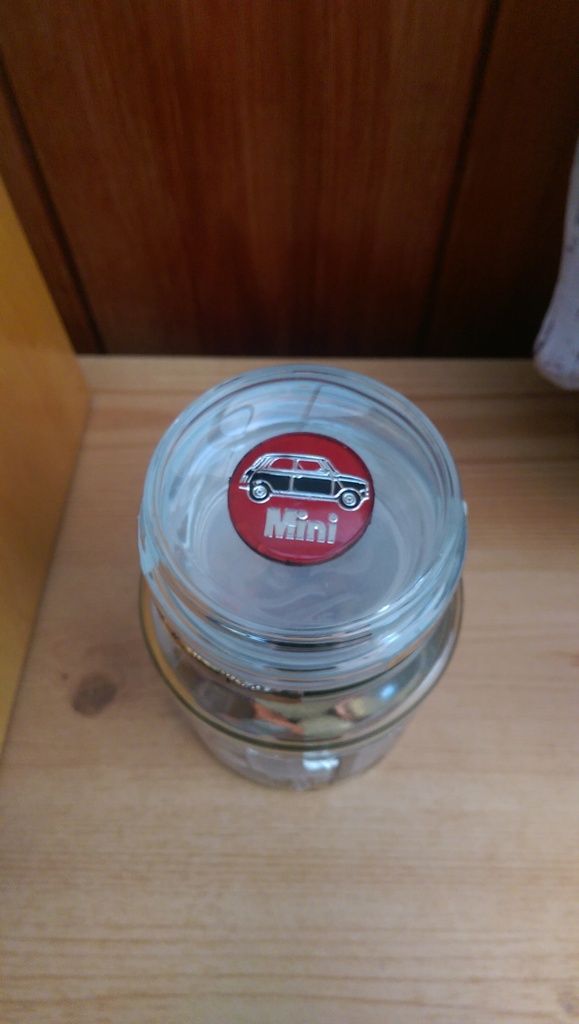
Found this little badge when I took the top dash apart, it's now on my Mini Cash Fund Pot :-)


IMAG1398_zpsmryrx1eh.jpg


#262 evansisgreat

evansisgreat

    One Carb Or Two?

  • TMF+ Member
  • PipPipPipPipPipPipPip
  • 1,096 posts
  • Local Club: Not yet

Posted 19 May 2015 - 07:51 PM

That's a great little find, good use for it too. All I found was a penny. Too rusty to spend.


#263 JonnyAlpha

JonnyAlpha

    Up Into Fourth

  • Members
  • PipPipPipPipPipPipPipPipPip
  • 2,748 posts
  • Location: North Devon
  • Local Club: Exmoor Minis

Posted 28 May 2015 - 07:53 PM

I created a list of jobs left to do on the Mini to get it rolling (let along looking smart) it equated to about 12 days work (that's full days) which normally means double :-(


Anyway here are some photos showing a few jobs completed using the odd spare half day here and there.


First of all I wanted to finish repairing the Rear Valance, its got a lot of holes in it from Spot Welding etc and when I refit it I want to weld from the top through the boot floor lid.


So using some flattened copper pipe I set about plug welding up the holes:


IMAG0451_zpsuofqmvzk.jpg

Here's the finished article, not dressed the welds down yet as I want to wait until I have a few other items to Epoxy.


Next I carefully trimmed the tin worm from the lower front wing:


IMAG0458_zpstmmqwvwv.jpg


Then using some cardboard I made up a template and marked up some steel:


IMAG0460_zpseg28okz9.jpg


A little fettling and folding:


IMAG0461_zpsjt2fviyo.jpg


Thought I took a pic of the welds but here it is dressed down:


IMAG0462_zpswj8aqwoo.jpg


As you can see I cut the repair piece to make it fit in two parts:


IMAG0463_zpsqkgwvc46.jpg


A little blow through on the second as the copper backing slipped:


IMAG0464_zpsyonxw0oo.jpg


And a third section:


IMAG0465_zpsxvmwhble.jpg


Carefully welded in: 

IMAG0466_zpsaztou0jt.jpg


And dressed:


IMAG0467_zps3ytevgfl.jpg


There were a few other holes that needed to be filled, some of these were Self Tapping holes for the Grill, they have become too large and the grill was not a good fit so I'll re drill them:


IMAG0468_zpstggh9e2y.jpg


The upper wing was in better condition:


IMAG0469_zpsngmcpms8.jpg


And easier to patch:


IMAG0470_zpswupgi9dh.jpg


IMAG0471_zpshksopcfs.jpg


Then some Zinc Etch to stop the rust:


IMAG0474_zpsjxecz38n.jpg


IMAG0473_zpswnguzjrk.jpg


Didn't take a photo of the two together but they are a good fit :-)


#264 Hendred

Hendred

    Speeding Along Now

  • Members
  • PipPipPipPipPip
  • 484 posts
  • Location: Cleobury Mortimer Nr Ludlow, Shropshire Name: John

Posted 28 May 2015 - 08:09 PM

Much more satisfying than just sticking a new panel in, great work.


#265 JonnyAlpha

JonnyAlpha

    Up Into Fourth

  • Members
  • PipPipPipPipPipPipPipPipPip
  • 2,748 posts
  • Location: North Devon
  • Local Club: Exmoor Minis

Posted 29 May 2015 - 07:57 PM

Much more satisfying than just sticking a new panel in, great work.

Thanks Hendred


#266 JonnyAlpha

JonnyAlpha

    Up Into Fourth

  • Members
  • PipPipPipPipPipPipPipPipPip
  • 2,748 posts
  • Location: North Devon
  • Local Club: Exmoor Minis

Posted 29 May 2015 - 08:19 PM

Set about fixing the LH front Door Step today so I could maybe get the Sills on to fit the Subby and get this thing rolling again?


Anyway while I was over the LH side I had another look up inside the Arch to remind myself how bad it was and assess whether or not it would need as much work as the RH side?


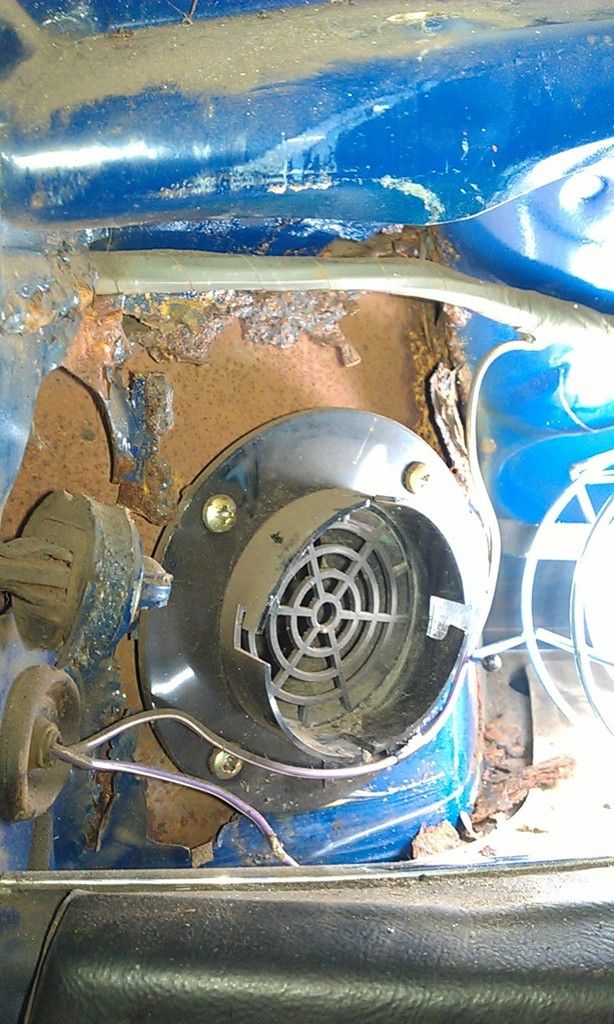
Pulled back the insulation around the LH vent and saw this..............


IMAG0478_zpstf4xsylu.jpg


Absolutely shocking, scary to think this got through its last MOT, I understand that they don't pull out carpets and the like but its horrible to think how much rust was lurking hidden away.


The A Post Closing Panel is rotted in exactly the same place as the RH one but the upper Flitch seems worse?

You can see in the pic how someone has just welded a plate straight on top of the rust!!!


Another big repair job coming up :-(


I started to cut out the area of the Door Step but realised that to do it properly I needed to remove the Door Check so out with the Spot Weld Drill Bit and with a bit of effort, voila (Removed the A Panel first).


IMAG0479_zpsvegxljhn.jpg


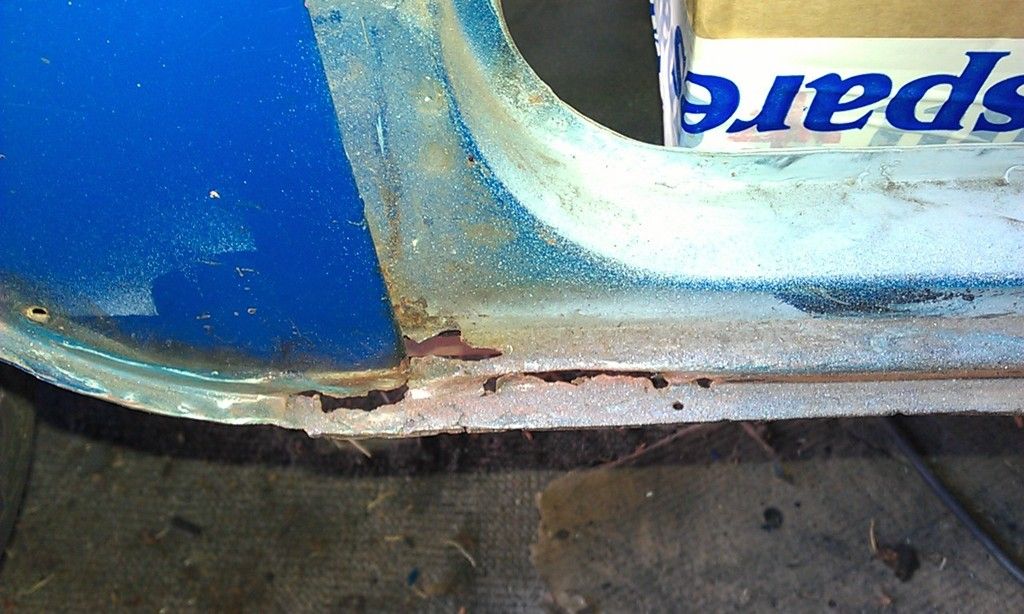
Here's the area of rot on the door step before taking out the A Post and Door Check:


IMAG0476_zps3aijeunk.jpg


 First cut along the bottom and wire brush to check for rot:


IMAG0482_zpsz6tnoxrx.jpg


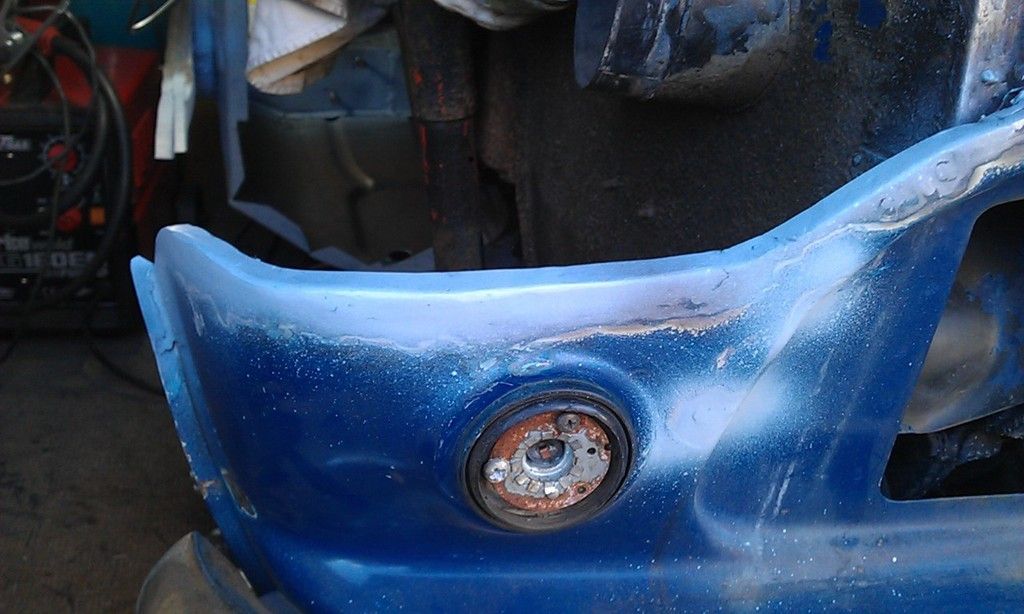
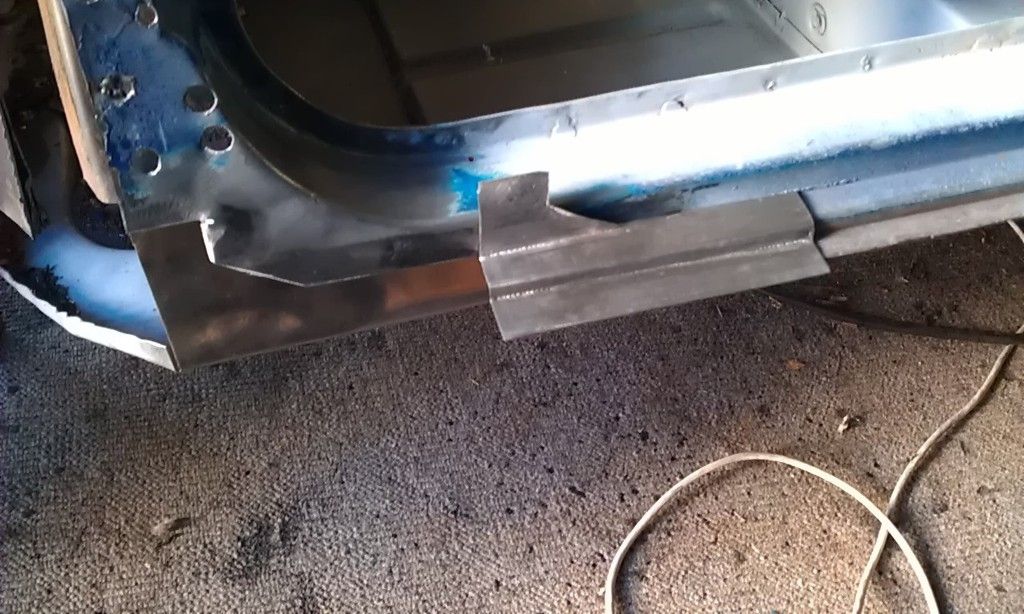
And with a little more cutting, I then used the template I made for the RH side and modified it, cut out some 1mm steel and did some folding and fettling and here it is ready to weld in place:


IMAG0483_zpspdgrii4s.jpg


That was about 3 1/2 hours work then in for Tea and Medals and Series 5 of Game of Thrones :-)


Plan for tomorrow is:


Weld in the Doors Step Repair.

Clean up inside A Post.

Locate and fit bolts in floor for Pipe Work.

Clean and Epoxy Paint next lot of panels (Door Check, Flitches, Jacking Points, Rear Valance Closers, Rear Valance, Scuttle Closers, Scuttles, Sills).

Clean Underside Rear and Under Door Steps and A Posts as Required and Epoxy.


If time (I doubt it) clean up RH Inner Wing and Epoxy?  

Big task but if I get the painting done then I am ready to start.  


#267 Ben_O

Ben_O

    Mill Road Garage

  • Paint Doctor
  • PipPipPipPipPipPipPipPipPipPip
  • 9,785 posts
  • Location: Isle of Wight

Posted 30 May 2015 - 02:13 AM

You are doing really well with those repairs.


well done


Ben


#268 Hendred

Hendred

    Speeding Along Now

  • Members
  • PipPipPipPipPip
  • 484 posts
  • Location: Cleobury Mortimer Nr Ludlow, Shropshire Name: John

Posted 30 May 2015 - 07:12 AM

Superb again


John


#269 StefanPieter

StefanPieter

    Mini Mad

  • Noobies
  • PipPipPipPip
  • 131 posts
  • Location: Farnborough
  • Local Club: FDMC

Posted 30 May 2015 - 09:53 AM

Set about fixing the LH front Door Step today so I could maybe get the Sills on to fit the Subby and get this thing rolling again?
 
Anyway while I was over the LH side I had another look up inside the Arch to remind myself how bad it was and assess whether or not it would need as much work as the RH side?
 
Pulled back the insulation around the LH vent and saw this..............
 
IMAG0478_zpstf4xsylu.jpg
 
Absolutely shocking, scary to think this got through its last MOT, I understand that they don't pull out carpets and the like but its horrible to think how much rust was lurking hidden away.
 
The A Post Closing Panel is rotted in exactly the same place as the RH one but the upper Flitch seems worse?
You can see in the pic how someone has just welded a plate straight on top of the rust!!!
 
Another big repair job coming up :-(
 
I started to cut out the area of the Door Step but realised that to do it properly I needed to remove the Door Check so out with the Spot Weld Drill Bit and with a bit of effort, voila (Removed the A Panel first).
 
IMAG0479_zpsvegxljhn.jpg
 
 
Here's the area of rot on the door step before taking out the A Post and Door Check:
 
IMAG0476_zps3aijeunk.jpg
 
 First cut along the bottom and wire brush to check for rot:
 
IMAG0482_zpsz6tnoxrx.jpg
 
And with a little more cutting, I then used the template I made for the RH side and modified it, cut out some 1mm steel and did some folding and fettling and here it is ready to weld in place:
 
IMAG0483_zpspdgrii4s.jpg
 
That was about 3 1/2 hours work then in for Tea and Medals and Series 5 of Game of Thrones :-)
 
Plan for tomorrow is:
 
Weld in the Doors Step Repair.
Clean up inside A Post.
Locate and fit bolts in floor for Pipe Work.
Clean and Epoxy Paint next lot of panels (Door Check, Flitches, Jacking Points, Rear Valance Closers, Rear Valance, Scuttle Closers, Scuttles, Sills).
Clean Underside Rear and Under Door Steps and A Posts as Required and Epoxy.
 
If time (I doubt it) clean up RH Inner Wing and Epoxy?  
Big task but if I get the painting done then I am ready to start.  


Good progress.

I am sitting with a very similar rusty lip I need to replace. How did you manage to fold the lip? And so neatly?

#270 JonnyAlpha

JonnyAlpha

    Up Into Fourth

  • Members
  • PipPipPipPipPipPipPipPipPip
  • 2,748 posts
  • Location: North Devon
  • Local Club: Exmoor Minis

Posted 30 May 2015 - 11:21 AM

You are doing really well with those repairs.


well done


Ben


Superb again


John

Thanks fellas :-) Just welded in the LH Door Step Patch - sweet


1 user(s) are reading this topic

0 members, 1 guests, 0 anonymous users