Jump to content


Photo
- - - - -

1982 Austin Mini - Project Who?


  • Please log in to reply
852 replies to this topic

#211 JonnyAlpha

JonnyAlpha

    Up Into Fourth

  • Members
  • PipPipPipPipPipPipPipPipPip
  • 2,748 posts
  • Location: North Devon
  • Local Club: Exmoor Minis

Posted 27 April 2015 - 06:25 PM

Managed to remove the vent pipe going into the Engine Bay, as suggested it was held on with 4 x nuts, came off quite easily.


IMAG0308_zpseti0riuc.jpg


Next (with the Flitch repair panel in removed) I cleaned back the loose rust to check how much needed to be removed.


Edited by JonnyAlpha, 27 April 2015 - 06:28 PM.


#212 JonnyAlpha

JonnyAlpha

    Up Into Fourth

  • Members
  • PipPipPipPipPipPipPipPipPip
  • 2,748 posts
  • Location: North Devon
  • Local Club: Exmoor Minis

Posted 27 April 2015 - 07:59 PM

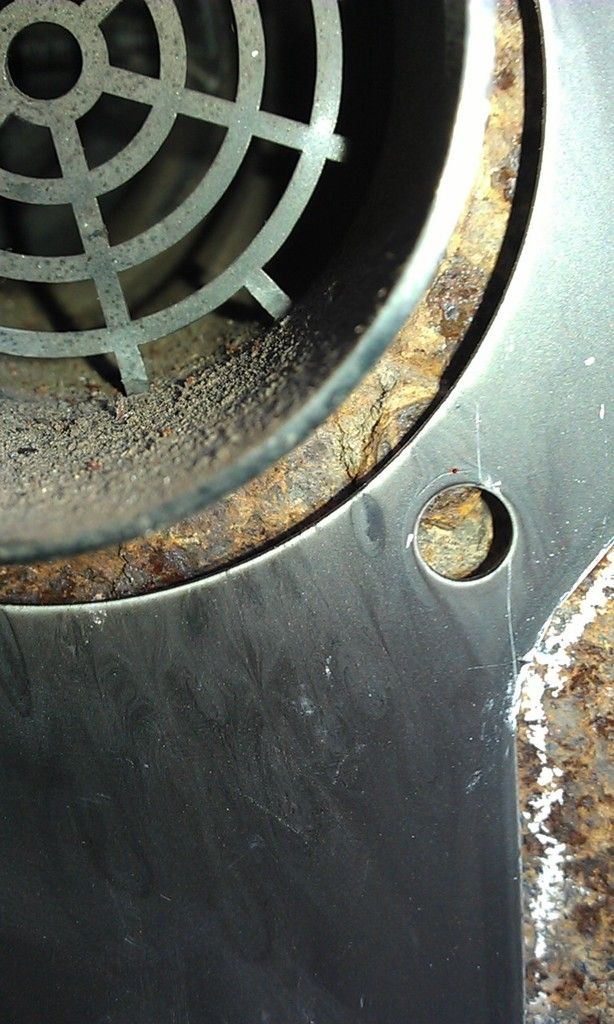
As I said earlier the holes in the Flitch Repair Panel don't line up with the vent bolts, there is a bit of play in the vent but I'm not sure how to proceed here?
 

IMAG0310_zpsxwjucgnl.jpg


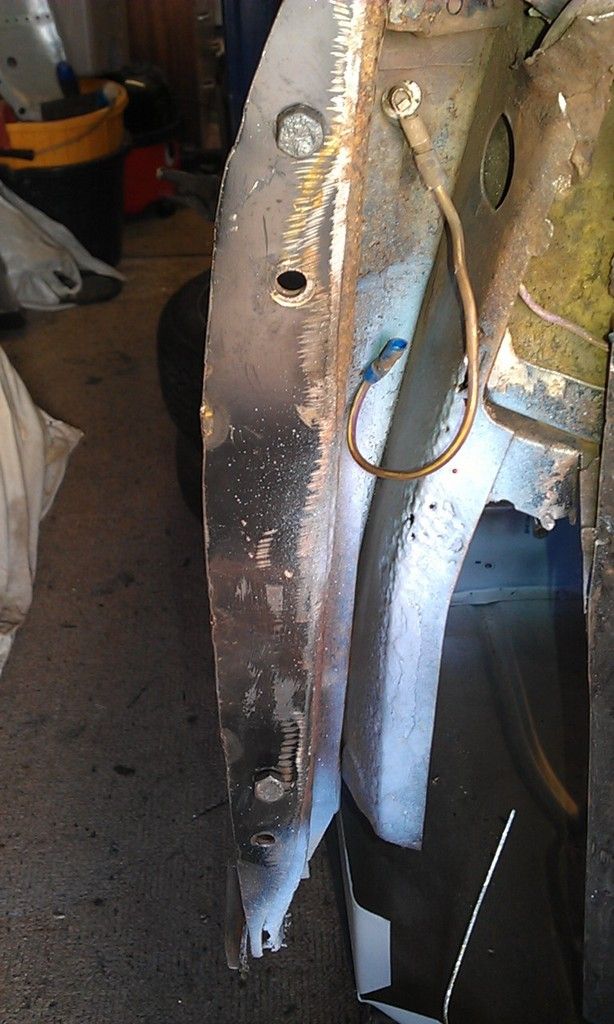
When the Flitch was last repaired a A Post Stiffener was fitted, I guess this will have to come off and I'll need to make two new ones or buy two. I have been told its the A Post Stiffener that give the A Post the correct profile for the A Panel?
 

IMAG0311_zpsaxsggc5t.jpg


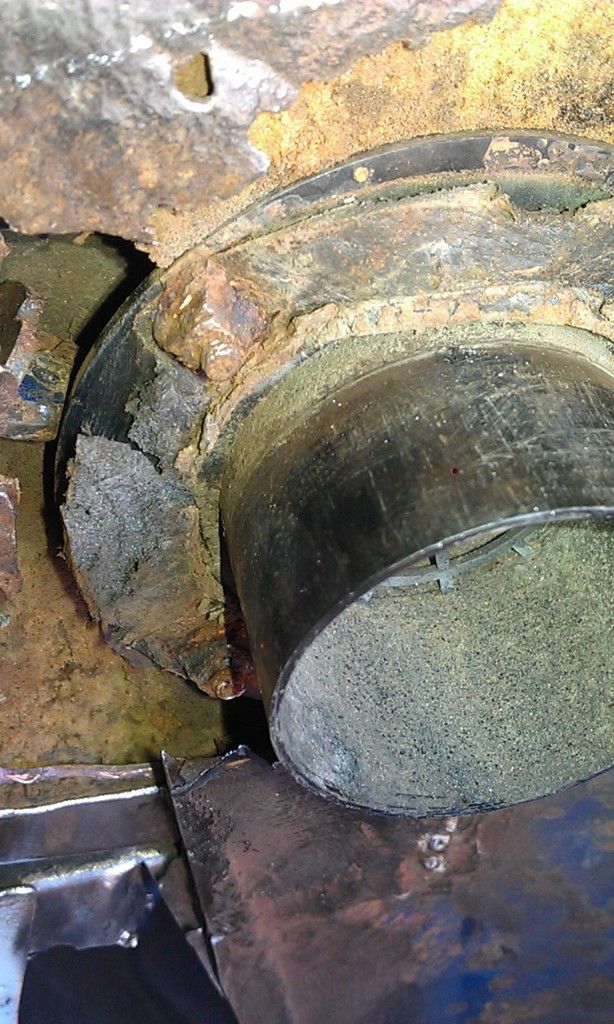
The nuts holding the vent in place where all corroded, not having removed one before I started to grind off the nut but ended up melting a bit of the vent :-( Also need a new packing piece that sits between the vent and the Flitch?
 

IMAG0312_zpssursjy40.jpg


Taking the vent apart was a bit of a feat as I have never done one before and although I have received some info on it putting the advice into practice was not as easy as it looked, the main thing was I dod not want to snap anything.

Luckily there is a small section on dismantling this in the Haynes manual.  


Here's the complete item removed but re-assembled:
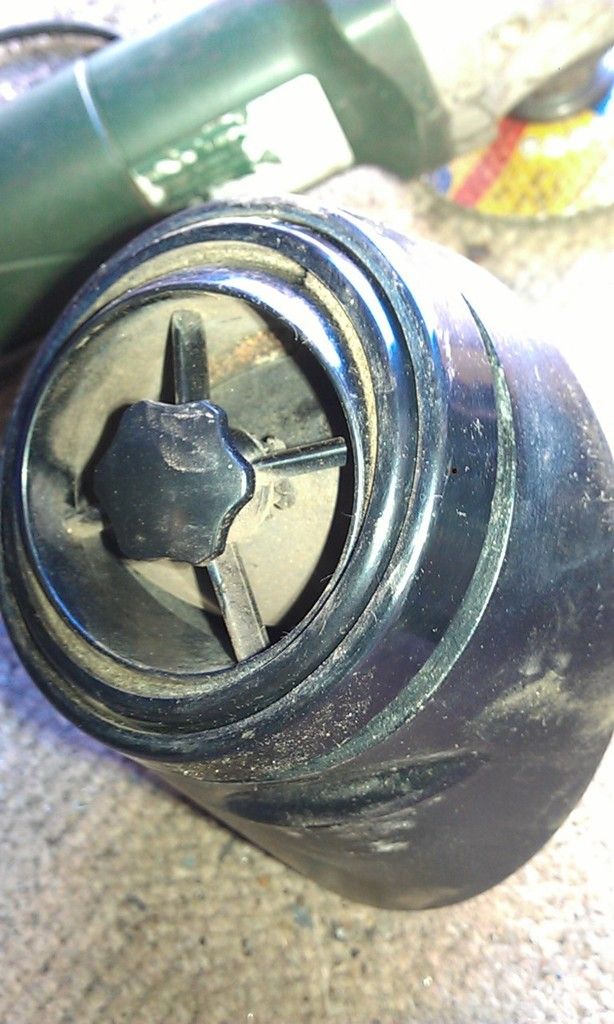
 

IMAG0313_zpska0okreu.jpg


To dismantle it first you need to unscrew the securing ring:
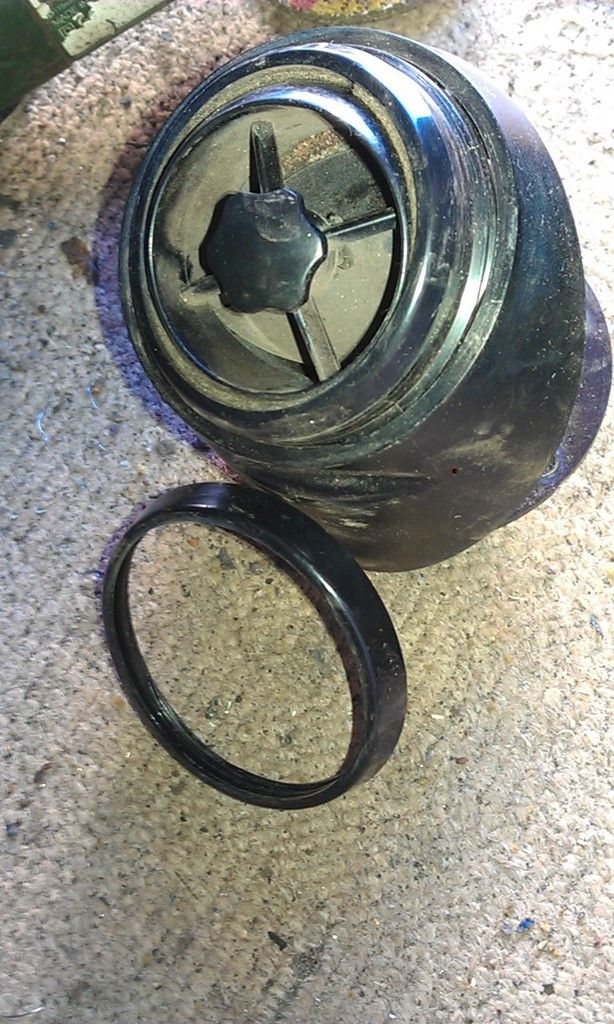
 

IMAG0314_zpsou7jh8vd.jpg


Next remove the shroud (called something else in the manual?)
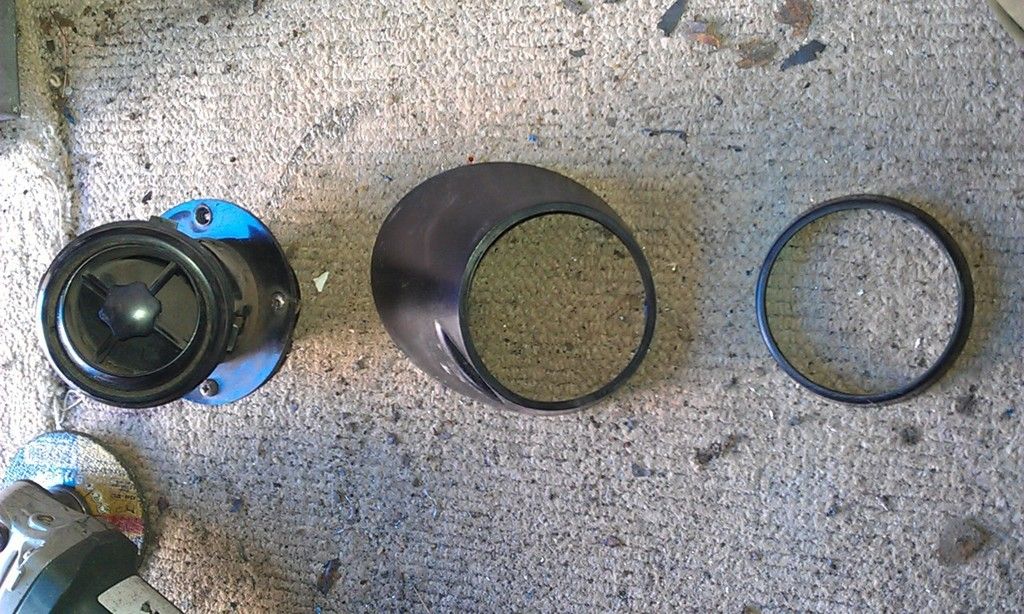
 

IMAG0315_zpsd3oaiftc.jpg


Then holding the rest of the vent from the inside twist Anti Clockwise and pull, at the time I was not sure why and it was a bit stiff but with a bit os twisting back and forth it came off.

Once it was off I could see why you twist anti clockwise, the vent is held in place with a sort of bayonet tab and twisting anti clockwise removes it from its housing allowing it to be pulled free.
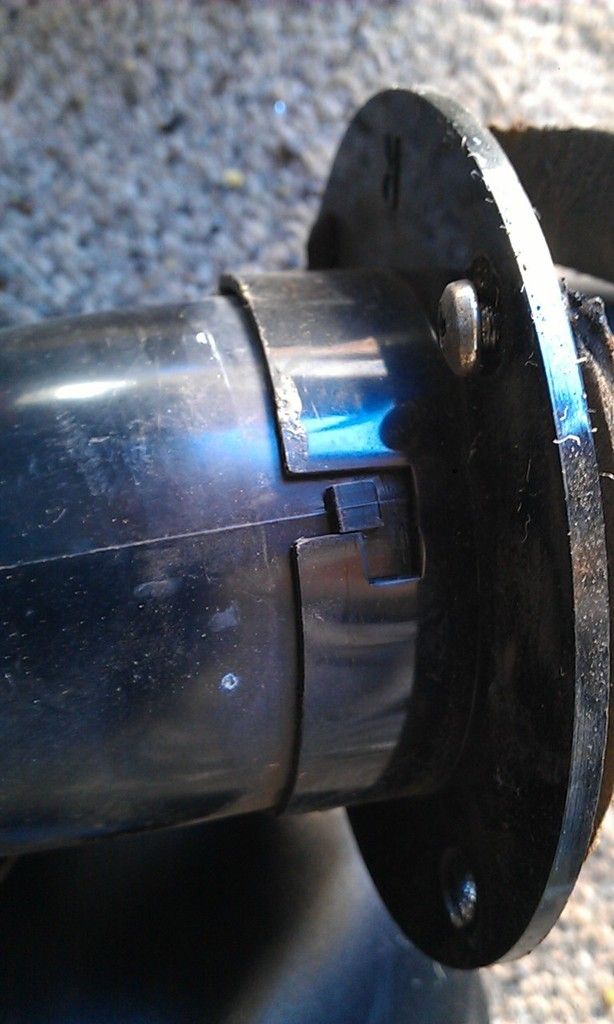
 

IMAG0317_zpsanojegtx.jpg


Here's the area that will now need repairing:
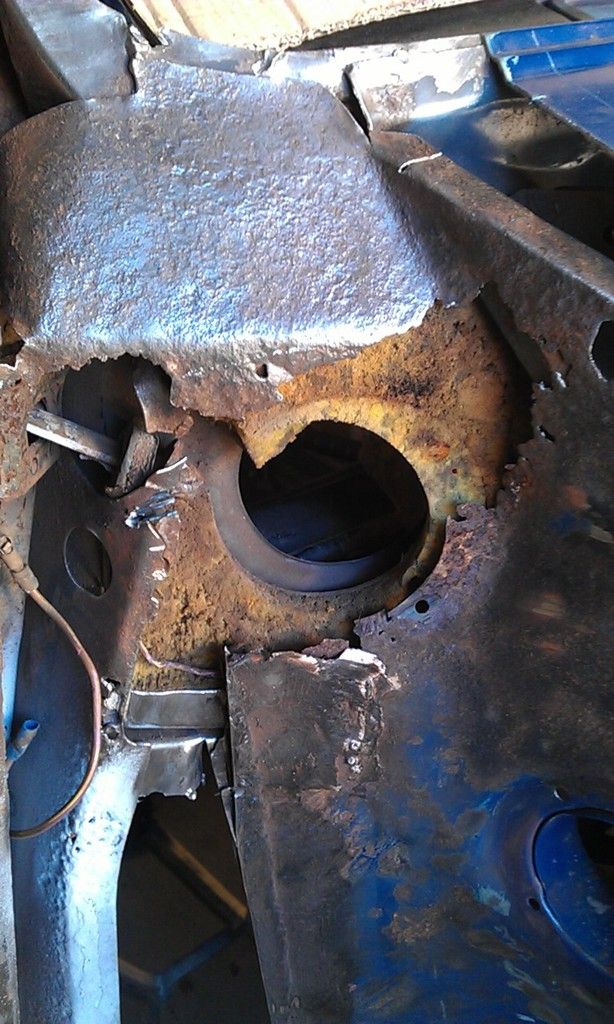
 

IMAG0318_zps1xbkaeq6.jpg


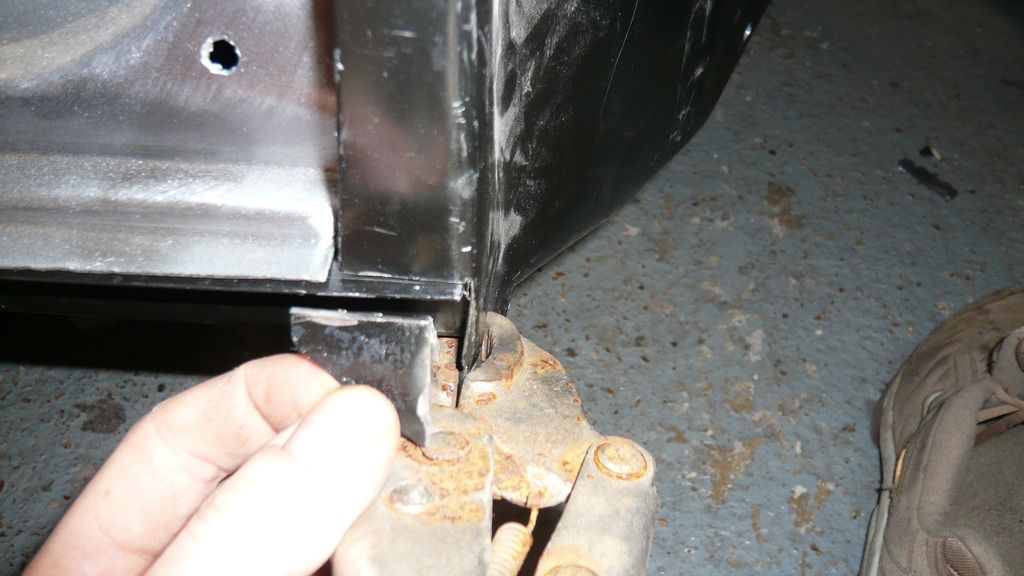
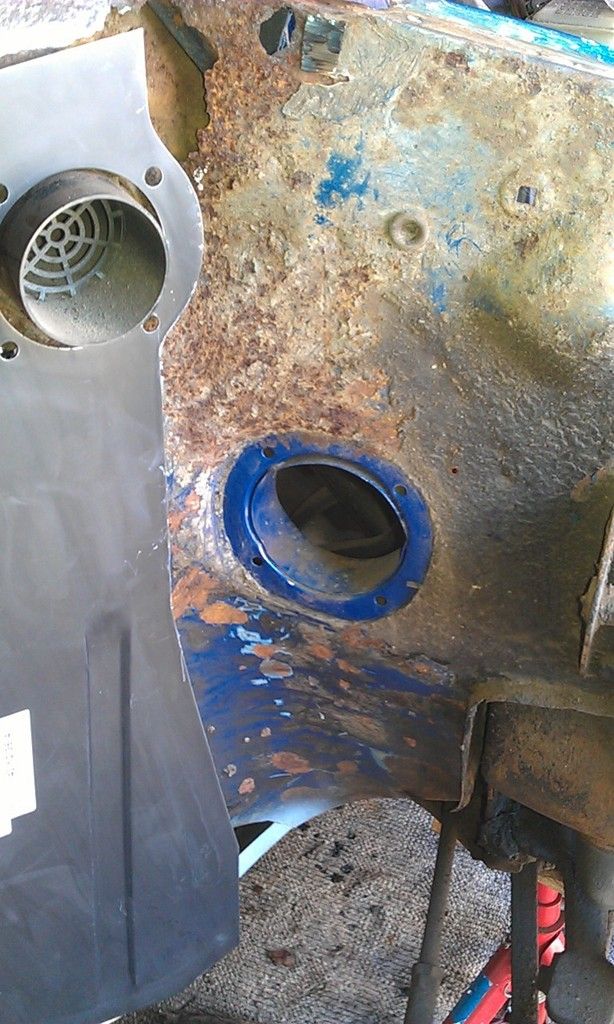
First, with the rot still in place I'll re-fit the Flitch Repair Panel and mark around it with a scribe. Next, after removing the repair panel I'll make up a cardboard template of the additional fill required. I'll then cut out and shape the fill piece.


Oh, does anyone have a pic of how the Flitch should mate up with the lower door step? Mine seems a little to long?
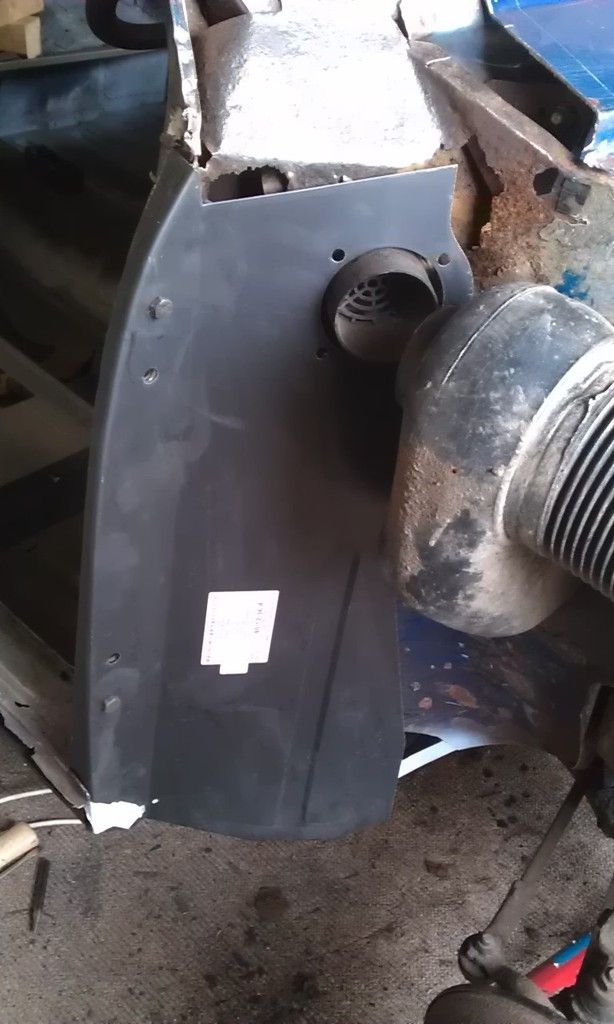
 

IMAG0298_zpsnifyfma2.jpg


In the pic above I had to cut a slit in the step (a repair that needs re-doing),


#213 Wise Old Elf

Wise Old Elf

    Camshaft & Stage Two Head

  • Members
  • PipPipPipPipPipPipPipPip
  • 1,655 posts
  • Location: Maldon
  • Local Club: Club Lotus

Posted 27 April 2015 - 08:13 PM

It bends under the floor.


#214 JonnyAlpha

JonnyAlpha

    Up Into Fourth

  • Members
  • PipPipPipPipPipPipPipPipPip
  • 2,748 posts
  • Location: North Devon
  • Local Club: Exmoor Minis

Posted 27 April 2015 - 08:19 PM

It bends under the floor.

Happy with that, but the piece that I think is too long is the flange on the outer edge.


#215 Wise Old Elf

Wise Old Elf

    Camshaft & Stage Two Head

  • Members
  • PipPipPipPipPipPipPipPip
  • 1,655 posts
  • Location: Maldon
  • Local Club: Club Lotus

Posted 27 April 2015 - 08:22 PM

I had to re-bend my outer edges and trim off the excess. I roughly fitted the doors and slotted the holes till I got a good fit to the door. Then I found the A panel would not fit so re-bent and trimmed the flitch.


#216 JonnyAlpha

JonnyAlpha

    Up Into Fourth

  • Members
  • PipPipPipPipPipPipPipPipPip
  • 2,748 posts
  • Location: North Devon
  • Local Club: Exmoor Minis

Posted 27 April 2015 - 08:33 PM

Just found this section of Ben_O's build thread which shows how the Flitch and Door Step should line up. (Ben pointed this part of his build thread out when I asked for advice on the A Post and Flitch).


Looks like the door step should stop at the Flitch but the Sill flange is slightly longer.


#217 Ben_O

Ben_O

    Mill Road Garage

  • Paint Doctor
  • PipPipPipPipPipPipPipPipPipPip
  • 9,785 posts
  • Location: Isle of Wight

Posted 27 April 2015 - 08:41 PM

Could there be a chance that might still have part of the a panel lip still attached to the end of the step lip?


It should stop just by the flange that the a panel fits to.


P1060879_zps5ozldwve.jpg


#218 Down&Out

Down&Out

    The King Of Retro Cool

  • Traders
  • PipPipPipPipPipPipPipPipPip
  • 4,847 posts
  • Location: -

Posted 27 April 2015 - 09:41 PM

The fit of the magnum flitch panels is ******* isnt it!


#219 1984mini25

1984mini25

    Crazy About Mini's

  • Members
  • PipPipPipPipPipPipPipPipPipPip
  • 8,783 posts
  • Location: -

Posted 27 April 2015 - 09:55 PM

The drivers side flitch panels have been shocking over the years, up until a few years ago the pressing towards the bottom right was pressed outwards, rather than in. Plus the air vent is never in the right place even though the hinge holes line up perfectly. That bottom corner should be tucked in behind the sill....


http://www.theminifo...resto-20/page-8


#220 Ben_O

Ben_O

    Mill Road Garage

  • Paint Doctor
  • PipPipPipPipPipPipPipPipPipPip
  • 9,785 posts
  • Location: Isle of Wight

Posted 27 April 2015 - 09:57 PM

A wise man once said to me ' oh Ben, i wish i had bought full inner wings'


#221 1984mini25

1984mini25

    Crazy About Mini's

  • Members
  • PipPipPipPipPipPipPipPipPipPip
  • 8,783 posts
  • Location: -

Posted 27 April 2015 - 10:09 PM

It has just occurred to me, I've fitted the older magnum flitch panel to the drivers side with the incorrect pressing. As I've had the panel knocking around for a few years, that's going to bug me now. Although technically it wasn't till the late 80's that the flinches got the extra pressing anyways.


#222 JonnyAlpha

JonnyAlpha

    Up Into Fourth

  • Members
  • PipPipPipPipPipPipPipPipPip
  • 2,748 posts
  • Location: North Devon
  • Local Club: Exmoor Minis

Posted 28 April 2015 - 06:04 AM

Thanks guys, one more thing to clarify, does the Sill fit over the Flitch flanges or does the Flitch fit over the Sill, my plan was to fit the Sill last?


#223 1984mini25

1984mini25

    Crazy About Mini's

  • Members
  • PipPipPipPipPipPipPipPipPipPip
  • 8,783 posts
  • Location: -

Posted 28 April 2015 - 10:47 AM

Thanks guys, one more thing to clarify, does the Sill fit over the Flitch flanges or does the Flitch fit over the Sill, my plan was to fit the Sill last?


The bottom of the flitch panel sits over the floor/sill. As doing it that way round makes it more water tight, bearing in mind where the road wheels sit and with the spray/mud etc. that will be thrown up.


#224 JonnyAlpha

JonnyAlpha

    Up Into Fourth

  • Members
  • PipPipPipPipPipPipPipPipPip
  • 2,748 posts
  • Location: North Devon
  • Local Club: Exmoor Minis

Posted 28 April 2015 - 04:58 PM


Thanks guys, one more thing to clarify, does the Sill fit over the Flitch flanges or does the Flitch fit over the Sill, my plan was to fit the Sill last?


The bottom of the flitch panel sits over the floor/sill. As doing it that way round makes it more water tight, bearing in mind where the road wheels sit and with the spray/mud etc. that will be thrown up.


So I need to fit the Sill before I fit the Flitch and weld up the bottom and when I do I need to wrap the bottom flange of the Flitch Panel over the top of the Sill so that the gap that will be seam sealed faces towards the rear of the car and not towards the front.


#225 Minidarren83

Minidarren83

    One Carb Or Two?

  • Members
  • PipPipPipPipPipPipPip
  • 1,207 posts
  • Location: Stanford Le hope

Posted 28 April 2015 - 05:06 PM

I cut all the flanges off both and welded and ground down smooth I didn't like the bit hanging down. It's not standard I know but my car is far from that


2 user(s) are reading this topic

0 members, 2 guests, 0 anonymous users