Jump to content


Photo
- - - - -

1982 Austin Mini - Project Who?


  • Please log in to reply
852 replies to this topic

#196 JonnyAlpha

JonnyAlpha

    Up Into Fourth

  • Members
  • PipPipPipPipPipPipPipPipPip
  • 2,748 posts
  • Location: North Devon
  • Local Club: Exmoor Minis

Posted 23 April 2015 - 10:12 PM

Good work going on here! :) just noticed your from braunton ! Not far from me in woolacombe !

There's a few of us around, I did try and set up a monthly meet last year but had no takers, maybe this year, always happy for anyone to come around and have a natter in the garage.


#197 JonnyAlpha

JonnyAlpha

    Up Into Fourth

  • Members
  • PipPipPipPipPipPipPipPipPip
  • 2,748 posts
  • Location: North Devon
  • Local Club: Exmoor Minis

Posted 24 April 2015 - 08:15 PM

Had an hour today, sharpened some drills and had a go at removing the wing.

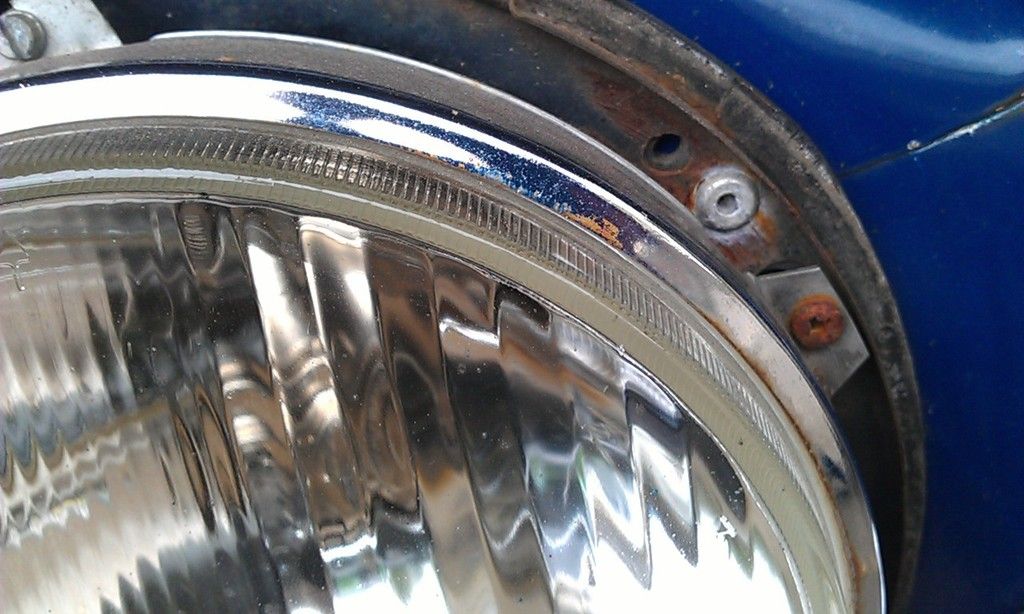
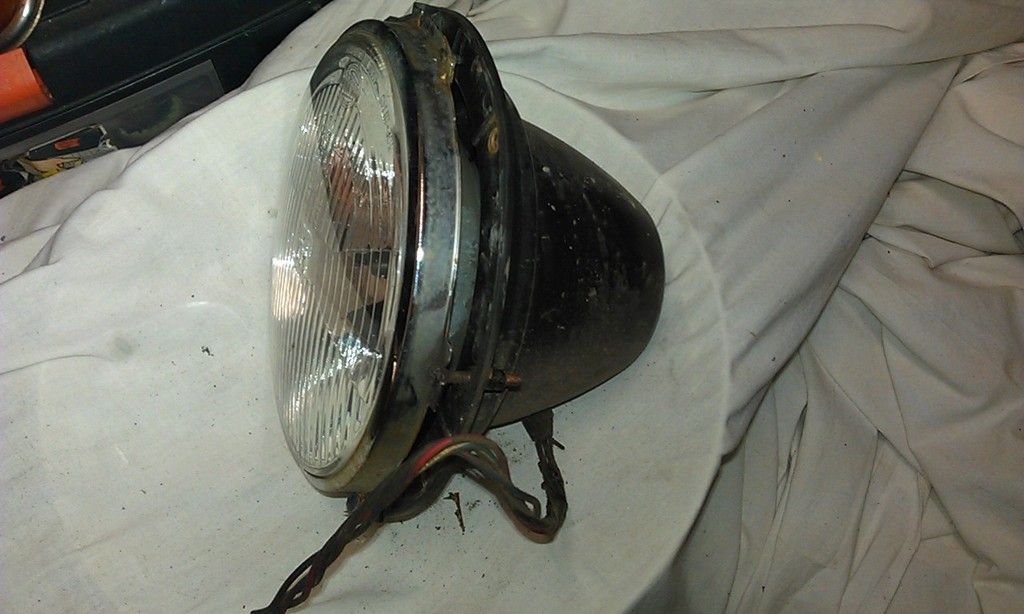
First out came the head lights, on doing this I noticed that the RH (Drivers) Head lights is different to the LH side different lens??

First I took the chrome / rusted cowl off (single self tapping screw).

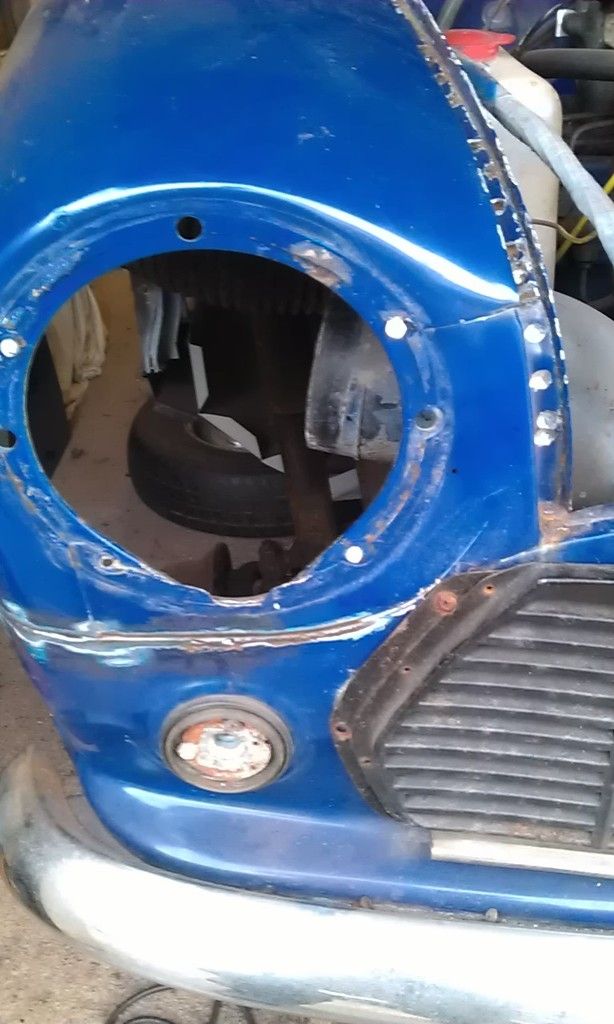
Next I removed the three self tappers holding the headlamp to the body, the LH one came off OK but some Bast**d has fitted the RH one using rivets?!?@?£?$?@?


IMAG0271_zpssjusmaxo.jpg


Drilled out the rivets and the headlamp was free.


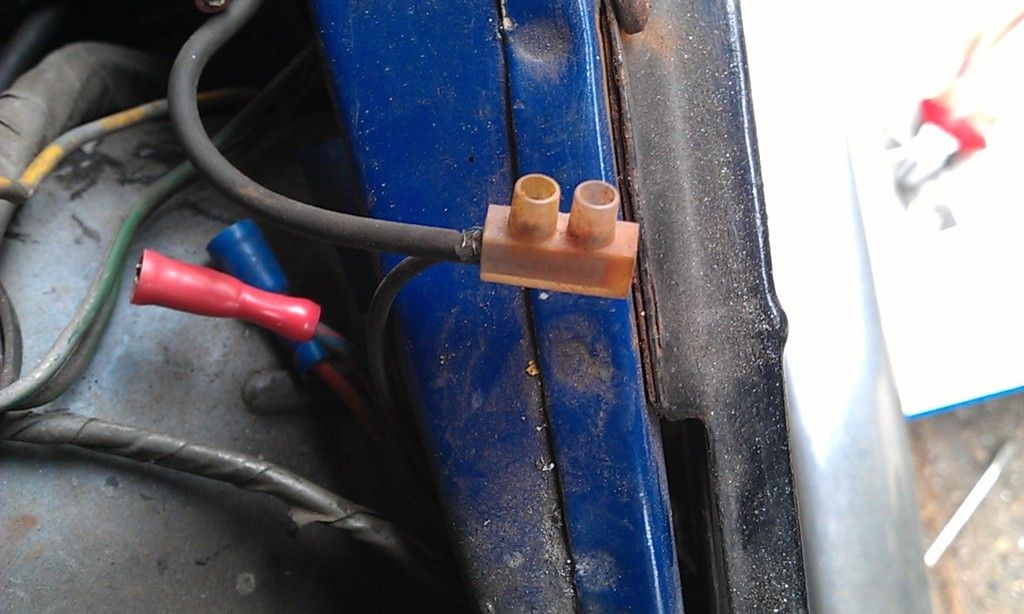
These headlamps are not like the ones in the Haynes manual they are a sealed metal dome and there is no obvious way to remove the wiring, the LH one had bullet clips further along the wiring and an earth lead connected to a plastic connector so that came off easy enough:


IMAG0272_zpsup5zxcis.jpg


The LH one had to be cut off :-(


Once the headlamp was out I started to try and remove the wing:


IMAG0275_zpsspdlt0wd.jpg


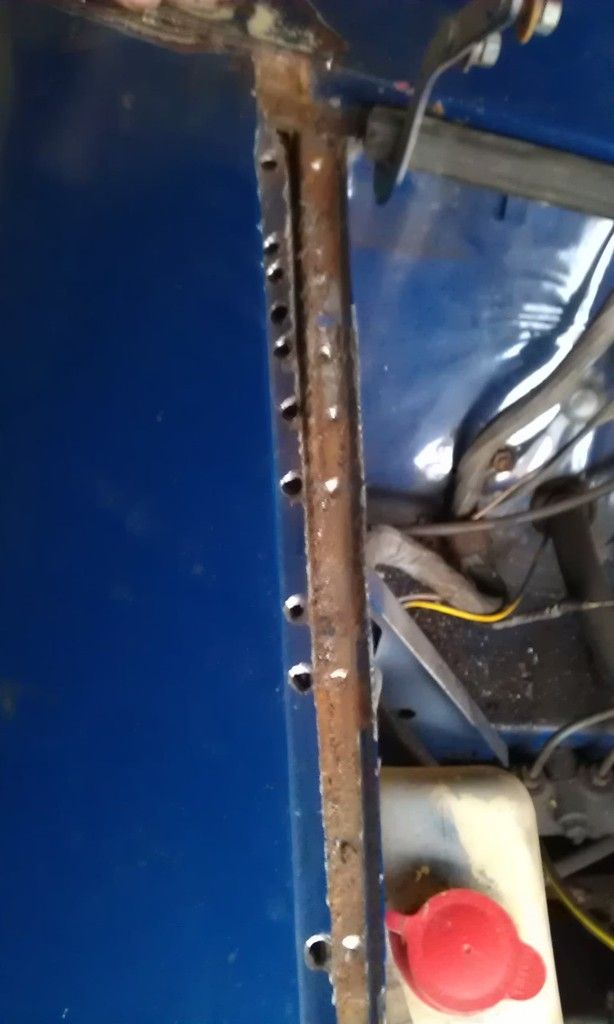
I drilled out the spot welds along the top edge and ground down a small seam weld by the bonnet hinge:


IMAG0273_zpsv7h3oroj.jpg


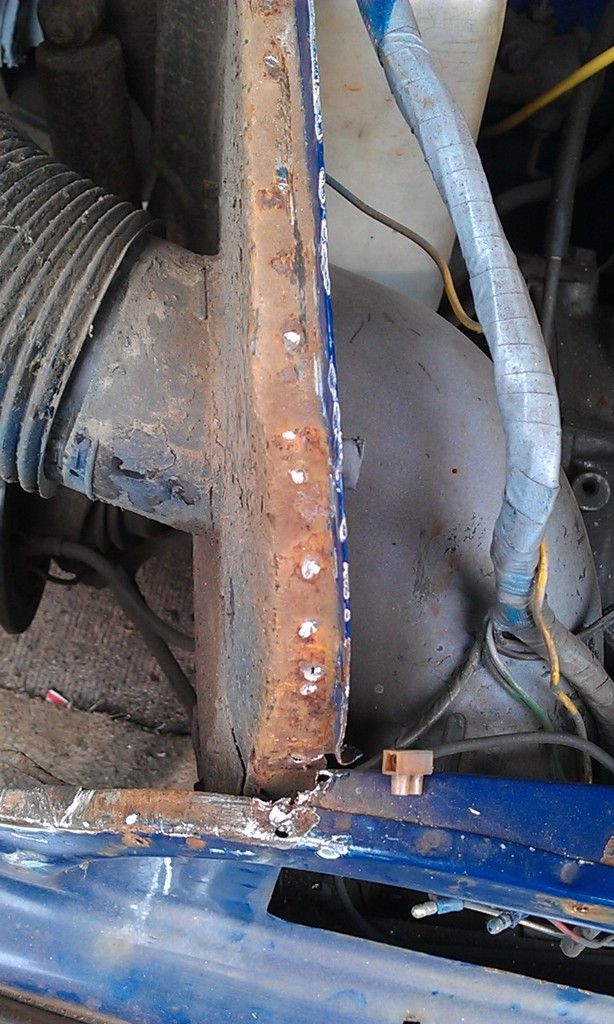
But I am at a loss at the moment regarding how to drill out the spot welds on the Inner Flange that sits under the headlight and inside the outer wing, there is not enough room to get my drill on all of the welds. Gonna have to put some thought into this.


IMAG0274_zpsjjlh0wmp.jpg


Back at it tomorrow.


#198 Ben_O

Ben_O

    Mill Road Garage

  • Paint Doctor
  • PipPipPipPipPipPipPipPipPipPip
  • 9,785 posts
  • Location: Isle of Wight

Posted 24 April 2015 - 08:52 PM

How about a small burr in a drill? Then you can grind the dimple of the spot weld to free it


#199 Minidarren83

Minidarren83

    One Carb Or Two?

  • Members
  • PipPipPipPipPipPipPip
  • 1,207 posts
  • Location: Stanford Le hope

Posted 24 April 2015 - 09:13 PM

Unless your keeping the wings and front panel just cut it out

#200 1984mini25

1984mini25

    Crazy About Mini's

  • Members
  • PipPipPipPipPipPipPipPipPipPip
  • 8,784 posts
  • Location: -

Posted 24 April 2015 - 09:18 PM

Cut the wing along the front panel seam with a grinder about half to a quarter of and inch above the seam. Then with the bulk of the panel/wing removed you can either grind off what's left or have better accesses to drill out the spot welds.


#201 Ben_O

Ben_O

    Mill Road Garage

  • Paint Doctor
  • PipPipPipPipPipPipPipPipPipPip
  • 9,785 posts
  • Location: Isle of Wight

Posted 24 April 2015 - 09:43 PM

Unless your keeping the wings and front panel just cut it out


Cut the wing along the front panel seam with a grinder about half to a quarter of and inch above the seam. Then with the bulk of the panel/wing removed you can either grind off what's left or have better accesses to drill out the spot welds.

He is re-using the wings.


another way would be to cut the flanges off from behind and then make new ones to graft onto the panels if the carbide burr doesn't work


#202 JonnyAlpha

JonnyAlpha

    Up Into Fourth

  • Members
  • PipPipPipPipPipPipPipPipPip
  • 2,748 posts
  • Location: North Devon
  • Local Club: Exmoor Minis

Posted 25 April 2015 - 06:01 AM

Could try out my new Air Die Grinder, I guess it would take a short spot weld drill bit?

#203 JonnyAlpha

JonnyAlpha

    Up Into Fourth

  • Members
  • PipPipPipPipPipPipPipPipPip
  • 2,748 posts
  • Location: North Devon
  • Local Club: Exmoor Minis

Posted 25 April 2015 - 04:41 PM

Well I went to buy a Tungsten Burr from a local shop Taylors Fasteners, they only sold individuals and once we worked out what one he checked the price - £35 not inc VAT - so I left it!!!


Anyway I thought i'd try with a 6mm drill in my Die Grinder, it started off OK but either something was wrong with the Grinder or the Compressor as it just kept running out of air. It's a cheap Toolzone RA Die Grinder but it says its only 4CFM, my compressor ran my HVLP Spray Gun??


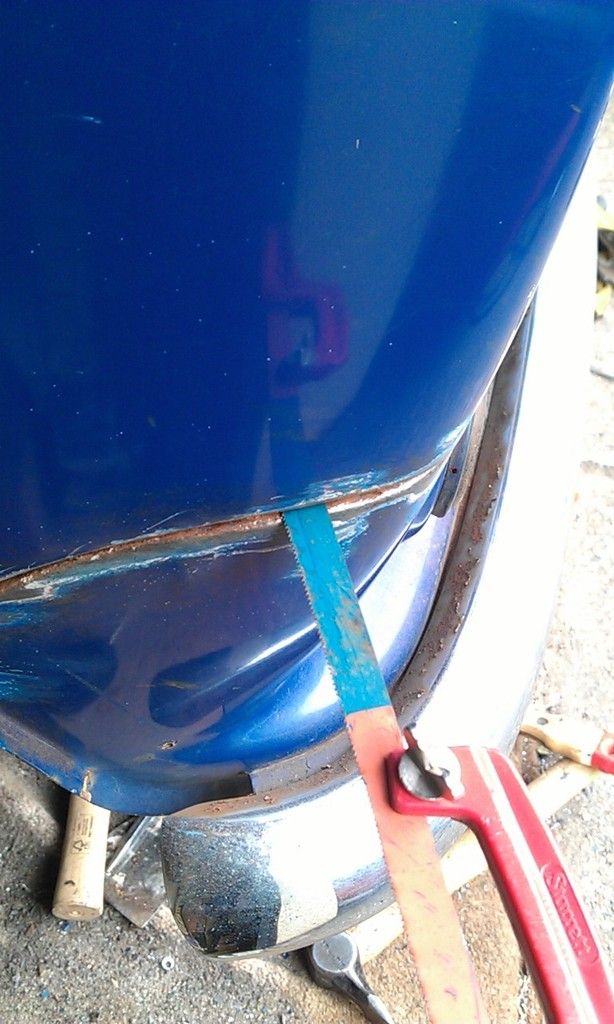
Anyway I tried using a paint scraper to get through the seam and it worked OK I then used a Hacksaw Blade as suggested on here and it did the trick to a degree.


IMAG0276_zpssgqalrdp.jpg


It went off kilter a couple of times and was pretty hard going but I got there in the end.


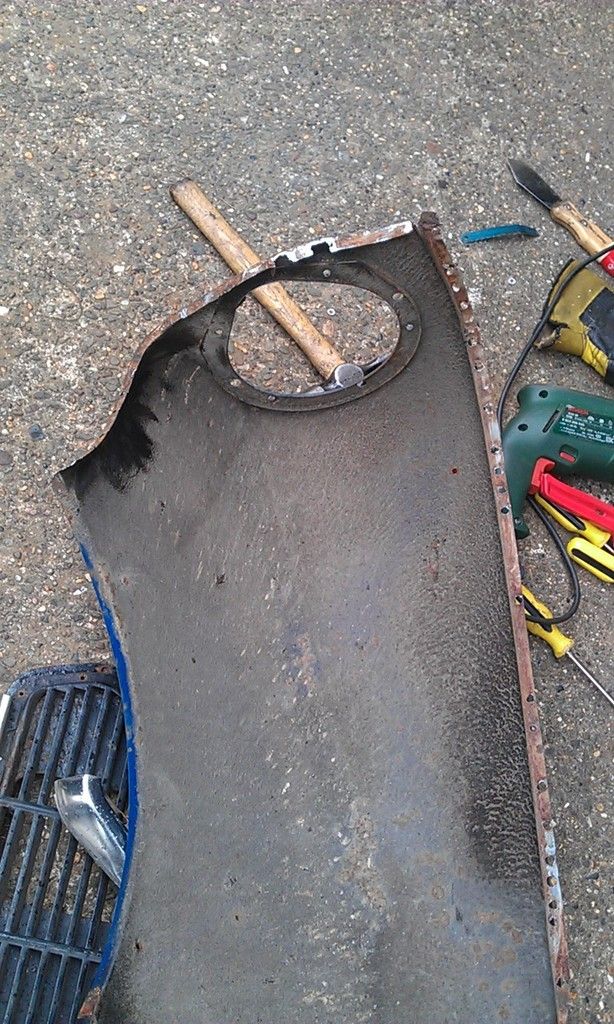
I had a bit of trouble with the slug of weld where the wing is joined to the face (top RH corner) but managed to get the wing off.


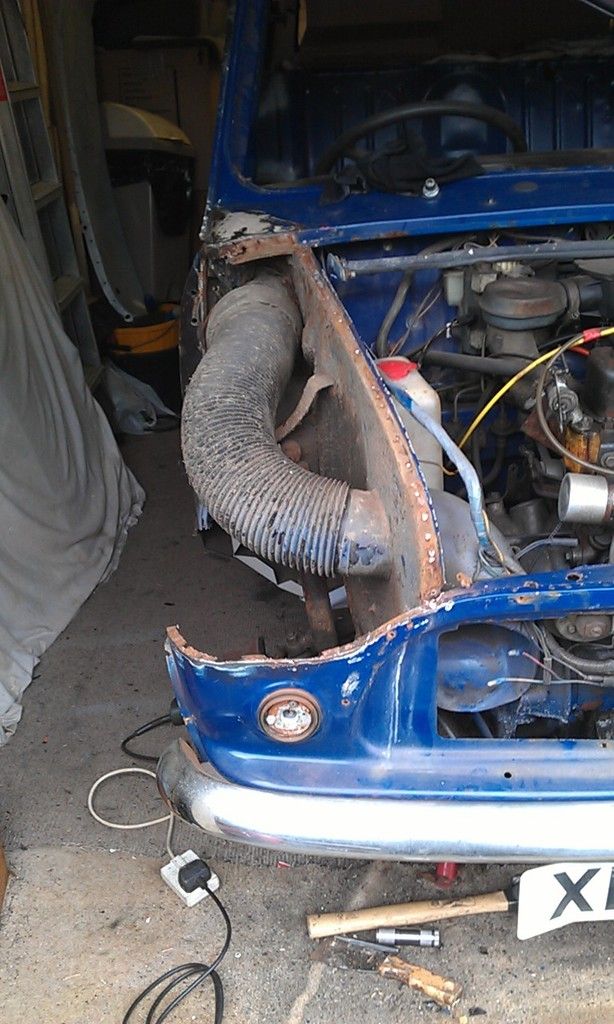
On inspection of the wing and the face that was left it came off without to much damage, i'll have to repair both in a couple of places but all relatively easy, but then I had a look around the Scuttle ................................


#204 JonnyAlpha

JonnyAlpha

    Up Into Fourth

  • Members
  • PipPipPipPipPipPipPipPipPip
  • 2,748 posts
  • Location: North Devon
  • Local Club: Exmoor Minis

Posted 25 April 2015 - 06:31 PM

As you can see I managed to drill a bit of some of the spot welds out:
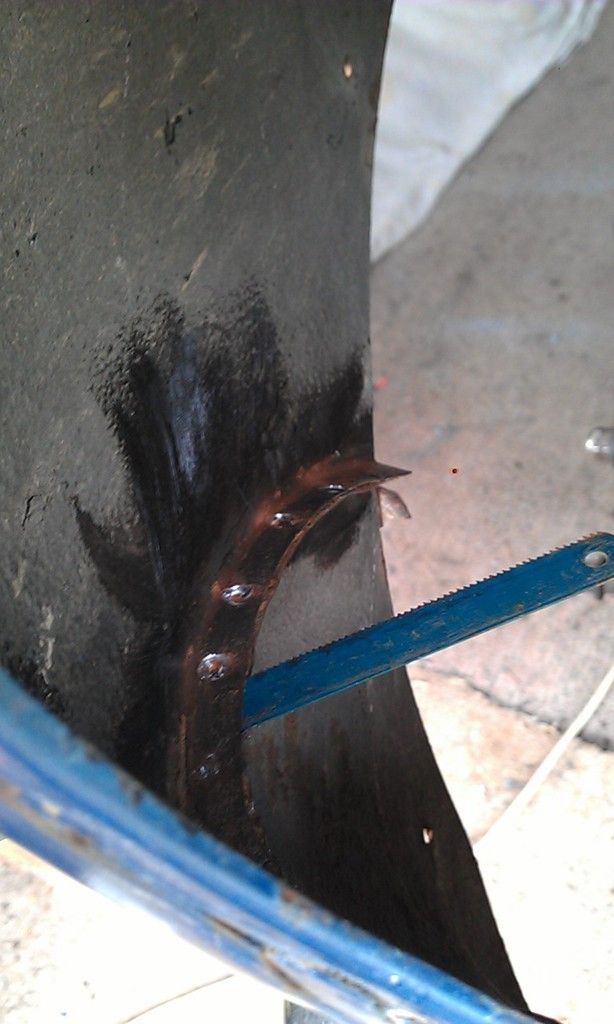
 

IMAG0277_zpsd7huv5qo.jpg


Looking very sad for itself now :-(


IMAG0278_zpsvs7wmhtw.jpg


Inner wing is OK here:


IMAG0279_zps5nhr0lqc.jpg


This flange will need repairing:


IMAG0280_zpsshq6aaei.jpg


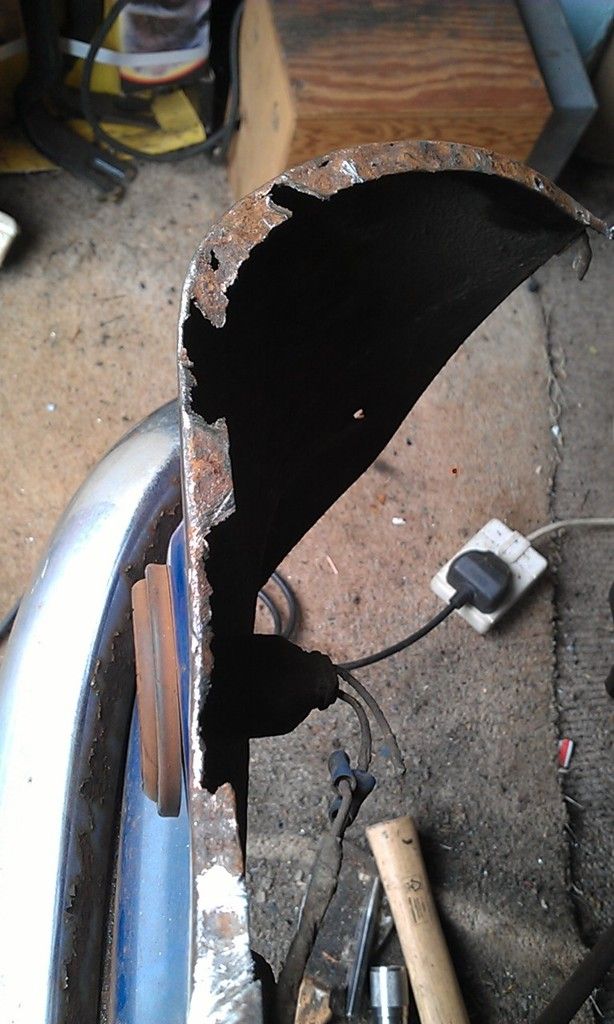
The wing is not that bad:


IMAG0281_zps0vplbsyn.jpg


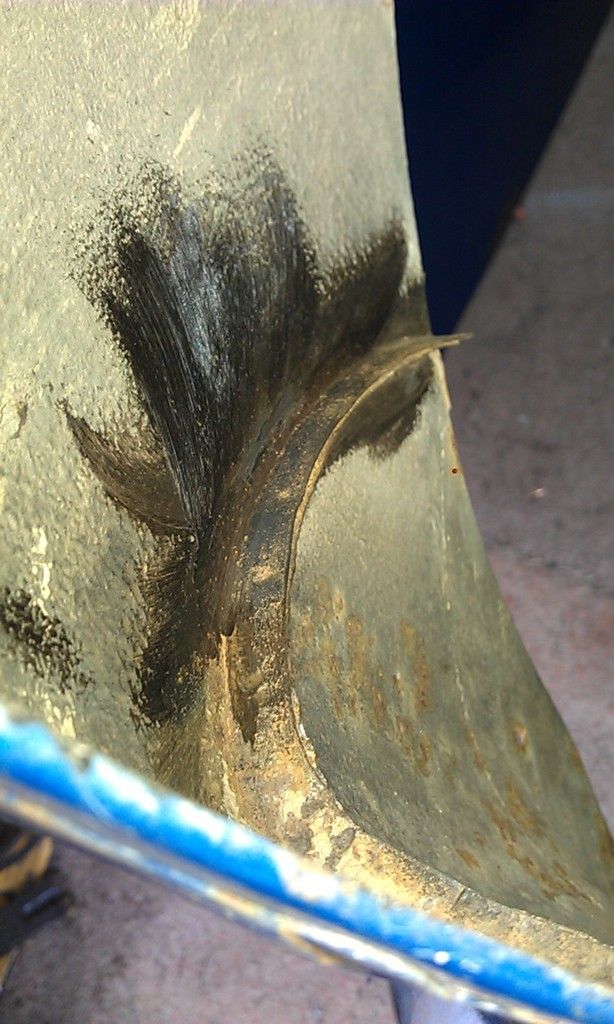
The flange on the wing will need repairing in a couple of places but the only real bad spot was under the Headlight:
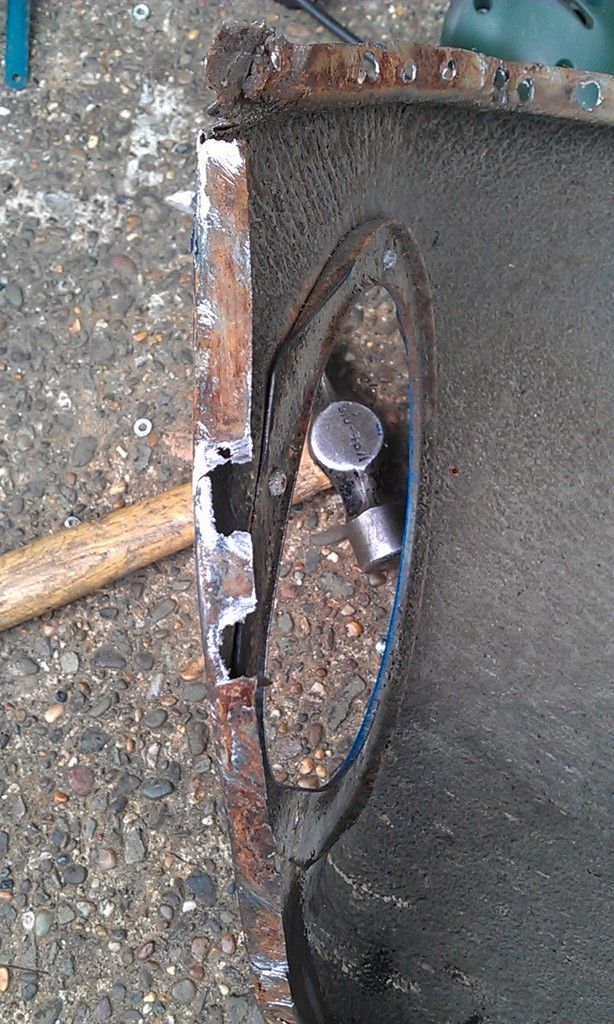
 

IMAG0283_zps9xbaevrh.jpg


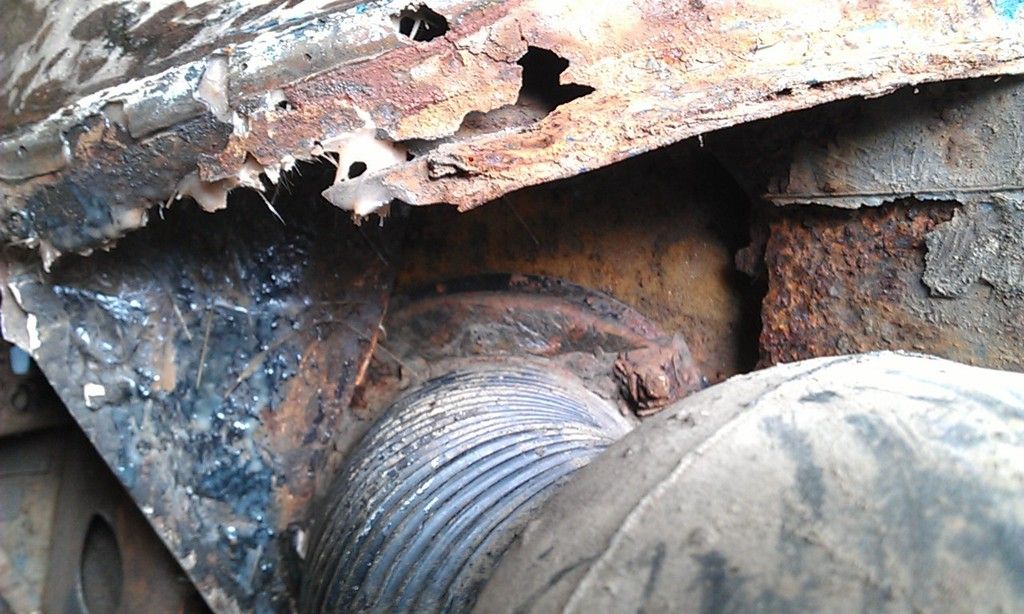
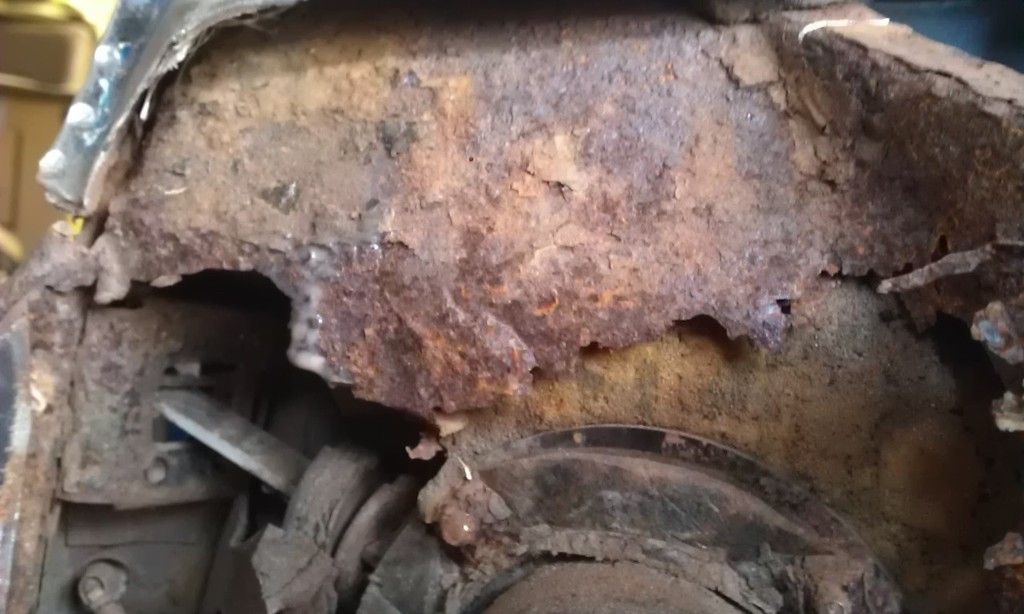
Then a view under the Scuttle :-(


IMAG0284_zpsztvfkzic.jpg

A lot of rot in the Inner Wing where it meets the Bulk Head:
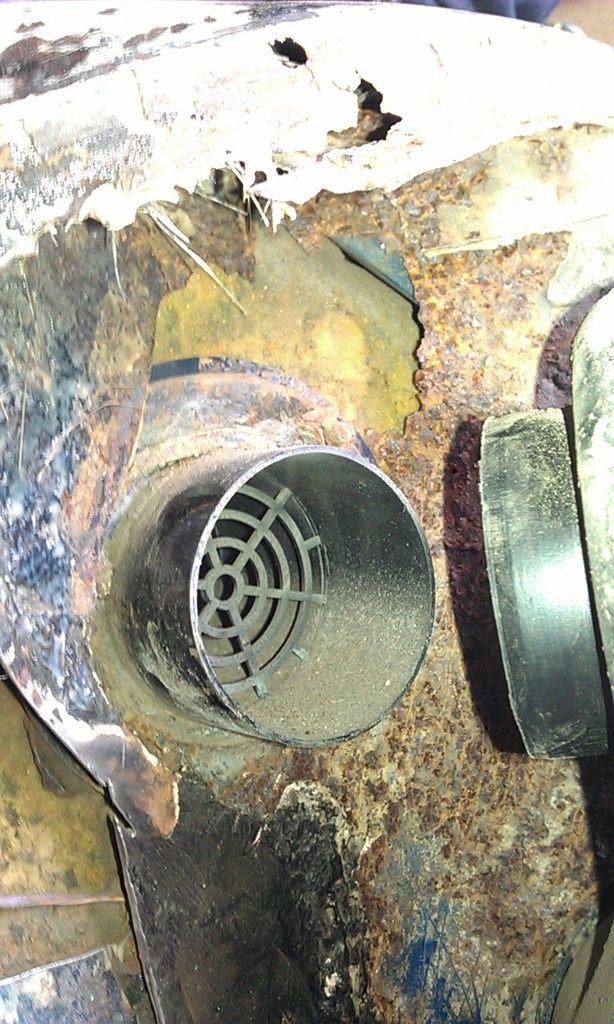
 

IMAG0286_zpshixyzkhr.jpg


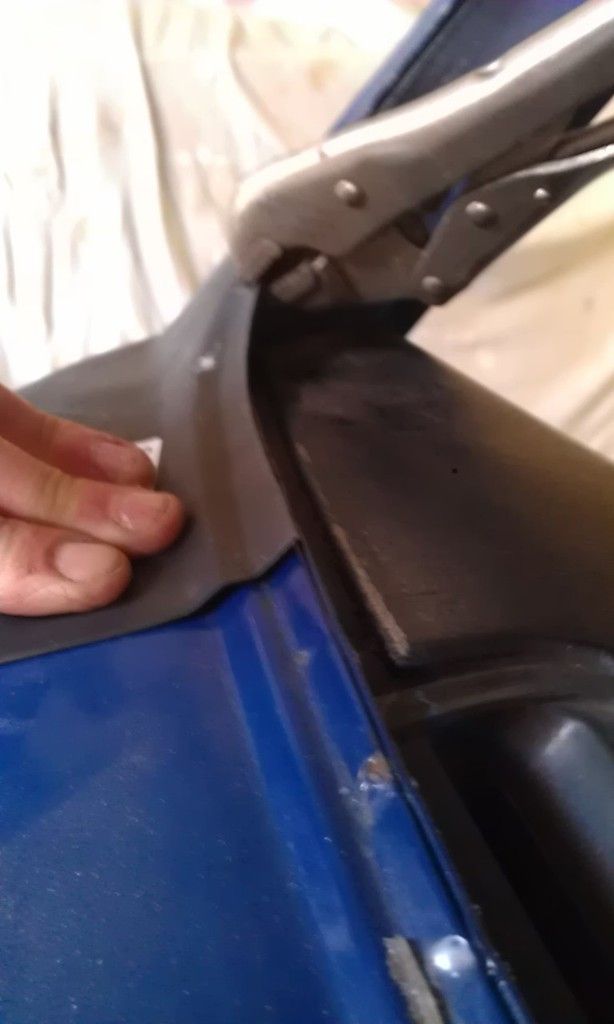
I then placed the Scuttle Repair over the area to be removed to check the fit, not too good at all, it will need a lot of fettling and the outer flange is way bigger, Nasty kink in the corner too:
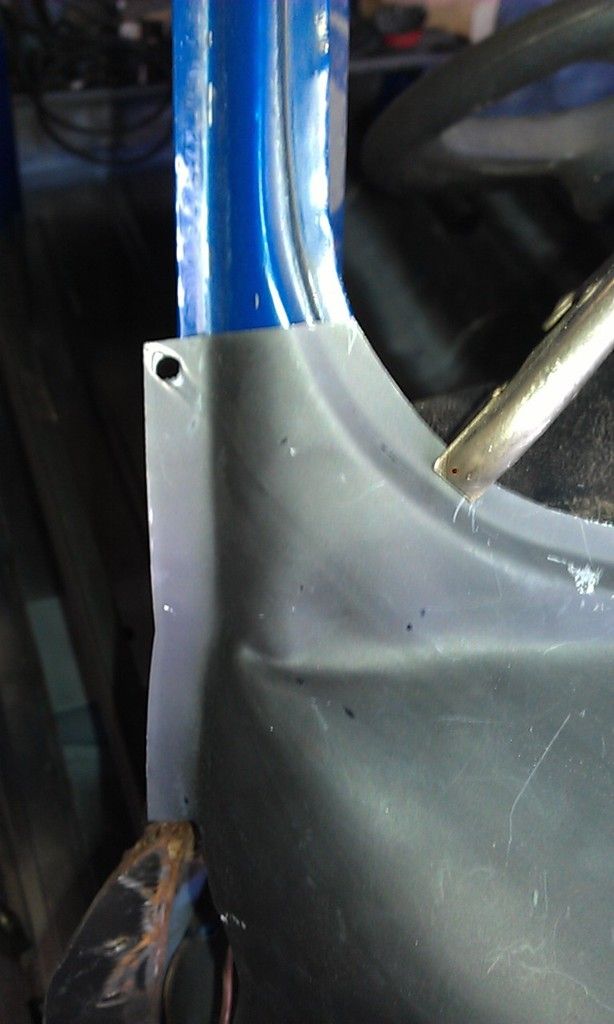
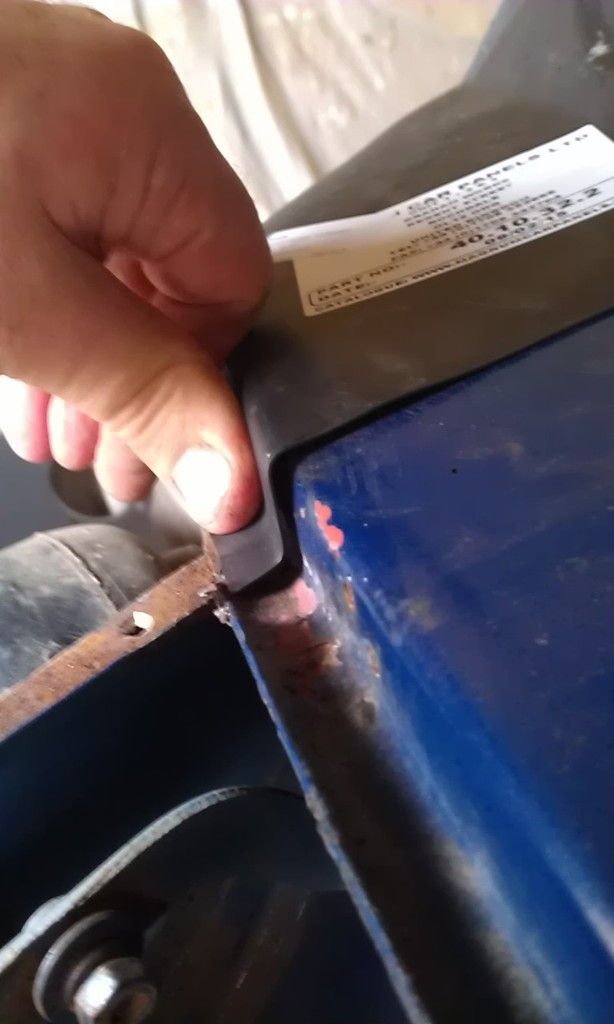
 

IMAG0290_zpsd7psc8bt.jpg


IMAG0292_zpsem5bcbd6.jpg


IMAG0293_zpsbxayjdp3.jpg


The bends just aren't as sharp.


I marked the outline of the Scuttle Repair and then cut most of it out, what was underneath was a bit of a shock to be honest :-(
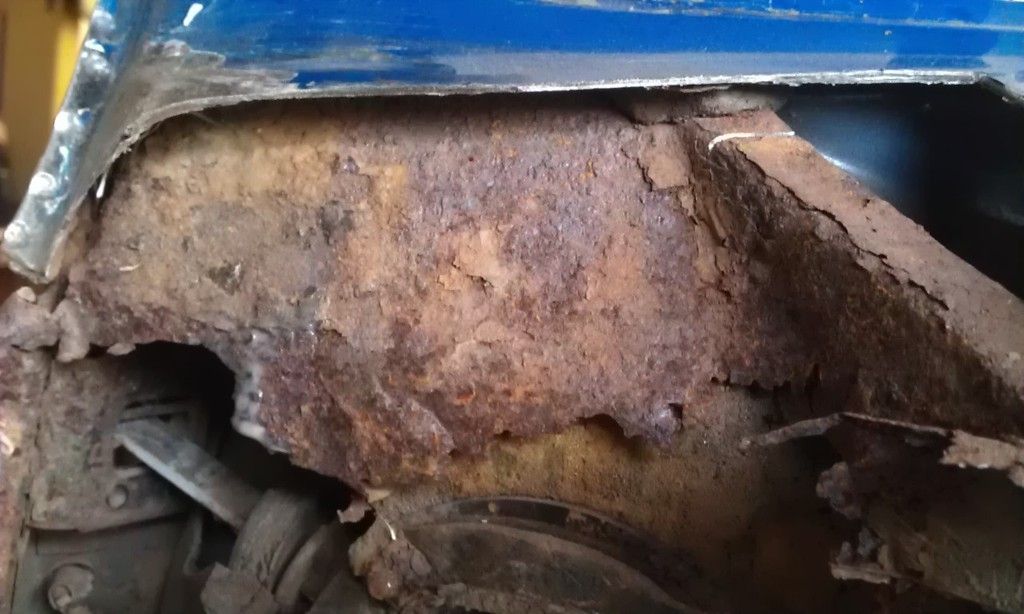
 

IMAG0295_zpsyy7sxuqg.jpg


Then I located the spot welds along the window ledge and hole punched then and made an impression with a 6mm drill.
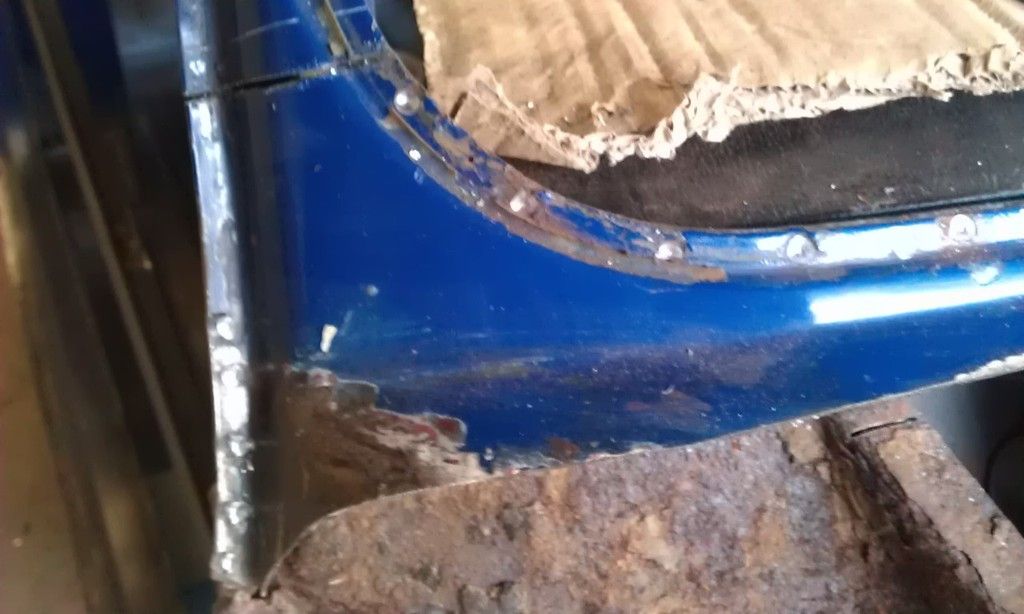
 

IMAG0296_zps4iozk9ny.jpg

Then I drilled out the spot welds with an 8mm spot weld drill bit and split the seam with a screwdriver and off it came:
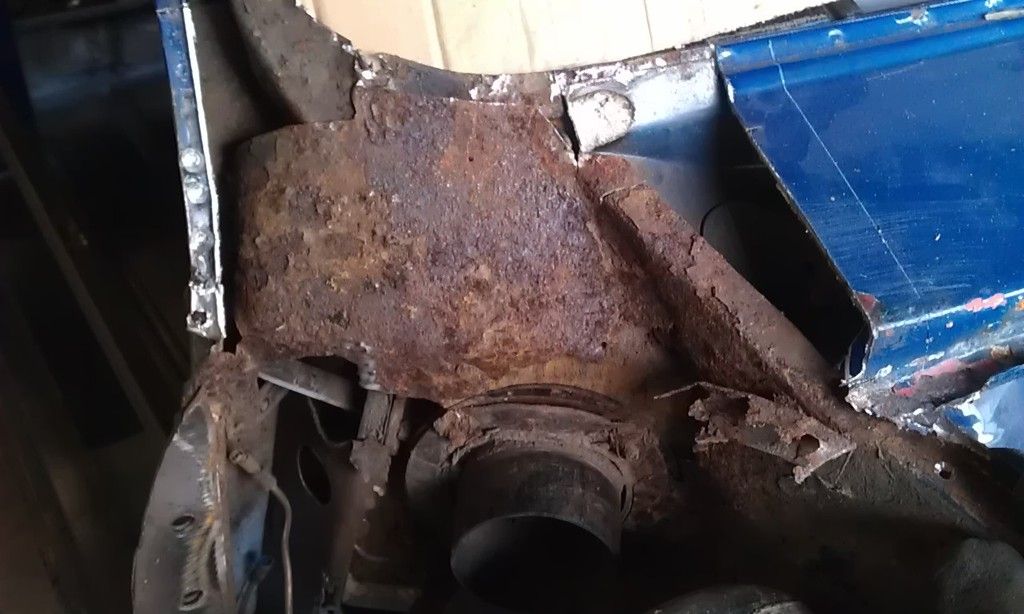
 

IMAG0297_zpsb1r68fmw.jpg

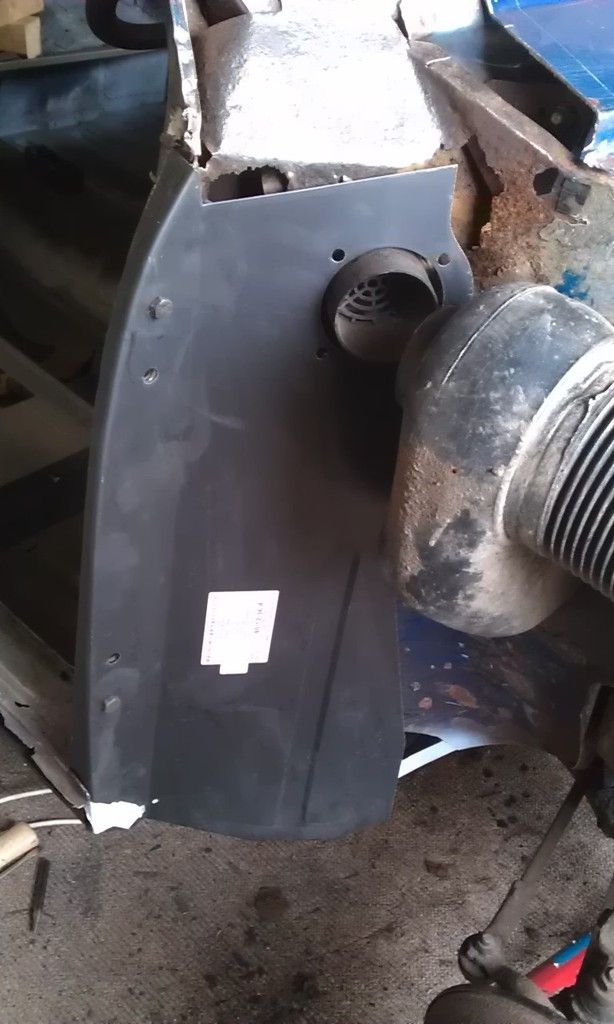
I was getting a little depressed seeing all the rot and repair needed so I cleaned up the upper area and slapped on the Flitch Panel:
 

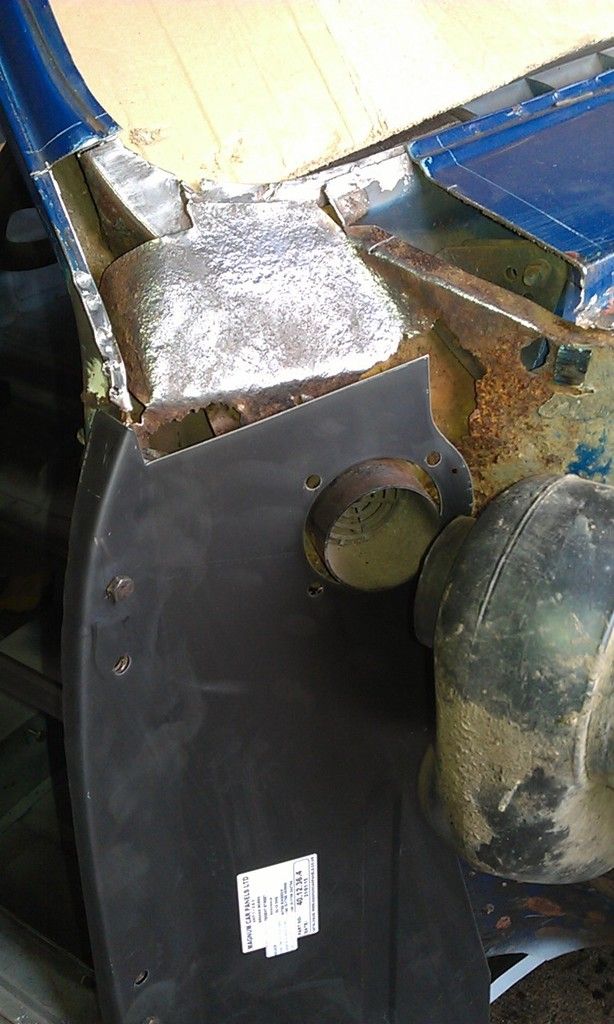
IMAG0298_zpsnifyfma2.jpg


There that's better :-)


I take it the shiny area is part of the Inner Wing and I need to cut out all the rot and make a filler piece to meet up with the Flitch Repair Panel?


How do I remove the large plastic container that sits between the two flexi pipes? It goes into the engine bay?


Also the door step has had a pretty dodgy repair and I had to make a small cut to slot the Flitch in place, how should this area mate up and look?


Edited by JonnyAlpha, 25 April 2015 - 06:41 PM.


#205 JonnyAlpha

JonnyAlpha

    Up Into Fourth

  • Members
  • PipPipPipPipPipPipPipPipPip
  • 2,748 posts
  • Location: North Devon
  • Local Club: Exmoor Minis

Posted 25 April 2015 - 06:37 PM

In this pic you can see how the Inner Wing has rotted away, you can also just make out the top two bolts with what looks like remnants of the original Inner Wing. Are these bolts supposed to go through the four holes in the Flitch Repair Panel as shown in the second pic underneath?


IMAG0294_zpstpn37eoh.jpg

Another question - is the Scuttle Butt welded at the inner edge or joddled and seam welded?


IMAG0301_zpso7vw1t4y.jpg


Also here are my Headlights, nothing like the ones shown in my Haynes Manual (which is for the correct vehicle - I think).


IMAG0304_zps0iagqjqu.jpg


#206 JonnyAlpha

JonnyAlpha

    Up Into Fourth

  • Members
  • PipPipPipPipPipPipPipPipPip
  • 2,748 posts
  • Location: North Devon
  • Local Club: Exmoor Minis

Posted 25 April 2015 - 06:42 PM

Here's hoping the LH side isn't as bad but I doubt i'll be that lucky :-)


#207 evansisgreat

evansisgreat

    One Carb Or Two?

  • TMF+ Member
  • PipPipPipPipPipPipPip
  • 1,096 posts
  • Local Club: Not yet

Posted 25 April 2015 - 07:32 PM

 
I take it the shiny area is part of the Inner Wing and I need to cut out all the rot and make a filler piece to meet up with the Flitch Repair Panel?
 
How do I remove the large plastic container that sits between the two flexi pipes? It goes into the engine bay?
 
Also the door step has had a pretty dodgy repair and I had to make a small cut to slot the Flitch in place, how should this area mate up and look?


The shiney, or primered bit will need a little filler piece yes, you might also need one at the top where the flitch repair panel meets the bulkhead under the scuttle.

The plastic bit under the wing is bolted (no doubt with nice duty ones) in the passenger compartment, next to the pedal box. Of feeds fresh air to your heater.

I won't answer question 3 as I haven't made this repair yet, sorry mate.

Edited by evansisgreat, 25 April 2015 - 07:36 PM.


#208 Stu.

Stu.

    One Carb Or Two?

  • Members
  • PipPipPipPipPipPipPip
  • 912 posts
  • Location: My workshop.

Posted 25 April 2015 - 08:28 PM

Hi Jonny, I think you'd be better to butt weld the repair joint so you can use some inter grips. Go really slow with the welding and dont let it overheat otherwise it'll distort.


Impressed with your careful removal of the wing. Very tidy.


The four holes in the flitch repair needs to be lined up with the existing air vent holes. Good luck with making that good. I think I'd just replace the inner wing, but I guess you could just as easilly patch repair.


I think I'll follow your project. Looks interesting.


#209 Minidarren83

Minidarren83

    One Carb Or Two?

  • Members
  • PipPipPipPipPipPipPip
  • 1,207 posts
  • Location: Stanford Le hope

Posted 26 April 2015 - 07:45 AM

Don't use any of the holes on that flitch repair to align it they won't meet up lol. Non gen ones are notorious for poor shape and holes in the wrong place and they don't have the top piece that meets the bulkhead under the scuttle so you will need to make that first

#210 JonnyAlpha

JonnyAlpha

    Up Into Fourth

  • Members
  • PipPipPipPipPipPipPipPipPip
  • 2,748 posts
  • Location: North Devon
  • Local Club: Exmoor Minis

Posted 27 April 2015 - 06:24 PM

Don't use any of the holes on that flitch repair to align it they won't meet up lol. Non gen ones are notorious for poor shape and holes in the wrong place and they don't have the top piece that meets the bulkhead under the scuttle so you will need to make that first

So what do I need to do, weld up the holes and drill some new ones?


2 user(s) are reading this topic

0 members, 2 guests, 0 anonymous users