Jump to content


Photo
- - - - -

97 Mpi Cooper Classic


  • Please log in to reply
21 replies to this topic

#1 MigliaMayhem

MigliaMayhem

    Mini Mad

  • Noobies
  • PipPipPipPip
  • 132 posts
  • Local Club: North East Mini Club

Posted 07 February 2011 - 10:43 PM

Here's the mini prior to work :

Posted Image

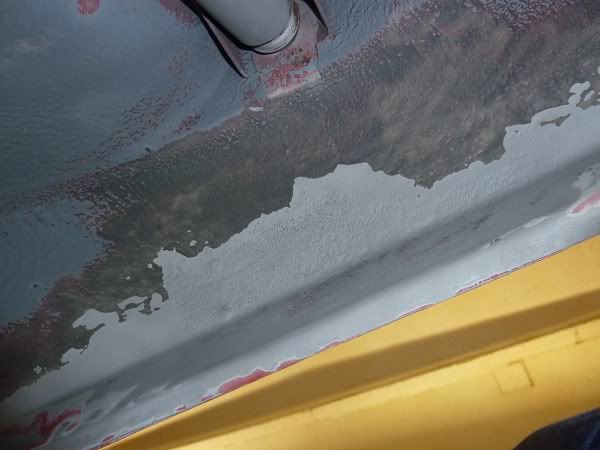
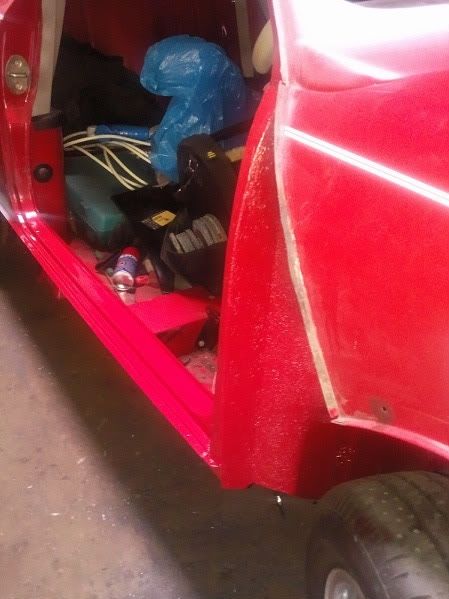
Having only covered 18k when I bought it in May this year, I was amazed to see how quick the sill lips had corroded away and shocked to see how little paint had been applied by Rover during its manufacture, every area that is unseen has no protection other than the primer, luckily due to lack of use and the fact it sat 95% of it's life garaged these areas were mint.

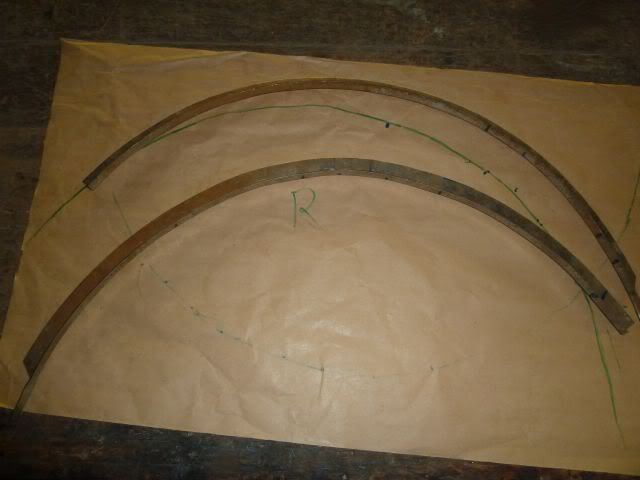
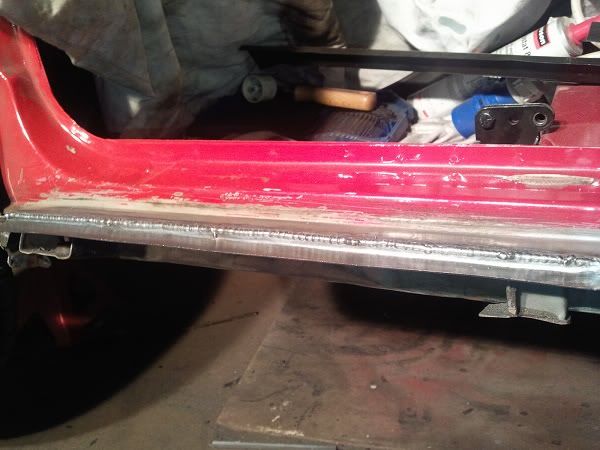
I decided to keep what original steel was possible and simply formed a couple of new lips and butt welded them on to the existing steps then linished off the welds and finished with solder prior to painting:

Posted Image

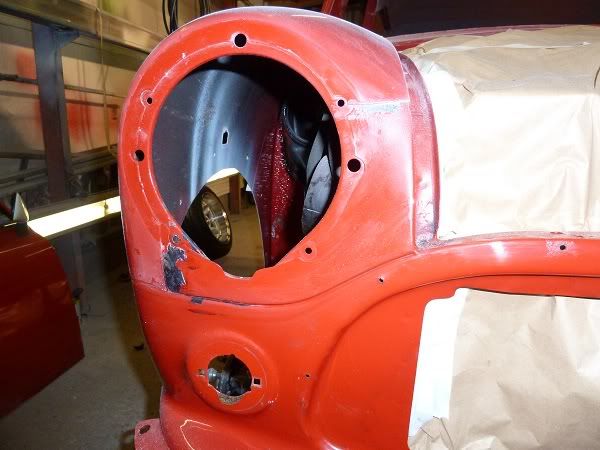
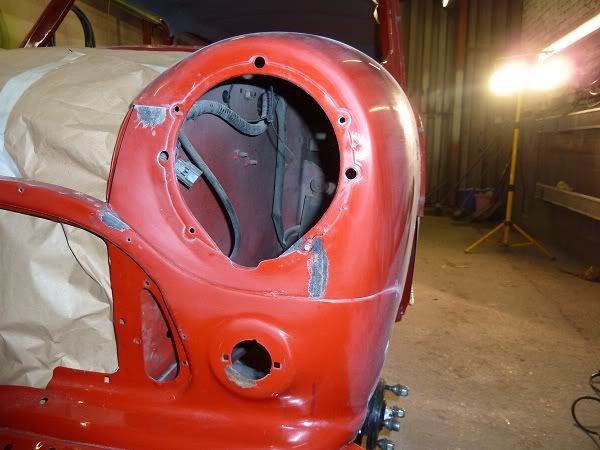
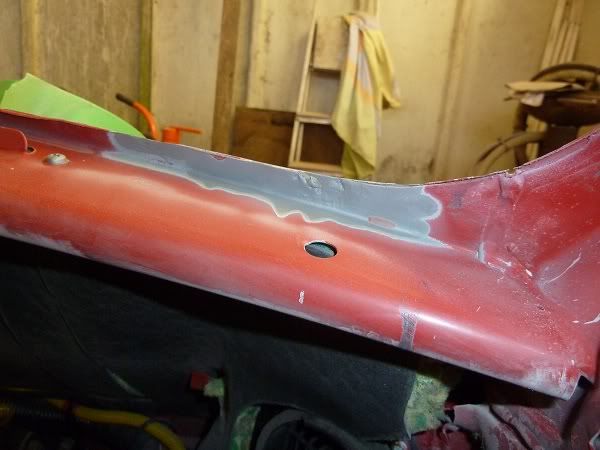
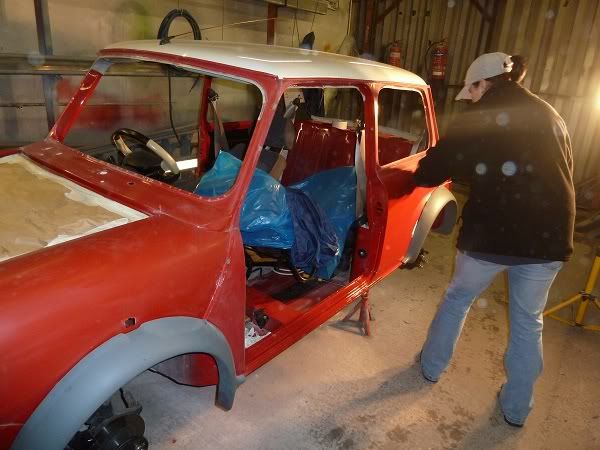
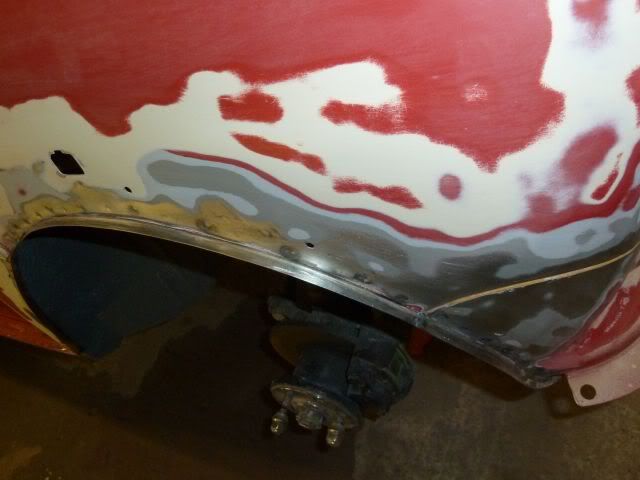
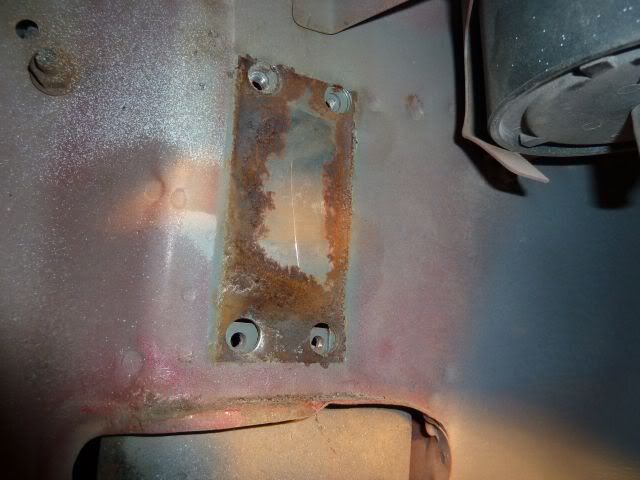
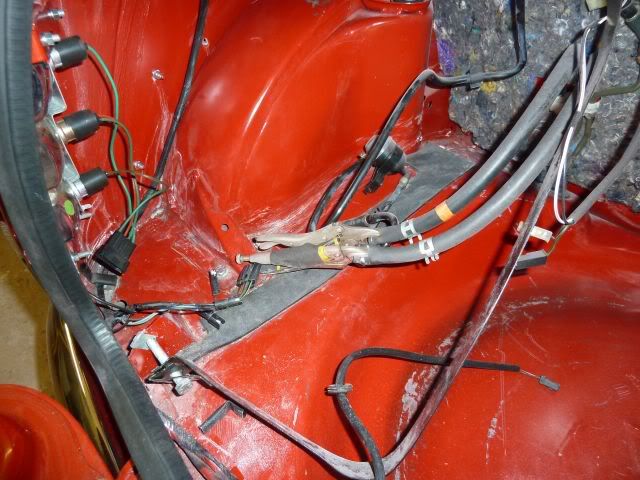
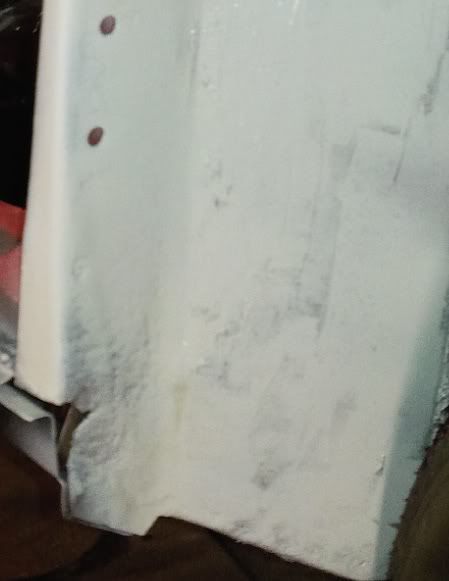
I had already sourced two genuine Rover A panels as the originals were just starting to bubble so these were removed to allow easy access to the inner door post area, common issue as we all know when the A panels start showing signs of rust.

Posted Image

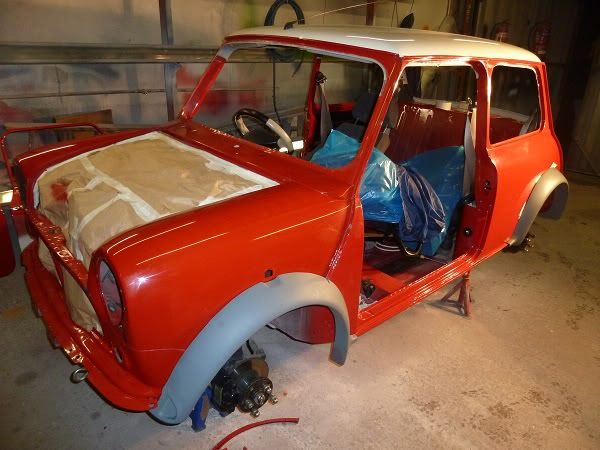
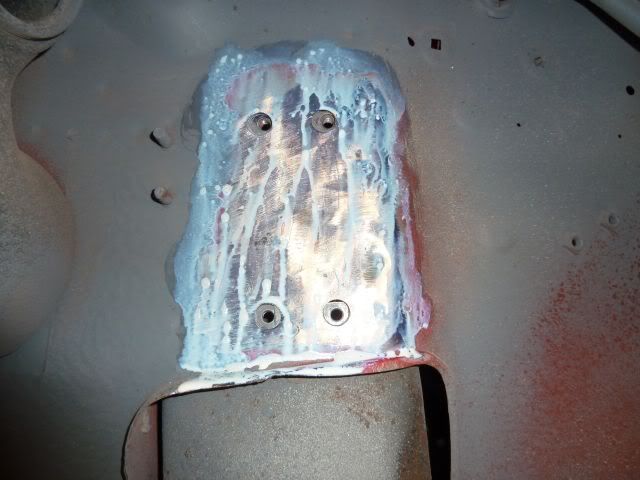
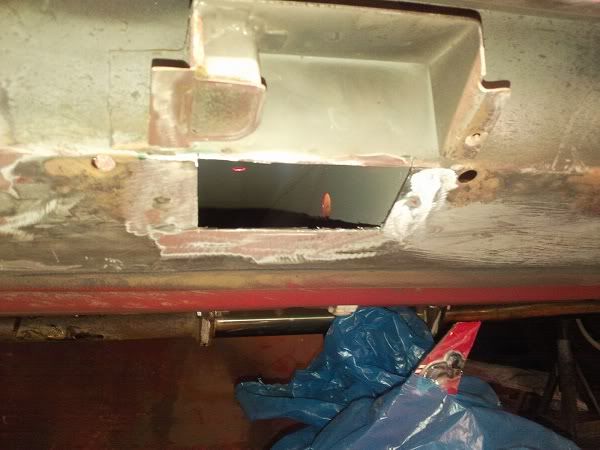
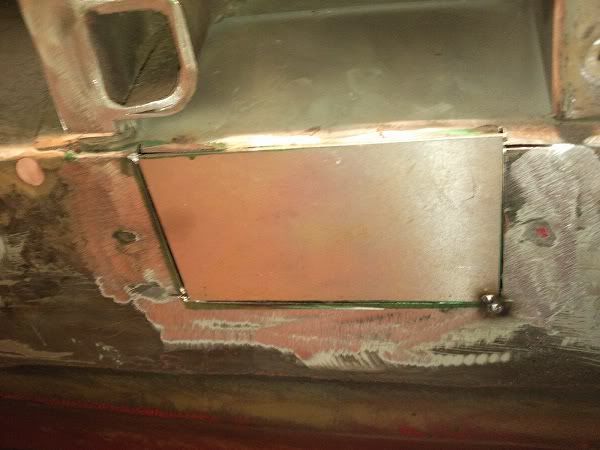
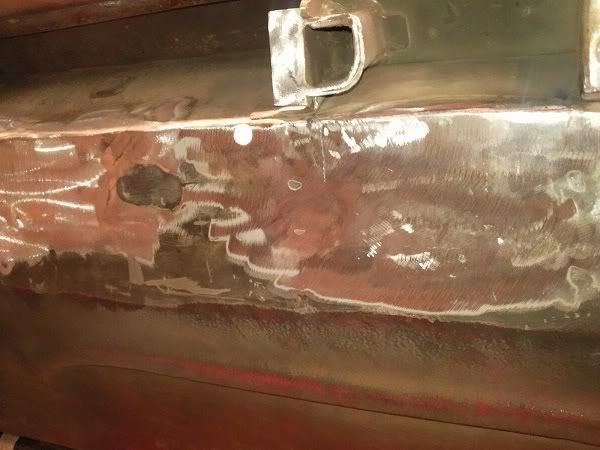
So here is the job done, any corrosion was cut well back and new steel butt welded in prior to dressing off.

Posted Image

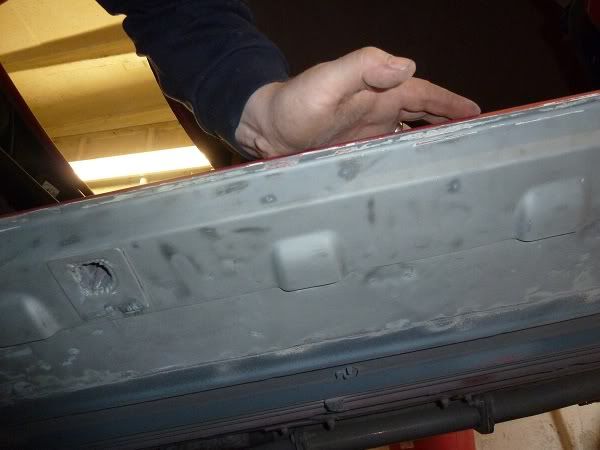
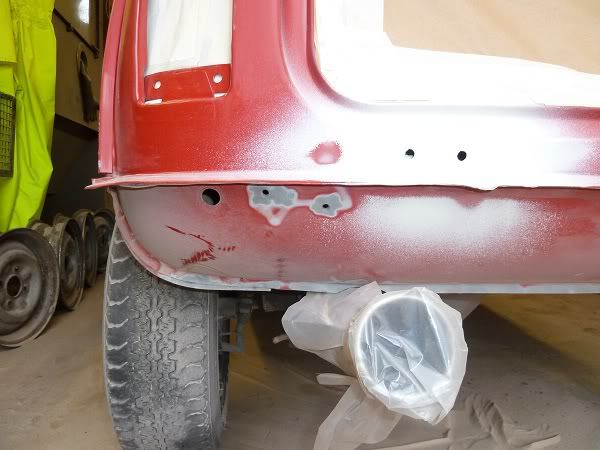
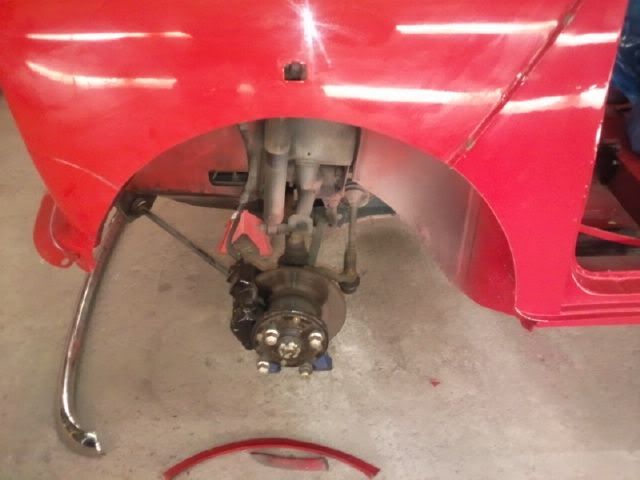
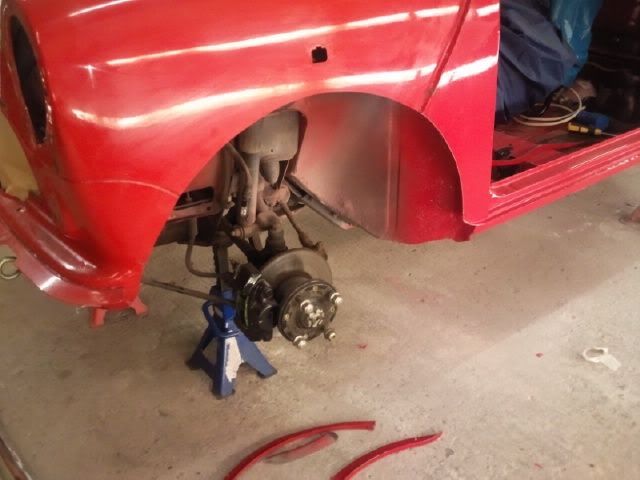
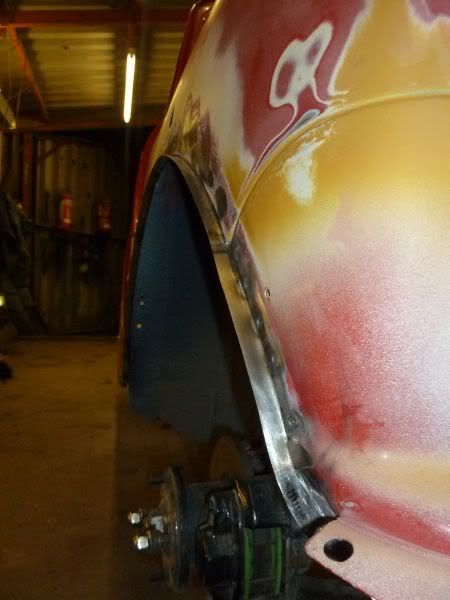
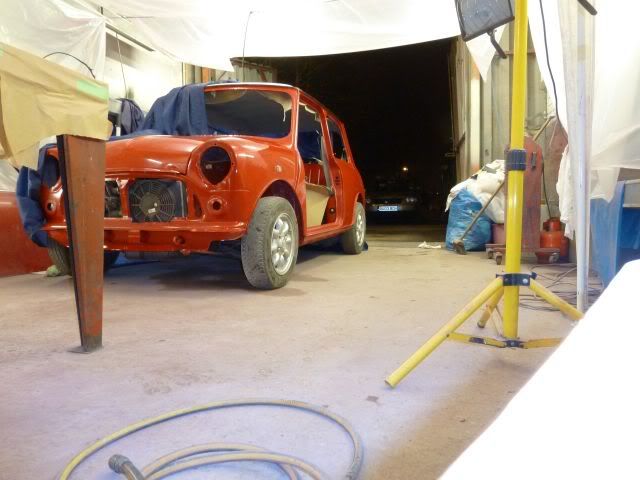
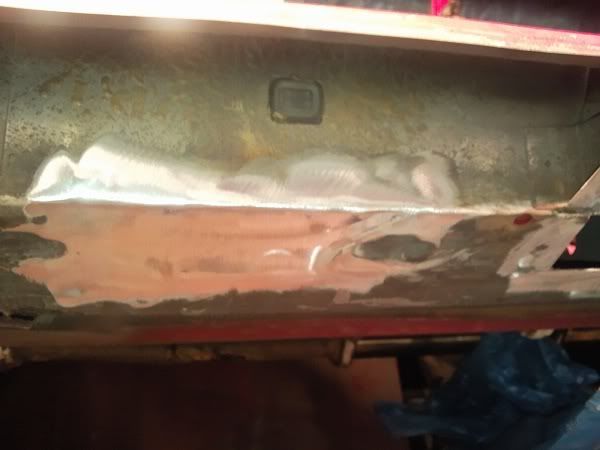
The outer sills were also removed as the lips had gone and having repaired a few in the past suspected that tin worm may well be harbouring under the sill on the floor:

Posted Image

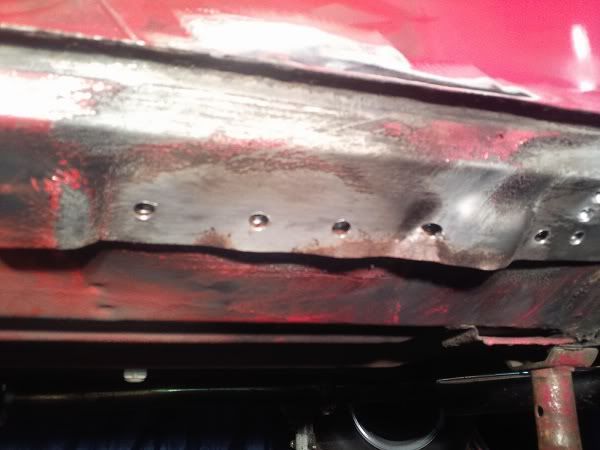
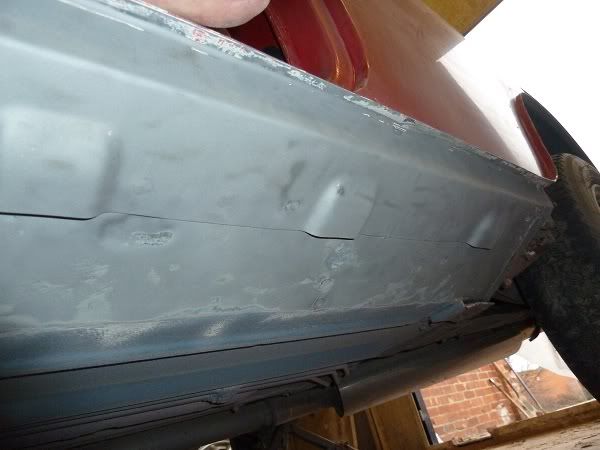
As expected there was a small amount of corrosion under there, two small sections of the floor had to be cut out of both sides and sorted prior to fitting a pair of genuine rover sills:

Posted Image
Posted Image

Rust gone

Posted Image
Posted Image
Posted Image

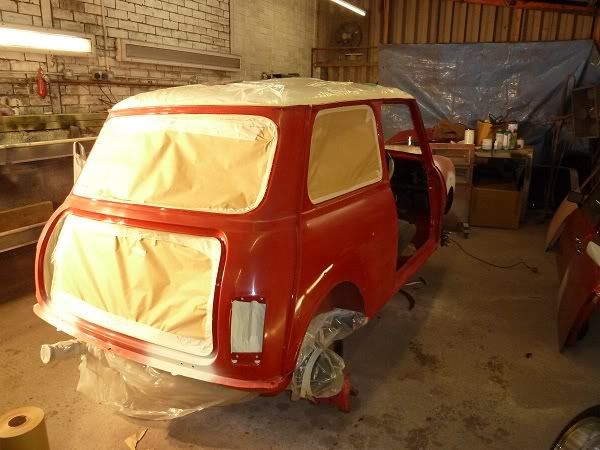
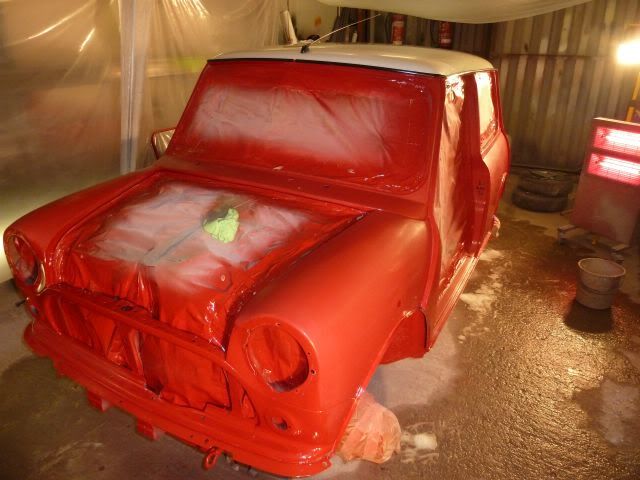
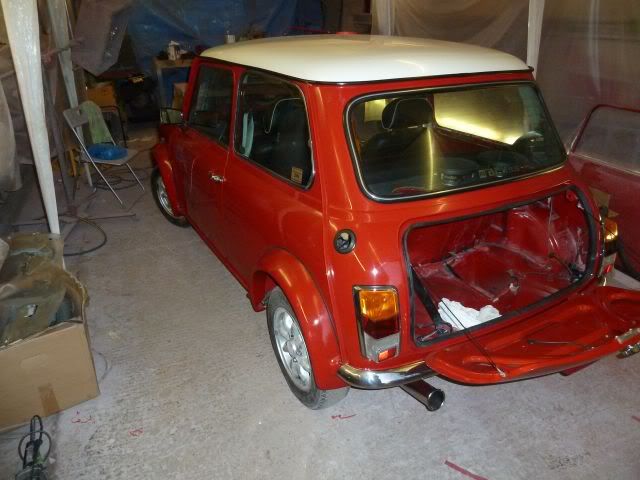
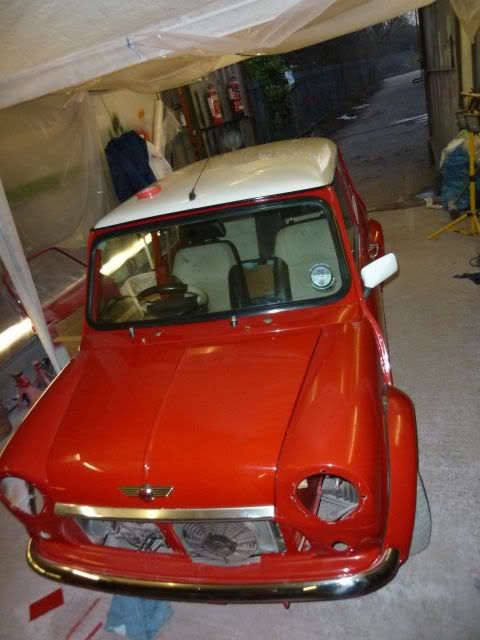
I decided to uses a spot welder along the seams to retain it's original look then gave it a coat of base coat followed by a few coats of laquer, this ended in tears though after applying the paint I decided to go for some lunch, when I returned I found someone had been in to turn the compressor off and never shut the door properly.

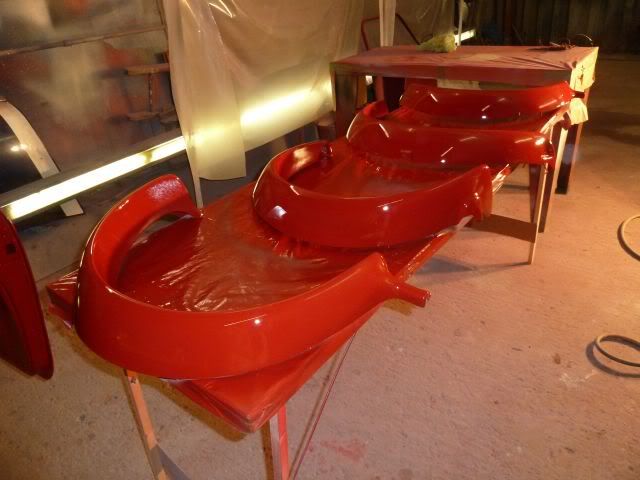
Here it is prior to popping out for some munchies:
Posted Image

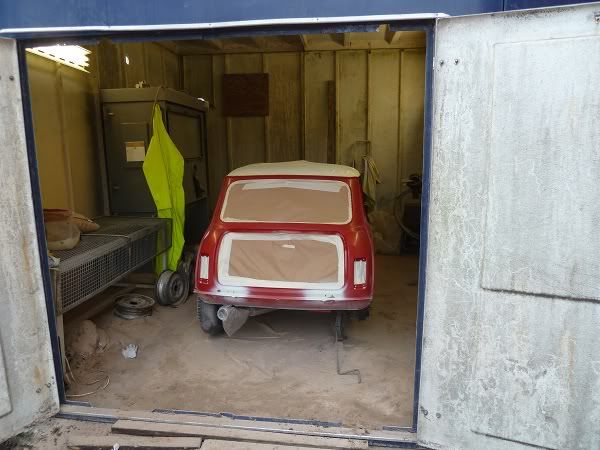
And when I returned:
Posted Image

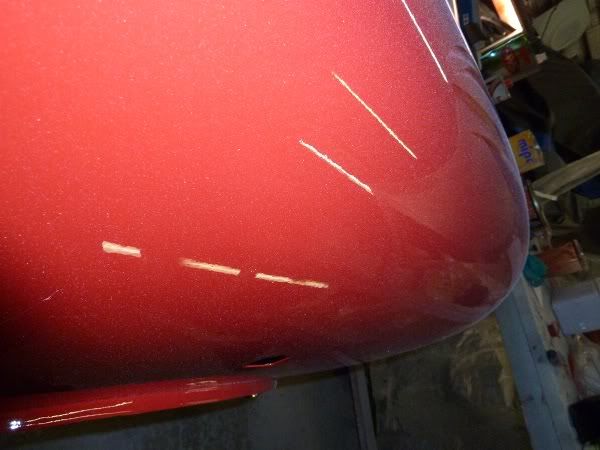
There was all kinds of crap stuck to the laquer, most has been flattened off and polished back but I'm far from happy with it, the car is now back in the shop awaiting me to complete it.

Over the winter I've been collecting parts, my plan is to try and complete it over the next four weeks (hopefully).

Heres a list of the crap I've been getting:

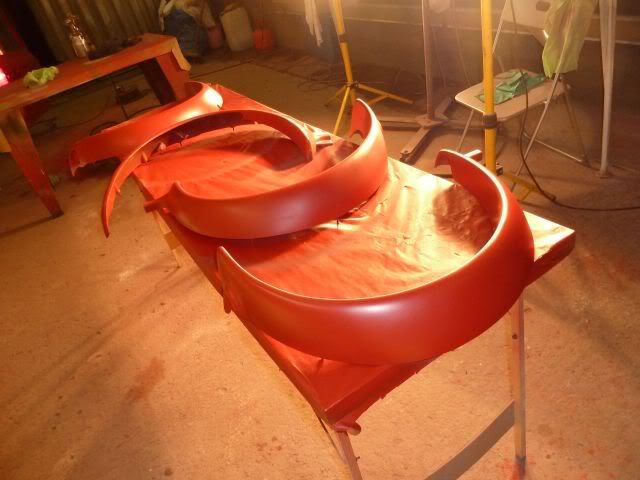
Genuine new Rover sportspack arches and trim
Genuine Hi Lo's
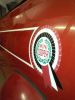
Rover le decals (sold originally as the motorsport decal kit by Rover)
Genuine Spotlights and 2 pair of covers
Burr walnut handles etc
Leather upper dash rail
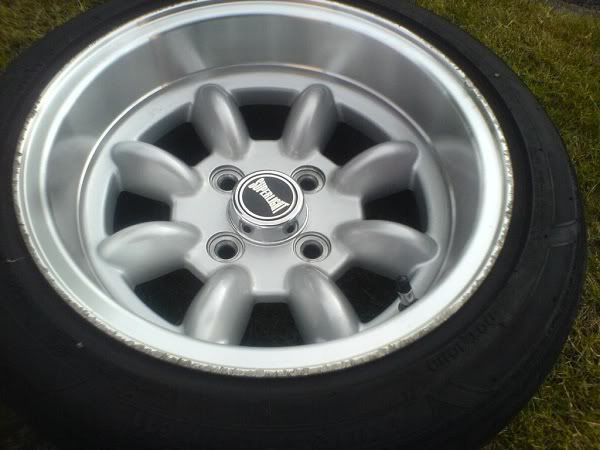
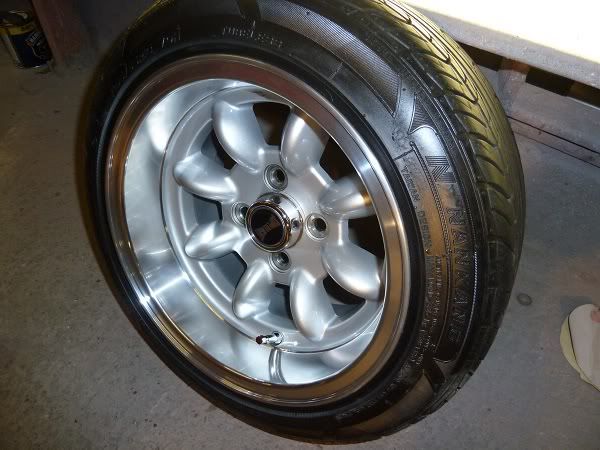
7x13 Supalights from Huddlesfield MS.
Pair of RS Turbo recaros (to be retrimmed in black leather with cream piping)

Looking for a spare MPI bonnet to de-lip as I plan to fit a a mk1 morris grille and some MPI alloy door furniture (JCG or genuine Rover).

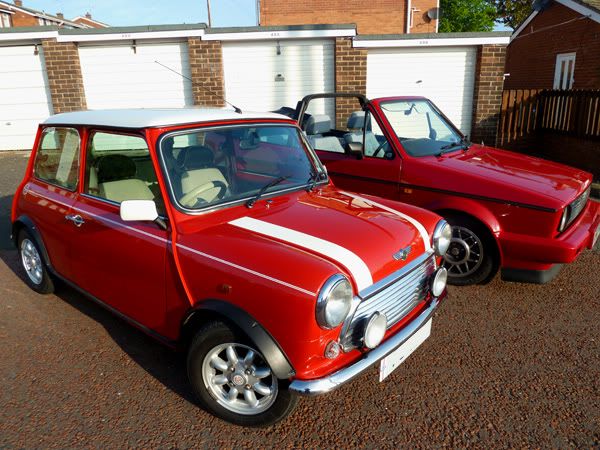
I do plan to keep everything I remove just incase I fancy reverting back to the classic look over time, it is currenty sitting on new 5x10" GB's and S discs (soon be for sale).

#2 Bean

Bean

    Queen of 'shoppin, Voted Miss TMF 2011

  • Members
  • PipPipPipPipPipPipPipPipPipPip
  • 8,054 posts
  • Name: Jean
  • Location: Malvern

Posted 08 February 2011 - 09:01 AM

Stunning Mini & loving the sound of the plans for it - Especially the interior!! >_<

Keep us updated! :angel:

:-

#3 bcjames

bcjames

    Up Into Fourth

  • Members
  • PipPipPipPipPipPipPipPipPip
  • 2,728 posts
  • Location: Leicestershire

Posted 08 February 2011 - 06:02 PM

Looks great! Good work, shame about the outcome with the paint. I have a '97 Cooper too, and its also fallen apart in places!

Looking forward to the updates.

#4 MigliaMayhem

MigliaMayhem

    Mini Mad

  • Noobies
  • PipPipPipPip
  • 132 posts
  • Local Club: North East Mini Club

Posted 13 February 2011 - 10:52 PM

Been busy the last week, the mini is now minus doors all glass, boot, bonnet, all the interior. Managed to get the front arches cut out and the holes drilled for the sportpack arches (no thanks to the minispares templates "would hate to have drilled the holes in accordance to these") removed my S discs and GB alloys (for sale soon) ready for the Alloy 4 pots and 7x13's.

Awaiting the sand blaster to remove the small amount of surface rust from around the headlamps and then it's prep time for the paint, overall the car is in near perfect condition and I'm only opting for a full paint due to the fact Rover forgot to paint behind any hinge etc and bare metal (no primer) needs covered, the dealer paint is also very thin in places so really needs doing properly, not original but I want the car to survive.

I will post pictures tomorrow, going to go and purchase the paint I need (last batch was wrong as my paint code read RCQ and the supplier informed me that this was a dual code used on the multi coloured cars and that the code I required was COF (BLVC818 Flame Red). I have since found out that the code is actually CPQ (BLVC1000 flame red) used on the later Coopers. :thumbsup:

#5 MigliaMayhem

MigliaMayhem

    Mini Mad

  • Noobies
  • PipPipPipPip
  • 132 posts
  • Local Club: North East Mini Club

Posted 22 February 2011 - 09:49 PM

Progress pics as I've taken a weeks holiday from graft to get my teeth into it, spent the day in the dirty works area sandblasting the dreaded tuin worm off (bonus as it was all surface):

Before:
Posted Image
Posted Image

After:
Posted Image
Posted Image

Whilst I was on I was unhappy with the finish on the sills I put on sio got rid of the sealer and stonchip ready for a better coat:
Posted Image
Posted Image

Inner rear O/S arch:
Posted Image

Scuttle (caught this MPI just in time) 17k from new just proves how shocking the Rover build quality was.
Posted Image

Some general photo's of the progress "managed to get the wife involved" :-
Posted Image
Posted Image
Posted Image
Posted Image
Posted Image
Posted Image

Bought these the other month and to say they had been scraped along a curb was an understatement, after a couple hours with some nitromours a file, wet and dry and some autosol, I was impressed with the results:

Before:
Posted Image

After:
Posted Image

I left the rims polished and wont be putting on any laquer as the car will not be an everday runner, So far tghe only panels to have been replaced were the two outer sills including both lips on the upper door step and A panels, the rest has been pretty much salvage work to halt any further corrosion.

#6 sonikk4

sonikk4

    Twisted Paint Polisher!!!

  • Admin
  • PipPipPipPipPipPipPipPipPipPipPip
  • 16,033 posts
  • Name: Neil
  • Location: Oxfordshire

Posted 22 February 2011 - 09:55 PM

Nice looking car, to be honest with you though you may find that rust on the wings and scuttle coming back to haunt you. Once the rust is in between the seams it will soon work its way out.

I hope it does not for you as the car will look the dogs danglies when its done.

#7 wardyxxx

wardyxxx

    One Carb Or Two?

  • Members
  • PipPipPipPipPipPipPip
  • 1,327 posts
  • Local Club: Leicester Mini Club

Posted 22 February 2011 - 10:02 PM

Nice looking car, to be honest with you though you may find that rust on the wings and scuttle coming back to haunt you. Once the rust is in between the seams it will soon work its way out.


+1 You must must must nip any rust on a later shell in the bud ASAP.

#8 MigliaMayhem

MigliaMayhem

    Mini Mad

  • Noobies
  • PipPipPipPip
  • 132 posts
  • Local Club: North East Mini Club

Posted 22 February 2011 - 10:04 PM

Nice looking car, to be honest with you though you may find that rust on the wings and scuttle coming back to haunt you. Once the rust is in between the seams it will soon work its way out.

I hope it does not for you as the car will look the dogs danglies when its done.


I worked the sand right into the seams both front and rear then treat with anti rust treatment (all I can do is try and retard the rust) as we all know regardless of mileage the corrosion had got into these MPI's whilst sitting around in the midlands awaiting dealerships , Rover should have been shot for applying seam sealer to bare metal during production. Scary to remove a boot hinge and find bare steel with no protection at all.

#9 thesidewalk

thesidewalk

    Stage One Kit Fitted

  • Noobies
  • PipPipPip
  • 52 posts
  • Location: Slough
  • Local Club: TVMC

Posted 24 February 2011 - 01:28 PM

I wish I got to the rust on my SPI before it got as bad as it is, now she needs a full rebuild D:

She is looking great mate :gimme: well done for getting your wife involved, it took me two days of persuasion to get my girlfriend to help me with a service, she loved it XD

once again looking great :)

#10 rosco454

rosco454

    One Carb Or Two?

  • Members
  • PipPipPipPipPipPipPip
  • 908 posts

Posted 24 February 2011 - 08:50 PM

Thats a good find,looks really solid (well as solid as a mini gets >_< ).Look forward to seeing your progress.

Cheers Ross.

#11 JustSteve

JustSteve

    Puke-Boy!!

  • Members
  • PipPipPipPipPipPipPipPip
  • 1,883 posts
  • Location: Long Eaton, Nottingham

Posted 25 February 2011 - 01:55 PM

Looking good so far :thumbsup: Keep it up!

#12 MigliaMayhem

MigliaMayhem

    Mini Mad

  • Noobies
  • PipPipPipPip
  • 132 posts
  • Local Club: North East Mini Club

Posted 27 February 2011 - 09:43 PM

Been a little busy and fell behind slightly (Kids and Holidays springs to mind) anyways I have 4 days to get some paint on before my time is up in the workshop:

Cut out the arches to tuck my 13s under, the jigsaw made light work of the job:

Posted Image
Posted Image

Looked OK but I was unhappy with the flex in the wing so using this:

Posted Image

I made these:

Posted Image

Then using a spot welder got them firmly in place:

Posted Image
Posted Image

After a quick flatten off I was more than happy with the result:

Posted Image
Posted Image

Whilst I was down amongst the arches I took the time to remove the front shock mounts, knowing that the are behind them is prone to rot:

No paint at all / not even primer:
Posted Image

Just caught them in time, so blasted the surface rust out, linished the steel back and treat:
Posted Image

Been quite lucky really as another couple of year on the road and it would have had a hold of yet another MPI.

Tomorrow I plan to get some base coat and laquer in the wheel arches etc, then prep the sportspack arches and doors etc ready for the full monty on Tuesday... All going well..

#13 MigliaMayhem

MigliaMayhem

    Mini Mad

  • Noobies
  • PipPipPipPip
  • 132 posts
  • Local Club: North East Mini Club

Posted 07 March 2011 - 09:46 PM

Made some more progress, hard to fit family and work around the car at present.

Mini and Arches in Base:

Posted Image
Posted Image

Laquer applied:

Posted Image
Posted Image
Posted Image

Where I'm at now:

Posted Image
Posted Image

So I have another door to paint, decals to apply and wheels to fit then it's just a case of fitting up at my leisure, forgot to post a pic of the boot behind the fuel tank as this is the 1st ever mini I have owned that has zero corrosion in the boot :w00t:

Posted Image

#14 Shifty

Shifty

    Sponsored by Fosters (tm)

  • Admin
  • PipPipPipPipPipPipPipPipPipPipPip
  • 13,138 posts
  • Name: Sean
  • Location: Shropshire(sunny)
  • Local Club: TMF

Posted 07 March 2011 - 09:48 PM

Nice job, a solid colour in base and laquer always gives a really deep shine.

#15 MigliaMayhem

MigliaMayhem

    Mini Mad

  • Noobies
  • PipPipPipPip
  • 132 posts
  • Local Club: North East Mini Club

Posted 07 March 2011 - 10:12 PM

1st time I've ever used Base, from the age of celly and 2k, I was suprised to find that a 97 cooper was actually base and laquer from the factory, my last mini was sold just after the 1999 40th birthday (great day and had the man himself hand sign my bonnet stripes) sadly he left us a year later. I've longed for another but starting a family and the purchase of a house put my relationship with minis on hold..

Glad im back in the mix :w00t:


1 user(s) are reading this topic

0 members, 1 guests, 0 anonymous users