Jump to content


Photo
- - - - -

My T4 Mini....my First Ever Build!


  • Please log in to reply
76 replies to this topic

#16 RED HOT

RED HOT

    Fantasy F1 Winner 2011

  • Traders
  • PipPipPipPipPip
  • 354 posts

Posted 15 March 2011 - 05:58 PM

Havent really sorted anything out on the interior yet.
Tried to put the seat in on the weekend but doesnt fit, back of the seat hits the frame and I havent even got the bulkhead in yet! Going to have to cut the mounts I think.

Dont worry, its not going to be white. But got many other colours going through my head at the moment.

By the way did you have to cut your rear valance off? Ive seen some zcars with it and some without. I really dont want to get rid of mine but its damn close to the rear wheel and Im not wure if it will clear it once the suspensions set up. Guess I could put a diffuser in place, but I really wanted to keep it as it is.


Rear valance still in place, but it will need a trim if you use the standard exhaust. Mine is also pretty close to the wheels, but I’m going to trim this and set up the arches etc once the alignment is done, but that’s a few weeks off yet as want some other bits finished first.

Diffuser is going to be tricky, had a look / measure the weekend and my initial plan is out of the window as the engine is so low, its pretty flat up to the last bar on the frame, so you'll have to sweep up from here; first impressions are it will be more of a visual impact that a practical one as we don't have the space!

One thing I did notice is that your engine lifting bracket is still attached, this'll need to be removed to get the bulkhead flat on top (unless you want it to poke through! Removed mine the weekend whilst measuring up once again – Tooooo much measuring going on and not enough production!

What seats you fitting? Trialled mine the weekend and they are close to the eyebolts, but hopefully ok! I can’t check 100% as I don’t have the correct bracket for the pedal box, but I don’t think you’ll ever have acres of leg room.

#17 benmoffat

benmoffat

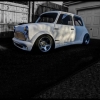
    Speeding Along Now

  • Members
  • PipPipPipPipPip
  • 347 posts

Posted 15 March 2011 - 06:28 PM

Thanks for that. Which ones the lifting bracket? Is it the one on the lh side with the round hole in it? Hadnt noticed that before.

Im fitting fibreglass bucket seats as the photos, not the biggest of seats but still having trouble getting the in. I havent bought a pedal box yet but using the old mini pedals I tried it out and thats where it needs to be. But touched the seatbelt mounts. Those are going to be some short harnesses if I can get them!
But nothings bolted in yet so will have to sort it out once the bulkhead in and the pedals/steeering wheel are in. Kind of changes my plans for a different looking bulkhead though.

Im not expecting the diffuser to do anything, Im not going to be going fast enough anyway! And its only going to be used on the road. It was just going to be something to fill the gap if the valance had to be cut off, but will see what happens when its all painted. Havent gone as far as measuring or anything to find what fits.

#18 RED HOT

RED HOT

    Fantasy F1 Winner 2011

  • Traders
  • PipPipPipPipPip
  • 354 posts

Posted 15 March 2011 - 06:49 PM

Thanks for that. Which ones the lifting bracket? Is it the one on the lh side with the round hole in it? Hadnt noticed that before.

Im fitting fibreglass bucket seats as the photos, not the biggest of seats but still having trouble getting the in. I havent bought a pedal box yet but using the old mini pedals I tried it out and thats where it needs to be. But touched the seatbelt mounts. Those are going to be some short harnesses if I can get them!
But nothings bolted in yet so will have to sort it out once the bulkhead in and the pedals/steeering wheel are in. Kind of changes my plans for a different looking bulkhead though.

Im not expecting the diffuser to do anything, Im not going to be going fast enough anyway! And its only going to be used on the road. It was just going to be something to fill the gap if the valance had to be cut off, but will see what happens when its all painted. Havent gone as far as measuring or anything to find what fits.


Indeed a short harness is required, but most top brands if you buy the right type are fully adjustable, you might need to cut off the excess with a hot knife though rather than have it behind the seat. Those seats are pretty thin, but I guess the angle of them decides how far back they'll go, plenty of peeps have used similar and they aren't all 5ft tall so once its all fitted and bolted in you'll get a better indication of actual space.

Rear valance should be fine, I want to keep mine as it adds a lot of strength to the rear, plus I’ve just replaced mine lol.

Engine lifting point is as you say, 2 bolts and its out.

#19 Evlabe

Evlabe

    Starting My Mini Up

  • Noobies
  • Pip
  • 4 posts

Posted 29 March 2011 - 11:05 PM

just seen your threads and had to but in, im in the process of preping the shell for a zcars t4 conversion. I have the engine but not the frames yet. This is my first mini conversion so im completley green. I have the majority of the back end out of the car, and am tackling a few minor holes in the floor before i send it off for blasting and primer. I was planing on painting it before the rear frame went in but judging by your experience it looks like the paint will be battered before the cars finished!! Any advice would be appriciated.

#20 RED HOT

RED HOT

    Fantasy F1 Winner 2011

  • Traders
  • PipPipPipPipPip
  • 354 posts

Posted 30 March 2011 - 07:17 AM

just seen your threads and had to but in, im in the process of preping the shell for a zcars t4 conversion. I have the engine but not the frames yet. This is my first mini conversion so im completley green. I have the majority of the back end out of the car, and am tackling a few minor holes in the floor before i send it off for blasting and primer. I was planing on painting it before the rear frame went in but judging by your experience it looks like the paint will be battered before the cars finished!! Any advice would be appriciated.


I'm currently trial fitting all of mine before I go down the final paint route. This way 99% of the bits will have been fitted and the holes drilled in the correct positions for them. Unfortunately things do happen and plans change, but the hope is to minimise this during the “mock up” and protect the paint as much as possible in areas likely to get damaged; door areas mainly due to the climbing and passing of bits in and out of the car. I’m not saying that’s the right way, it’s just the route I chose. Best of luck :thumbsup:

#21 benmoffat

benmoffat

    Speeding Along Now

  • Members
  • PipPipPipPipPip
  • 347 posts

Posted 30 March 2011 - 12:21 PM

Im also doing it as RED HOT says.
The kit has been trial fitted already, and I dont know about anyone else but I found it a hell of a lot harder than it looks on the dvd. It is to be expected really as they have done hundreds and this is my first one. But do make sure you cover up the frame really well, Ive now got scratches on the rear of mine that Im going to have to live with because the car wasnt completely trimmed properly and the shell caught on the frame.

Theres bound to be extra bits of trimming needed when you come to try and fit the frame, which you dont want to be doing if the shell has just been painted. If I was you I would trial fit as much as you can before paint, it may be more work but at least you run less risk of damaging something. Good luck with the build.

#22 rustandoil

rustandoil

    Speeding Along Now

  • Members
  • PipPipPipPipPip
  • 317 posts
  • Location: Gloucestershire

Posted 30 March 2011 - 02:31 PM

I am intending to do pretty much a full build including suspension set up before stripping it all down for paint :thumbsup:

#23 benmoffat

benmoffat

    Speeding Along Now

  • Members
  • PipPipPipPipPip
  • 347 posts

Posted 26 May 2011 - 07:28 PM

Its been a while since my last update, not much been going on with the project as Ive been saving hard. Its currently up at Zcars for the wheel alignment. The good news is I had a nice new set of arches arrive this week, cant wait to see what they look like on.

Had some bad news today though, looks like I need a new shell. Really didnt go down well when I think of those hours and hours cutting and trimming it all, still, cant be helped I suppose.

Mine is beyond economical repair, so Zcars are on the hunt for a shell at the moment. Just wondering does anyone know of one up for grabs anywhere? Anything good condition will be considered.


Thanks

Edited by benmoffat, 26 May 2011 - 07:39 PM.


#24 remi

remi

    Mini Mad

  • Members
  • PipPipPipPip
  • 154 posts

Posted 26 May 2011 - 08:18 PM

theres one on ebay in bolton which looks good for £375, pretty solid...

http://cgi.ebay.co.u...0e#ht_500wt_697

#25 BlueminiJohn

BlueminiJohn

    Mini Mad

  • Members
  • PipPipPipPip
  • 204 posts
  • Location: Midlands
  • Local Club: n/a

Posted 26 May 2011 - 09:14 PM

Dude,

Just looked at this, Looks cool.
Iv'e nearly finished my volvo build.

Just looking at your door bars, they look the same as mine and I think they're meant to be the other way round, i.e the steep angle in the tube closer to the back of the door. Turning each one 180 degrees and re-bolting would do it. I may be wrong, but just a thought.

John

#26 RED HOT

RED HOT

    Fantasy F1 Winner 2011

  • Traders
  • PipPipPipPipPip
  • 354 posts

Posted 27 May 2011 - 03:20 PM

Ben, is a fibreglass shell out of the question?

Iv'e nearly finished my volvo build.


We need a thread and pictures :D

#27 benmoffat

benmoffat

    Speeding Along Now

  • Members
  • PipPipPipPipPip
  • 347 posts

Posted 27 May 2011 - 04:03 PM

Yea lets see some pics John!

Im not sure about a fibreglass shell. I hadnt thought of that to be honest. Would that still fit a standard kit? Ive only got a road kit not a race one.

Originally I had wanted to keep it as standard as possible body wise. So everything fit well and it looked like a normal Mini from the outside. I already have the money allocated to the bodywork etc, and cannot go over what Ive budgeted for which is why I decide to use my shell, otherwise I would have just got a heritage shell in the first place as thats not a whole lot more than the bodwork was going to be. But if a fg shell will fit, and be just as safe I might consider it now. Have never been in one though so I dont know what they are like.

Do you know of one for sale then? Ill give it some thought.

Thanks

Edited by benmoffat, 27 May 2011 - 04:06 PM.


#28 RED HOT

RED HOT

    Fantasy F1 Winner 2011

  • Traders
  • PipPipPipPipPip
  • 354 posts

Posted 27 May 2011 - 08:25 PM

Do you know of one for sale then? Ill give it some thought.


Afraid not buddy, but they do come up quite often so wondering if it was something to consider? Might also be worth looking on the 16v mini forum for ideas on mounting aswell as checking the for sale sections

#29 BlueminiJohn

BlueminiJohn

    Mini Mad

  • Members
  • PipPipPipPip
  • 204 posts
  • Location: Midlands
  • Local Club: n/a

Posted 01 June 2011 - 06:31 PM

Yeah, I need to start a thread.
I meant to do it ages ago...
Ill get one going in the next few days :(

#30 benmoffat

benmoffat

    Speeding Along Now

  • Members
  • PipPipPipPipPip
  • 347 posts

Posted 08 June 2011 - 05:03 PM

Well Im now the proud owner of a brand new shell - well sort of. Ive bought it but its not actually at home yet.

Should be picking it all up in about 3 weeks time, and suffice to say theres no bodywork needed and no painting! Bring on the build!

So when I get it back here I can actually start on connecting it all up and trying to get the engine running, Im so excited. Will put on pics and another update once the shell is here.


By the way, Ive reread your post John and I now realise what you mean about the door bars! I hadnt even thought of that when I bolted them in, will take another look at them when I get the kit back from Zcars.

Thanks for reading.
Ben


2 user(s) are reading this topic

0 members, 2 guests, 0 anonymous users