Jump to content


Photo
- - - - -

My Mini ;) The Third Chapter. 998 Fast road.


  • This topic is locked This topic is locked
842 replies to this topic

#61 SomethingNew71

SomethingNew71

    Speeding Along Now

  • Traders
  • PipPipPipPipPip
  • 453 posts
  • Location: Charlotte, NC, USA
  • Local Club: Carolinas Classic Minis United

Posted 05 January 2011 - 02:22 AM

[quote name='afoggo' date='Jan 4 2011, 10:33 AM' post='2012279'

jealous of your garage space :) :D
[/quote]

Me too......

#62 se_juggles

se_juggles

    One Carb Or Two?

  • Members
  • PipPipPipPipPipPipPip
  • 1,043 posts

Posted 05 January 2011 - 02:49 AM

nice project mate... and i too am jelous of that space i have around a ft eitherside to work with :D... getting there SLOWLY tho!!

#63 analogue_radio

analogue_radio

    Up Into Fourth

  • TMF+ Member
  • PipPipPipPipPipPipPipPipPip
  • 4,897 posts
  • Location: Melton Mowbray, UK.

Posted 04 February 2011 - 07:17 PM

Right kids, managed to get back for the weekend :w00t:

My little Brother had an incident with a ditch so his car was in need of repairs, meaning 'Paddy' was temporally demoted to the driveway, a blue tarpaulin and some bricks. The rain, wind and condensation didn't do him much good and started to rust through again, so I took the effected areas back to bare metal then a layer of etch and a heavy coat of red oxide for protection. I don't think he'll be going back outside again as my Brothers car is almost done, but if 'Paddy' does it will fair a lot better than before.

Aside from that I straightened out a few edges, welded up a few holes and cleaned up a few areas.

Oh and I've got my new Canon 550D so enjoy some 18 Megapixel images and the odd 1080P HD footage ;)

Posted Image

New boost gauge!

Posted Image

Posted Image

Posted Image

Pretty much all the bits I've left in Etch primer were effected, didn't take long to get it back to normal though.

Posted Image

Next task was to straighten the above out, this is where Shifty had put on a new genuine wing. I wasn't happy with how wonky it was so I did my best to try and correct it.

Posted Image

Looks a lot straighter! Next bit was to fill the holes..

Posted Image

Posted Image

Left over from fixing the wing on I think..

Posted Image

So welded up, etched and red oxided.

Posted Image

Posted Image

Took both the shock mounts off :thumbsup: was expecting this to be honest! I've seen a few people do it before so I'm sure it's not a huge deal.

Posted Image

By this stage the front was looking like this, tidy!

Posted Image

Then sorted the front valance, it had been bashed about a bit in the past I assume, so straightened that up as best I could, and etched.

Posted Image

Engine bay wire brushed.

Posted Image

Posted Image

& cleaned with a rag soaked in petrol.

Posted Image

And lastly, etched.

Posted Image

Tomorrows job :P

#64 LouisT

LouisT

    Mini Mad

  • Members
  • PipPipPipPip
  • 197 posts
  • Location: Manchester

Posted 04 February 2011 - 08:48 PM

moving on now mate, cant wait to see it finished,

got the hinges by the way,

cheers

louis

#65 analogue_radio

analogue_radio

    Up Into Fourth

  • TMF+ Member
  • PipPipPipPipPipPipPipPipPip
  • 4,897 posts
  • Location: Melton Mowbray, UK.

Posted 07 February 2011 - 02:16 PM

moving on now mate, cant wait to see it finished,

got the hinges by the way,

cheers

louis


Good good :genius:


So had a huge long day yesterday (Sunday) before going back to Uni later that evening. I did take a whole load of photos but they are all fairly repetitive. I am basically continuing the task of sorting the bodywork for paint and tidying up any rough edges. I found a few more rusty holes to either patch or fill, but nothing major!

Posted Image

I turned my attention to the rear as this is an area I hadn't touched bodywork wise.

Posted Image

Posted Image

Any rough edges like that have to go, can't justify skipping over them and even though they will be hidden under the bumper, it'd just bug me them being left there!

Posted Image

& this.

So that whole area was grinded, bare metaled, ku-rusted & etched.

Posted Image

Dropped the rear subframe which was a major PITA! Luckily I could rope in Dad to use a ratchet above board whilst I was underneath holding on for dear life with a pair of mole grips. It seems to be in good shape so I'll probably clean it up and sell it on as it's unneeded.

Posted Image

Few more holes discovered.. I hate that horrible factory fitted stuff, horrible and sticky when you attack it. That's down in the OS rear wheel arch pocket. When I've finished doing the bodywork on the top half the shell will be rolled onto a mattress and I'll bare metal and sort the underside out.

Posted Image

Posted Image

And these are near both the air vents, which will be easy to fill. BUT, if you look through the hole you'll see more rust.. which I can't reach at the moment, as above, when it's rolled on the mattress I should be able to reach up there, maybe..

Posted Image

Posted Image

Posted Image

Patch that I started to make, I think I've gone the right way about this. I'll plug weld the right angled section to the flat section at the back and then position in place and then seam weld the edges. Obviously the top would be cut down afterwards, that was just to make handling the piece easier.

Posted Image

I also want to graft either one of these switch panels (prefer the one with the switches already in it I think) into where you can see the cut outs for the switches on the Autoplas dashboard.


Posted Image

& that's how I left her looking.

Did some more cleaning all over, tested my Under-seal as well on the lower half of the bulkhead. Just a test to see if it reacts with the etch and red oxide, hopefully it won't!

Edited by analogue_radio, 07 February 2011 - 02:19 PM.


#66 analogue_radio

analogue_radio

    Up Into Fourth

  • TMF+ Member
  • PipPipPipPipPipPipPipPipPip
  • 4,897 posts
  • Location: Melton Mowbray, UK.

Posted 13 February 2011 - 12:12 AM

I don't know wether to either chop the lip of my MK3 bonnet in order to fit my MK1 grille or go with a fibreglass MK1 bonnet and keep the MK3 bonnet in one piece safe and sound.

http://www.the-arc-a...sp?CategoryID=2

Then if I was to fit a MK1 fibreglass I don't know wether to fit the 'ultralite' or the 'ready to fit', difference being the 'ready to fit' retains the use of the standard hinges and bonnet catch whereas the 'ultralite' does away with that and it would be secured by fixings in all 4 corners.

I think I'm leaning towards going with the 'ready to fit' and then getting rid of the bonnet catch so I can fit a full MK1 grill and then use leather straps to secure the front and the back would still be using the standard hinges.


Hmm :D

You can tell I'm bored of being stuck at Uni.

#67 camp freddy

camp freddy

    Definitely Not Camp Or A Freddy

  • TMF+ Member
  • PipPipPipPipPipPipPipPipPip
  • 3,696 posts
  • Local Club: Wreake Mini Wanderers

Posted 13 February 2011 - 10:11 AM

Nice to see your back on track with the Mini Luke, Your best to go over it with a fine tooth comb
to catch all the missed rusty bits to save you the misery of sorting later on....

#68 analogue_radio

analogue_radio

    Up Into Fourth

  • TMF+ Member
  • PipPipPipPipPipPipPipPipPip
  • 4,897 posts
  • Location: Melton Mowbray, UK.

Posted 24 February 2011 - 11:18 PM

Quick update as I'm back for the weekend but I'm going to Berlin until Monday, so I won't be making any progress but it meant I could open all the packages that had arrived over the past few weeks.


From Minispares -

- MK1 grille package, opted for the one with the dipped slat for the external bonnet release even though I'm not fitting one, just to make it look a bit more subtle
- Pair of boot hinges, so I can drill holes in the fibreglass MK1 boot
- Headgasket, so I can get on with the engine whilst the shell is away for paint

From Demon Tweeks -

- OMP Bonnet pins, for location and drilling holes
- Spring hooks, same reason

Ebay

- Period Toggle switch extenders, because I liked them >_<

Arc Angels

- MK1 ultralite bonnet.


Will update with photos soon.

Edited by analogue_radio, 01 March 2011 - 04:36 PM.


#69 GreaseMonkey

GreaseMonkey

    Has Ratchet, Will Make Noises

  • Members
  • PipPipPipPipPipPipPipPipPip
  • 3,663 posts

Posted 24 February 2011 - 11:32 PM

Where did the bonnet come from?

#70 Midas Mk1

Midas Mk1

    Crazy About Mini's

  • TMF+ Member
  • PipPipPipPipPipPipPipPipPipPip
  • 5,729 posts
  • Location: Manchester
  • Local Club: S.U.N.M.C

Posted 25 February 2011 - 10:45 AM

Nice Project!

When my arc angels bonnet arrived, it came with chips around the edges, but fitted fine, hopefully yours will do too :thumbsup:

#71 analogue_radio

analogue_radio

    Up Into Fourth

  • TMF+ Member
  • PipPipPipPipPipPipPipPipPip
  • 4,897 posts
  • Location: Melton Mowbray, UK.

Posted 01 March 2011 - 11:54 AM

Photos!

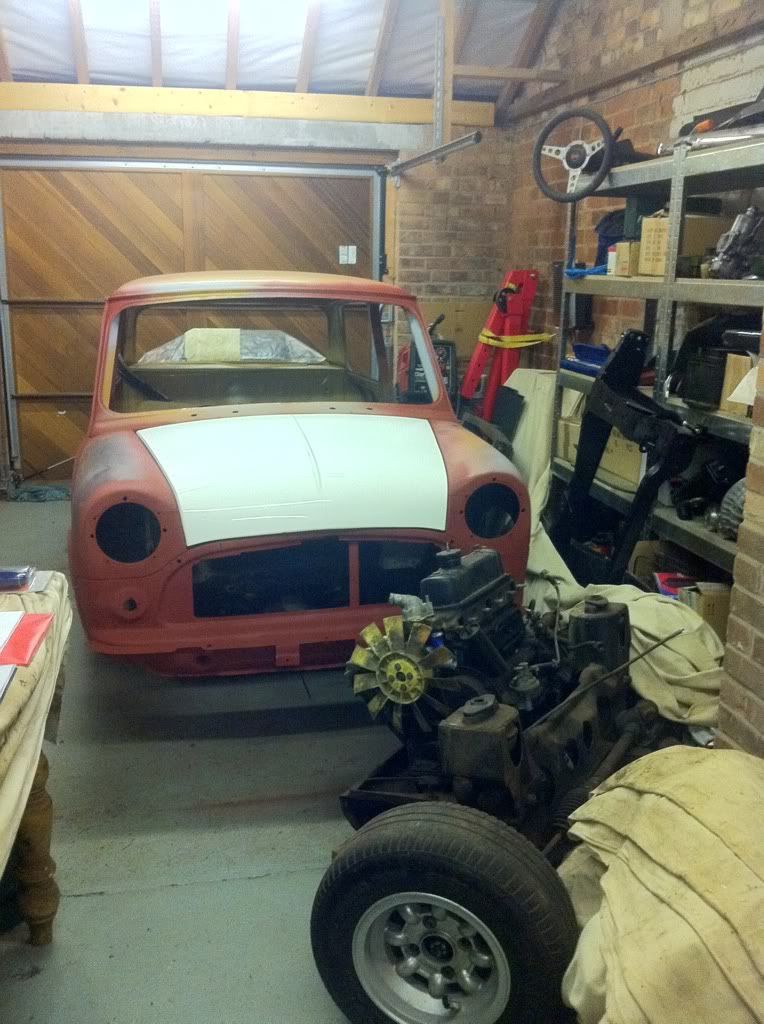
Posted Image

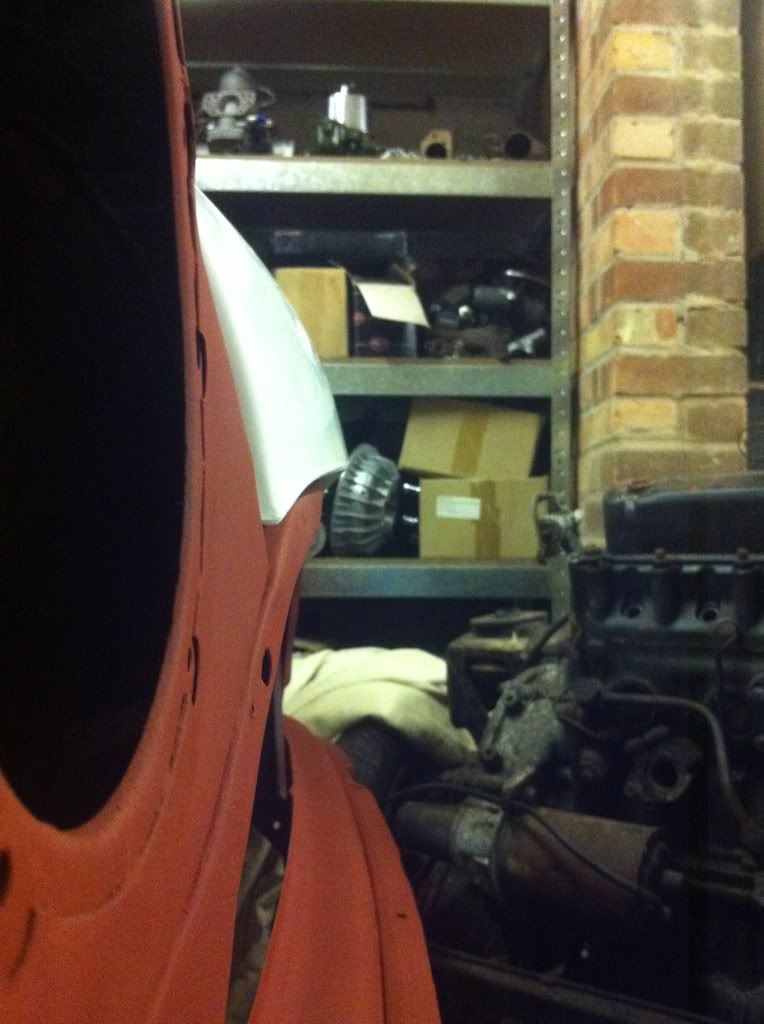
& a few lesser quality ones with my Iphone..

Posted Image

Posted Image

It does sit very well, as you can see from the top photo. But the front lip overhangs a lot, I've had a quick look at some other MK1 minis and it seems to sit flush with the slam panel, then the grill protrudes further.

Edited by analogue_radio, 01 March 2011 - 04:49 PM.

#72 analogue_radio

analogue_radio

    Up Into Fourth

  • TMF+ Member
  • PipPipPipPipPipPipPipPipPip
  • 4,897 posts
  • Location: Melton Mowbray, UK.

Posted 01 March 2011 - 04:48 PM

Just had a chat with a bloke from Arc Angels and he said that over 600 bonnets have been produced from that mould and only 3 people have had complaints, so I'm being picky :D

The fit isn't just down to the bonnet it's down to the panels that have been replaced around it, so if one isn't fitted properly it causes a knock on effect.

And as far as the chips and pitting goes they are all cosmetic and can be easily sorted with some filler.


Few deadlines coming up so my workload will lighten up for a week or two soon, really hoping to get back for a long weekend to have a final push on the bodywork!

#73 mini_mad69

mini_mad69

    Let future you worry about it

  • Traders
  • PipPipPipPipPipPipPipPipPipPip
  • 5,417 posts
  • Local Club: urrrr no

Posted 01 March 2011 - 04:55 PM

And as far as the chips and pitting goes they are all cosmetic and can be easily sorted with some filler.


It's looking good luke. Try to use as little filler as possible on the bonnet, fibreglass tends too flex a bit and causes the filler to crack.

And telling you that your picky is crap to be honest. You pay for something you'd expect it to fit properly and not be pitted.

Edited by mini_mad69, 01 March 2011 - 04:57 PM.


#74 buddylove

buddylove

    Camshaft & Stage Two Head

  • TMF+ Member
  • PipPipPipPipPipPipPipPip
  • 1,639 posts
  • Location: North America
  • Local Club: SAMOA

Posted 01 March 2011 - 07:16 PM

I agree with mini_mad69. You payed the money, you are allowed to be picky. In other news, its coming along nicely.

#75 analogue_radio

analogue_radio

    Up Into Fourth

  • TMF+ Member
  • PipPipPipPipPipPipPipPipPip
  • 4,897 posts
  • Location: Melton Mowbray, UK.

Posted 01 March 2011 - 07:20 PM

If they are all from the same mould then they will all be the same shape, surely?

Not 100% on the process of fibreglass and moulds.


3 user(s) are reading this topic

0 members, 3 guests, 0 anonymous users