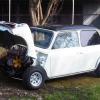
My Mini ;) The Third Chapter. 998 Fast road.
#676

Posted 02 August 2012 - 01:02 PM
Area you not putting down soundproofing and carpet before you put in the heater though?
#677

Posted 02 August 2012 - 05:26 PM
Looking great mate - cant wait for more updates
Ta mate! I'm off to another placement soon so the updates will slow again!
Finish mine when you have time Luke? I never get much time to work on Elliot of late
.
Progress is looking good, so looking forward to when mine is eventually in paint.
Haha I'm struggling to find time to work on mine! Yeah I can't wait to see your in paint, the amount of detail & effort you've put into it, it'll look stunning.
Looking good Luke, your storming ahead!
Area you not putting down soundproofing and carpet before you put in the heater though?
For now I'm just going to slip the carpet up underneath until I iron out any possible problems, then I'll strip it all out and line the inside of the shell with soundproofing.
Another few hours in there today.. not many photos as it's just been a lot of electrical work and tidying up loose ends.


Lights on the centre binnacle are coming into play as well which is nice, I'd like to get it electrically sound and then continue on with the engine / brakes etc..
Also, on a centre binnacle.. which lights are supposed to flash to show the indicators are working..

I would've thought it should have been the orange lights either side.. but the middle green one at the top flashes.
Edited by analogue_radio, 02 August 2012 - 11:15 PM.
#678

Posted 02 August 2012 - 06:21 PM
I doubt mine will look anywhere near as good as yours. It'll be drivable again though so I can have the joy of a Mini in my life again.
#679

Posted 02 August 2012 - 06:44 PM
Stunning. Just great!
Adam is right, green one in the centre flashes for both left and right hand indicators, orange is for oil pressure warning, red for ignition, and blue for high beam, there is one of the oranges spare, ive used it for fog light warning in the past...
#680

Posted 02 August 2012 - 08:03 PM
& okay that makes sense now, I just assumed as there were two orange lights on either side they would be for the indicators! At least it's wired up correctly.
I'm also after a MK1 gear knob & a MK1 choke cable.
#682

Posted 02 August 2012 - 09:13 PM
#683

Posted 06 August 2012 - 05:12 PM

More parts from Minispares.

New gear knob screwed into place, suits so much more than the other one I bought 2 years ago.

So that's for sale, brand new and unused (apart from being screwed on) £10 posted.

Headlamp rings on & looking super shiny!

Parts from the last update sprayed and dried.

I preferred how this Lucas coil clamp looks as opposed to the black one so I used that instead.

Steady in, I need to touch the bar up as the ratchet caught it & I know I'll have to undo that far end for the plate, but it's just a temporary thing.

Pretty cool to see!

New gear seal, gaiter & metal bush.

& I'm halfway with removing this damn stud to replace it with a new one.
#684

Posted 06 August 2012 - 05:24 PM
And a nice mini, love the color.
#685

Posted 06 August 2012 - 06:54 PM
Graham
#686

Posted 06 August 2012 - 07:15 PM
That silver collar should go before the seal in the gearbox.
Its a guide to stop the selector rod moving and abusing the seal.
#687

Posted 06 August 2012 - 08:31 PM
First time here, thoroughly impressed with the photography.
And a nice mini, love the color.
Thank you mate!
Loving the progress, it reall looks good. One thing tho, the gearbox rod seal, should the metal bush with O ring be inside the box, not next to the rod as it is doing nothing there as far as I can see??? Might have got it wrong but just doesn't look right.
Graham
Yupo G, its the wrong way luke
That silver collar should go before the seal in the gearbox.
Its a guide to stop the selector rod moving and abusing the seal.
Thank you guys and yeah I did realise that, I didn't replace the bush so I figured sticking the new one on that end would only compress the gaiter more and make it less prone to leaking & picking up dirt etc.. figured I'd paid for it so I might as well stick it on there somewhere, won't do any harm having another that end.
#688

Posted 06 August 2012 - 08:38 PM
#689

Posted 06 August 2012 - 08:50 PM
First time here, thoroughly impressed with the photography.
And a nice mini, love the color.
Thank you mate!Loving the progress, it reall looks good. One thing tho, the gearbox rod seal, should the metal bush with O ring be inside the box, not next to the rod as it is doing nothing there as far as I can see??? Might have got it wrong but just doesn't look right.
GrahamYupo G, its the wrong way luke
That silver collar should go before the seal in the gearbox.
Its a guide to stop the selector rod moving and abusing the seal.
Thank you guys and yeah I did realise that, I didn't replace the bush so I figured sticking the new one on that end would only compress the gaiter more and make it less prone to leaking & picking up dirt etc.. figured I'd paid for it so I might as well stick it on there somewhere, won't do any harm having another that end.
Mate it wont work that way, been there done that.
You wont be able to select 2nd and 4th and reverse, fit the big alloy o ring to the gearbox and slide the dust gaiter over.
#690

Posted 06 August 2012 - 08:59 PM
2 user(s) are reading this topic
0 members, 2 guests, 0 anonymous users


 This topic is locked


