My Mini ;) The Third Chapter. 998 Fast road.
#661
Posted 05 July 2012 - 12:15 AM
Not a whole lot of progress as I was busy with other things (secured a 3 month placement with a studio in Leicester!)
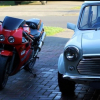
And I've almost moved into the other garage so managed to give her some fresh air & she got caught in an unexpected bit of rain!
Rear is sitting far too low! Looks cool but so impractical!
#662
Posted 05 July 2012 - 07:36 AM
#663
Posted 05 July 2012 - 07:40 PM
But a video to show one of the jobs I did.. well.. half did today!
#664
Posted 05 July 2012 - 09:55 PM
#665
Posted 05 July 2012 - 10:14 PM
#666
Posted 06 July 2012 - 03:58 AM
#667
Posted 06 July 2012 - 10:02 AM
Not as amazing as the door shut video, but not bad.
Hahaha
I really enjoy reading your updates, your building a really amazing mini there! just one little niggle! When you have gone to such attention to detail, why use the blue crimp terminals? I have worked and specialised in auto electrics for around 12 years now and hate to see those crimp connectors. I use auto sparks as they supply original equipment terminals. For example, spade terminals with black covers C219/C220. You'll need a crimp tool for non insulated terminals such as auto sparks AST2 crimper, but I gaurantee you'll be smiling when you see the factory style results you get! Anyway, keep the updates coming and I hope to see this out and about when your done, as your not that far away from me.
Oh I know, it pains me.. I even colour coordinate my socks & my boxers so it does feel wrong using blue terminals.
I think for now they'll do, once I know the electrics are faultless and are all working as they should be, I'll then go round and swap bits for the original terminals from Auto Sparks.
Looking forward to more video updates! :)
#668
Posted 06 July 2012 - 11:13 AM
Keep up the good work.
#669
Posted 21 July 2012 - 07:38 PM
I'm currently in Sheffield at a placement but have come back for the weekend to sort through all my spare parts as I'm hoping to sell them all as a job lot, both to free up a lot of spare and also create some money to fund the last leg of the project.
#670
Posted 21 July 2012 - 09:00 PM
#671
Posted 21 July 2012 - 11:54 PM
#672
Posted 01 August 2012 - 08:41 PM
#673
Posted 02 August 2012 - 11:10 AM
Just more work on getting the electrics in place & doing all the odd jobs I can until I need to place another Mini Spares order.
Parts I pulled out of the spares lot that I need.
Broken down, cleaned & Ku-rusted.
Etched.
Sprayed. Bad photo.. black on black.
Coming together!
Heater works and feels really efficient, obviously not blowing out hot air yet.
#674
Posted 02 August 2012 - 11:59 AM
#675
Posted 02 August 2012 - 12:42 PM
Progress is looking good, so looking forward to when mine is eventually in paint.
1 user(s) are reading this topic
0 members, 1 guests, 0 anonymous users