My Mini ;) The Third Chapter. 998 Fast road.
#511

Posted 19 December 2011 - 06:45 PM
He's located near Solihull.
If you want his details drop me a message and I'd be happy to pass them on.
#512

Posted 19 December 2011 - 06:47 PM
I can highly recommend George!
He's located near Solihull.
If you want his details drop me a message and I'd be happy to pass them on.
Sadly I am in the US and my job was done by a friend of mine here in NC. It's a mistake that keeps getting bigger and bigger as time passes and the paint ages.
#513

Posted 19 December 2011 - 08:33 PM
Doorcards, lovely!
Are these the cards you made yourself? They look amazing, I need to do some for mine.
#514

Posted 20 December 2011 - 12:09 AM
Edited by analogue_radio, 20 December 2011 - 12:09 AM.
#515

Posted 20 December 2011 - 12:13 AM
#516

Posted 20 December 2011 - 12:34 AM
#517

Posted 20 December 2011 - 05:53 PM

Liners pushed into place ready for fettling and fixing.

I had to re-tap these threads as the stonechip had covered them up.

During fitment.

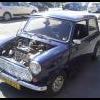
Arches going on. Absolute nightmare.. I was so worried about doing this job, but they look fantastic!


All on

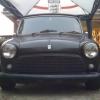
Tucked up with my new car cover
#518

Posted 20 December 2011 - 06:02 PM
I'm very quiet because I am so very jealous!
#519

Posted 20 December 2011 - 06:05 PM
Haha Adam, don't be daft.
#520

Posted 20 December 2011 - 06:57 PM
#521

Posted 20 December 2011 - 09:10 PM
#522

Posted 20 December 2011 - 09:27 PM
#523

Posted 20 December 2011 - 10:44 PM
#524

Posted 20 December 2011 - 10:49 PM
#525

Posted 22 December 2011 - 03:51 PM
Because funds are now low, I'm limited to what I can do.. ideally the first things I need to do are buy a wiring loom so I can run that and get it all in place and run the fuel, battery & brake lines along the inside of the cab.
But I'm cracking on with what I can do
Today I started to refurbish the heater, I did refurb the heater that came out of the '90, but that was over a year and a half ago so decided to start afresh with the one from the '79 and make a proper good job of it.


Everything was cleaned and stripped of the grot and old foam, it'll all be replaced with something similar.

In the 'spray booth' for etch priming.

Gave the heater matrix a good flush through, I didn't get a photo when it first started to come out but it was a horrible brown colour!
I repeated this process switching from side to side about 6 times and whilst the water was flushing, shaking it about to loosen any dirty areas until it was running nice and clean.

Thought this was a good photo as well

(Sorry it's dark, got the cover on)
Few more interior bits going in.
2 user(s) are reading this topic
0 members, 2 guests, 0 anonymous users


 This topic is locked


