My Mini ;) The Third Chapter. 998 Fast road.
#391
Posted 18 September 2011 - 09:00 PM
I've managed to pop home for a few days.
More plastic bags from Moss!
Door shims from Smiffys Bits ebay store.
Etch primer also came through so protected the bare metal bits from the previous update.
Washers on, just need to secure the rear mounts on the front subframe now. I won't bother with the tear drops for now as the front subby will be coming off at the bodyshop.
Temporary zip ties replaced by the proper clevis pins and split pins.
In, other than the guides, again this will be removed so he can spray the brackets as they will be visible.
Badge holes.
Gone.
Cable & wire holes gone.
These two needed fillering to smooth them over, I did finish this off and etch but no photo.
And then this.. as you can see it's looking flimsy and a bit half arsed.. the more I tried to correct it the more damage I did and I wasn't happy with it.
So I took the left hand support out and then welded those two patches in to close the gap.
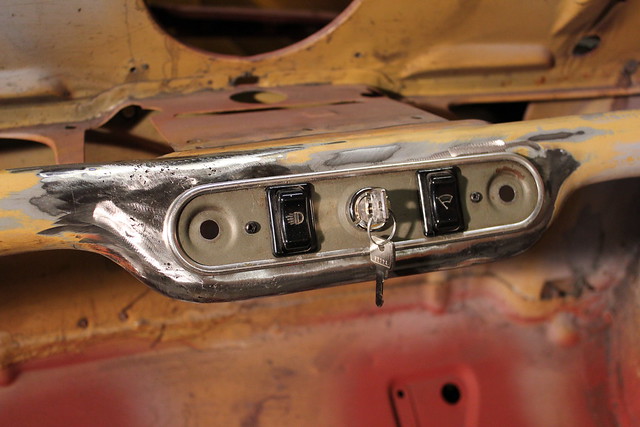
Cut another support out and welded that in.. some time later after lots of welding and grinding.. Just needs some fillering and it'll look beautiful!
It now sits very flush and very comfortably, really pleased with this now.
I love how the black screws look as well, they suit the patina
And the list..
#392
Posted 18 September 2011 - 09:07 PM
If that makes sense..
#393
Posted 19 September 2011 - 03:32 PM
Dowels had to be removed as I've put new ones in the arms, so after some GT85, plenty of heat and a vice grip later.. they were out.
Etched.
First coat of paint.
Pot joint end bearings on.
And after hours and hours and hours of effort.. the CV end went in
Greased up.
Driving them home.
So clean! as you can see one side is missing the zip ties as the rubber boot popped off so I had to cut them off and the only ones in the garage we've got long enough are white! so to be consistent and perfect I'll get some off ebay.
Also stuck another coat of paint on the hubs, I'll see if I can get Dad to give them one more during the week so when I'm back next weekend they are ready to build back up.
I also couldn't get the bearings out of the upper arms for love nor money, it's the little things that are the biggest problems.. so I'm going to cop out and buy some new ones to save time.
So yeah.
Expect another update next weekend!
#394
Posted 19 September 2011 - 03:38 PM
#395
Posted 19 September 2011 - 04:54 PM
Mine were a doddle after the heat from welding the nut in place, the knocked out in 2 or 3 taps each.
The CV boots that came with my new CV's don't look like that, strange.
#396
Posted 19 September 2011 - 05:03 PM
Im surprised to see you went for poly front subframe mounts rather than solid too, given all the early mini touches you are adding to it.
Great as ever to see more progress
#397
Posted 20 September 2011 - 04:10 PM
I've bitten the bullet and bought a new pair along with some other bits and pieces that I need in order to get it done this weekend.
I know it's a cop out and I would've rather done it myself but I can't faff around wasting more weekends, soon I'll be starting lectures and my workload this year won't give me any free weekends so I'm making the most of the time I've got now.
I had a look through your thread Deathrow but couldn't find a photo of your CV boots, where did you get yours from? mine are from Mini Sport.
#398
Posted 20 September 2011 - 04:18 PM
They came with my new CV joints from Mini Spares. Going through their site though, mine are like this: http://www.minispare...ty=pb&pid=34208
#399
Posted 20 September 2011 - 04:22 PM
Ah genuine! Is that £18 each?
I did think about replacing the zip ties with jubilee clips, I think I'll do that when it's back from paint. I wasn't happy with how loose the zip ties still were even though I couldn't get them any tighter.
#400
Posted 20 September 2011 - 06:16 PM
The clips with these are those strange type that you crush with pliers. Not really clear about how you're meant to use them though. Doesn't the boot have a rib on the inside which locates in the channel on the joint? Shouldn't need to be too tight to stop it jumping out.
#401
Posted 20 September 2011 - 06:20 PM
#402
Posted 20 September 2011 - 09:55 PM
I really love the attention to detail, want to do mine? haha I've got biscuits...
#403
Posted 21 September 2011 - 11:14 AM
Crazy going back to the very start of the first chapter, unfortunately most of the photos have disappeared, but what I was doing and my plans are a world apart from what I'm doing now.
Yeah I'll do yours, after I've got this done, my fixie bike and my '59 lambretta bit of a long waiting list
#404
Posted 21 September 2011 - 05:17 PM
#405
Posted 21 September 2011 - 05:34 PM
3 user(s) are reading this topic
0 members, 3 guests, 0 anonymous users