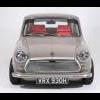
My Mini ;) The Third Chapter. 998 Fast road.
#316

Posted 15 August 2011 - 08:38 PM
#317

Posted 15 August 2011 - 08:51 PM
keep up the good work
#318

Posted 16 August 2011 - 06:07 AM
Mate is this not done yet lol, you should of sad hi if you seen me at the weekend.
Rome wasn't built in a day
its looking good mate i like to see how you still have the same optimism as when you first started the project it will be a top car.
keep up the good work
Cheers mate! I'm getting there!
#319

Posted 21 August 2011 - 05:39 PM


Got the front subframe out and up on two workstands, gave it a dust down & lick of black hammerite in places where it had been knocked and then started to place a few parts in, waiting on two orders from Mini Sport and Moss before I can start building it up.

The last patch to do! woo!

Patch.

& in, my welds are so bloody ugly.. not the easiest of places to gain experience and practice!

(Looking at the rear seat)
Because I had welded the heelboard end, you could see where I had welded in new metal. I will be having a harness bar which means my rear seats will be left as bare metal.. so I didn't want visible welds, it needs to be nice and smooth

Out came the DA sander..


Which made light work of the filler! Still some rough edges, but after some paint gets put down they won't be as noticeable.

Last week I dug out all the underseal along the bulkhead & rear seat lines.. and it got everywhere! even in the boot! And as I kept moving around the shell I kept standing/kneeling on it which was smudging it, so before things got worse I pulled out the hoover and cleared that all up.

Another thing to sort was where I had removed the two stripes with a heat gun, it hadn't removed it all so whilst the DA sander was out I took the chance to smooth it all down..

Looking smoother!


Quickly whipped around tidying areas up and giving them a coat of red oxide.

And a good photo, she's almost ready
#320

Posted 21 August 2011 - 06:38 PM
So much attention to detail though!!!!
True inspiration!
Cheers
Louis
#321

Posted 23 August 2011 - 08:15 PM
#322

Posted 25 August 2011 - 07:38 PM
Small update, I've been waiting on a few parcels.

^ Mini Sport

^ Moss

^ Minispares


I am over the moon with these! They aren't cheap but they will be so effective! I will throw a load of waxoyl up into the arches and then fasten these down, will keep all the dirt and grot out! Should quieten the road noise down a lot as well!


Sexy

Quickly assembling bits and bobs, working out what goes where and which bits I'm missing.
#323

Posted 25 August 2011 - 07:47 PM
just dreading all the nuts and bolts haha, looks great mate!!
Louis
#324

Posted 25 August 2011 - 07:49 PM
#325

Posted 25 August 2011 - 08:00 PM
keep going bud, not long now
#326

Posted 27 August 2011 - 07:22 PM
Fairly productive day of sorting things out and getting things in order
& George (crazypainter) came over from Solihull today to have a proper look at the shell, which was very good of him, he had a look around and pointed things out that I didn't even notice.. such as how the rear 1/4s dip in at the bottom, not noticeable at the moment unless you run your hand over it, but if this went uncorrected you'd notice it a whole lot more if it got painted.
He also pointed out a lot of half arsed poorly done repairs that Shifty had done (sorry mate!) such as how the a-panel is incorrectly and badly fitted, which will be noticeable when the doors are on (photos to demonstrate). He also picked up on how Shifty had reskinned the door (this was a job on the to do list that I knew about already, but was yet to correct it) so that needs sorting as well.
Basically there are a few things left for me to do to the shell before it goes away into the trusted hands of George, he's working out some prices for paint and dates for when it can be picked up at the moment
I need to get it rolling & he asked if I could get the handbrake linked up and working so it didn't roll away when he paints it
I also need to get the doors fitted and the correct amount of shims so it all fits nicely as well as a few other jobs like tidying up the seams so the cover strips will sit nicely, source and fit a bonnet & a few more jobs..
Anyway.. today..

Started off with this clean space!

Dug out this grotty lot..

Yuck!

Yuck!

Cleaned!

Messy messy messy!

End result


They're different.. is this okay? I assume so as they were working fine when the '90 was running! maybe one was replaced at some point.


And then I tidied all the junk I had pulled out of the '79 into this one box as it was just pilled up and looking messy in the corner, in doing so I pulled out some parts that I will need to re-use.

Pulled the heater out of the '79 as well, I will be using this one.

Lovely!

Stripped and boxed up, I will go back to it when the shell is away being painted.

One night this week I will sort the rust and repaint these. Got the rebuild kits for the top arms on the way as well.
#327

Posted 27 August 2011 - 07:27 PM

Correct.

Incorrect, should have a tack at the top.

Correct.

Incorrect.

This needs addressing, to make the seam strip sit properly.

And the bottom of the door..

Quickly got them in place (no seals, hinges, catches etc.. just sat in place)

You can see how it bows in at the bottom.. this is the one that Shifty reskinned.

& this door, which I bought from elsewhere.

Sits straighter.. not level as the seals & other parts aren't in, but already miles better than the other door..
#328

Posted 27 August 2011 - 10:50 PM
#329

Posted 28 August 2011 - 08:43 AM
George (crazypainter) will be replacing the O/S a-panel as I'm not happy with it and it's a shoddy job.
#330

Posted 28 August 2011 - 03:58 PM
1 user(s) are reading this topic
0 members, 1 guests, 0 anonymous users


 This topic is locked


