Jump to content


Photo
- - - - -

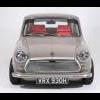
My Mini ;) The Third Chapter. 998 Fast road.


  • This topic is locked This topic is locked
842 replies to this topic

#286 analogue_radio

analogue_radio

    Up Into Fourth

  • TMF+ Member
  • PipPipPipPipPipPipPipPipPip
  • 4,897 posts
  • Location: Melton Mowbray, UK.

Posted 07 August 2011 - 06:24 PM

Nice project! An inspirational retro build. :-


Cheers! :-

Updateee..

If only the weekends were longer! Might chat to work and see if there is a really quiet day in which they won't need me, can get a whole lot done in a single day..

Posted Image

I left the garage in a bit of a state yesterday and I don't like doing work in the garage if it's messy! So had a quick tidy up to kick off the day.

Posted Image

Nice, clean and organised :lol:

Posted Image

Rear subframe dropped down and out again.

Posted Image

Underseal scuffed and marked by being too heavy handed..

Posted Image

Touched up, allll better again.

Posted Image

Posted Image

Posted Image

Another job on the list was to rectify this.. where a previous owner (cough, cough) had put a new wing on and torn the metal in the process.

Posted Image

Blobs here and there, looking unsightly!

Posted Image

Posted Image

Posted Image

Posted Image

Posted Image

A bit of filler and neat seam sealer and it'll be right as rain :( the metal was very thin in places beforehand so I'm confident I've made it thicker.

#287 analogue_radio

analogue_radio

    Up Into Fourth

  • TMF+ Member
  • PipPipPipPipPipPipPipPipPip
  • 4,897 posts
  • Location: Melton Mowbray, UK.

Posted 07 August 2011 - 06:25 PM

Posted Image

Popped into Halfrauds to get ripped off! £16 for those two! Ran out of Red Oxide as well so I've got 4 cans on order from Ebay, £14 for 4 :lol:

Posted Image

Posted Image

Posted Image

Posted Image

This is unneeded, never been a fan of the fresh air vents, won't be able to use them anyway as I've got works rally style dashboards and it's just another place for rust to form! I'll open my windows instead :( so rather than opting for cutting it out, I decided to just plate over the top of it.

Posted Image

Posted Image

Posted Image

Posted Image

Posted Image

Started off well.. so damn awkward trying to get up inside the arch and see what you are doing.

Posted Image

SCROLL PAST THIS PHOTO QUICKLY :-

Posted Image

After that was done I moved onto the cabin, these metal 'tags' are unneeded now.. I will be applying dynamat (of some sort) and then will spray adhesive and the carpet over the top of that.

Posted Image

Quite of a lot of the fiddly things! And as my spot weld drill is blunt and awful, I opted for the angle grinder and flap disc.

Posted Image

23 tags later!

Posted Image

Looking a tad dirty!

Posted Image

Voila! after a good old hoover and a dusting of etch primer in the necessary areas. Much better :-

#288 LouisT

LouisT

    Mini Mad

  • Members
  • PipPipPipPip
  • 197 posts
  • Location: Manchester

Posted 07 August 2011 - 07:11 PM

Do you not need the tags?

i was wondering what to do with these on mine?

cheers

louis

#289 analogue_radio

analogue_radio

    Up Into Fourth

  • TMF+ Member
  • PipPipPipPipPipPipPipPipPip
  • 4,897 posts
  • Location: Melton Mowbray, UK.

Posted 07 August 2011 - 07:21 PM

Correct me if I'm wrong, but they are used to retain the loose sound deadening pads that were fitted as a factory standard. I've kept a few of the tags that are up underneath the upper dash rail as I might use these to retain the wires behind my dashboards.

There are also some tags in the engine bay which are used to retain and keep the wires up and hidden under the scuttle.

#290 LouisT

LouisT

    Mini Mad

  • Members
  • PipPipPipPip
  • 197 posts
  • Location: Manchester

Posted 07 August 2011 - 07:29 PM

Ok thanks for that, ill remove mine then when i get round to it.

Louis

#291 Ace Alex

Ace Alex

    Formally known as Pedal Pusher

  • Members
  • PipPipPipPipPip
  • 330 posts
  • Location: Somewhere

Posted 07 August 2011 - 07:32 PM

Another good update, all those small jobs add to the finished article. Do you have a final colour(s) in mind?

#292 analogue_radio

analogue_radio

    Up Into Fourth

  • TMF+ Member
  • PipPipPipPipPipPipPipPipPip
  • 4,897 posts
  • Location: Melton Mowbray, UK.

Posted 07 August 2011 - 07:36 PM

Yeah little by little, it's all in the right direction!

Posted Image

Aye, Sandy Beige with a Snowberry white roof :lol: unsure on the actual colour codes..

#293 minimuk

minimuk

    Camshaft & Stage Two Head

  • Members
  • PipPipPipPipPipPipPipPip
  • 1,946 posts
  • Location: Midlands

Posted 07 August 2011 - 08:09 PM

Yeah little by little, it's all in the right direction!

Posted Image

Aye, Sandy Beige with a Snowberry white roof :lol: unsure on the actual colour codes..


I will have a look for you, what year approx is that car? 1969? by the way is that chrome arch trim? on 12" wheels?

Edited by minimuk, 07 August 2011 - 08:14 PM.


#294 minimuk

minimuk

    Camshaft & Stage Two Head

  • Members
  • PipPipPipPipPipPipPipPip
  • 1,946 posts
  • Location: Midlands

Posted 07 August 2011 - 08:24 PM

Sandy Beige BMC/BC Code; BG15
Snowberry White BMC/BC Code; WT 4

#295 analogue_radio

analogue_radio

    Up Into Fourth

  • TMF+ Member
  • PipPipPipPipPipPipPipPipPip
  • 4,897 posts
  • Location: Melton Mowbray, UK.

Posted 07 August 2011 - 08:25 PM

Yeah it's a '69 :lol:

& yeah that's a chrome arch trim but they are 10" wheels.

EDIT: Cheers Minimuk! :-

Edited by analogue_radio, 07 August 2011 - 08:27 PM.


#296 analogue_radio

analogue_radio

    Up Into Fourth

  • TMF+ Member
  • PipPipPipPipPipPipPipPipPip
  • 4,897 posts
  • Location: Melton Mowbray, UK.

Posted 08 August 2011 - 07:09 PM

I've got this Wednesday off work :( so I'll get a long day in and also ring round a few bodyshops ;)

I've been developing my 'prototype', could do with finding some thicker card really, but for now the thin stuff is fine.

I've added tabs on the end to allow room for the rivets (the sharp corners will be rounded in the final design) and a tab at the base for another rivet.

Posted Image

Posted Image

Posted Image

The base also needs to be a tad wider, of if I were to off centre the mirror it would work that way.. but I like the idea of having it centralised.

#297 minimuk

minimuk

    Camshaft & Stage Two Head

  • Members
  • PipPipPipPipPipPipPipPip
  • 1,946 posts
  • Location: Midlands

Posted 08 August 2011 - 09:01 PM

looking good, can I suggest you make a plead in the middle of the large vertical one with the edges 3 degrees inwards will do, so it won't colapse inwards and have a 2mm rim folded under the "base" (front and back) for more strenght down wards. got my drift?

#298 analogue_radio

analogue_radio

    Up Into Fourth

  • TMF+ Member
  • PipPipPipPipPipPipPipPipPip
  • 4,897 posts
  • Location: Melton Mowbray, UK.

Posted 08 August 2011 - 09:08 PM

Not 100% sure what you mean but it should do as it is mate! It'll be made out of 1mm brushed aluminium (I think) and the mirrors are damn light anyway, once they are tightened down there won't be much vibration.

#299 minimuk

minimuk

    Camshaft & Stage Two Head

  • Members
  • PipPipPipPipPipPipPipPip
  • 1,946 posts
  • Location: Midlands

Posted 08 August 2011 - 09:20 PM

no problem, was just a thought, I am sure you know what you are doing, the precision drawing + templates show's that.

#300 tedmcedd

tedmcedd

    Up Into Fourth

  • Traders
  • PipPipPipPipPipPipPipPipPip
  • 2,751 posts
  • Location: Huddersfield

Posted 10 August 2011 - 03:01 AM

looking good! the wing mirror mounts are getting there! are you going to get them made up in some stainless or some ally??

W&P will look good on this with the 6x10

Ed


3 user(s) are reading this topic

0 members, 3 guests, 0 anonymous users