My Poor Wee Mini Sky
#121

Posted 20 February 2011 - 08:29 PM
Graham
#122

Posted 05 March 2011 - 06:52 PM
But thanks again for the advice and encouragement benjy_18, pinhead, liam_italian and Graham.
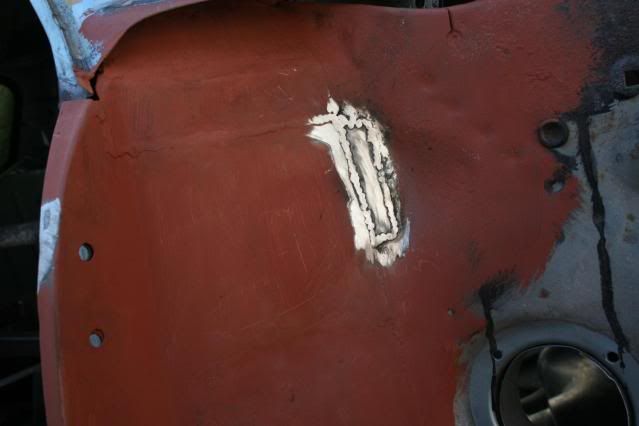
I depressed myself more by cutting out the welding I had done at the tops of the inner wings - I thought that was preventing the panel coming back - this made no difference so I had to repair my repairs!
Drivers side


Passenger side - it would break your heart. I took the piece right out and replaced it. I had cut into it with grinder previously, like I do!


Then I did a repair to the door pillar - driver's side at the door stop


ghastly welding


I also did a few repairs to the side seams and the roof channel where the plug welds go
De-rusted and painted with POR15 - you have to 'Marine Clean' then 'Metal Ready' before you can apply the POR15. The metal contact areas are painted with weld through primer.

And then forced the panel in. Drilled a million holes and did a million plug welds.

I used a joiners clamp to force the steel to the shape of the door pillar, clamped with mole grips and plug welded. The fit at the sides is better than I expected but if the welds give way it will spring back to shape with an awful release of energy


But the plug welds at the roof are awful. I could not get the torch in properly and I couldn't get comfortable to weld. I'd advise anyone trying this to drill the holes in the panel and plug weld from underneath. We are so wise afterwards. I will have to try and grind carefully and cover the mess with seam sealer. But you know me with a grinder - yes I'm sure to slip and cause havoc.

And from the inside

I have just put a couple of plug welds on the bottom and will do it properly as the dash rail goes in.
This looks like nothing but it has been quite horrendous. It's taken hours of work and aged me. I am just not up to Neil's (sonikk4) or Shifty's abilities. I would have loved to hand it over to them.
I have to tidy up the job and then weld in the new upper dash rail. Maybe I'll do the passenger rear quarter next. I've got the floors to do but maybe leave this till the subframes are out and I can get it on its side.
That's another job done and gaping rust holes have been repaired. The windscreen was a mess. Hopefully I might get a bit more done soon. Surely the dash rail will go quicker.
Grinding on
Hugh
Edited by hughJ, 05 March 2011 - 07:06 PM.
#123

Posted 05 March 2011 - 07:02 PM
With regards to grinding down the welds are you using grinding discs or the flapper style disc's. The flapper style are less abrasive and leave a nice polished finish or you could use a high speed die grinder with a Roloc holder and discs to finish off any grinding. Again these leave a really nice smooth finish which is why i have been using them by bushel on Erm.
#124

Posted 05 March 2011 - 07:10 PM
#125

Posted 05 March 2011 - 07:20 PM
Oli
#126

Posted 05 March 2011 - 08:21 PM
for example on the O/S flitch

Inner sill for me next, biggest bit yet for welding, hope it turns out as good as your welding !!! Keep going !
Graham
#127

Posted 05 March 2011 - 11:52 PM
Certainly making swift progress of and always love reading up to see what your up to. Its been said before... but this will be the dogs danglies when done
Keep up the good work
Matt
#128

Posted 06 March 2011 - 12:48 AM
#129

Posted 07 March 2011 - 12:14 AM
Your doing amazingly well, keep it up..
Dan..

#130

Posted 07 March 2011 - 09:27 AM
Mark
#131

Posted 08 March 2011 - 02:26 AM
I have to do my flitches tomorrow, im not looking forward to it as it will be the first major think that i cut out of my estate and with no previous experience of body work, its kinda pants filling (if ya get my drift).
#132

Posted 10 March 2011 - 07:14 PM
I have put in the upper dash rail - on the whole not too difficult. This was a non-genuine panel from minispares.com and fitted pretty good.
The pictures tell the story.


And I have to say, despite my worries, that the front looks so much better now and seems so much more solid. I've ordered floor repair panels and sills.
Welding along
Hugh
#133

Posted 10 March 2011 - 07:27 PM
#134

Posted 10 March 2011 - 07:29 PM
Don't need to go to that etent thankfully, but make sure the windscreen fits before welding in fully !!! You have probably already thought of this but thought I'd just say !!
Graham
Hugh 100% agree with Graham here as we nearly fell foul of this problem just before Erm went to paint. Considering i only changed the scuttle the windscreen would not fit at all so i had to trim a lot off both lower corners and eventually some in the centre section as well. In the process of trying we did ruin the old windscreen seal and had to try another way of installing the windscreen which was successful. I even fitted the seal filler strip just to be certain all was good.
To be honest the scuttle was cut back to the original cut marks and clamped to match the inside contour of the original panel but it just shows you it was still out.
Hopefully you should not have the same problem but DO check, it saves hassle later.
#135

Posted 10 March 2011 - 09:36 PM
Nick - there are some pictures further back in the post (page 5). I made sure the bolt holes for the hinges lined up by putting bolts in them. I put the doors in a few times to see if things looked OK. I had up to about 1mm gap between the panel and the old edge of the flitch- enough for an intergrip to fit. It seemed to fit better as the welding went on.
Hugh
3 user(s) are reading this topic
0 members, 1 guests, 0 anonymous users
-
Bing (2)


