Jump to content


Photo
* * * * * 2 votes

My Poor Wee Mini Sky


  • Please log in to reply
1146 replies to this topic

#61 DAVEY_C

DAVEY_C

    Super Mini Mad

  • Members
  • PipPipPipPipPipPip
  • 555 posts
  • Location: kildare, ireland
  • Local Club: irish minis owner club

Posted 31 December 2010 - 09:28 PM

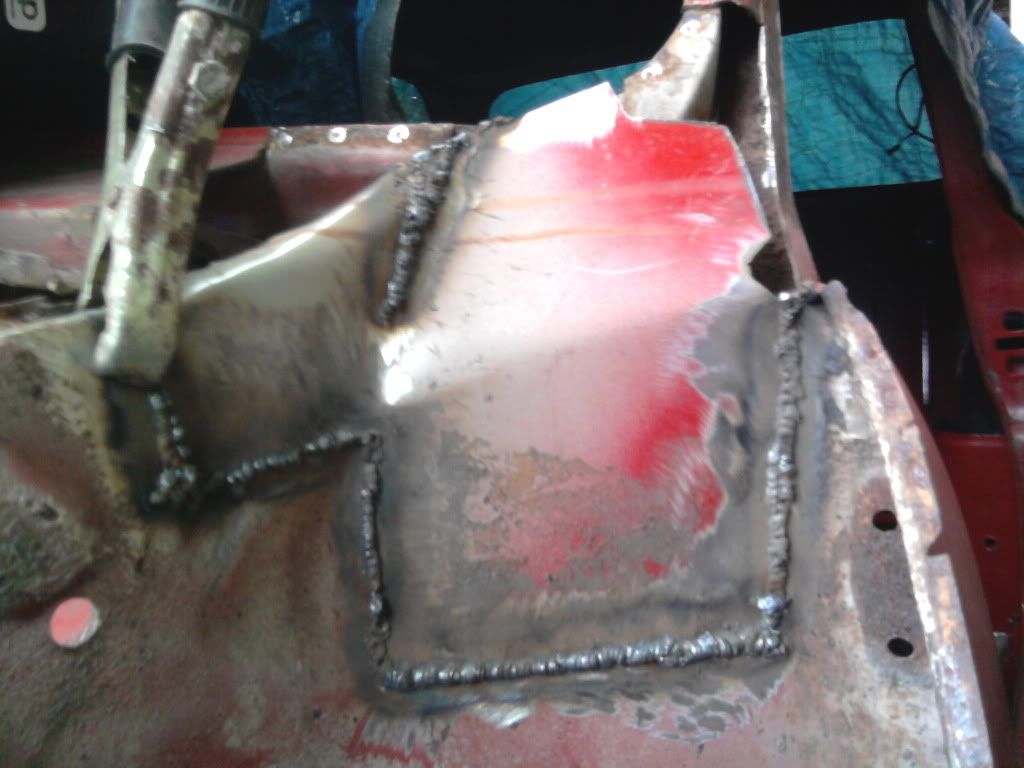
good progress being made, persistance is the key and good to see your persistance is inspiring others. here is a cuple of pic's of my first flitch repair, i made a cardboard templete and cut it out of an old door skin, shaping was done on my bench and for curved flanges i had bits of plywood so i cut a former to help. on the top inside i couldn't get it to sit down when welding because it needed stretching so i cut it and filled the gap with weld.... not the neatest of jobs but the rot is no more

Posted Image
Posted Image

keep up the good work....

#62 hughJ

hughJ

    Soldiering Along

  • Members
  • PipPipPipPipPipPipPip
  • 727 posts
  • Location: Highlands, Scotland

Posted 03 January 2011 - 12:56 PM

pinhead, Chris and DAVEY_C a huge thanks to you for the advice. This forum is so helpful. Great to see your pictures back Chris. Well I had a couple of days off - a good new year to you all. I don't think I'll get much done this week. I'm church treasurer and its the best chance to balance the accounts to the end of year and produce a statement that is acceptable to OSCR (Office of the Scottish Charity Regulator). But the bank's not open till tomorrow.

I drilled out spotwelds and tried to deal with the roller welds on the door pillars at the windscreen surround. I think you guys are so much more patient than me - damage as usual and not a clean job.

Drivers side

Posted Image

Passenger side

Posted Image

Notice I had to repair a bit I gouged out with my chisel!

Posted Image

And the drivers side I had to stitch a wee tear

Posted Image

And ground it

Posted Image

Hugh

#63 Danny-T

Danny-T

    Mini Mad

  • TMF+ Member
  • PipPipPipPip
  • 111 posts

Posted 03 January 2011 - 01:30 PM

I'm definitely with you on the patience stakes, the result of my frustrations with the pedal box :(
Posted Image

Any progress is good progress, keep it up ;)

#64 hughJ

hughJ

    Soldiering Along

  • Members
  • PipPipPipPipPipPipPip
  • 727 posts
  • Location: Highlands, Scotland

Posted 03 January 2011 - 07:22 PM

Oh Danny-T! Somedays you could cry. But we've got to be men! These are the days you think I should have stayed in the house.

This afternoon I took all the rear glass out. I used my feet lying on my back and out popped the rear windscreen straight onto the concrete floor! I thought well there's another bit gone but, it didn't break! I then took out the rear side windows using the same method and you'd never believe I did the same with one of them and it didn't break either. The jam was with me today. However, true to me, I trashed the trim cards below the windows trying to get them out. A Mini's trim is really made of rubbish and very difficult to remove without wrecking it.

Posted Image

Glass ready to go up to attic

Posted Image

And a heap of other bits

Posted Image

Then I tackled the spot welds along the top of the windscreen surround. I made a poor job. I couldn't see the weld, could just feel a dimple in the metal behind. I am going to have to cut out and put in some patches. I am dreading tackling the roller weld along the roof seam.

Posted Image

Hugh

#65 CLM

CLM

    One Carb Or Two?

  • Members
  • PipPipPipPipPipPipPip
  • 817 posts

Posted 03 January 2011 - 08:23 PM

Looking good Hugh! On those sections that are spot welded that you cant find them, one way is to cut it so it's just a strip welded on, get one spot weld out and with mole grips/small screw driver lift that sectup away untill you locate where the next spot it then take care of that spot by drilling or grinding, and then pull up the seam to the next one. Dont think I have any pictures of that unfortunatly, though I did that last night. What I am working on would scare you hehe. No pictures though unless it's sucessfull. :D

Chris

#66 dfraser

dfraser

    Mini Mad

  • Noobies
  • PipPipPipPip
  • 121 posts
  • Local Club: Minis in Inverness

Posted 03 January 2011 - 09:52 PM

Hi Hugh, nice to see a project post from someone local! I think you are doing great with your welding - nice to see you are wanting to get it right too. I'll be keeping an eye on your project. I might have some bits and bobs too if you find yourself needing second hand bits...
Best wishes, David

#67 leadly

leadly

    One Carb Or Two?

  • Members
  • PipPipPipPipPipPipPip
  • 779 posts
  • Location: Derby
  • Local Club: [] D.C.M.O.C []

Posted 03 January 2011 - 11:57 PM

Just read through your topic so far and I'm pleased to see your keeping at it.

I'm learning to weld and my mini looks to be in similar condition to yours. I had ago at patching my bootlid after not much practice and made a right mess, so practice, practice, practice and all is getting better.

Keep up the good work and you will be done in no time.

It can really get you do can't it! I get fed up with it every now and then but you gotta think of what an amazing feeling you will have once you get to 100% complete................then the fun of buying another one to repair, lol!

Best of luck!

- Rich

#68 myredmini

myredmini

    My Mummy Says It's OK

  • Members
  • PipPipPipPipPipPipPipPipPip
  • 3,211 posts
  • Name: Dan
  • Location: Teesside
  • Local Club: BOG MOG

Posted 04 January 2011 - 12:39 AM

Looking great, that weldings coming on a treat well done !!!

#69 hughJ

hughJ

    Soldiering Along

  • Members
  • PipPipPipPipPipPipPip
  • 727 posts
  • Location: Highlands, Scotland

Posted 04 January 2011 - 08:28 PM

Thank you Chris - I almost feel we are old friends now even though an ocean is between us. I am looking forward to more pictures from your restoration. To be taking panels off one Mini to use on another takes my breath away - good for you.

And thanks David, yes another Highlander with just two firths and twenty miles between us. Thanks for your kind offer - I will probably get in touch later. At present can't see past the grinding and welding.

Thanks Rich - the welding is difficult but I do seem to have got round a corner. I don't panic about blowing through and if I do and havn't ground it too thin I can usually catch it again. Its still not beautiful.

Thanks, too, myredmini for the nice comments.

These comments do keep you going.

Well after a day at figures I decided on therapy - out to the garage and get a couple of patches in. Chickened out of tackling the seam at the gutter.

So I tackled the grinding and spot weld removing mess and destruction created by HughJ removing panels. Tackled the top passenger corner. I first stitched a grind mark I had done years ago when I was looking at how bad the rust was. Then patched in a wee piece. I didn't use one continous piece as I wanted it to be as near to what it was. It is two pieces at the corner.

Posted Image

You can clearly see my damage!

Ground down - can't get into the corner - I have a wee power tool that might do that. Then cut out the next bad bit and put in another patch.

Posted Image

And ground it flat.

Posted Image

Not much but every little will get me to a going Mini.

Hugh

#70 CLM

CLM

    One Carb Or Two?

  • Members
  • PipPipPipPipPipPipPip
  • 817 posts

Posted 06 January 2011 - 11:14 AM

Thanks Hugh,

Well you know, when you are short on funds either you wait or you make do with what you have, I have a lot of donor bits to work with so *shrug*

my current 'project' in the mini would scare you... I am saving something that was not saveable...

Pictures when I get the project mostly done >_<

Chris

#71 Meland4

Meland4

    Previously Known as Eve

  • Noobies
  • PipPipPip
  • 94 posts

Posted 13 January 2011 - 11:04 AM

I've just read this from the beginning. Looking really good, i'm no welder (luckily the hubby is) but can see how much your welding has improved, impressed >_<

I spend my hours with the wire brush and we have only just started the body work.

Looking forward to watching your progress

Mel

#72 sonikk4

sonikk4

    Twisted Paint Polisher!!!

  • Admin
  • PipPipPipPipPipPipPipPipPipPipPip
  • 15,970 posts
  • Name: Neil
  • Location: Oxfordshire

Posted 13 January 2011 - 06:40 PM

Hugh if i was you the wiring loom needs to be pulled up and out of the way. I have attached a piece of old washing line by lots of tape and a ty wrap and then pulled the loom out into the car.

The last thing you need to do is melt the loom.

#73 hughJ

hughJ

    Soldiering Along

  • Members
  • PipPipPipPipPipPipPip
  • 727 posts
  • Location: Highlands, Scotland

Posted 15 January 2011 - 07:24 PM

I have been doing a bit but I seem to work so slowly compared with others. I was out in the garage most nights this week - cold early in the week but today quite mild!

Thanks again for the replies - Chris, Mel and Neil. Chris - always an encourager. Thanks again for advice, Neil, I will move the loom before welding the new windscreen surround. Thank you Mel, give welding a go - for me it is starting to become more pleasant than wire brushing! But who likes wire brushing! However the welds down below are not very nice.

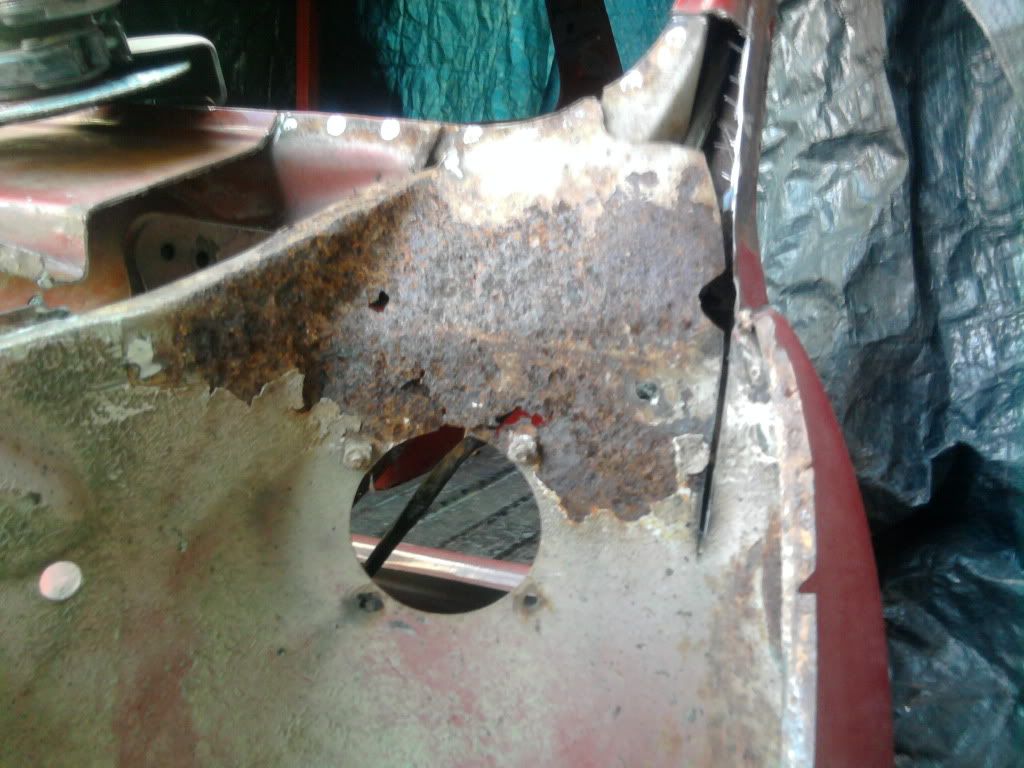
I've moved from the windscreen surround to doing the drivers side flitch panel. I have to take more metal away from the windscreen - having got the new panel to compare with. The flitch panels have to be repaired anyway, before the the scuttle and surround can be fitted.

Posted Image

I had to do a wee repair to the doorstep before the repair panel can be fitted.

Posted Image

Posted Image

Posted Image

Cut out the shape of the repair panel

Posted Image

And did a very ugly repair to the back of the lower dash-panel

Posted Image

Trial fit of the flitch repair panel - I tried to be so careful but there is quite a gap in some places where I have to butt weld. I'll put my hammered bit of copper pipe behind it when I do it. I've also drilled holes for plug welding.

Posted Image

The door on this side has always been a poor fit and drops as its opened. I hope this is due to the lip on the scuttle panel having rusted away (where the A-panel is folded round it). I hope when all welded up it will be fine. I did try the door in a couple of times but it still sags when just held with a couple of bolts and clamps.

And surfaces cleaned with flap wheel and primed with weld through primer where metal meets metal.

Posted Image

So next week I will hopefully weld in my first panel, instead of just wee patches. I have seen this repair on other members topics but could not conceive of the work involved to get here.

Grind on

Hugh

Edited by hughJ, 15 January 2011 - 07:35 PM.

#74 mini mayhem

mini mayhem

    Speeding Along Now

  • Members
  • PipPipPipPipPip
  • 307 posts
  • Location: Cork,Eire
  • Local Club: Mini Club Of Ireland

Posted 15 January 2011 - 08:21 PM

wow, great project and your welding is coming on leaps and bounds. best of luck with the scuttle repair :lol:

#75 Meland4

Meland4

    Previously Known as Eve

  • Noobies
  • PipPipPip
  • 94 posts

Posted 15 January 2011 - 09:05 PM

Ooo Exciting stuff!! Looking good :lol:

I am not quite as brave as you, and have a hubby who can already weld, so although I want to learn I'm going to let him do Harvey and hopefully by the next project I will be good enough notto just blow holes everywhere.

We are just about to cut out the driver side flitch panel for a pretty similar repair to yours.

Mel


3 user(s) are reading this topic

0 members, 2 guests, 0 anonymous users


    Bing (1)