My Poor Wee Mini Sky
#481

Posted 21 January 2012 - 06:35 PM
#482

Posted 28 January 2012 - 04:54 PM
Andrew, Danny and Tom once again appreciate the encouragement.
I've had a less productive week. Or an even less productive week. You should see what Tom gets through!
I've rebuilt the left side parts for the front subframe - calliper with new stainless pistons and seals, driveshaft with new gaiters and hub - degreasing the swivel pins and bearings and using new seals.


I am waiting on a top arm repair kit which should be early next week. I need to clean and paint a bit at the front before the subframe goes in. Maybe, just maybe next week, nearly a month late!
Crawling along
Hugh
#483

Posted 28 January 2012 - 05:05 PM
#484

Posted 28 January 2012 - 06:24 PM
#485

Posted 28 January 2012 - 07:29 PM
Keep crawling,
Graham
#486

Posted 06 February 2012 - 09:43 PM
Graham I pushed the pistons through the dust seal and piston seal just having the retainer lightly tapped in to start with. I hope they aren't kinked!! You always worry me and your usually right!
minimuk if it was done in a month I would be delighted but no way!
Carlos your offer is so kind! But I'll turn it down this time (well every time really).
I had to fit a new top arm repair kit. I tried to drift the old needle bearings out - no luck. I tried welding a bit of steel and hammering from behind but the weld didn't take on the greasy surface and I'm out of practice. Eventually and it turned out to be easy - I drove a small drift behind the bearing and then got a big screwdriver into the space and out it came in bits.
I cooled the new ones overnight in the deep freeze and warmed up the top arm on top of the stove. I do that when doing wheel bearings. It just makes that bit easier to tap in.

I had to strip the paint off the arm and do it again after all the work in the vice!

And rebuilt the left side of the subframe

Then had to deal with this - I had painted from underneath so couldn't get at this easily till the right way up.


Now I'm not happy. Where I used insulating tape to mask the Rustoleum Combicolor has peeled off. Does not fill you with confidence. I had ordered more but got phoned back by Combination to say they don't do the Combicolor rattle cans any-more. So they sold me Rustoleum Hard Hat. It feels better in every way. It covers quickly. It dries quickly. It has a tougher feel about. But its a bit more expensive. I think I am going down this road now. The colour is identical as seen above.
So tonight it looks like this

I have bits of paint to touch up, but its on its wheels and can be moved about!!
But now its what I have been dreading - getting the drivers door to fit. Then putting on the front.
Help - Can anyone advise on the size of the splined bolts that hold the door hinges to the doors. I have a metric bit that fits but not snugly. I don't want to hit with the impact driver unless I get a good fit.
Wheeling along
Hugh
#487

Posted 06 February 2012 - 10:26 PM
#488

Posted 06 February 2012 - 10:27 PM
#489

Posted 06 February 2012 - 10:40 PM
ages away from there myself, but will get there this year. Is the rustoleum chipping off easily too, aswell as the masking tape strip?? I am getting on to Avenue coatings tomorrow to see if they can colour match my engine with it. Have read on another thread about chipping, but others say it's fine. What have you found??
Did you just replace the needle bearings in the top arms? /the ends look in great nick, better than mine.
Nice progress,
Graham
#490

Posted 06 February 2012 - 10:44 PM
#491

Posted 06 February 2012 - 10:57 PM
Chris
#492

Posted 13 February 2012 - 05:17 PM
Then once the Pugeot is compleated will start looking for a Mini project, well if SWMBO allows it!!!!.
Roddie
#493

Posted 13 February 2012 - 08:11 PM
Yes Chris it is scary but that's life. I am never succesful with paint. I have tried my push-bike frame several times and a winter soon shifts my paint!! I am hoping the stonechip will save the day!
Thanks Shifty - your advice is always appreciated. I am going to 'Hard Hat' it!
Hi Graham - I am not overly impressed with Rustoleum's Combicolor but the Hard Hat does seem better. I reused the pin and needle bearings in the drivers side top arm but fitted new needle bearings and pin in the passenger side.
Thanks minifcd there are a lot of 'kind' people on the forum who offer you all sorts of jobs - the top arms are not so bad once you get the right method. Try what I found worked!
Thanks Tom it is nice putting in cleaned up parts.
Well I've been bad. After getting it on all four wheels again I have had a week of doing nothing to the Mini. I go through these periods of just getting fed up of it. Well when you have been working at it for over a year it gets to you sometimes! But today is half-term holiday and my wife (dear little woman) more or less said 'get back out to your garage'. I'm obedient! She was right, as always!
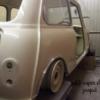
I decided to tackle the door fit. I showed on page 6, long, long time ago! the poor fit of the driver's door.
It had rubbed away paint at the top rear corner. It also was too far inwards though it doesn't show here.

And it stood proud at the bottom rear.

So I fitted the doors and got to work with some simple tools - a hammer, a block of wood and a long piece of wood for a lever.
This is the driver's door now


And that bad top corner

Now I am delighted with that. I know there are others who get a superb fit. But I am happy with this. The door open and shuts like a Golf, well nearly. It sits nicely against the seal. So it will do me.
The passenger side needs a wee bit - I think I'll just remove the shims. My new rear quarter is just a bit snug. It doesn't rub though.

I thought my doors would always be a disaster but I'm quite happy now.
I also did a bit of replacing of washers and bolts on the front subframe. I had lost a couple of spring washers and one had broken in two!
Then I removed the bitumen from the rear seat panel. I had melted it doing a repair underneath.

So I am glad that she made me go out. The next dreaded job is fitting the front!! But I have a bit of cleaning inside to do!
Chuckling along
Hugh
#494

Posted 13 February 2012 - 08:17 PM
looking good otherwse! keep it up
#495

Posted 13 February 2012 - 08:19 PM
3 user(s) are reading this topic
0 members, 1 guests, 0 anonymous users
-
Bing (2)


