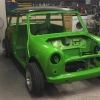
My Poor Wee Mini Sky
#166

Posted 25 April 2011 - 08:27 PM
#167

Posted 25 April 2011 - 08:32 PM
hugh you should be proud off your work so far! trust me you are not the only one that gets carried away with the grinder i too have spent most of my time repairing what i have butchered, and forgetting to turn gas on ect...........but we all learn from mistakes keep up the good work!Hello - Dan - good to hear from you again - thank you.
I got the passenger side floor welded in today. And it fought me.
Made up a wee clip to hold the fuel line - you will see why I know about this in a wee minute
And plug welded it to the underside of the floor panel. Me being me forgot to put the gas on and had to redo one of the welds. Will I ever learn?
And here's how I know how to put that on
Yes! I went merrily through the fuel line with the grinder when removing the old steel on Saturday. What a wally. I knew the battery cable and the brake lines went down the right side so was careful cutting through the drivers side. But I just merrily ground away.
Well I tacked the panel in. You can see on the front left that I had cut too much off the replacement panel. I just never learn.
And welded it up
Look at the mess at the left front where I had to put in patches and extra pieces to join it all up. It's really horrible. Thank goodness for carpet!
Somehow its less offensive when covered in primer
And this warms my heart - despite all the disasters, ugly mistakes, etc - I have the floors at the front and the flitch panels all sorted out!!
So I move back a bit now. I'll put the sills on later.
I'm shattered!!
Hugh
#168

Posted 26 April 2011 - 09:29 AM
Graham
#169

Posted 26 April 2011 - 05:47 PM
Good progress though, don't work about forgetting the gas we all do that so its no big deal.
#170

Posted 27 April 2011 - 10:32 AM
#171

Posted 02 May 2011 - 06:19 PM
I did three small repairs today. They were all done together - as paint was drying I worked on another bit, etc.
So tackled the passenger side shock mount - just the same as the driver's side. This time I took my time and got all four bolts out without shearing any of them.

You hope it might be OK but once you wire brush it the truth reveals

So cut it out and made up one single thickness, thicker plate

And welded it in

Then tackled a perforated piece on the passenger door step at the front and the driver's door step about the middle


Made up small plates


And welded in


That's all, I'm afraid. I haven't dressed the welds or primed - I'm out of primer. I answered your question Graham about primer of your own post - in case anyone thinks I'm being rude to Graham.
I've got the new passenger side quarter panel. I'm waiting on the retainer panel but that's where I'll go next.
Welding along
Hugh
#172

Posted 02 May 2011 - 06:29 PM
Graham
#173

Posted 09 May 2011 - 08:01 PM
Graham - thanks as always for your comment. Oh to be a master fabricator!!
By the by - there used to be a really nice bloke called Chris (CLM) on the forum. He gave me helpful advice early on and was a great encourager. I haven't heard from him for a while. Checking his profile - he hasn't been on the forum since 29th January. Hope Chris your OK! If anyone can shed light let me know!
I've just come in from the garage - going to tackle the passenger side rear quarter. There is quite bad corrosion on it - this is from the outside

and the retainer panel from inside

and at the bottom - I had cut into it some time ago in my exploratory cuts

This is to fit these panels

So cut out the retaining panel - what a sorry mess

And trial fitting of the new panel from M-Machine

I have drilled it for plug welds and have primed the back - so hopefully put it in tomorrow and start cutting out the quarter panel. Then see what damage it hides.
Grinding along
Hugh
Edited by hughJ, 09 May 2011 - 08:04 PM.
#174

Posted 10 May 2011 - 08:15 PM
Welded in retainer panel - just a couple of tacks at the rear till I see how everything lines up. Also cut out most of the rear quarter

And from inside the car

And the boots perspective

I think I am going to get away with small plates or patches round here. The wheel arch seems sound and so does the bottom of the companion bins. I'll know better once I get the wire brush on it. I still need to clean off the welds round the cut area. There is another roller weld round the wheel arch. I hate removing roller welds. It was bad enough doing the top of the windscreen surround.
Grind on
Hugh
#175

Posted 10 May 2011 - 08:20 PM
I don't think I would be able to do that to mine, would be to worried about the shell warping.
Not that there is any chance of that happening mind, paranoia is a weird thing!
Looking good so far tho!!
Edited by tino, 10 May 2011 - 08:20 PM.
#176

Posted 10 May 2011 - 08:24 PM
#177

Posted 10 May 2011 - 08:46 PM
#178

Posted 10 May 2011 - 09:54 PM
by the look of your handle its a clarke welder
thanks and keep it up
#179

Posted 11 May 2011 - 12:49 PM
Carlos I got the panel from M-machine - they are quite excellent. You can download their parts catalogue though some prices in it are dated. It is on page 9 and is described as a Quarter Panel Liner Retainer left hand Mk3-5. I think it was £11.50 I paid for mine.
087dave I have a Clarke MIG Welder 135TE (Turbo) which I am more than pleased with. For my thin sheet butt welds I use the lowest power - 1 and min and a wire speed of 6. For plug welds I use 2 and min and a wire speed of 7. I used this as well when doing the thicker plate behind the shock mount. Neil (sonikk4) seems to use a higher setting than this but he is very experienced. If I tried this I would melt the whole universe in the vicinity of my welding torch. For the butt welds you just want to hold the weld down for a second or two. As the red colour dies out move a bit, hit the edge of the red and do it again. In this way you can weld the thin sheet without a disaster happening. It takes an awful lot of practice on pieces of thin steel. You do start to get a feel for it.
Hugh
#180

Posted 11 May 2011 - 04:42 PM
Thanks mate!
2 user(s) are reading this topic
0 members, 2 guests, 0 anonymous users


