Jump to content


Photo
- - - - -

Mk3 Saloon, Very Rusty Project


  • Please log in to reply
879 replies to this topic

#631 jagman.2003

jagman.2003

    One Carb Or Two?

  • Members
  • PipPipPipPipPipPipPip
  • 1,307 posts
  • Location: In the shed.
  • Local Club: Owner of my own club of Minis

Posted 17 January 2013 - 08:05 AM

When we made a dash for my sons first car, we built with MDF and used an old trick from the sixties. in those days vinyl roofs were popular but the cheap look worked well. all we did was run two lines of thick masking tape to create the look of sewn seams and sprayed over with textured paint such as stone chip and then overpainted this with satin black enamel. the finish was durable and looked brilliant. When we did Michaels dash for his mini, i used a similar technique but instead of overpainting with enamel, we ragged off the stonechip and it finished looking like plastic. Cheap, easy and no srface prep required. over a year later, it still looks like a new plastic finish dash.

I like the sound of these ideas. Might try something with stonechip...nice!

#632 minimaxie

minimaxie

    Camshaft & Stage Two Head

  • Members
  • PipPipPipPipPipPipPipPip
  • 1,687 posts
  • Location: Romford

Posted 17 January 2013 - 03:16 PM

jagman how about covering the dash in this?

http://www.ebay.co.u...=item27cc130f4f

#633 jagman.2003

jagman.2003

    One Carb Or Two?

  • Members
  • PipPipPipPipPipPipPip
  • 1,307 posts
  • Location: In the shed.
  • Local Club: Owner of my own club of Minis

Posted 04 February 2013 - 12:58 PM

Quick update. I've been working on another project for a couple of weeks. (see other projects). But now back on the mini. I've continued with the dashboard. Got the glove box sorted. Found some fittings from an old wooden dash. Austin MG 1300 for those old enough to remember them. Will be getting all the brackets & fittings ready. Hopefully will start painting it this week. I'm trying the stonechip with extra texture suggested above. Pics to follow soon.

#634 jagman.2003

jagman.2003

    One Carb Or Two?

  • Members
  • PipPipPipPipPipPipPip
  • 1,307 posts
  • Location: In the shed.
  • Local Club: Owner of my own club of Minis

Posted 14 February 2013 - 08:20 AM

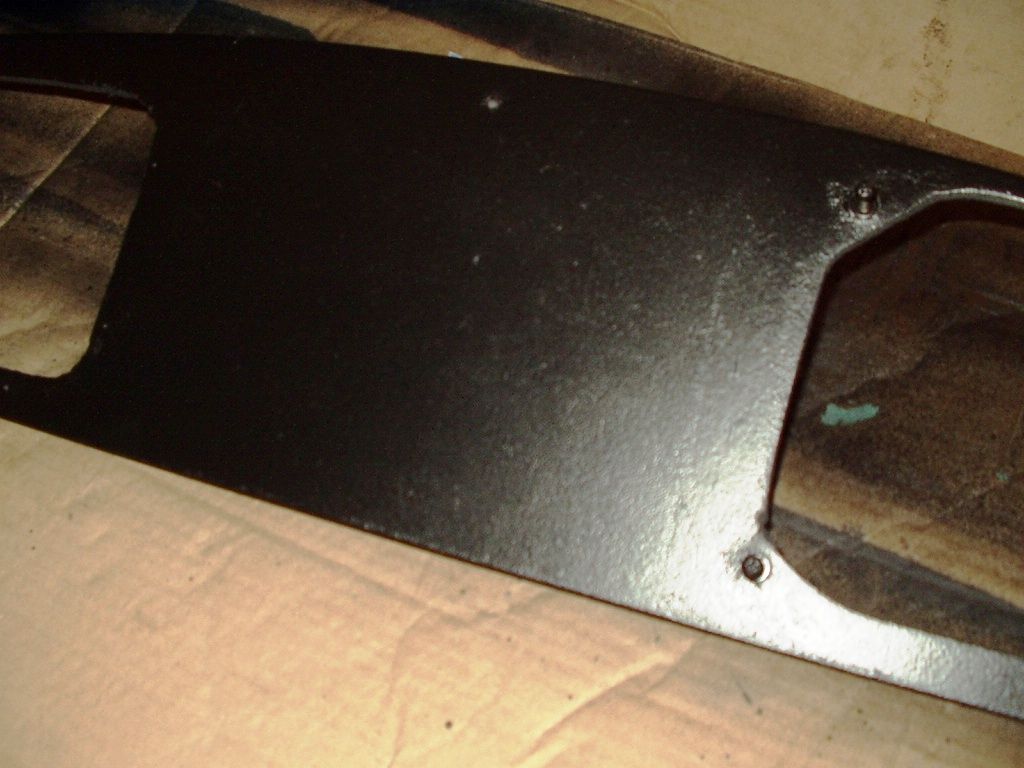
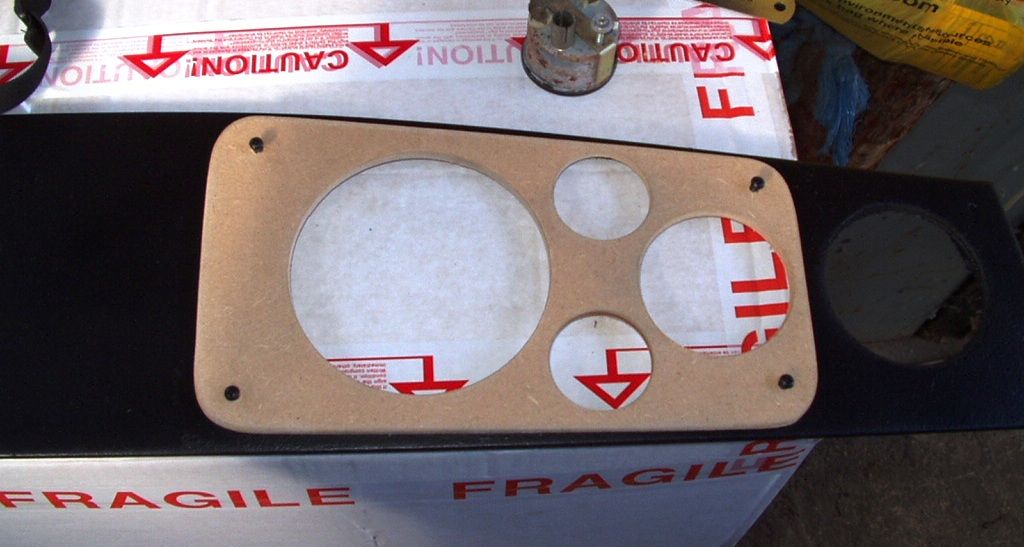
Ok, finished playing with one of my other projects for a while. I have been trying out various methods & styles of dash board finishes. The one I've settled with was suggested earlier by 'Yoda'. I have given the MDF some good layers of primer. Then a quick coat of matt black. Then a coat of stone chip paint. This is thick & sticky. Covers some minor blemishes & gives texture. I then used a sponge to get a pattern in the paint. Finally I have finished with two coats of hard finish satin black. Photos may not show it very well but I'm resonably happy with the result. Should look good once all the dials & trim are fitted.
Posted Image
Posted Image

Edited by jagman.2003, 14 February 2013 - 08:20 AM.


#635 jagman.2003

jagman.2003

    One Carb Or Two?

  • Members
  • PipPipPipPipPipPipPip
  • 1,307 posts
  • Location: In the shed.
  • Local Club: Owner of my own club of Minis

Posted 25 February 2013 - 08:31 AM

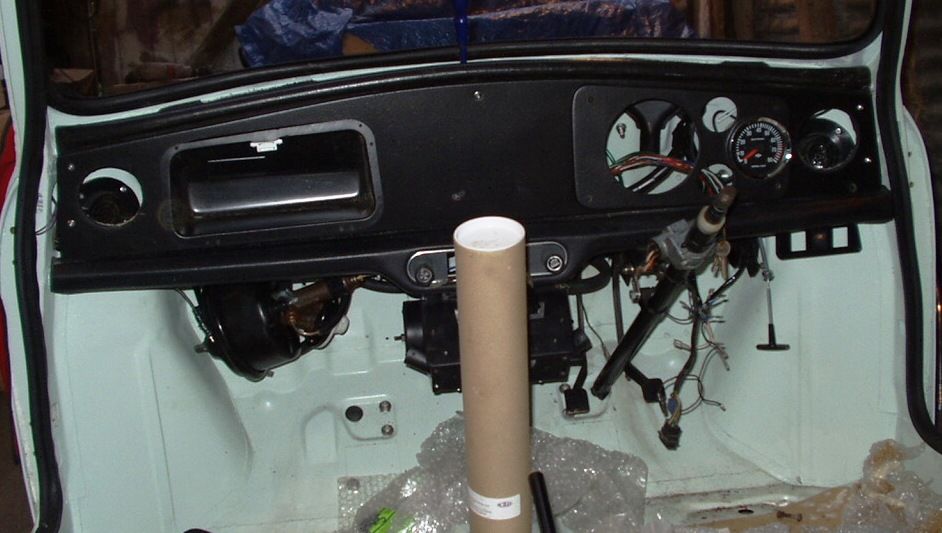
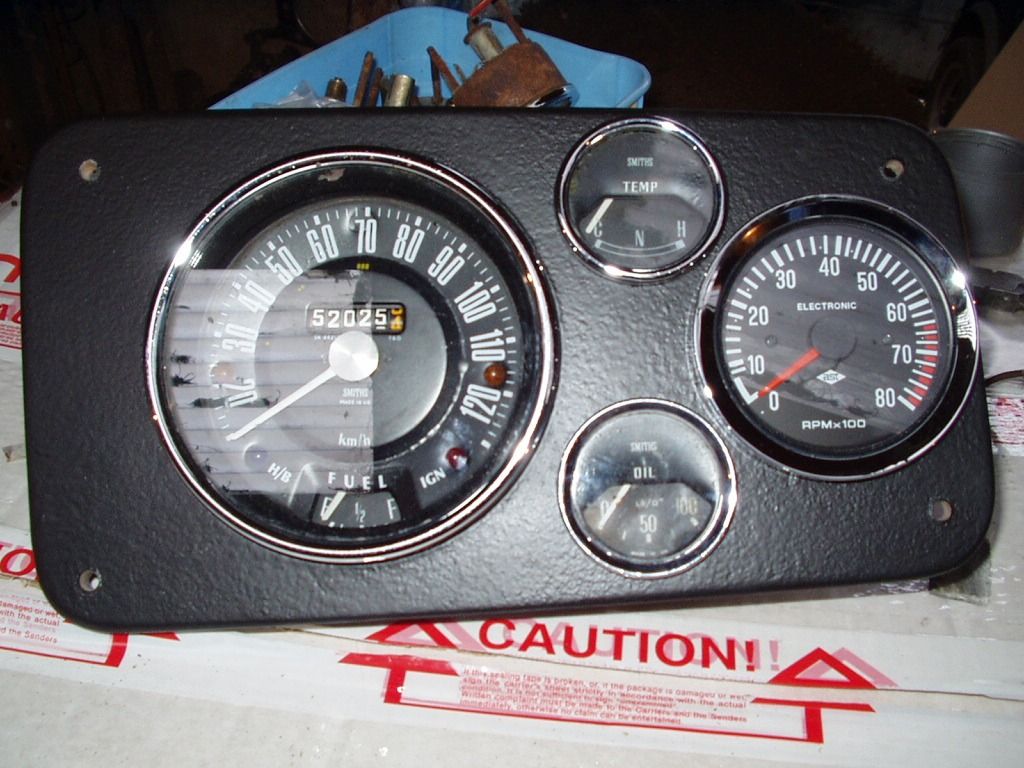
Hello folks, slow progress on the dashboard. Having to spend some time getting it right. The finish is ok. But getting it sit in the right place is a challenge. But I can at least make it functional, live with it a while & then make a choice to change or modify. Just need to modify some dash brackets to support it better & then connect it all up.
Posted Image
Posted Image

#636 mercenary62

mercenary62

    Speeding Along Now

  • Members
  • PipPipPipPipPip
  • 359 posts
  • Location: some where in the 70s
  • Local Club: mini clan

Posted 25 February 2013 - 12:47 PM


just read the whole thread amazing work there fella , glad you took your time and did it right, top work

#637 jagman.2003

jagman.2003

    One Carb Or Two?

  • Members
  • PipPipPipPipPipPipPip
  • 1,307 posts
  • Location: In the shed.
  • Local Club: Owner of my own club of Minis

Posted 25 February 2013 - 12:50 PM

just read the whole thread amazing work there fella , glad you took your time and did it right, top work

Thanks, much appreciated. Hopefully will bet to test the 'did it right' bit soon with a drive.

#638 markje

markje

    Mini Mad

  • Members
  • PipPipPipPip
  • 183 posts

Posted 25 February 2013 - 09:11 PM

This is worked great

#639 hoody99

hoody99

    Super Mini Mad

  • Members
  • PipPipPipPipPipPip
  • 699 posts
  • Location: fife, Scotland

Posted 25 February 2013 - 10:00 PM

Dash looks great bud and if you ar wrapping mdf you could paint it first so you can wet it or try pva or varnish just something to stop the water soaking in and to let the vinyl move a bit befor sticking

#640 jagman.2003

jagman.2003

    One Carb Or Two?

  • Members
  • PipPipPipPipPipPipPip
  • 1,307 posts
  • Location: In the shed.
  • Local Club: Owner of my own club of Minis

Posted 28 March 2013 - 04:10 PM

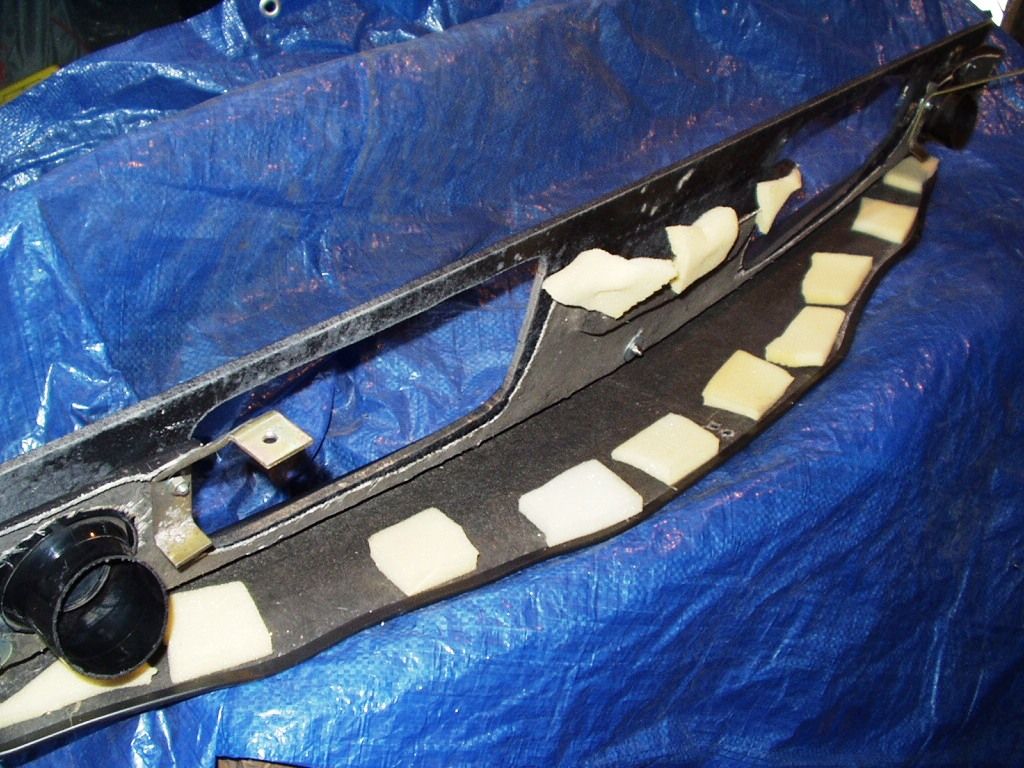
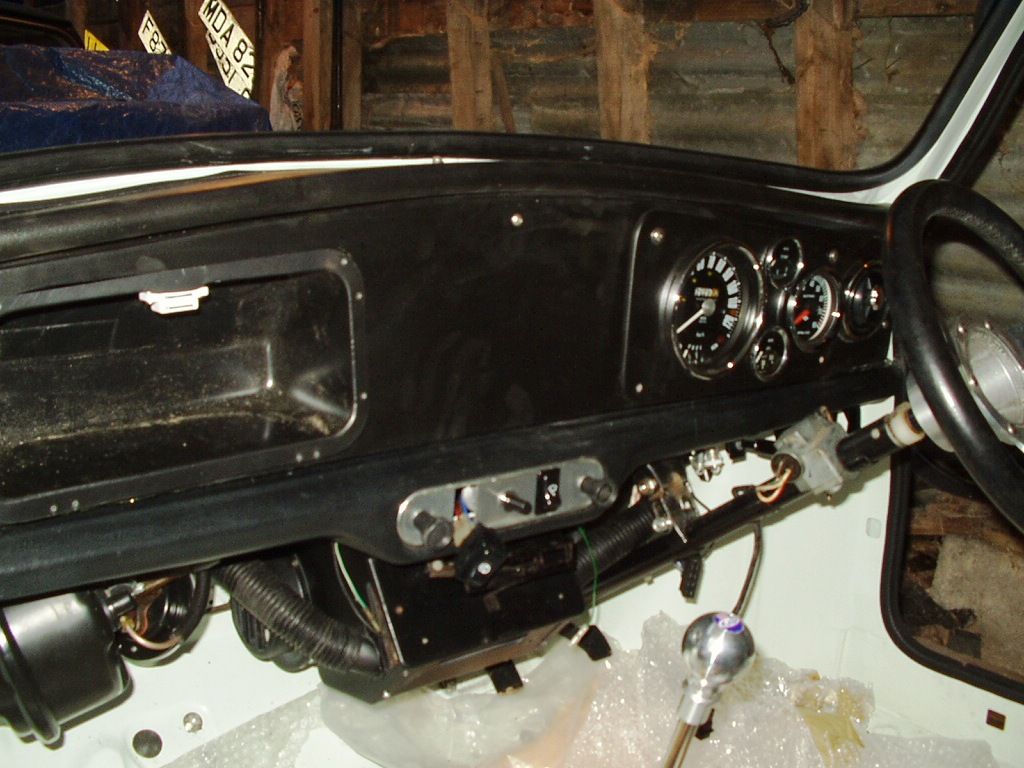
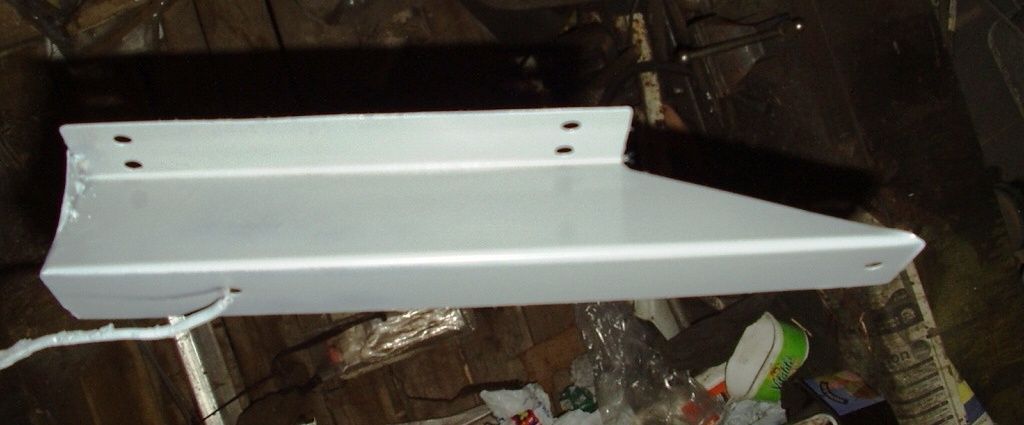
Quick but overdue update. The dash is coming along. I have done several trial fits so far. I glued a series of foam pads on the rear to reduce any noise from vibration. All I need to get right now is the air vent ducts. I'm not sure if I'm completely happy with the end results but it's taken so long I'm going to live with it for now. I can always change/modify later. Also I have been looking at mounting the oil cooler. I drilled a couple of holes in the subframe before I fitted it anticipating mounting something there. So I got my fabrication hat on & made a bracket to mount it on the subframe to poke through the grill aperture. I'll be using a couple of rubber mounts to reduce engine vibration. Will fabrcate a top bracket once in place. Just need some fittings now to finish.
Posted Image
Posted Image
Posted Image
Posted Image

#641 minimuk

minimuk

    Camshaft & Stage Two Head

  • Members
  • PipPipPipPipPipPipPipPip
  • 1,946 posts
  • Location: Midlands

Posted 28 March 2013 - 06:58 PM

looking excell, like yr 4 clock bineacle, all in one glance ;D

#642 Willz

Willz

    Stage One Kit Fitted

  • Noobies
  • PipPipPip
  • 64 posts
  • Location: Bolton
  • Local Club: Somewhere Up North Mini Club

Posted 28 March 2013 - 09:29 PM

Wow! - I've pretty much just read every page with my jaw ont floor! Watching it all come along is
truly inspiring! Your work is phenomenal!

Would it be possible to take it back to that bush it was cut from for a before and after picture? : D

Will

Edited by Willz, 28 March 2013 - 09:30 PM.


#643 thudson331

thudson331

    Passed Test

  • Noobies
  • PipPip
  • 33 posts
  • Location: Tx

Posted 02 April 2013 - 02:43 AM

great read!!! keep the updates coming!

#644 jagman.2003

jagman.2003

    One Carb Or Two?

  • Members
  • PipPipPipPipPipPipPip
  • 1,307 posts
  • Location: In the shed.
  • Local Club: Owner of my own club of Minis

Posted 02 April 2013 - 08:04 AM

looking excell, like yr 4 clock bineacle, all in one glance ;D

Thanks, that's the idea. But might need some adjustment by the time the proper seat position is in.

#645 jagman.2003

jagman.2003

    One Carb Or Two?

  • Members
  • PipPipPipPipPipPipPip
  • 1,307 posts
  • Location: In the shed.
  • Local Club: Owner of my own club of Minis

Posted 02 April 2013 - 08:05 AM

Wow! - I've pretty much just read every page with my jaw ont floor! Watching it all come along is
truly inspiring! Your work is phenomenal!

Would it be possible to take it back to that bush it was cut from for a before and after picture? : D

Will

Thanks, it's been fun & even better now there's light at the end of the tunnel.


2 user(s) are reading this topic

0 members, 2 guests, 0 anonymous users