Jump to content


Photo
- - - - -

My Mk1 Mini Rebuild


  • Please log in to reply
202 replies to this topic

#46 johnsn

johnsn

    Stage One Kit Fitted

  • Just Joined
  • PipPipPip
  • 69 posts
  • Local Club: OMS

Posted 13 June 2012 - 03:26 PM

Well, that was some break, being busy being a dad. Following some unplanned unemployment I've spent some time with the mini hacking the floor pan out. Took a lot longer than I'd thought, mostly due to the layers and layers of patches. Stripped the drivers side toe board down properly for linishing but the passenger side is still fighting. Painful, noisy work.

Some pics:

Posted Image

Posted Image

Posted Image

Posted Image

Posted Image

Hi,
Good bracing.
On your toe-board, I'd remove the two re-enfourcement plates. They will have rust under them like where the floor pan was.
Also, don't scrap your old floor pan. Keep the tunnel. It could help someone that has a bad one. If you cut the front off the tunnel, keep it, at the verry least it can be used as a pattern.
I would love to have your tunnel and crossmember for my progect. If you're willing to prep it for shipping to the USA. And I'd pay of course.

Keep up the good work.
john :D :D

#47 minimikej

minimikej

    Speeding Along Now

  • Members
  • PipPipPipPipPip
  • 347 posts
  • Location: Derbyshire

Posted 14 June 2012 - 03:06 PM

Thanks for the support, people.

@John - You really don't want the crossmember, it is corroded internally and been messed about with half a dozen patches. The captive nuts for the seat mounts broke off too. The tunnel is ok apart from the nose which I chopped off to aid removal, but has been lap welded to the "floor pans" so there's two lines of weld, one on top, one underneath.

So, now I've cleaned up the mating surfaces and ground down layers of old doorsteps, I have offered up the pan for a trial fit. Fits well!

Posted Image

Posted Image

Posted Image

Posted Image

Posted Image

Posted Image

That's a sight I have waited an awful long time to see.

Something odd going on with the nearside fron doorstep, it veers outwards towards the front. Seem to recall someone else had the exact same issue??

Think it's down to the layering of over sills and doorsteps gradually pushing the a panels out as they've been replaced over the years - the door check strap panels do seem to have been bashed outwards. That's the problem when a car gets this bad, there is nothing original there to line up with. The doors ended up too high in the frames before, the new inner sill line is about 8mm below what it was. Hopefully this will straighten things out.

The fit with the seat pan looks good, next job is to refit rear subframe and then check the overall alignment somehow....

Cheers -

#48 minimikej

minimikej

    Speeding Along Now

  • Members
  • PipPipPipPipPip
  • 347 posts
  • Location: Derbyshire

Posted 14 June 2012 - 07:47 PM

Update: Put new bushes on the rear subframe and offered it up; fits like a glove. So the car is no less bent than it was before at least...


#49 mk1leg

mk1leg

    Crazy About Mini's

  • Members
  • PipPipPipPipPipPipPipPipPipPip
  • 9,343 posts
  • Location: Jersey
  • Local Club: Mini Club Jersey, MCR

Posted 15 June 2012 - 03:00 PM

wow a complete floor congrats not an easy job to do and glad to see you've braced the shell.....................keep up the stirling work............. :proud:

#50 matty...

matty...

    Super Mini Mad

  • Traders
  • PipPipPipPipPipPip
  • 605 posts
  • Location: Oxfordshire
  • Local Club: Turbominis

Posted 16 June 2012 - 02:50 PM

I had the same problem with the nearside widening, but because my shell had soo many bodged repairs in the past, I put it down to that.

Measure accross the door seal lips and see if they are equal front and back.

Have you made any jigs to ensure the heel board goes back in the correct place?

#51 minimikej

minimikej

    Speeding Along Now

  • Members
  • PipPipPipPipPip
  • 347 posts
  • Location: Derbyshire

Posted 16 June 2012 - 06:54 PM

Have you made any jigs to ensure the heel board goes back in the correct place?


Hmm well not exactly, no. I positioned the boot floor with the new subframe before removing the floor and it's still lining up, but I take your point in that the heelboard could be a couple of mm out either way. I do have the correct dimensions to hand though so I will be making up some pins to drop through the front and rear rear subframe mounts and measure as accurately as I can. Not the best approach but I wasn't happy the heelboard mounts were correct in the first place because both sides had been lap welded over the original board.

Here's hoping...

#52 miniman_7

miniman_7

    Mini Mad

  • TMF+ Member
  • PipPipPipPip
  • 286 posts
  • Location: Prestwood, Bucks
  • Local Club: Looking...

Posted 16 June 2012 - 07:03 PM

Must be very satisfying to have the new floor in place!

Soon be on the road.........
.............At least that's what I keep telling myself :)

#53 jagman.2003

jagman.2003

    One Carb Or Two?

  • Members
  • PipPipPipPipPipPipPip
  • 1,307 posts
  • Location: In the shed.
  • Local Club: Owner of my own club of Minis

Posted 18 July 2012 - 07:22 AM


Have you made any jigs to ensure the heel board goes back in the correct place?


Hmm well not exactly, no. I positioned the boot floor with the new subframe before removing the floor and it's still lining up, but I take your point in that the heelboard could be a couple of mm out either way. I do have the correct dimensions to hand though so I will be making up some pins to drop through the front and rear rear subframe mounts and measure as accurately as I can. Not the best approach but I wasn't happy the heelboard mounts were correct in the first place because both sides had been lap welded over the original board.

Here's hoping...

For what it's worth Mike, my heelboard wasn't that well positioned in the first place. I'm sure the new one is better now than before. I took some measurements from the front floor holes & from the crossmember. Nice neat looking new floor there. Best way of doing it. I have only bought half floors for my next project. I didn't realise you could get the early floor complete. It's so nice to put things on the car floor knowing they are not going to fall through the other side.

#54 minimikej

minimikej

    Speeding Along Now

  • Members
  • PipPipPipPipPip
  • 347 posts
  • Location: Derbyshire

Posted 19 July 2012 - 06:32 PM

Well, despite the lack of photos, I did make more progress before starting my new job, and will post something this weekend if I get a chance. The nearside rear bin, stiffener and closing panel are now in and I was thinking I'd go do the off side but started thinking about fitting the nearside rear quarter and doorstep first. I have m-machine panels and the quarters aren't quite the same as the usual offerings in that the lower rear window profile is not included; you just get part of the horizontal fold under the window. I'm not quite sure how to approach this, I think the mk1/2 shells are different in that the factory produced the whole body side as a single pressing (I think). And I believe that the mk3 shells were built differently with separate panels ??? So there isn't a folded over flange from the rear quarter around the B post and the question is whether to butt or lap weld the B post join - - Any suggestions folks?

Cheers,
Mike

#55 johnsn

johnsn

    Stage One Kit Fitted

  • Just Joined
  • PipPipPip
  • 69 posts
  • Local Club: OMS

Posted 22 July 2012 - 06:16 AM

@John - You really don't want the crossmember, it is corroded internally and been messed about with half a dozen patches. The captive nuts for the seat mounts broke off too. The tunnel is ok apart from the nose which I chopped off to aid removal, but has been lap welded to the "floor pans" so there's two lines of weld, one on top, one underneath.


Ok, I'm still interested in the tunnel. If you could cut it on the outside of the welds, And leave the center of the crossmember, I can use it that way. I have MkIII floor halves and a MkI Mini.
john
#56 minimikej

minimikej

    Speeding Along Now

  • Members
  • PipPipPipPipPip
  • 347 posts
  • Location: Derbyshire

Posted 23 July 2012 - 08:14 PM

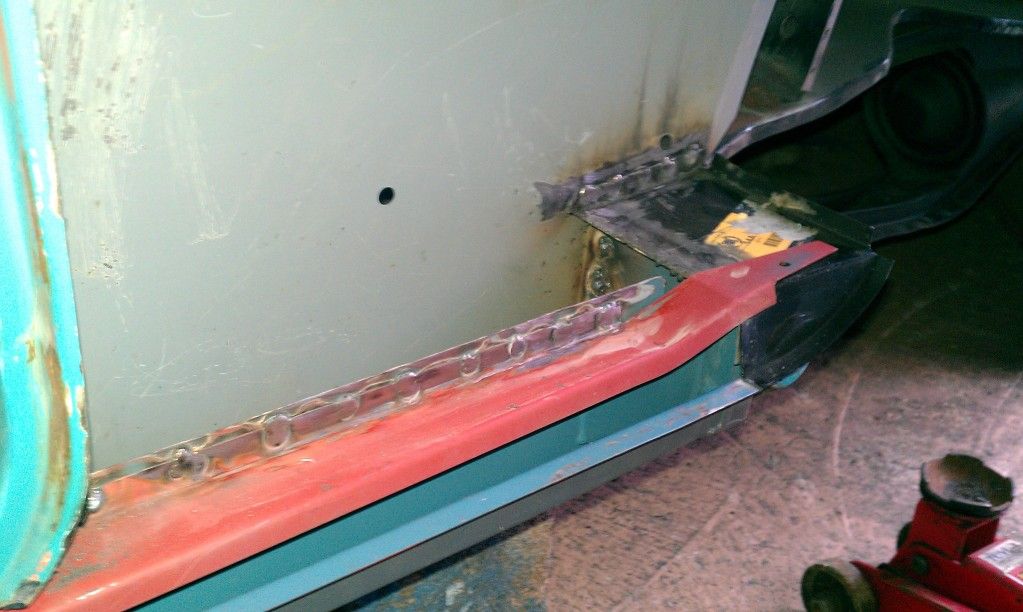
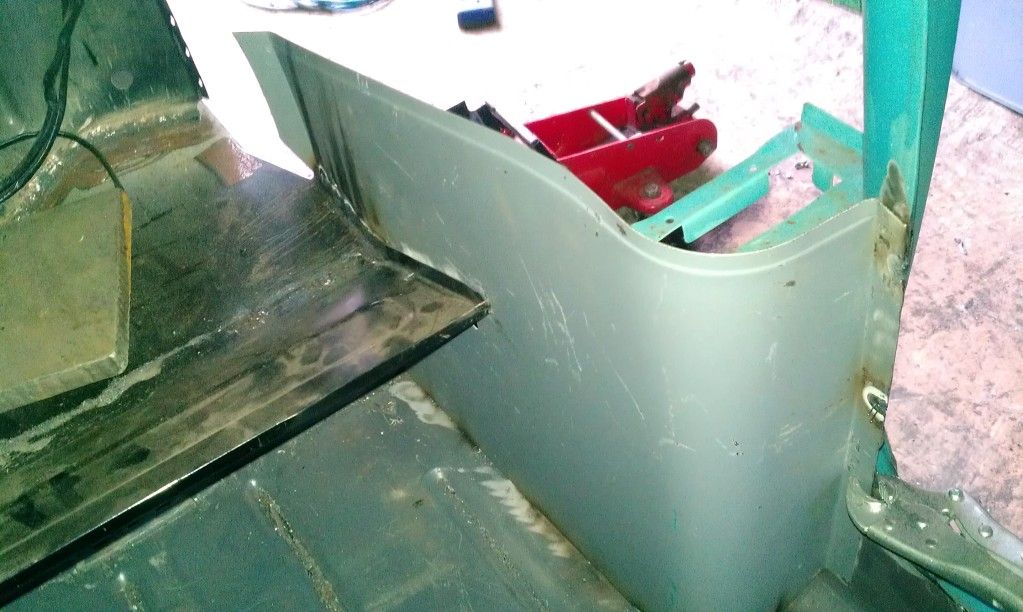
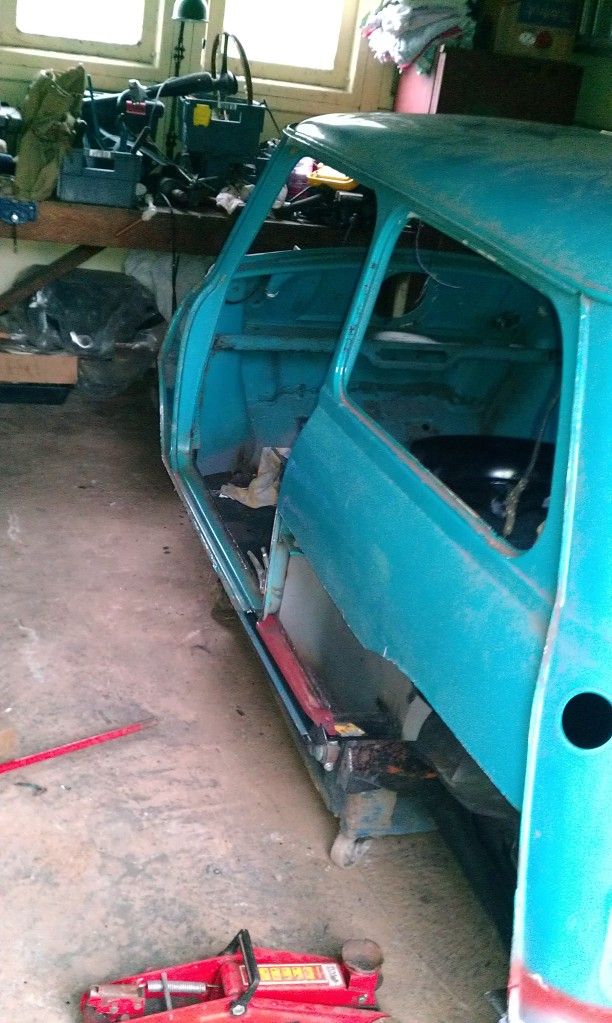
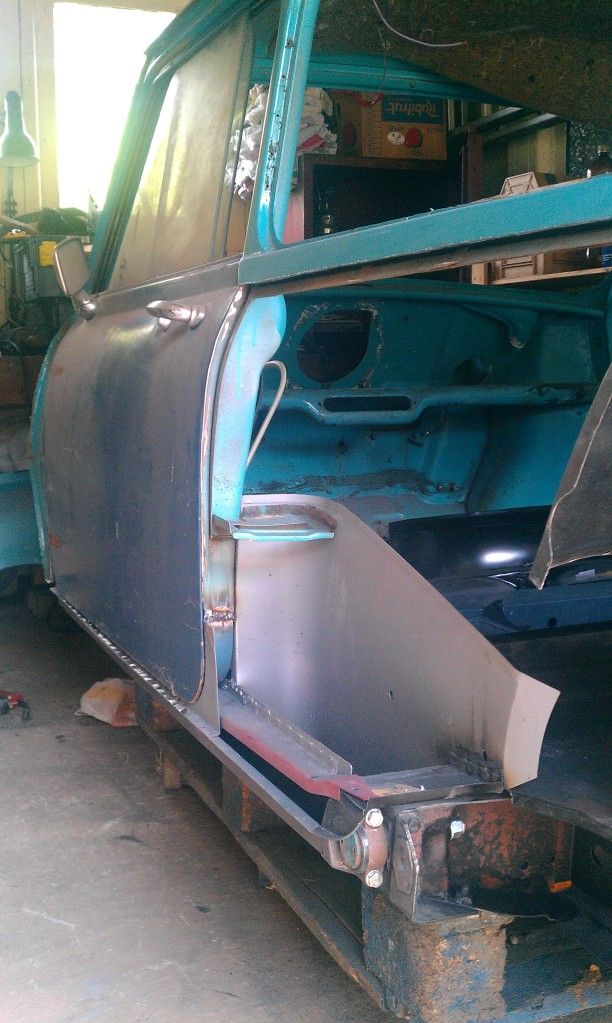
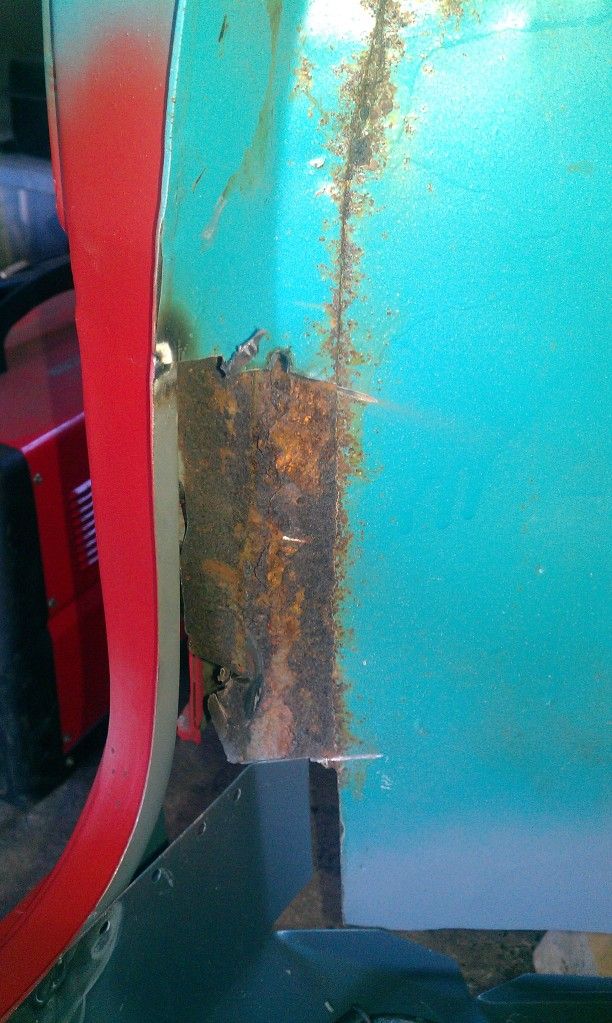
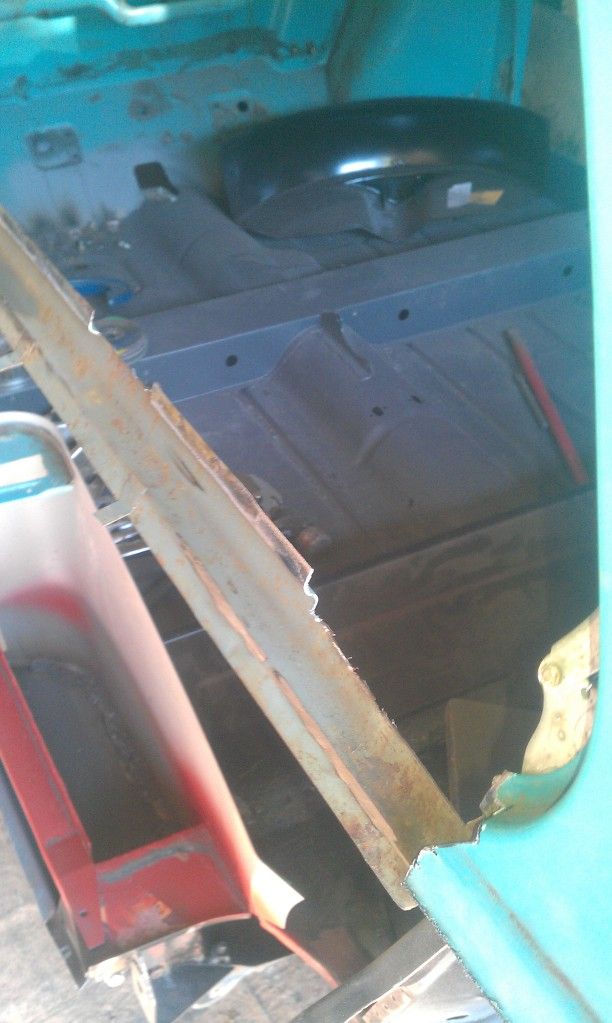
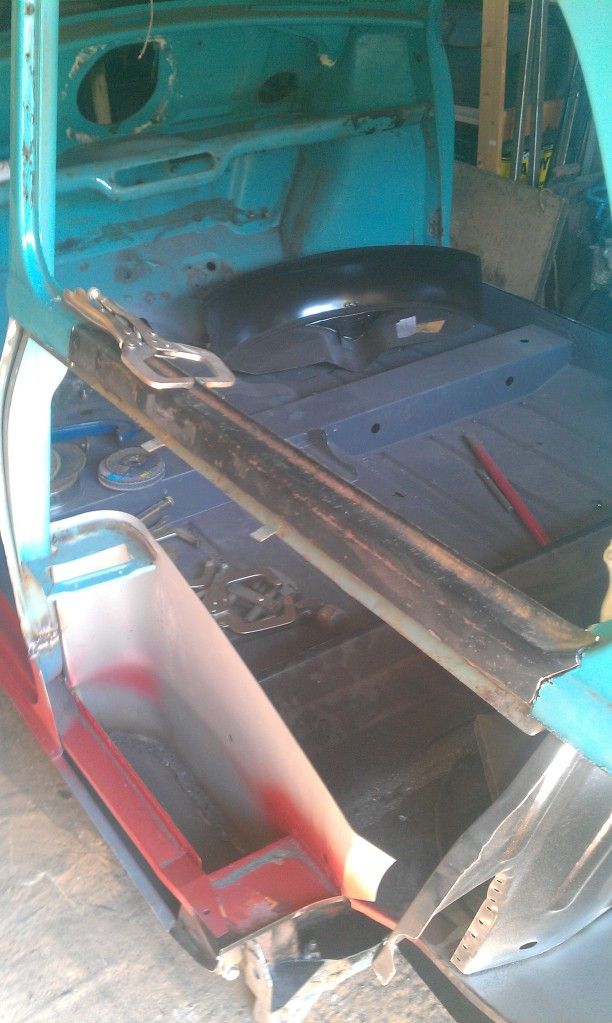
Well as promised, here's the recent progress. Not all plane sailing, made some mistakes. Biggest pain was realising that I'd plug welded the seat base to the rear bin , forgetting that I'd already released the clamps and it sprung up by about 8mm. That explains the burnt mess on one of the pics.

Decided to tackle the doorstep after taking the rear quarter off, because the quarter will lap around the doorstep and it would be a pain to do things the other way round. Chopped away at the old A panels to leave some room and cut down the new panel to fit. The m-machine doorsteps fit like a glove, not like the pattern parts I've used before which are a joke. I'm pleased with the result, almost completely smooth join without any filler.

Next I hacked at the rear window surround and that was pretty rotten. Started folding up my own repair section for the inner rail using some angle iron, a vice and a club hammer but wasn't happy with the result so have ordered a metal floder from machine mart. Chopped the top off a cheapo pattern panel quarter for the window frame profile because these are missing from the m-machine rear quarters, slightly annoyingly. Still not sure where to make the final cut to offer up the new quarter.

Posted Image

Posted Image

Posted Image

Posted Image

Posted Image

Posted Image

Posted Image

Posted Image

Posted Image

Posted Image

Anyone else fitted the m-machine rear quarters? Any recommendations as to where to make the join?

Cheers
Mike

#57 minimikej

minimikej

    Speeding Along Now

  • Members
  • PipPipPipPipPip
  • 347 posts
  • Location: Derbyshire

Posted 23 July 2012 - 09:20 PM

Ok, I'm still interested in the tunnel. If you could cut it on the outside of the welds, And leave the center of the crossmember, I can use it that way. I have MkIII floor halves and a MkI Mini.
john
Hi John, I think the old floor pan is still on the communal scrap metal pile at my garage, I will check at the weekend. However, I think you would be better off with a new one from m-machine, pretty sure they cant be all that expensive.
Cheers,
Mike

#58 DanParsons

DanParsons

    Mini Mad

  • Noobies
  • PipPipPipPip
  • 135 posts

Posted 23 July 2012 - 09:29 PM

looks good, im about 3/4 way through a 1962 mk1 build also!

#59 miniman_7

miniman_7

    Mini Mad

  • TMF+ Member
  • PipPipPipPip
  • 286 posts
  • Location: Prestwood, Bucks
  • Local Club: Looking...

Posted 24 July 2012 - 05:06 PM

looks good, im about 3/4 way through a 1962 mk1 build also!


Time to start a thread!

#60 minimikej

minimikej

    Speeding Along Now

  • Members
  • PipPipPipPipPip
  • 347 posts
  • Location: Derbyshire

Posted 24 August 2012 - 09:12 PM

Well, some progress today. Good job I'd booked the day off work 'because the VW Passat died on the way home yesterday :(

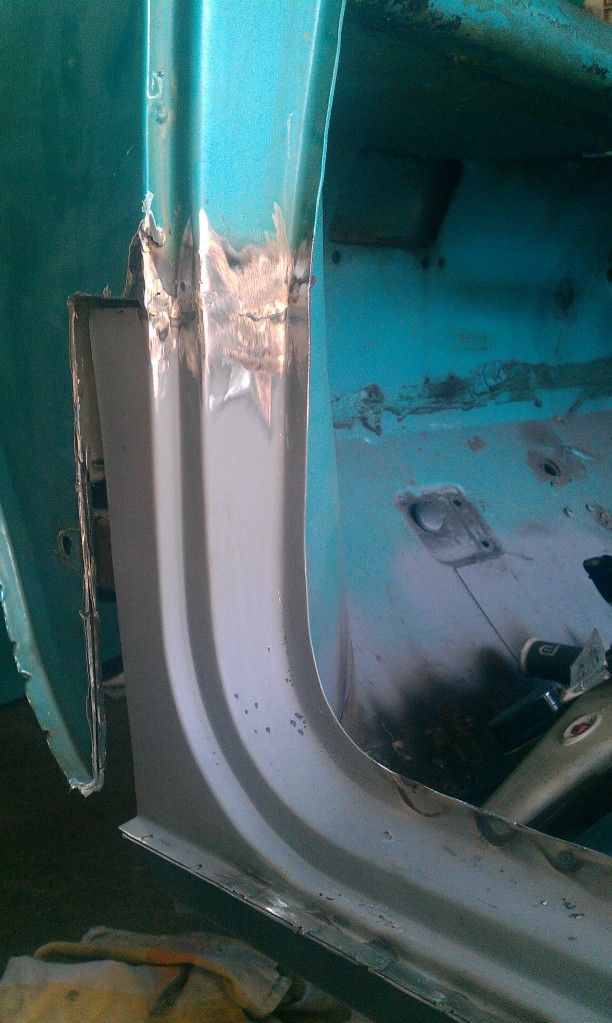
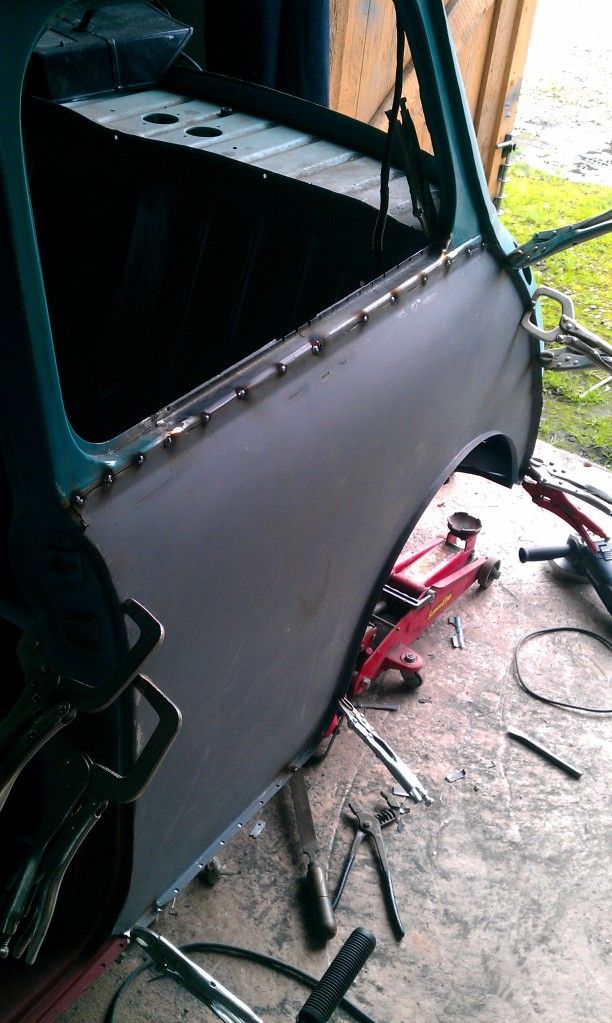
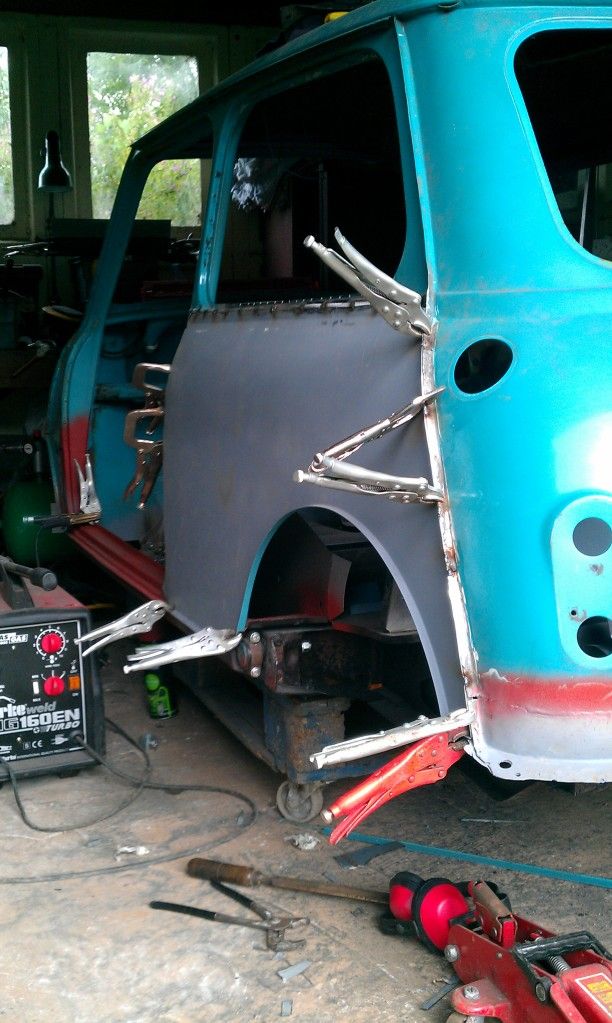
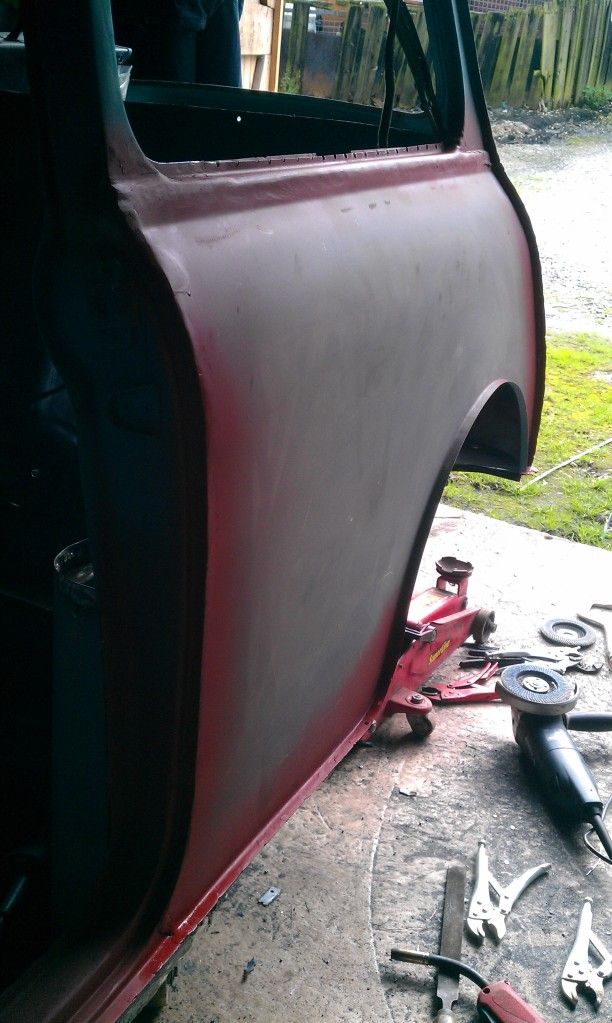
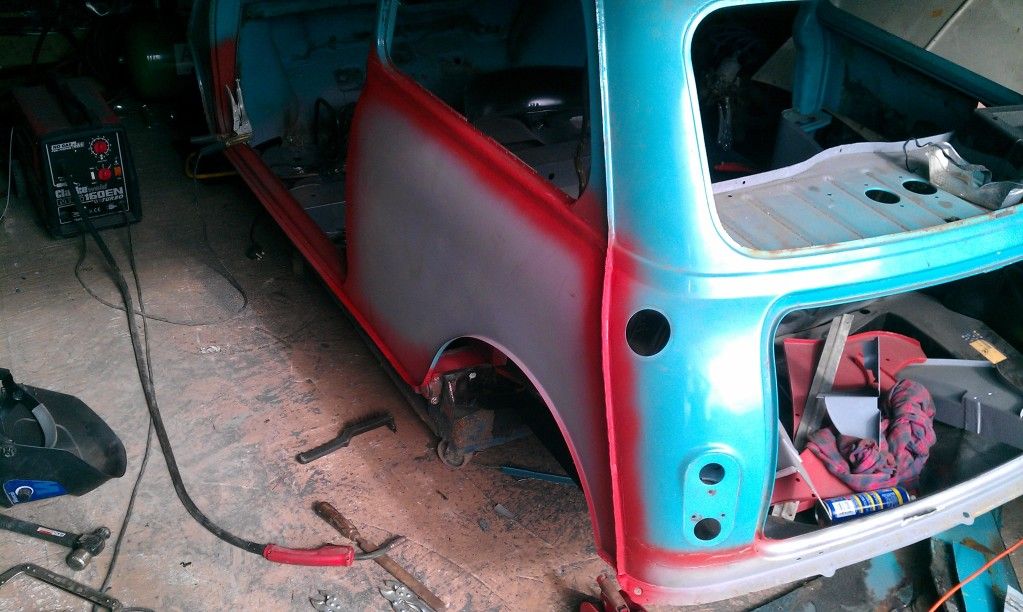
Todays aim was to get the NS rear quarter fitted. And it was a pig. Probably my car is to blame - it has had a fair bit of work done on the rear end in the past, a bump I'd say. Simply could not get the rear seam to fit and still have the front flange or the bottom flange lined up. This is with the M-machine rear quarters; actually I think I may have been better off with the magnum one...

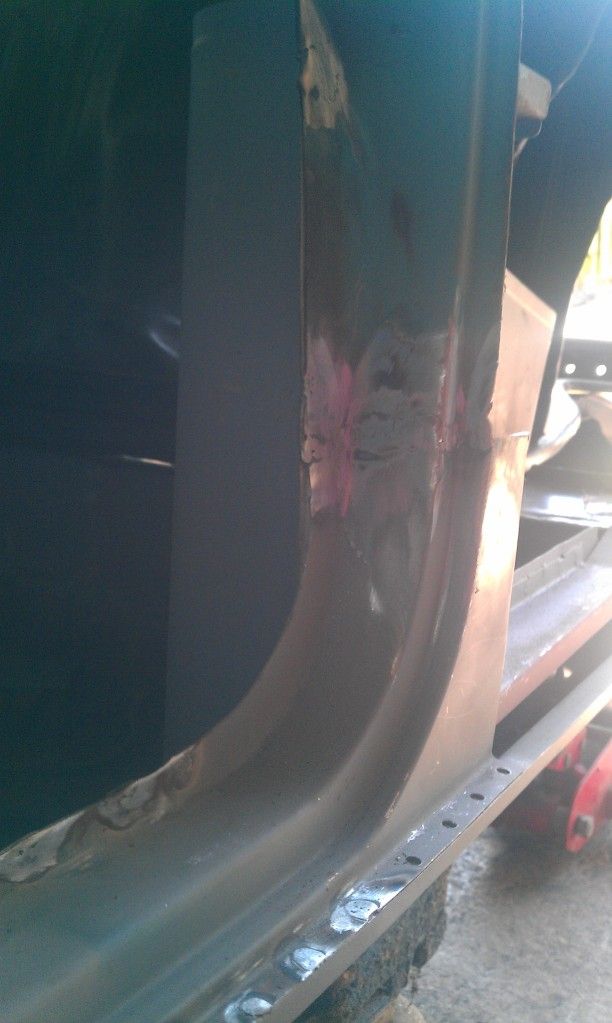
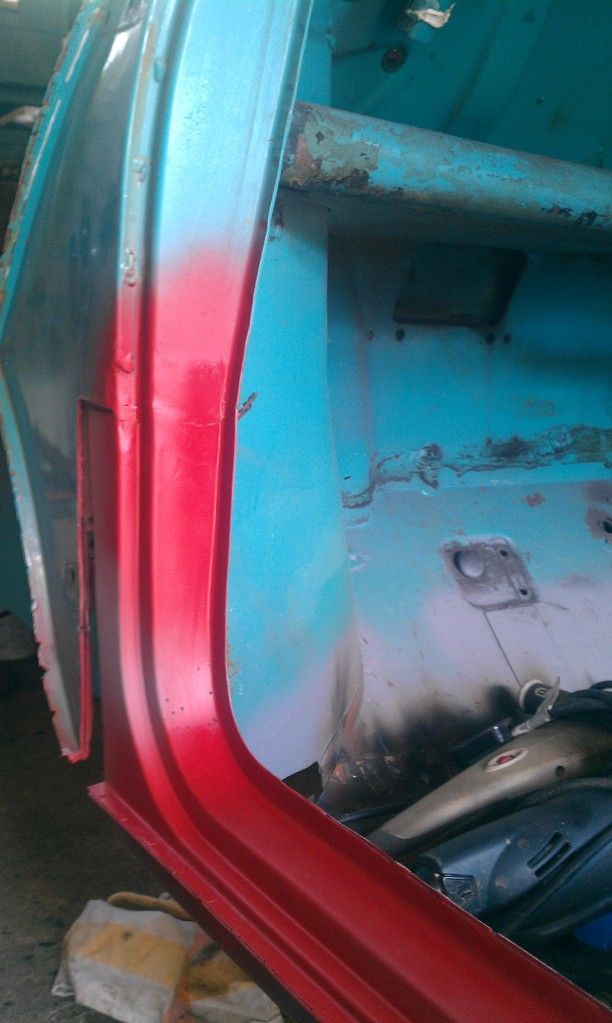
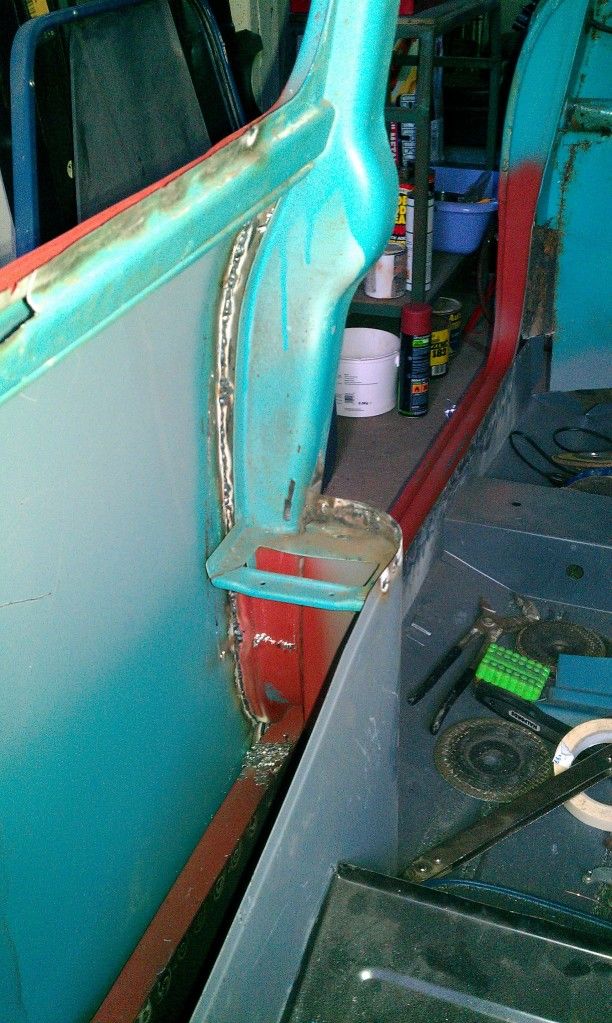
So, in the end I clamped up the sill seam and rear seam, clamped the window edge together and cut a straight line through both old and new panels with a 1mm cutting disc. Stitched that in position round 3 sides and finally ground the front flange down, to do a seam weld down the front vertical corner.

Actually, it's turned out better than I'd hoped. Only downside is that the radius for the front vertical edge is too sharp. If I'd known I'd have this trouble I'd have cut a centimetre inbouard. Still, experience is expensive as they say.

Some pics:

Posted Image

Posted Image

Posted Image

Posted Image

Here you can see the weld penetration from the inside. And, surprisingly to me, a whole load of lead loading from somewhere. Thought it got a bit explosive above the striker plate... :-S

Posted Image

All in all, happy with today's progress. Finished welding the seat base to the heelboard and then ran out of gas :-(

Cheers
Mike


1 user(s) are reading this topic

0 members, 1 guests, 0 anonymous users