Jump to content


Photo
- - - - -

My Mk1 Mini Rebuild


  • Please log in to reply
202 replies to this topic

#151 mk1leg

mk1leg

    Crazy About Mini's

  • Members
  • PipPipPipPipPipPipPipPipPipPip
  • 9,343 posts
  • Location: Jersey
  • Local Club: Mini Club Jersey, MCR

Posted 03 August 2013 - 11:01 PM

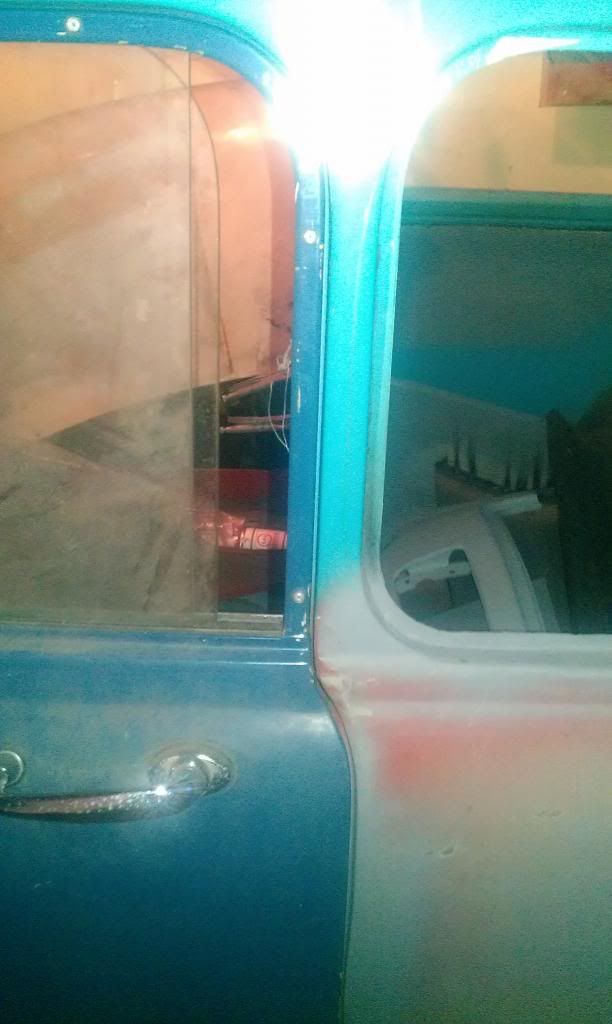
Spent some time today working out what's wrong with the door gap. Nothing a little persuasion couldn't sort out, fingers crossed:

IMAG0555_zpsbdb5fa64.jpg

Also, clamped up wing and front panel to add a bit of structure whilst I was messing about with the door:
Cheers

I found this a while back in an old MCr magazine........how to ajust doors......

scan.jpg

I hope you find this usefull


#152 minimikej

minimikej

    Speeding Along Now

  • Members
  • PipPipPipPipPip
  • 347 posts
  • Location: Derbyshire

Posted 04 August 2013 - 04:28 PM

Wow that's geat, thanks!!


#153 minimikej

minimikej

    Speeding Along Now

  • Members
  • PipPipPipPipPip
  • 347 posts
  • Location: Derbyshire

Posted 23 August 2013 - 06:17 PM

Well, I think there may be light at the end of the tunnel. I had the day off work and spend 6 hrs in the garage doing the little bits of welding that had been annoying me for ages.

I repaired the ends of the dash rail, made some filler pieces for the area around the door radius above the seatbelt mount, and fitted the radiator cowl and FE number.


I decided to attack the drivers side front wing to A panel joint with the angle grinder. It wouldn't clamp closed. So I made up an L profile length and welded that in. Like Hugh did on poor wee mini sky here: http://www.theminifo...ini-sky/page-40


The drivers side windscreen pillar was a bit thin in places so cut out and welded another L shaped section in.


And then I took a step back and thought 'what next?'. And do you know, there's nothing else to do on the top side. I need to roll the shell onto its side so that I can seam weld the floor from below, and fit the rear valance closing panels.


Will hopefully get some pics this weekend.


#154 minimikej

minimikej

    Speeding Along Now

  • Members
  • PipPipPipPipPip
  • 347 posts
  • Location: Derbyshire

Posted 08 September 2013 - 11:23 AM

Well I've been a bit lazy on the updates. But have now done pretty much everything - last job was to replace the drip rails and swap over bits of detail like the bonnet stay and petrol tank fittings.


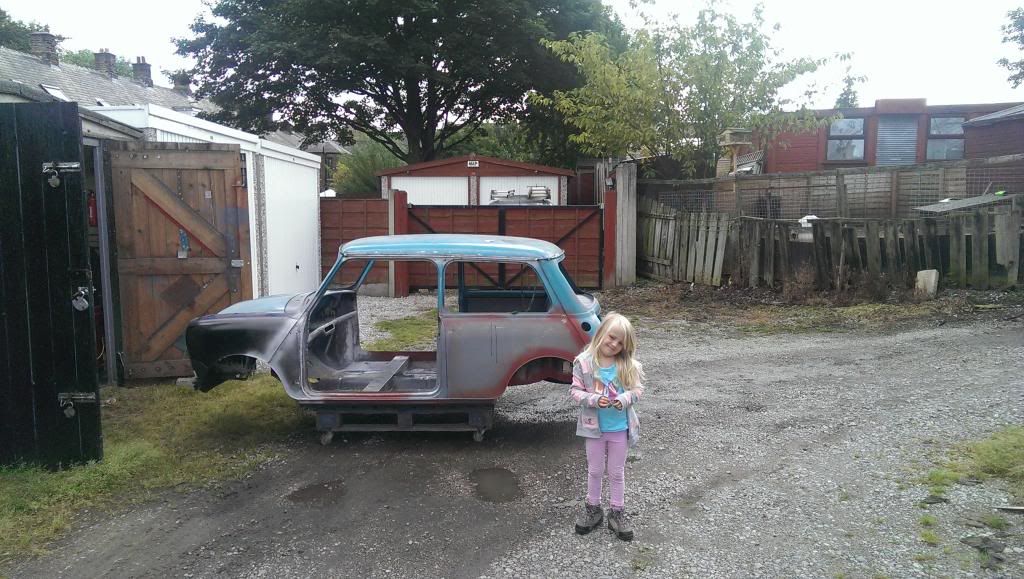
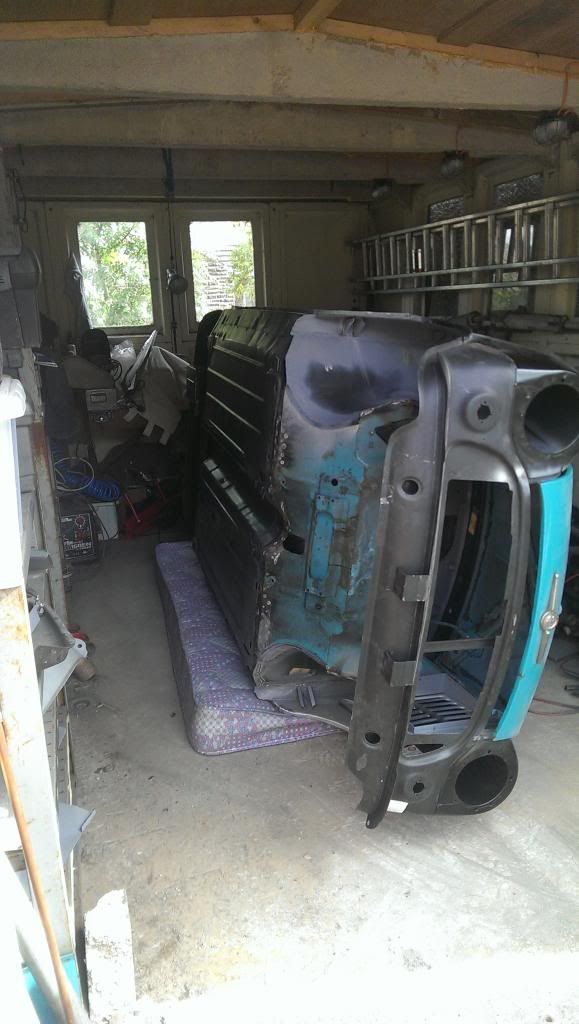
And today was a big day because it was finally time to get the shell turned over, with some help from my daughter and friend Nathan (who's camera shy :)


IMAG10061_zpsf5aaf59d.jpg


IMAG10071_zpsc781292f.jpg


Next jobs: Seam weld the toe-board join, seam weld the wing to front panel flanges (as these were really rough and crinkly, being pattern parts and I don't want a moisture trap). Then attach the rear subframe floor reinforcement plates, closing panels and valance. And then that's it!


No more progress today though, wife poorly and children's party to attend :-/


Cheers


#155 okc78

okc78

    Mini Mad

  • Noobies
  • PipPipPipPip
  • 169 posts
  • Location: Gloucestershire
  • Local Club: none so far

Posted 08 September 2013 - 06:53 PM

Wow, looking good Mike, the pattern front end looks like its fitting pretty good in the pic.
How come your seam welding the toe board join if you don't mind my asking. Is it for strength? I have noticed that the new heritage motorsport shells have some extra stitch welding and I think the toe board/floor/exhaust tunnel area is one of those places to get the extra welds.
Are you planning on painting it yourself when you finish welding?

#156 minimikej

minimikej

    Speeding Along Now

  • Members
  • PipPipPipPipPip
  • 347 posts
  • Location: Derbyshire

Posted 08 September 2013 - 07:39 PM

Wow, looking good Mike, the pattern front end looks like its fitting pretty good in the pic.
How come your seam welding the toe board join if you don't mind my asking. Is it for strength? I have noticed that the new heritage motorsport shells have some extra stitch welding and I think the toe board/floor/exhaust tunnel area is one of those places to get the extra welds.
Are you planning on painting it yourself when you finish welding?

Thanks Ollie,

Yeah the front panel is fitting just about well enough but what a bloomin faff that was. Needed all twenty pairs of moll grips and even then I had to cut a few slots here and there.


I guess the seam welds are for my own peace of mind, nothing more. If the car was more original then I probably wouldn't bother but it is a proper 'Trigger's Broom' and no denying.


As for painting it myself, I'm still not sure. My wife's not working at the mo so things are a lot tougher. But I have a friend who works at a local bodyshop come to see it on Saturday and his advice was 'do as much as you can to make it as best you can, then give us a call and we'll make it better'. They're not cheap, but their work is superb and I trust him.


Your mk2 is looking good!


Cheers


#157 okc78

okc78

    Mini Mad

  • Noobies
  • PipPipPipPip
  • 169 posts
  • Location: Gloucestershire
  • Local Club: none so far

Posted 08 September 2013 - 08:55 PM

Cheers, the mkII is moving along but its tricky to get time.
I know what you mean about the peace of mind, I've added a few extra welds and beefed up the steel here and there on my car.
I seam welded the boot floor in places but did some reading on it afterwards. Apparently intermittent stitch welding is stronger with spot welded panels as it is less likely to split with fatigue, weld an inch miss an inch and so on. Makes sense I guess, I've seen it done all over other cars prepared for racing and rallying. Also the floor I got from M Machine was like that.
I'm no expert but years ago I painted my minis myself and got a pretty good result, its not that hard I just put loads of coats on and wet polished it afterwards, its all the prep that's more difficult as any undulations will obviously show up afterwards with the gloss paint.
My wife stays at home with the kids as well so we only have my wage= pitance, makes me feel quite guilty for spending money on the mini but I keep telling myself its an investment for the future. Just hope I don't spanner it into a wall when I eventually get it on the road.

#158 minimikej

minimikej

    Speeding Along Now

  • Members
  • PipPipPipPipPip
  • 347 posts
  • Location: Derbyshire

Posted 10 September 2013 - 11:33 AM

Cheers, the mkII is moving along but its tricky to get time.
I know what you mean about the peace of mind, I've added a few extra welds and beefed up the steel here and there on my car.
I seam welded the boot floor in places but did some reading on it afterwards. Apparently intermittent stitch welding is stronger with spot welded panels as it is less likely to split with fatigue, weld an inch miss an inch and so on. Makes sense I guess, I've seen it done all over other cars prepared for racing and rallying. Also the floor I got from M Machine was like that.
I'm no expert but years ago I painted my minis myself and got a pretty good result, its not that hard I just put loads of coats on and wet polished it afterwards, its all the prep that's more difficult as any undulations will obviously show up afterwards with the gloss paint.
My wife stays at home with the kids as well so we only have my wage= pitance, makes me feel quite guilty for spending money on the mini but I keep telling myself its an investment for the future. Just hope I don't spanner it into a wall when I eventually get it on the road.


Hmm. Good point. My M-Machine floor is the same. Will ponder over that one - I also want to minimise any moisture ingress which I feel is more likely having plug welded the join rather than spot welding for some reason. Got plenty of U-Pol and tiger seal handy though...


Cheers


#159 minimikej

minimikej

    Speeding Along Now

  • Members
  • PipPipPipPipPip
  • 347 posts
  • Location: Derbyshire

Posted 21 April 2014 - 04:54 PM

Well, I have been doing a few bits as and when I can get the time.


The welding is done at last. Undersealed the underside with upol gravitex after failing miserably with tetrosyl which just reacted with absolutely everything and fell off in sheets,
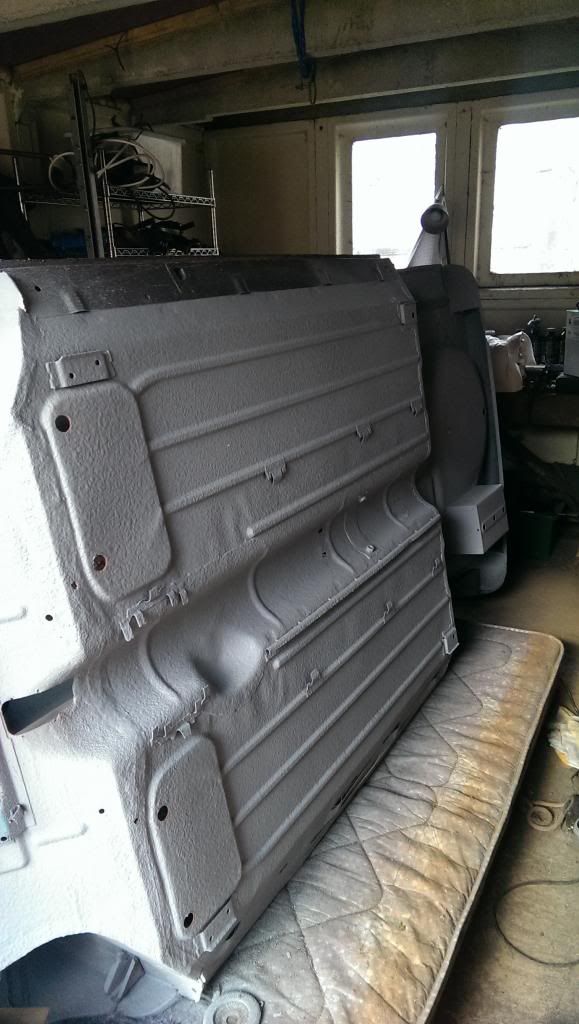
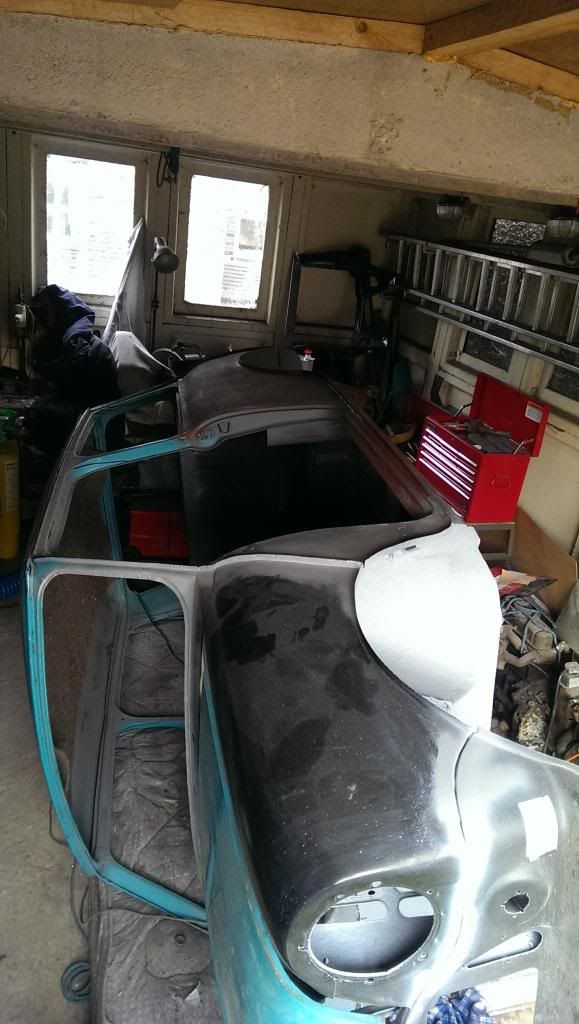
 

IMAG12231_zps12cfc145.jpg


IMAG12241_zps6243328e.jpg


I stripped down the replacement doors and struggled with the rusty screws that hold in the glass channels.


The doors and boot lit are in really good nick but there are signs of rust in the seams. Nothing near enough to justify taking the skins off, but I would like to do something beyond wirebrush and rust killer. Any suggestions? I'm thinking of making a phosphoric acid bath.


Next job is to roll the shell back upright and get the doors fitting with their seals, something I've been struggling with. I really hope I don't have to cut off the door steps again. As others have said, I believe that the m-machine doorsteps curve too gently at the b-post. I had to slot them, hammer into shape and re-weld. Not ideal but better that than the common 'door don't fit' look.


Cheers


#160 minimikej

minimikej

    Speeding Along Now

  • Members
  • PipPipPipPipPip
  • 347 posts
  • Location: Derbyshire

Posted 02 January 2015 - 11:14 AM

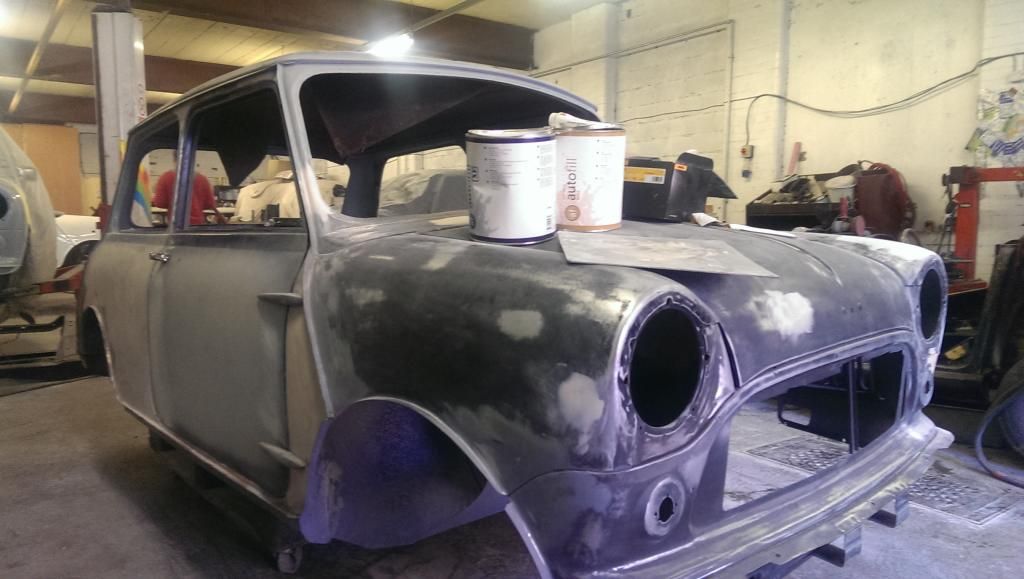
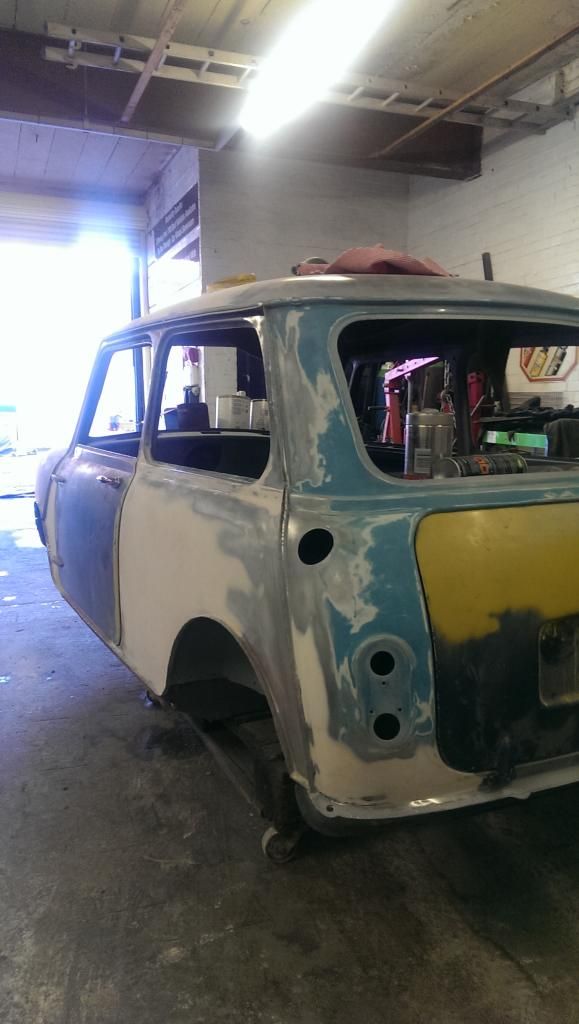
Christmas Eve down at the body shop for final prep and then paint at last:

IMAG1773_zps75506f52.jpg


IMAG1772_zps2b38142b.jpg


End of tunnel definitely in sight now!


#161 ToM 2012

ToM 2012

    Up Into Fourth

  • Members
  • PipPipPipPipPipPipPipPipPip
  • 4,066 posts
  • Location: halesowen

Posted 02 January 2015 - 03:51 PM

Looking excellent mate bet you can not wait to see the back of all that fillering! I was rubbing panels down for weeks on mine lol what color you having it? Cheers Tom

#162 minimikej

minimikej

    Speeding Along Now

  • Members
  • PipPipPipPipPip
  • 347 posts
  • Location: Derbyshire

Posted 02 January 2015 - 08:38 PM

Cheers Tom,

To be honest I'm paying for the flatting and filling work. I just don't have the time with a new baby in the house! I got the shell best I could manage with my limited skills and handed it over.

It will be Surf blue still, but with OEW roof to mark this new phase in its life. I think that will look good with either the refurbished GB alloys or maybe a set of charcoal rose petals. Not sure yet.

Cheers


#163 minimissions

minimissions

    Up Into Fourth

  • Members
  • PipPipPipPipPipPipPipPipPip
  • 3,427 posts
  • Location: North West
  • Local Club: M.M.O.C

Posted 30 September 2015 - 09:49 AM

Wow just had a read through this build and having seen the car in person this is a truly lovely build, I have said it all along if my mk1 comes out anywhere near as close to this I will be happy. Some awesome work has gone into this car and you must be proud looking forward to seeing the finished car you must come round and show me it might boot me up the a** to start mine... Nice work Mike :D

#164 ToM 2012

ToM 2012

    Up Into Fourth

  • Members
  • PipPipPipPipPipPipPipPipPip
  • 4,066 posts
  • Location: halesowen

Posted 03 October 2015 - 06:26 PM

Sounds excellent Mike I have had both sets of wheels on my mini I drive and they both look great but I prefer my rose petals ATM but I will probz change them again soon as I am wheel mad lol cheers Tom

#165 minimissions

minimissions

    Up Into Fourth

  • Members
  • PipPipPipPipPipPipPipPipPip
  • 3,427 posts
  • Location: North West
  • Local Club: M.M.O.C

Posted 04 October 2015 - 09:07 AM

Ooo do like a set of rose petals I just have nothing to get a set for lol think my mk1 is having reverse rims as have had those for a while now :)


Edited by minimissions, 12 April 2016 - 01:57 PM.


4 user(s) are reading this topic

0 members, 4 guests, 0 anonymous users