Looking good....
How long before completion??
Posted 25 September 2014 - 07:47 AM
Looking good....
How long before completion??
Posted 25 September 2014 - 08:15 AM
That is one hell of a car!!!!
Hats off to you for a truly awesome build.
Posted 25 September 2014 - 09:19 AM
Looking good....
How long before completion??
Are these cars ever complete Andy? Its sort of completed now, I'm going to add a few miles to her until its starts to get wet and then I'll work on the things I want to change / finish over the winter. Biggest issue at the moment is getting the speedo and ECU talking to each other so I can see what's going on, I'm very reluctant to drive too far as I've no idea of engine temps. I'm trying to sort this out atm but I've got conflicting info from 2 people who supply the products which isn't helping.
Other bits like the centre console, tubular manifold, clocked turbo set-up, avcr wiring and general tidy up behind the dash can wait for the time being as I want to try and get out as much as possible and fix any niggles that appear as the miles increase; I've got a few knocks and creaks to look into as well as rechecking the tightness of the bolts etc.
That is one hell of a car!!!!
Hats off to you for a truly awesome build.
Thanks
Edited by RED HOT, 25 September 2014 - 09:20 AM.
Posted 17 October 2014 - 09:01 AM
Can you show more this interior. What do you have in the roll bar? Great project.
I don't really have any at the moment, but I'll get some taken the next time its out of the garage. I've got a wink mirror attached to the roll bar either side, but I've removed a section of mirror at the end and replaced it with an Apexi AVC-r boost controller.
Posted 06 November 2014 - 09:16 PM
awesome !!!
Posted 15 May 2015 - 12:33 PM
I’ve been meaning to update this thread for some time as I have been working on a few things; including a revised exhaust. I wasn’t copying Andy…. and mine was purely because…. Read on and you’ll see.
Anyway, as they say a thousand words and all that, so please see below for some pictures and an awesome description of what I’ve been doing!!
The first act of the year was to collect my new wheels, I had been in talks with the guy for almost a year (seriously) regarding collection etc. but as he was living away from home it just took that long. In normal cases I’d have just walked away from the deal, but they’re super rare in Mini fitment so I just held out. Sooo glad I waited.
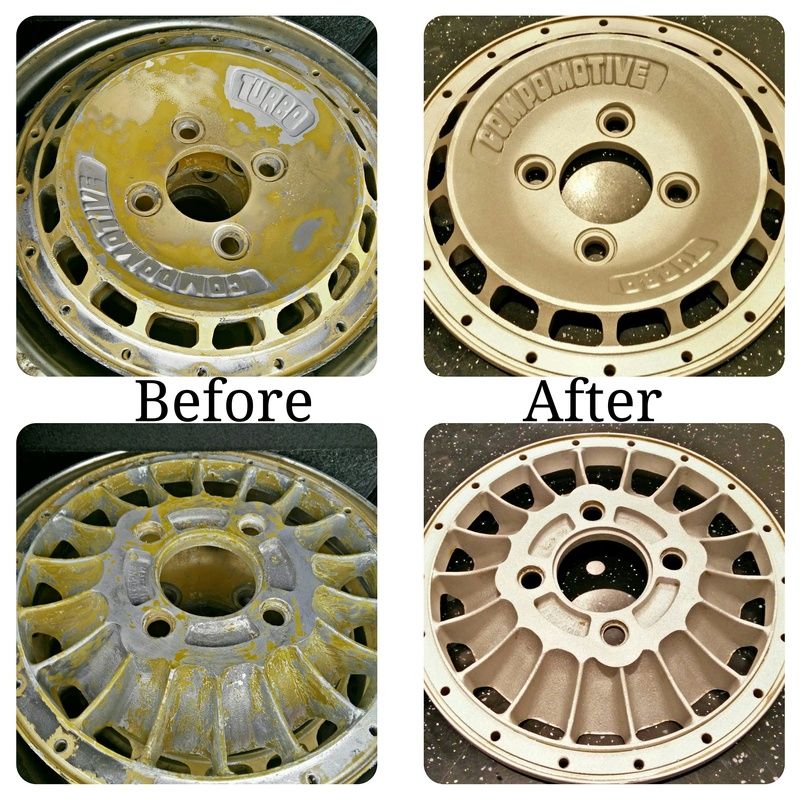
They weren’t in the best of condition with a few coats of paint on them and a half-hearted attempt to remove it using paint stripper, but a quick trip to my local wheel refurb co. and they looked better already.
Also had a quick go at polishing one of the lips to see how they were under all the dust and semi sanded surface:-
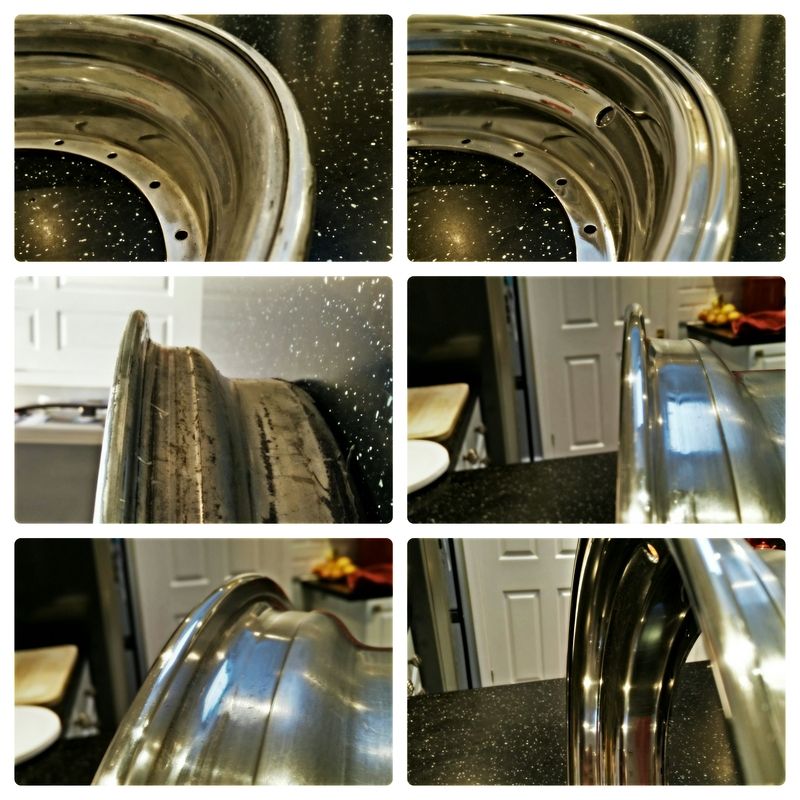
Found out later these are a racing version of the Compomotive Turbo’s which means standard centre caps don’t fit; sure I can sort something out though. It also means the lips are the racing type with the returned lip for additional strength, nice.
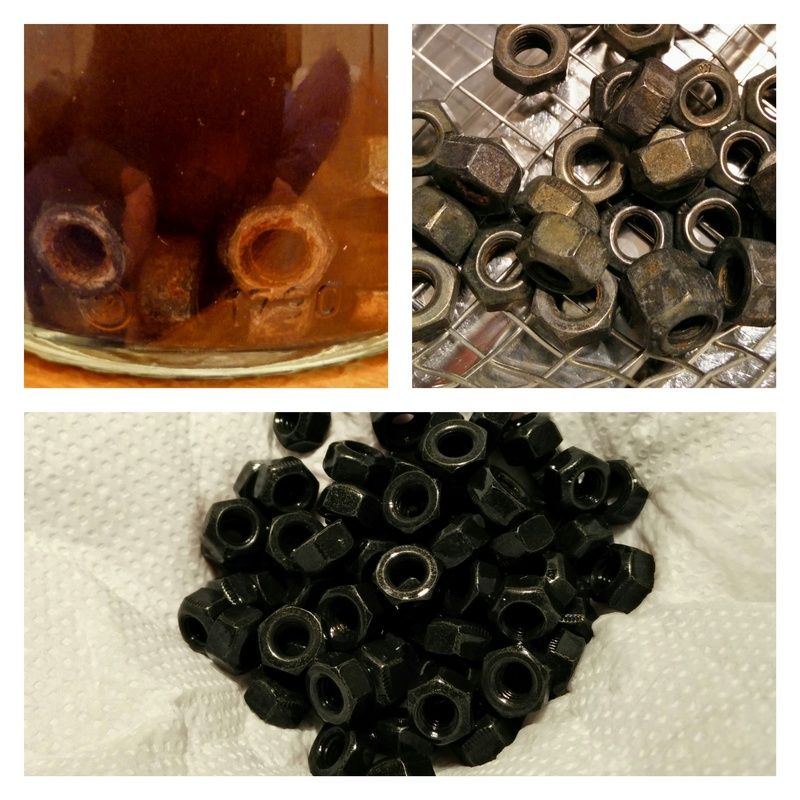
The standard nuts and bolts were a little tired, so I decided to try and rejuvenate them; a quick vinegar bath (7 days with the odd shake) to remove most of the rust and grime, followed by some good old chemical blacking and bingo, good as new:-
The next job on the cards was to try and tidy the bay up and the old turbo was letting the side down as it was filthy with years of grime. The answer (obviously) was to make a soda blaster and give it a clean:-
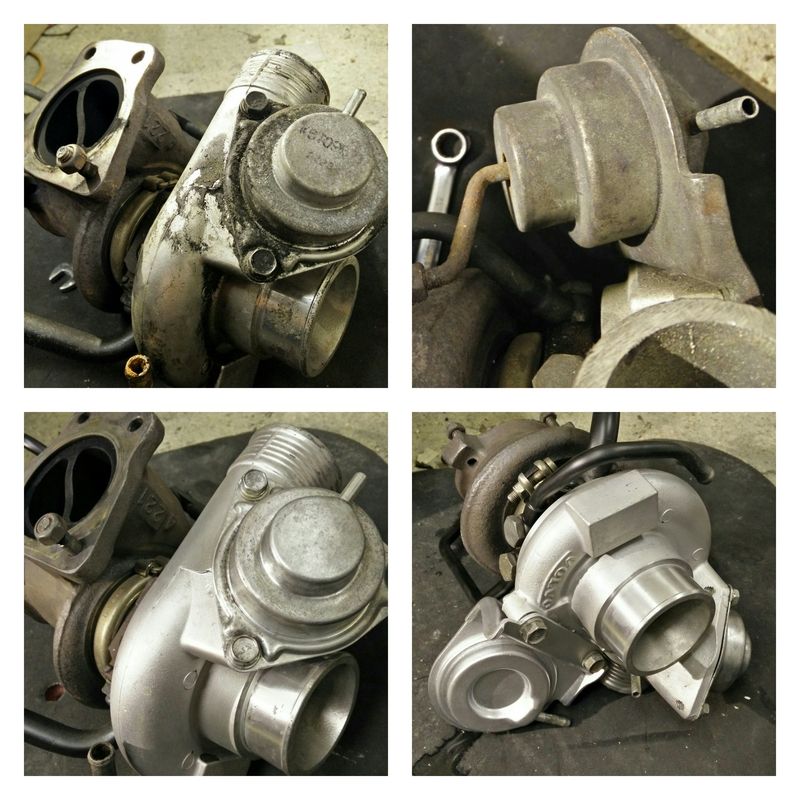
This was then put to one side as I bought a bigger turbo anyway!
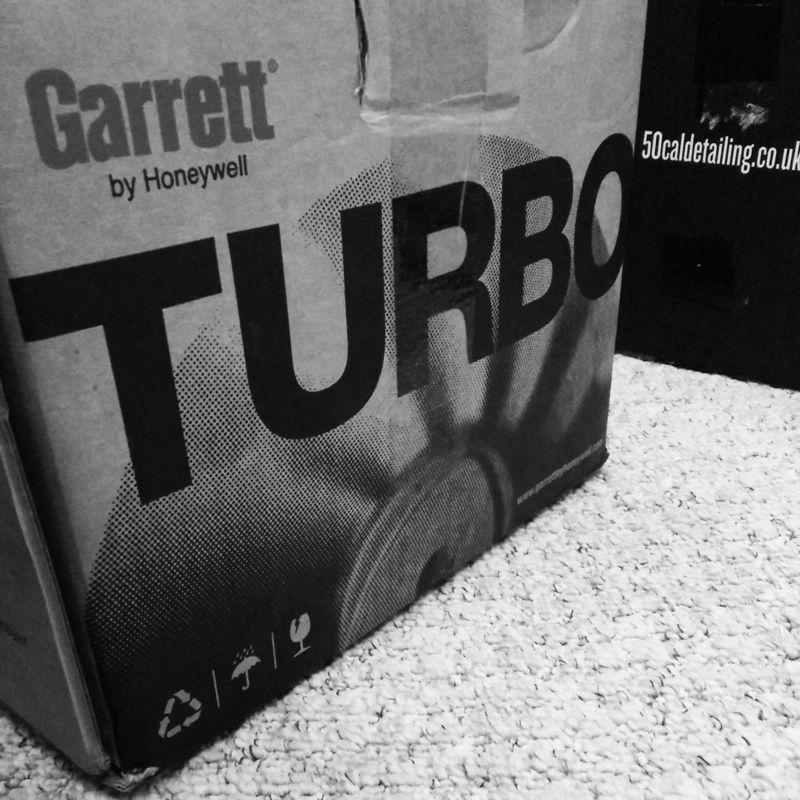
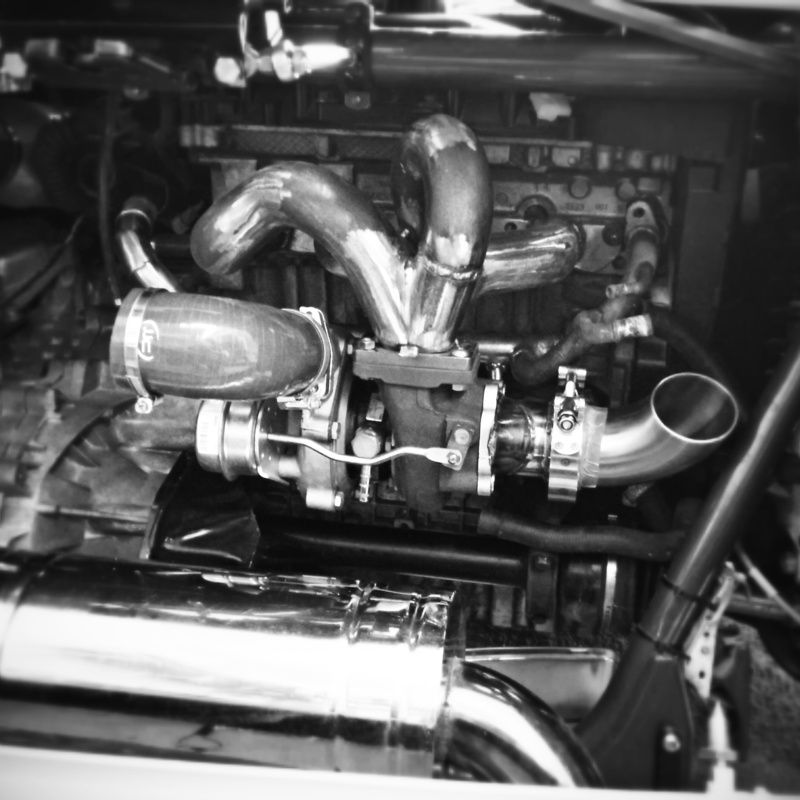
Mmmm new turbo, a Garrett GT2560R that’s commonly used on the S14 & 15’s, good for around 350bhp, but well within the window I require:-
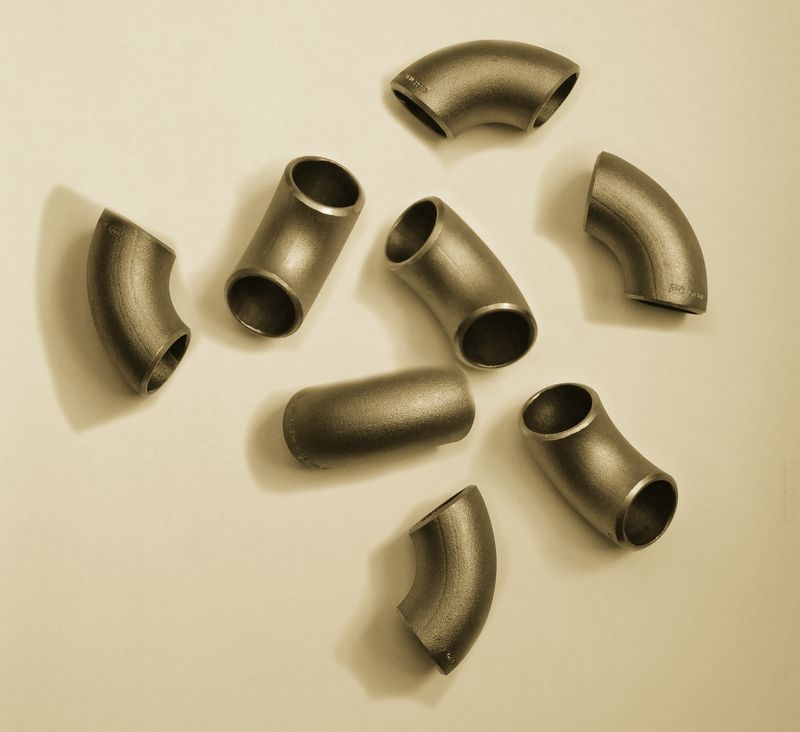
Manifold bits:-
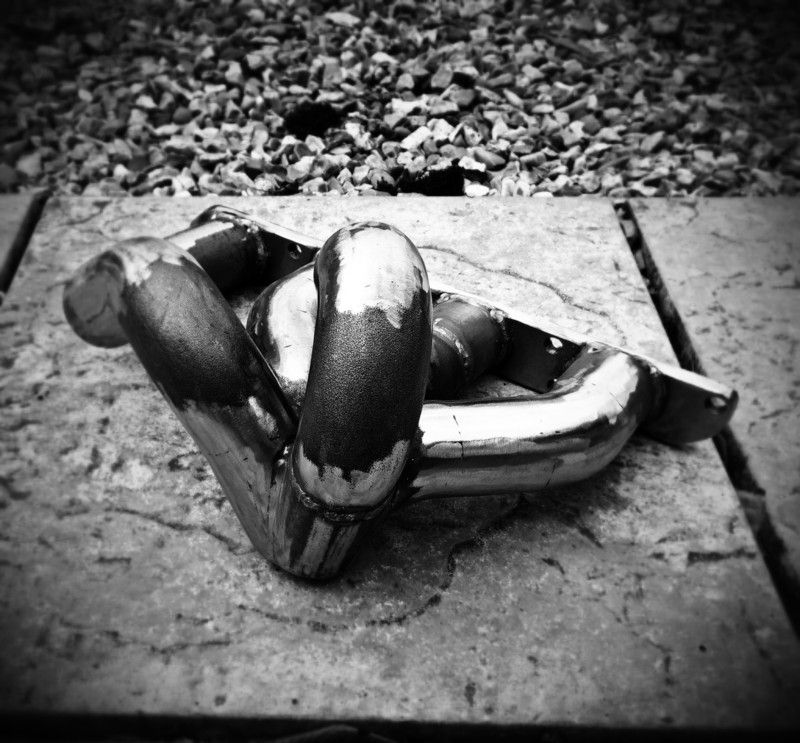
Exhaust manifold and turbo mock up:-
My cad work is only 2d; unfortunately I don’t have cptkirk’s 3D CAD skills and excuse the poor screen shot!

So with it all drawn up I purchased the required materials:-
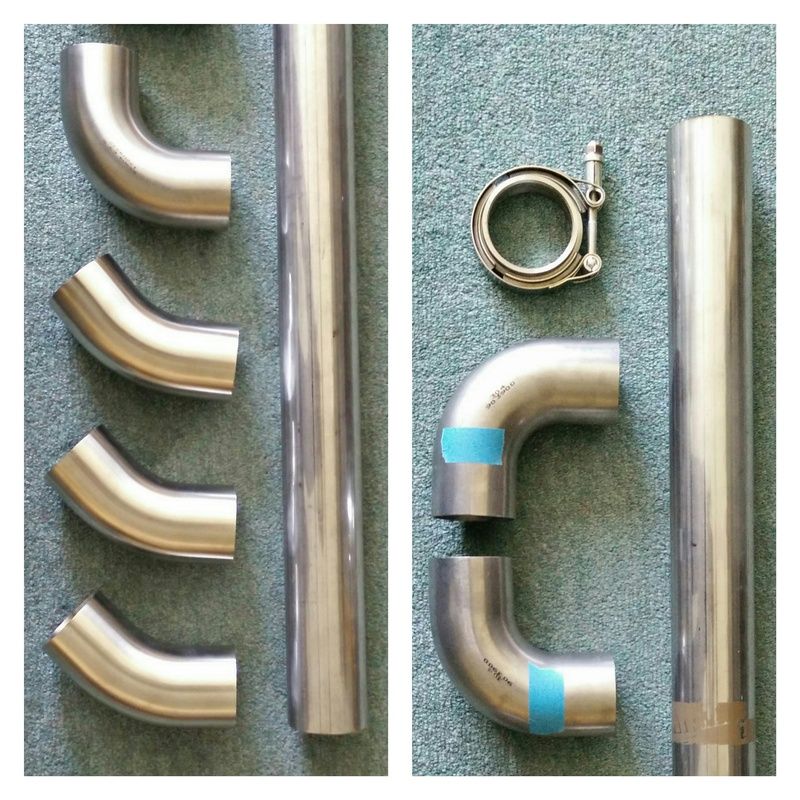
Which then magically turned into this:-
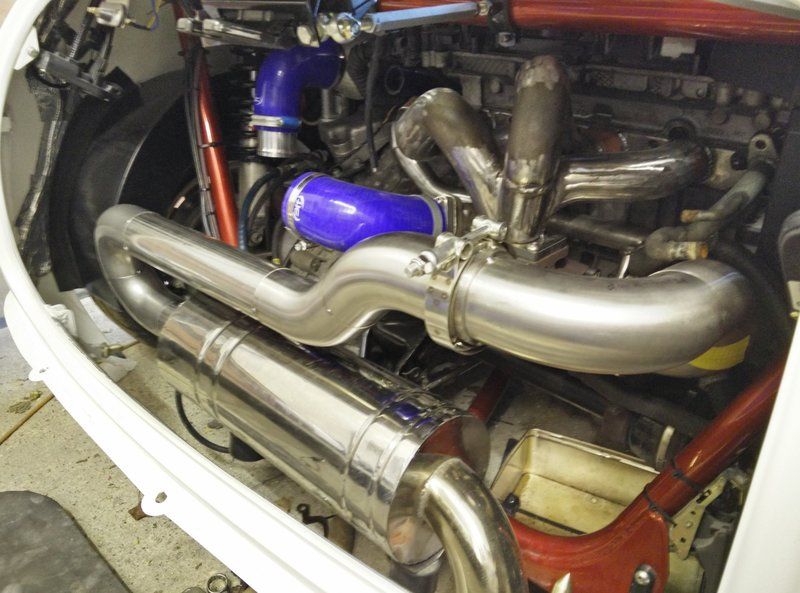
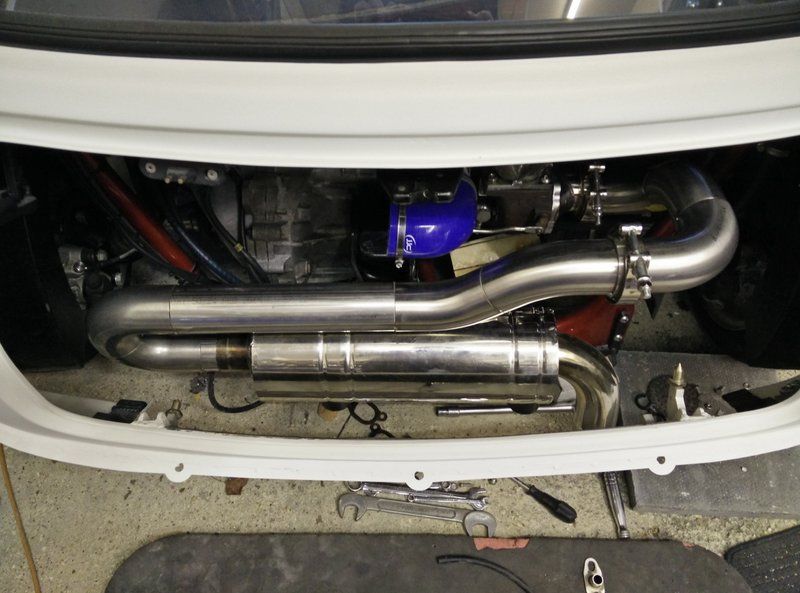
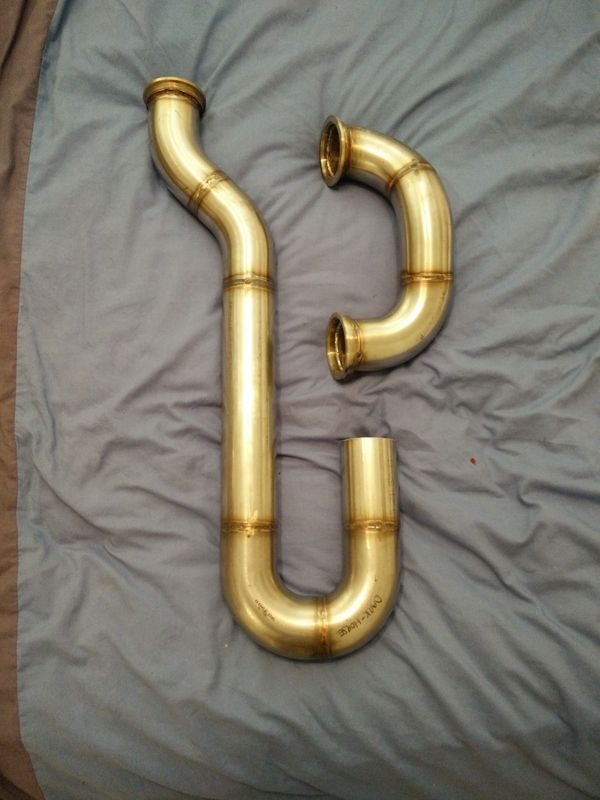
Although I’d already been working on it alongside the exhaust (as well as water and oil feeds / returns), now the exhaust was complete I could finally position and tie up the air filter and charge cooler pipework. I didn’t want a massive piece of silicone pipe (although it would probably have been better for temperature isolation), so a custom length of beaded ally was required. Unfortunately I couldn’t find anybody online who manufactured at bespoke lengths! To resolve this I bought a longer section and cut it down…… what, you thought I’d just leave it cut down. Next job was to make a “ghetto” tool to re-bead the end, test piece below:-
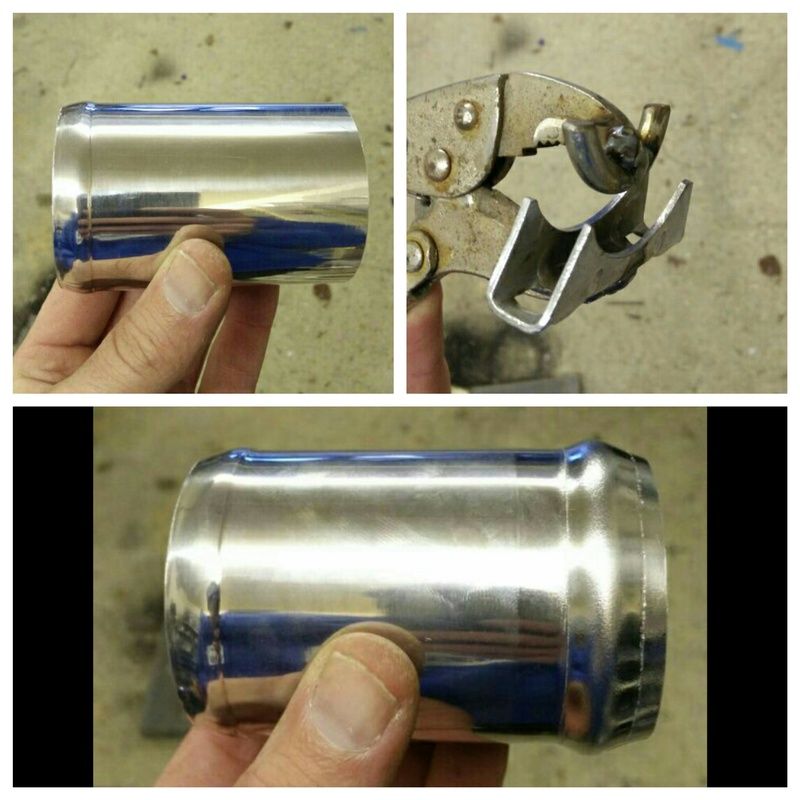
Better than the stock one ![]()
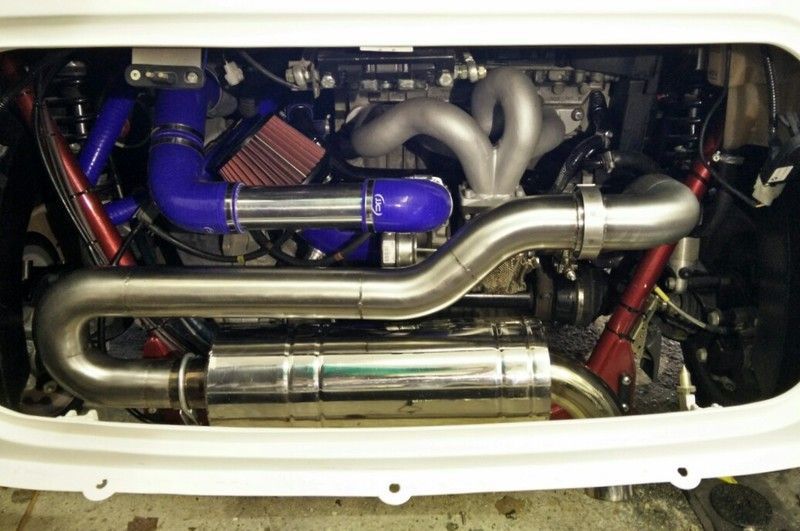
And a few steps later with 90% of it all plumbed in:-
I’ve got a few more updates that I’ll try and post up over the next day or 2; don’t want to bore you with them all in one hit.
Cheers
Kev
Posted 15 May 2015 - 01:19 PM
Posted 15 May 2015 - 02:55 PM
I’ve been meaning to update this thread for some time as I have been working on a few things; including a revised exhaust. I wasn’t copying Andy…. and mine was purely because…. Read on and you’ll see.
Anyway, as they say a thousand words and all that, so please see below for some pictures and an awesome description of what I’ve been doing!!
The first act of the year was to collect my new wheels, I had been in talks with the guy for almost a year (seriously) regarding collection etc. but as he was living away from home it just took that long. In normal cases I’d have just walked away from the deal, but they’re super rare in Mini fitment so I just held out. Sooo glad I waited.
They weren’t in the best of condition with a few coats of paint on them and a half-hearted attempt to remove it using paint stripper, but a quick trip to my local wheel refurb co. and they looked better already.
Also had a quick go at polishing one of the lips to see how they were under all the dust and semi sanded surface:-
Found out later these are a racing version of the Compomotive Turbo’s which means standard centre caps don’t fit; sure I can sort something out though. It also means the lips are the racing type with the returned lip for additional strength, nice.
The standard nuts and bolts were a little tired, so I decided to try and rejuvenate them; a quick vinegar bath (7 days with the odd shake) to remove most of the rust and grime, followed by some good old chemical blacking and bingo, good as new:-
The next job on the cards was to try and tidy the bay up and the old turbo was letting the side down as it was filthy with years of grime. The answer (obviously) was to make a soda blaster and give it a clean:-
This was then put to one side as I bought a bigger turbo anyway!
Mmmm new turbo, a Garrett GT2560R that’s commonly used on the S14 & 15’s, good for around 350bhp, but well within the window I require:-
Manifold bits:-
Exhaust manifold and turbo mock up:-
My cad work is only 2d; unfortunately I don’t have cptkirk’s 3D CAD skills and excuse the poor screen shot!
So with it all drawn up I purchased the required materials:-
Which then magically turned into this:-
Although I’d already been working on it alongside the exhaust (as well as water and oil feeds / returns), now the exhaust was complete I could finally position and tie up the air filter and charge cooler pipework. I didn’t want a massive piece of silicone pipe (although it would probably have been better for temperature isolation), so a custom length of beaded ally was required. Unfortunately I couldn’t find anybody online who manufactured at bespoke lengths! To resolve this I bought a longer section and cut it down…… what, you thought I’d just leave it cut down. Next job was to make a “ghetto” tool to re-bead the end, test piece below:-
Better than the stock one
And a few steps later with 90% of it all plumbed in:-
I’ve got a few more updates that I’ll try and post up over the next day or 2; don’t want to bore you with them all in one hit.
Cheers
Kev
Loving the ghetto tool........
Why pay someone else when you can do it yourself - with a bit of ingenuity....
I look forward to the other bits.
Posted 10 June 2015 - 10:54 AM
A few more things fitted this past week in the hope to get her together for players classic at the weekend; still missing some important items, assuming you class doors as important?!
Anyway, wheels have progressed to a state where they are on the vehicle, but I did have to make a small sacrifice to achieve this in that the lips are now brushed rather than polished; a previous owner had tried to refurbish and it looks like various spots throughout the lips must have had significant corrosion or scratches, but rather than spin these up or even sand it was purely done locally which look out right ******* when polished. I've manufactured (once again) a ghetto wheel polisher in the garage to allow me to spin them up and get some sandpaper on them to remove 90% of the divots, but due to time constraints and me really wanting them on the car opted for the brushed finish which I actually pretty like.
Here's a quick snap of one all built up so I could check fitment etc. colour is to be unveiled at the weekend I'm afraid...... so pictures will follow thereafter.
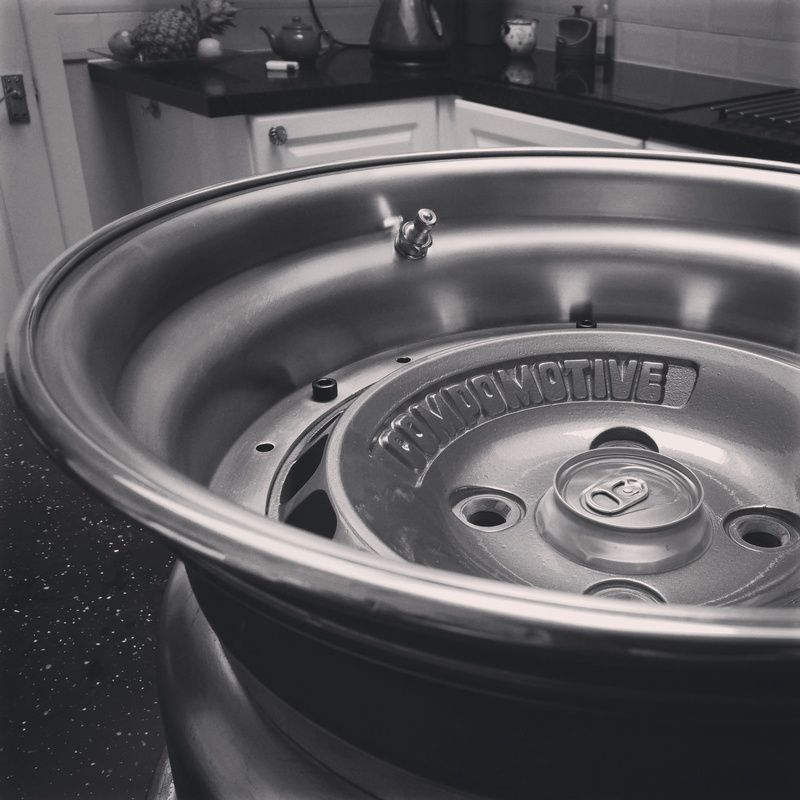
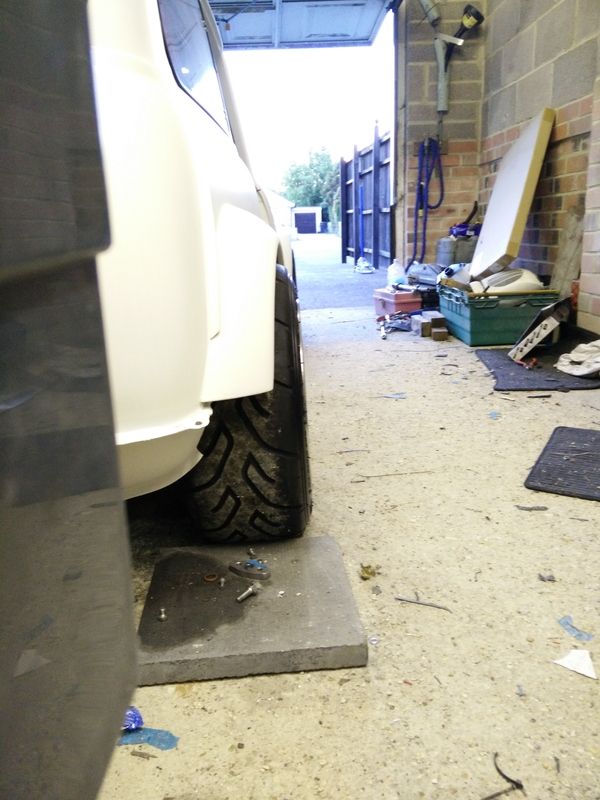
These are slightly wider; 8J compared to the Wellers 7 so a bit more poke is evident! a slight sus alteration may be required to stop scrubbage on the rears! time will tell
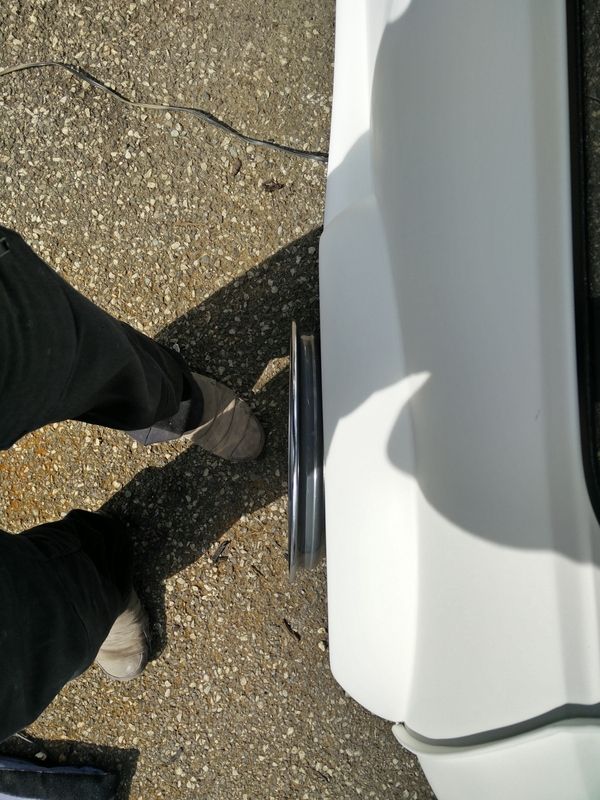
And a side profile now they're fitted
Another side project was the hydraulic handbrake, I wanted to keep the centre console clean and smooth so don't have the conventional Mini one fitted, I do have an electric one hidden below said centre console, but this is only really for when stopping for long periods of time; due to the time it takes to activate and deactivate it not a hill start option, thus the hydraulic option.
Space is limited in and around the centre console area so I had to find somewhere else..... but this somewhere also had to provide sufficient support for the forces being applied to them. This only really left one option and that was to the roll bars to the right hand side of the driver.
I drew up many plans and took many measurements as things were still going to be tight; as with most things due to my own doings and wanting a dual action handbrake; push forward to lock the front wheels and back to lock the rears thus 2 cylinders and a mounting bracket in the space from mini sill to seat!!
The end results and progress can be seen below:-
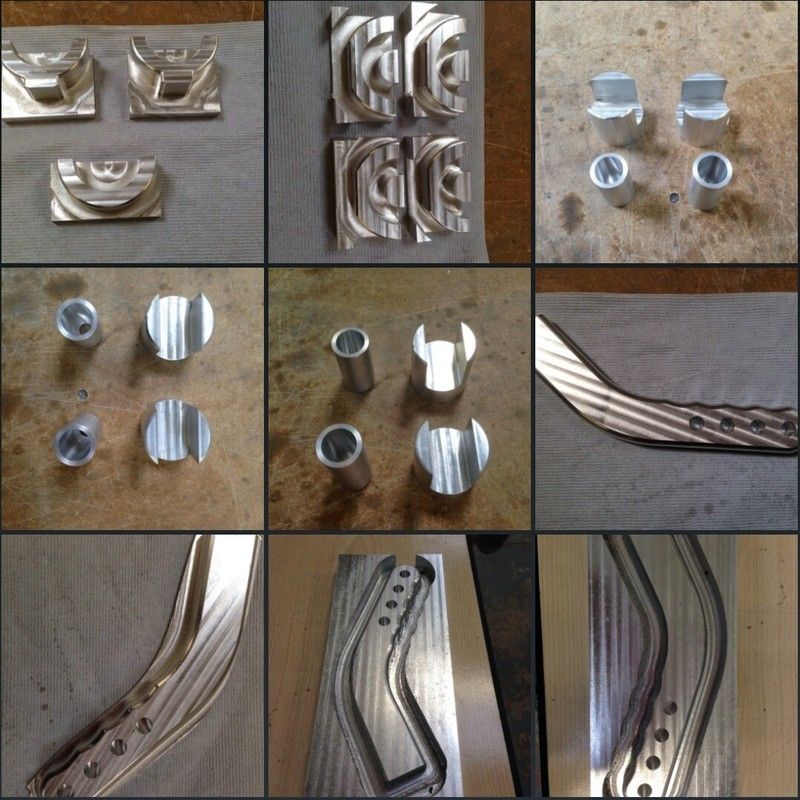
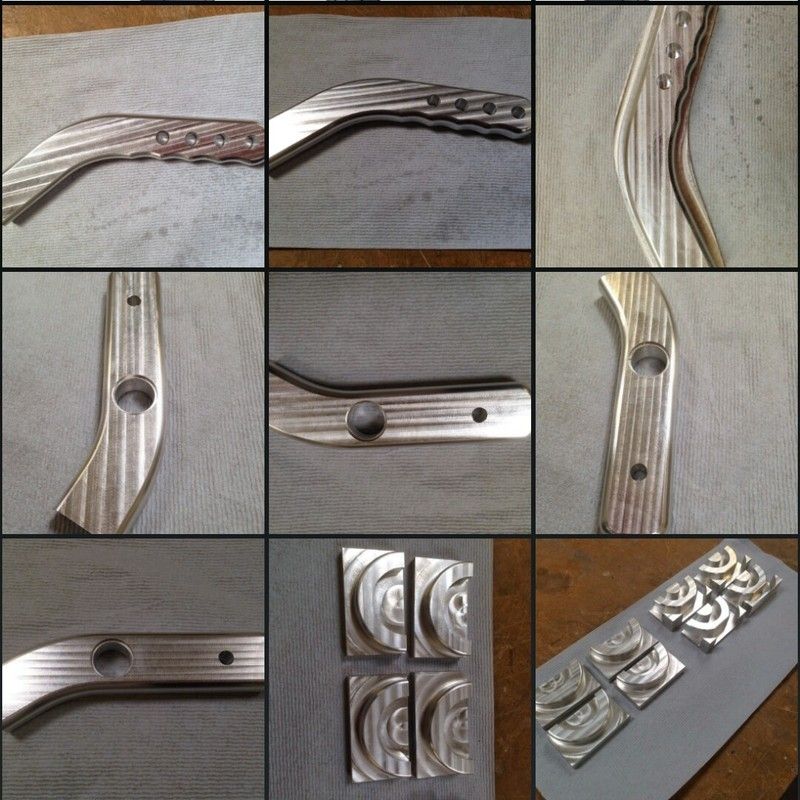
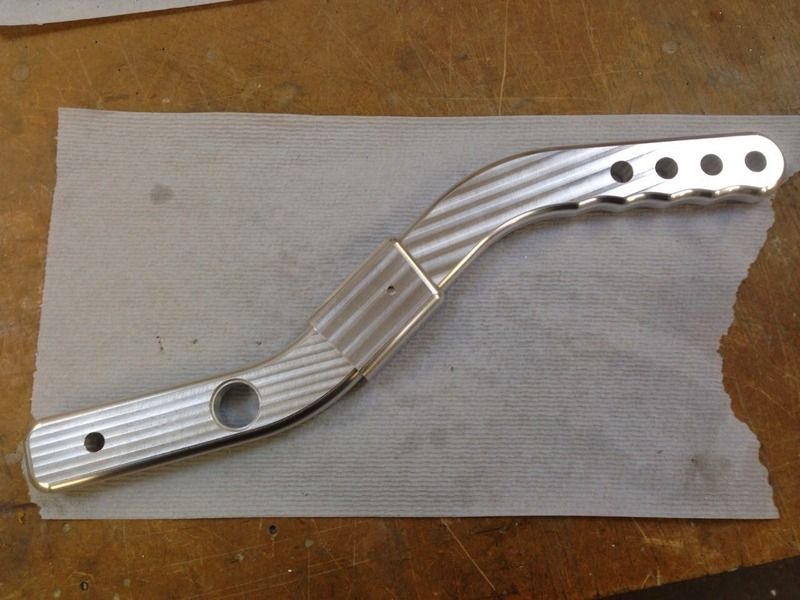
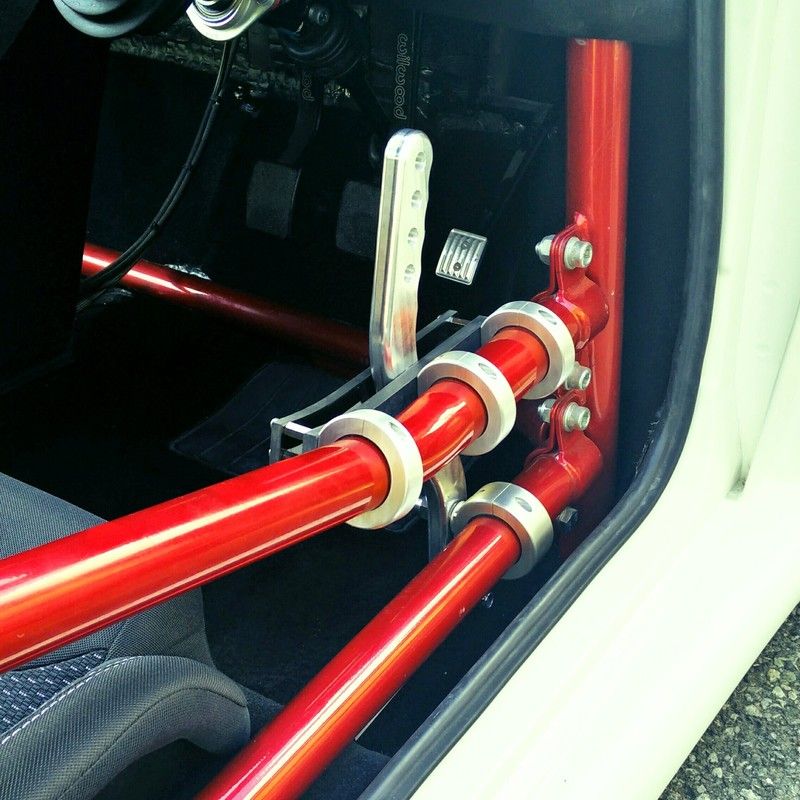
The handbrake isn't fully complete as I'm waiting on a few linkage components, so you'll have to wait for the next episode to see if it actually works and for final pictures including the space restrictions I had to work with!!!
Posted 10 June 2015 - 01:14 PM
Trick handbrake - I like it - I LIKE IT A LOT....
Posted 10 June 2015 - 10:33 PM
Edited by dondo, 10 June 2015 - 10:43 PM.
Posted 11 June 2015 - 06:02 PM
Trick handbrake - I like it - I LIKE IT A LOT....
Thanks Andy
Very cool. Nice work trying to out do someone else on this site !!!!!
Only joking.
We can but try lol
Edited by RED HOT, 11 June 2015 - 06:33 PM.
Posted 15 June 2015 - 03:56 PM
Took a little trip to Exeter on Sunday to show at BHP Fuel Fest 2015 and as the wheels had been "unveiled" at players classic the day before you guys can now see them in their newly selected colour.
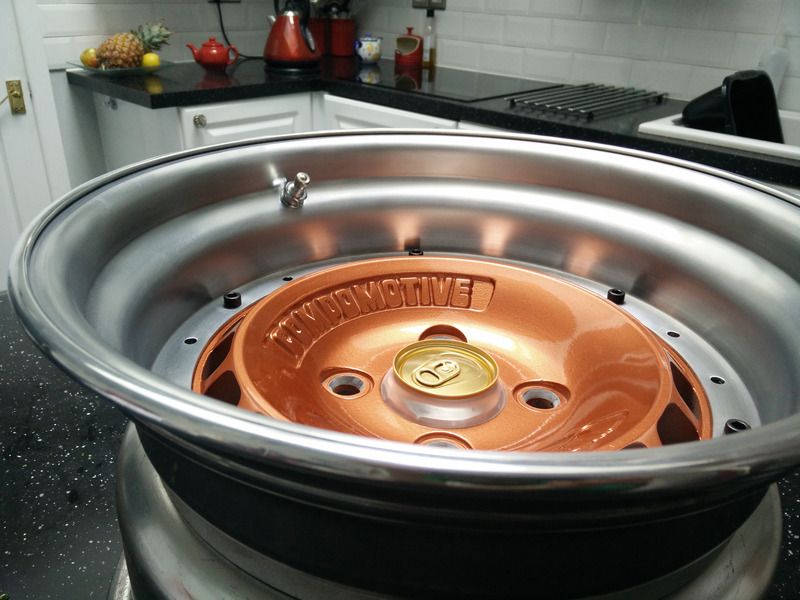
and fully assembled and fitted:-
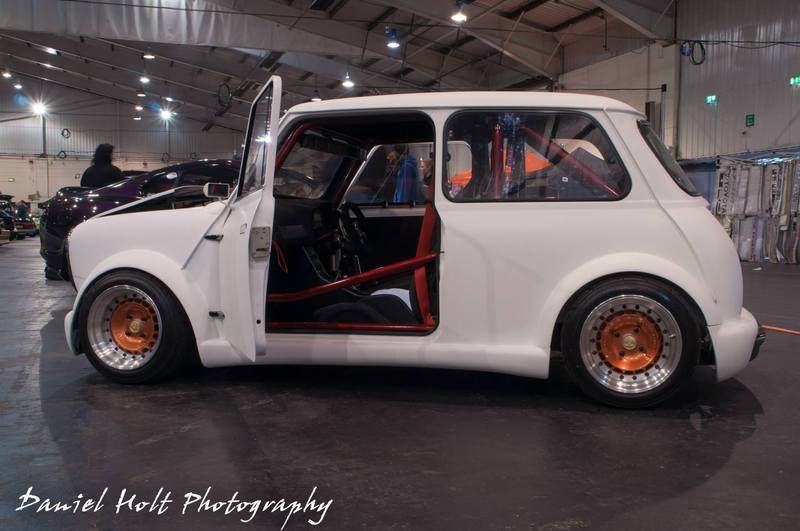
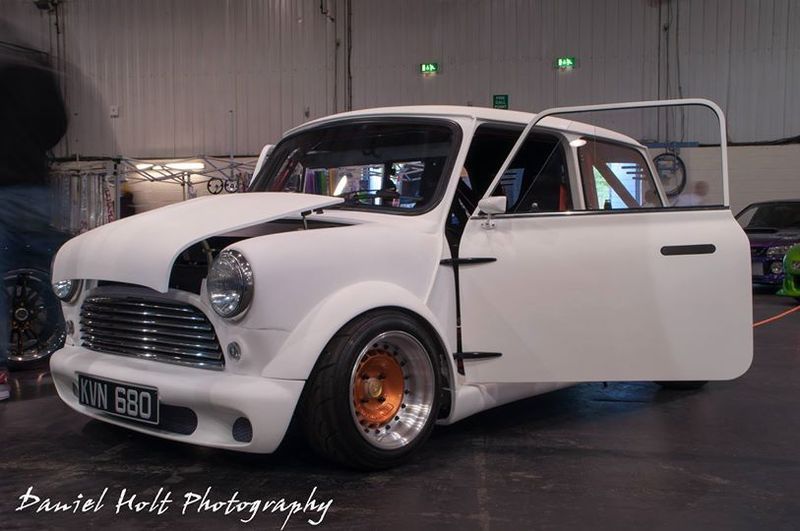
The pictures don't really show it, but the Kandy goes really metallic and pops in the sun totally transforming the colour; its also less orange than my phone photo at the top shows!
Posted 16 June 2015 - 09:08 AM
Very Nice......
0 members, 2 guests, 0 anonymous users