Jump to content


Photo

Dash Without A Padded Dash Rail.


  • Please log in to reply
2 replies to this topic

#1 Lady Grey

Lady Grey

    Just On Tickover

  • Noobies
  • Pip
  • 6 posts

Posted 17 August 2010 - 07:18 PM

I am in the process of restoring my mini and was considering leaving the bottom dash rail as painted metal, rather than putting the padded dash rail back on. However this causes a bit of a problem with the switch panel as it's made to fit into the padding.

Does anyone know of a solution? I thought about a mk1 switch panel, but as mine's a mk4 the switches are all different.

If anyone has done this before and has pics, it would be appreciated.

Thanks :)

#2 MichaelH

MichaelH

    On The Road

  • Noobies
  • PipPip
  • 41 posts

Posted 18 August 2010 - 12:15 PM

Hi,

I can offer you those suggestions:

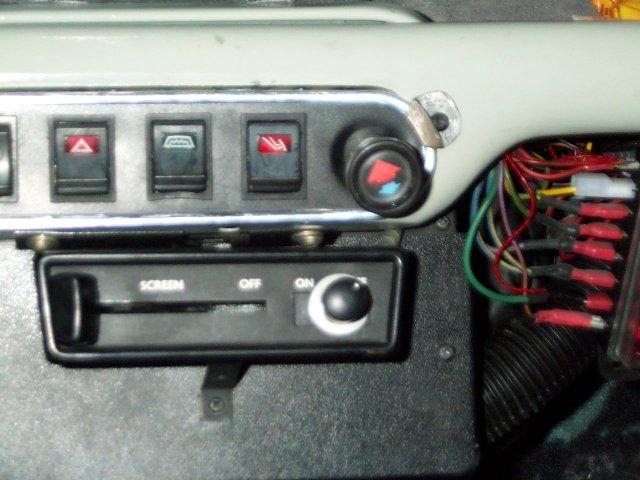
I did that too in the past and this is how it was done in the first:
Posted Image
I've simply made some small clamps that fix the switch panel. The panel is just big enough to cover the hole in the dash rail.

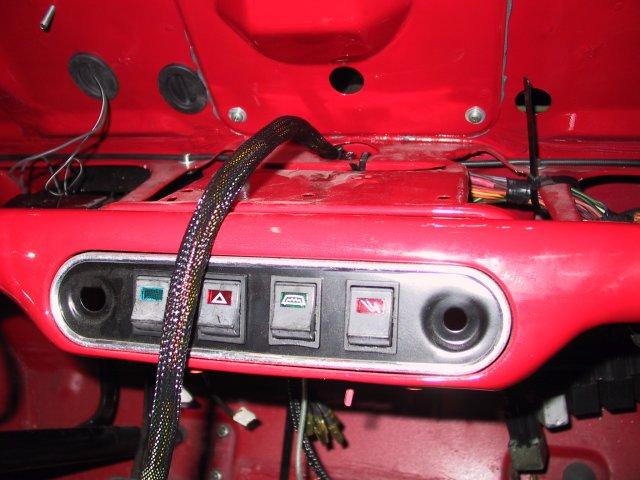
Later on, I did it this way, sinking the panel into the rail:
Posted Image

There is a bit more work involved as you'll have to enlargen the hole in the rail and weld some brackets onto the back of the panel as well as some bolts behind the rail.

Third, you might look for the switch panel of a Mini van. This uses the same switches as yours but the panel itself is larger and can be screwed onto the rail using the existing holes. (IIRC)
The only drawback with this solution is the lack of one switch, the rear screen heater (which is obviously not used in a van) But you might consider replacing the brake fluid test switch by a simple bulb which means one switch less. (Honestly - who testes the brake fluid control light regularly anyway??)


HTH
Michael

#3 1984mini25

1984mini25

    Crazy About Mini's

  • Members
  • PipPipPipPipPipPipPipPipPipPip
  • 8,784 posts
  • Location: -

Posted 18 August 2010 - 07:37 PM

I just went ahead and welded a spare chrome 5-hole switch plate into the dash rail, ground it back and filled.

[attachment=101781:HPIM3015.JPG][attachment=101782:HPIM3031.JPG]
[attachment=101783:HPIM3047.JPG]

Edited by 1984mini25, 18 August 2010 - 07:38 PM.


1 user(s) are reading this topic

0 members, 1 guests, 0 anonymous users