Working a treat, should bring things along nicely.


1960 Morris 850 And Friends
Started by
CLM
, Aug 12 2010 01:20 AM
417 replies to this topic
#106

grahama
-

- Members
-

- 2,442 posts
Up Into Fourth
- Location: Warrington
- Local Club: None in my area !!
Posted 20 November 2011 - 10:16 PM
#107
CLM
-
- Members
-
- 817 posts
One Carb Or Two?
Posted 20 November 2011 - 11:19 PM
Chris,
If you add some small plates on each side, I think they are called fish-plates, like the attached picture, you'll be fine.
Tell me more about the door jigs?
john
I might add the other bracing later on but need to take care of a few other projects.
The door bracing is a pair of tight fitting door frame fixtures shown in the first picture of post #98, I made them originally in the 1960 shell as it had virgin door frames they were made to fit tightly so I could build up the door aperatures around them and they would be the perfect shape, so far I have set them in the 1980 van door aperatures and this 68/69 mk2 wagon fram and they fit snug like they are supposed to. They also fit into the 5 main corners of the door opening, bottom corners, top corners, and front corner. I chose to not have a X in the center so I could have easy access inside working on the shell. They key into the center brace you see bolting to the striker plates and the hand brake cable holes keeping them from flexing in and out, the roof keeps it from flexing at the top the front bulkhead does at front and the floor at the bottom. I made these up when I was going to be assembling the pickup from the saloon shell which had the door frames not quite true, I was going to true them up to these jigs.
Chris
Edited by CLM, 20 November 2011 - 11:24 PM.
#108
CLM
-
- Members
-
- 817 posts
One Carb Or Two?
Posted 21 November 2011 - 02:36 AM
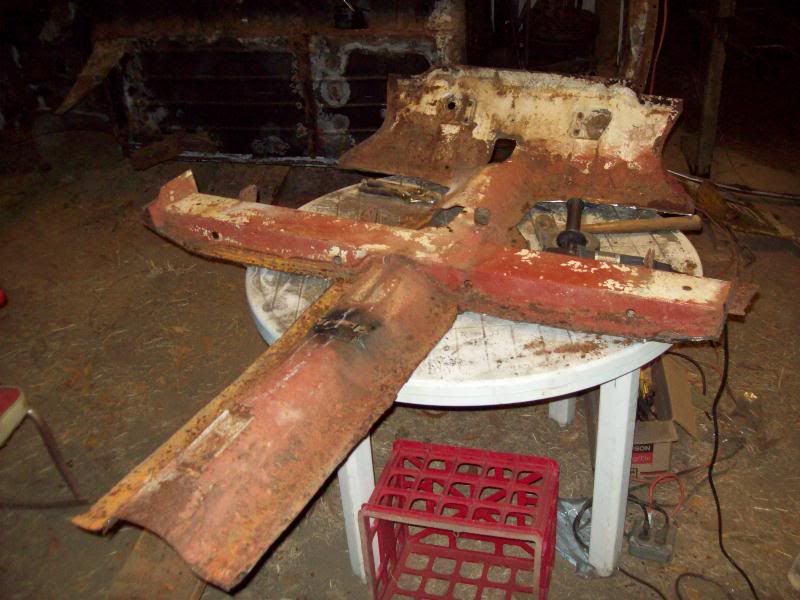
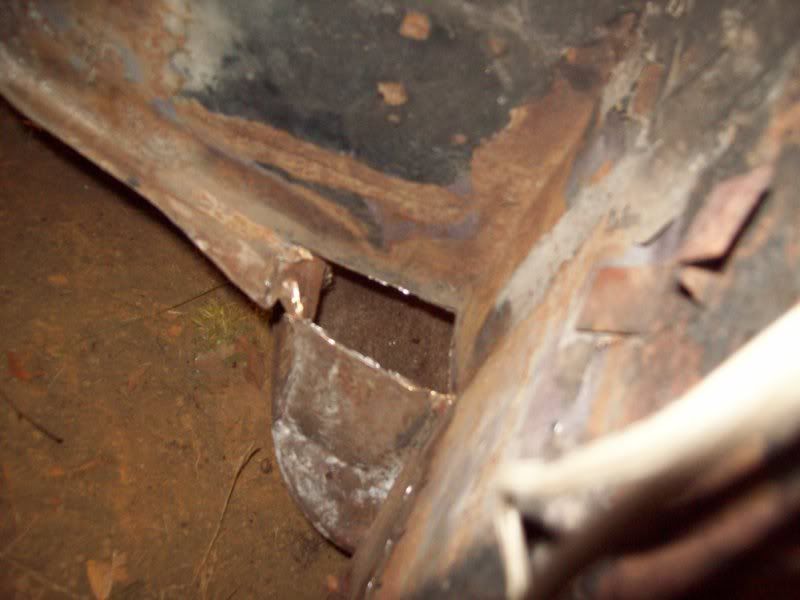
Tonight on Bodge vision, brought to us by the letter O, the letter M, and the letter G, we see the curious case of how a propper bodger repairs a rusty floor on an estate wagon! Here is how it should look when it's done!
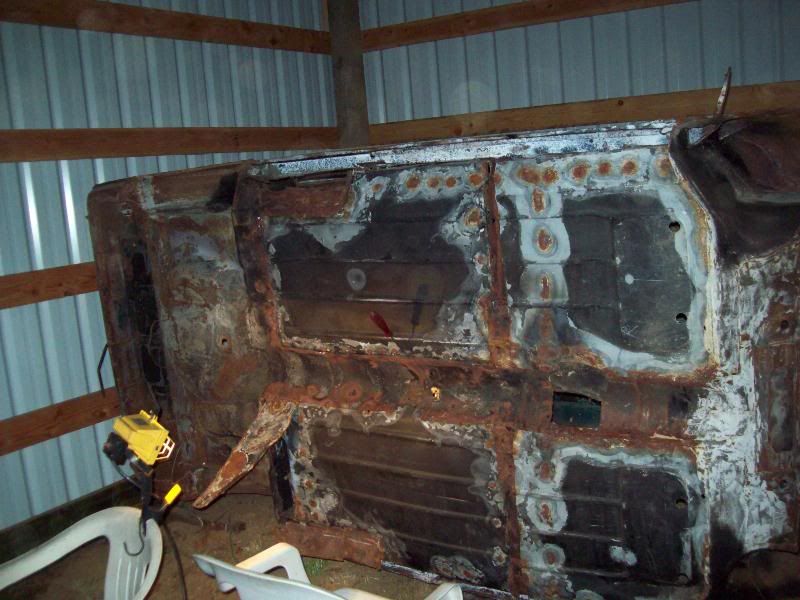
Make sure yolu dont actually repair any rusty metal... lace is very sexy in panels, strength!? Who needs it!?
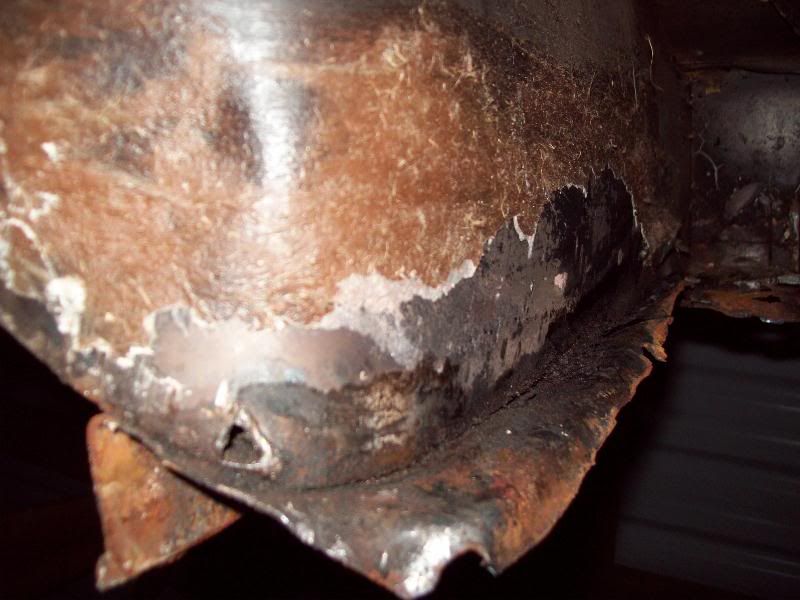
Leaving anything in decent shape is strictly a no-no, see this companion box has no rust on the bottom, and is fully intact... you will notice the propper bodger did however do welding that made up for it, there on the corner you can see the hole where the full of the ammount of welding was done to secure the floor panel.
Beautiful... no?
Here we have an almost intact repair panel just waiting for the next time a bodger can use it!.
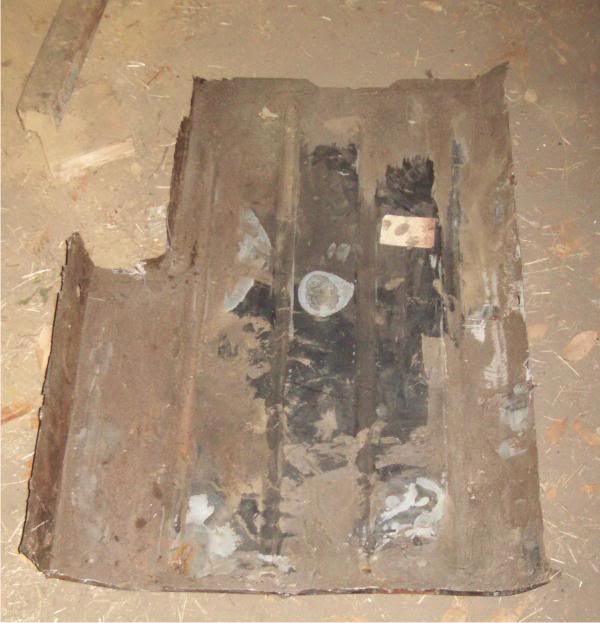
Thanks for watching Bodge Vision tonight, next time we may look into the many and creative uses of bondo!
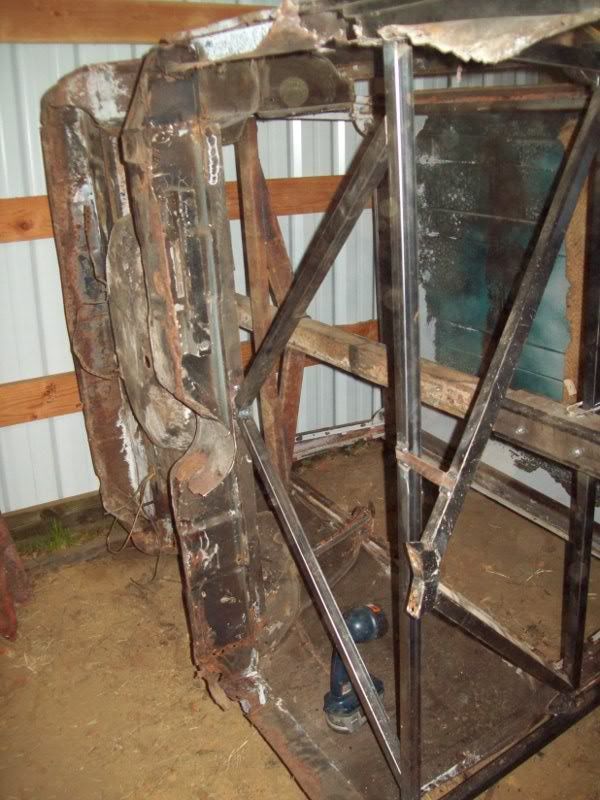
The floor had about a dozen tack welds around it's perimiter with maybe 5 of them still attached, more then anything it was glued in by afiber billed bondo stuff, I was able to pull the panel out in a single piece which is all together scary if you ask me. The car doesnt look like it has deteriorated much since this work was done... Scary. The white showing at the bottom of the doorframe is the phosphoric acid treated door frame, hoping to save it so I dont have to replace a part of the door aperature which might change it's shape. I will likely weld reinforcements in there after scouring and treating it so it will not lose any strength... Can you Believe they welded the floor in around a crossmember that far gone!? Hope to salvage the crossmember and tunnel from the floorpan from the saloon I cut up, the rh side is tweaked due to an accident, but if I pull it off the floor I should be able to fix it... it should be better then building a whole new seat crossmember like I am sure it would take with that one.... I need to pull these floor panels out and brace up the shell so I can pull the load floor out... so I can put the van on the spit...
Chris
Make sure yolu dont actually repair any rusty metal... lace is very sexy in panels, strength!? Who needs it!?
Leaving anything in decent shape is strictly a no-no, see this companion box has no rust on the bottom, and is fully intact... you will notice the propper bodger did however do welding that made up for it, there on the corner you can see the hole where the full of the ammount of welding was done to secure the floor panel.
Beautiful... no?
Here we have an almost intact repair panel just waiting for the next time a bodger can use it!.
Thanks for watching Bodge Vision tonight, next time we may look into the many and creative uses of bondo!
The floor had about a dozen tack welds around it's perimiter with maybe 5 of them still attached, more then anything it was glued in by afiber billed bondo stuff, I was able to pull the panel out in a single piece which is all together scary if you ask me. The car doesnt look like it has deteriorated much since this work was done... Scary. The white showing at the bottom of the doorframe is the phosphoric acid treated door frame, hoping to save it so I dont have to replace a part of the door aperature which might change it's shape. I will likely weld reinforcements in there after scouring and treating it so it will not lose any strength... Can you Believe they welded the floor in around a crossmember that far gone!? Hope to salvage the crossmember and tunnel from the floorpan from the saloon I cut up, the rh side is tweaked due to an accident, but if I pull it off the floor I should be able to fix it... it should be better then building a whole new seat crossmember like I am sure it would take with that one.... I need to pull these floor panels out and brace up the shell so I can pull the load floor out... so I can put the van on the spit...
Chris
#109
GuamMini
-

- Noobies
-
- 54 posts
Stage One Kit Fitted
- Location: Guam
- Local Club: Guam Classics
Posted 23 November 2011 - 06:48 AM
Wow
#110
CLM
-
- Members
-
- 817 posts
One Carb Or Two?
Posted 08 December 2011 - 11:10 AM
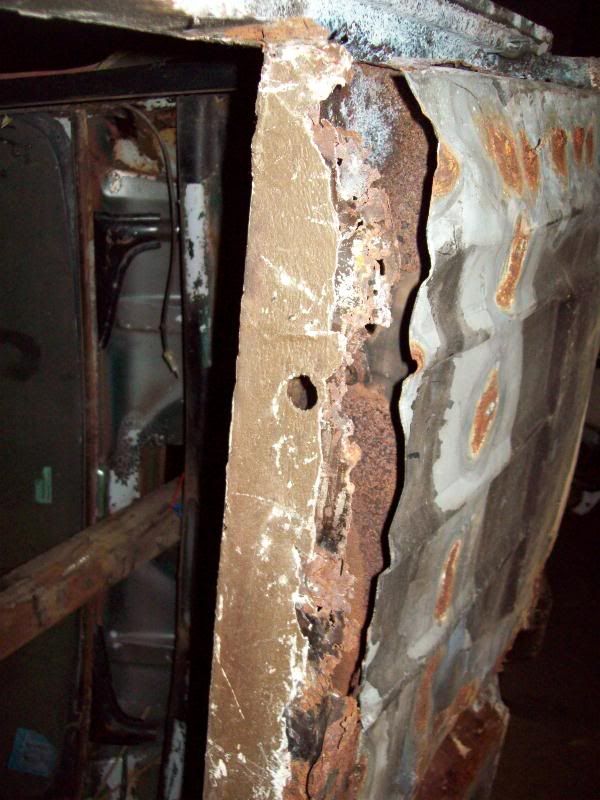
Ok, where were we... I had gotten the right rear quarter floor out and I started soaking and treating the rust under the door seeing if it could be saved, Ospho then rinse Ospho then rinse. It didn't look good at first...
But I actually started getting some clear metal and I think once treated and sealed These door frames should be salvageable.
Unfortunately as the majority of the floor... if you can call it that.. was still there and I didnt have a wire brush to fit on the grinder of an appropriate shape I only have done one half so far, so I worked at the front half of the right hand floor and managed to pull it out, though not in as good of condition as the back. (sorry it's blurry, but eh.. it's clear enough )
)

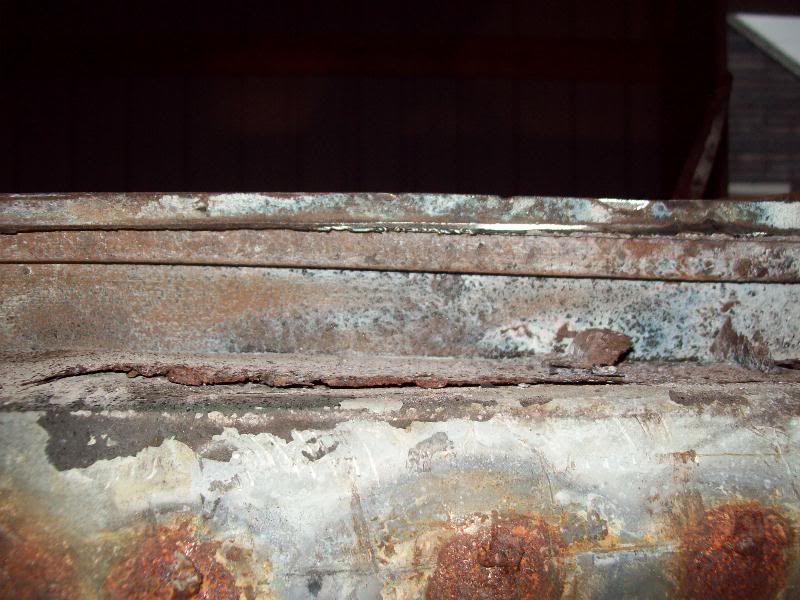
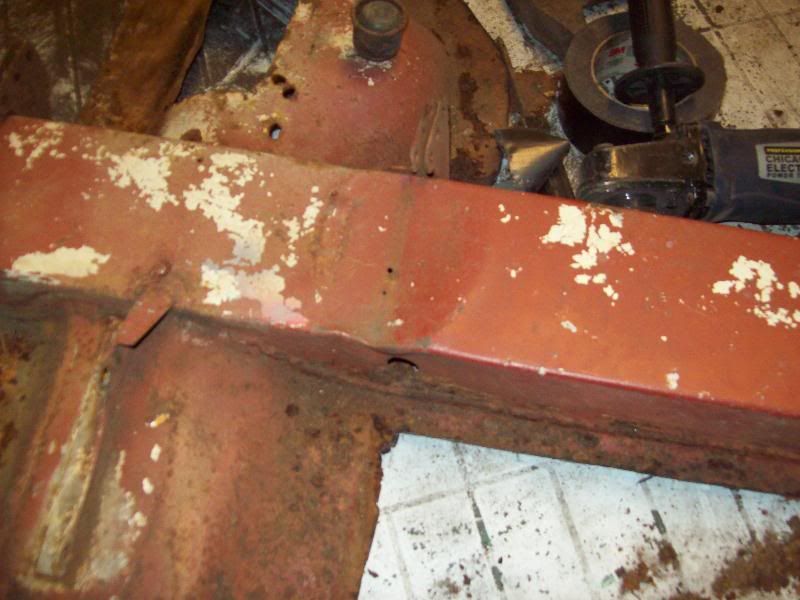
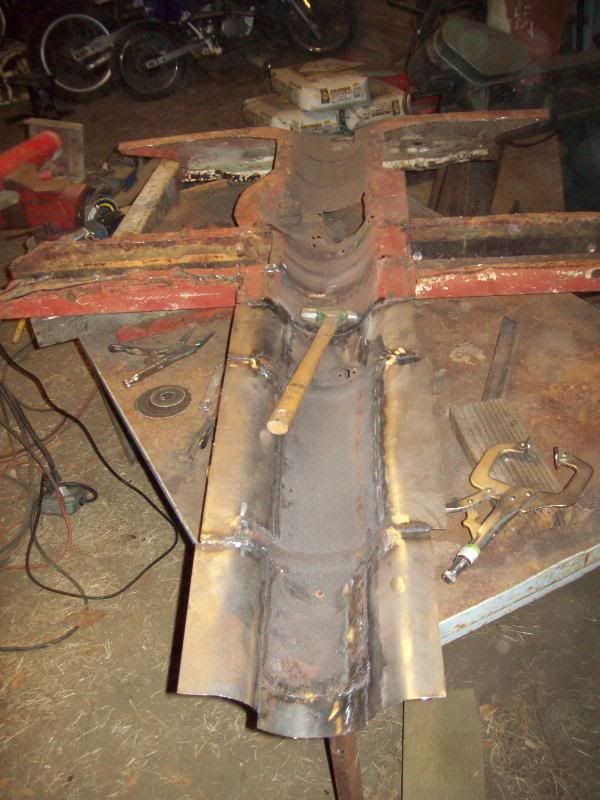
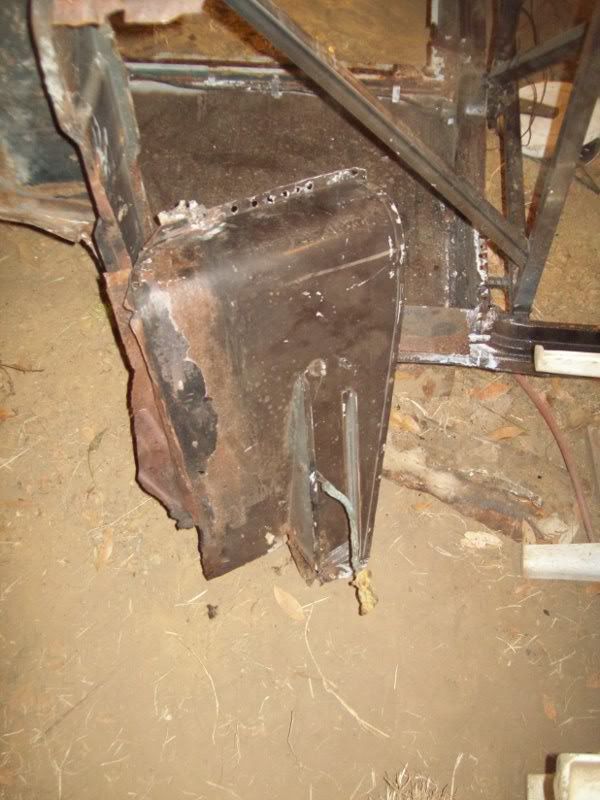
You want to talk about hidden horror... Let me show you this crossmember... hide your weak stomached friends.
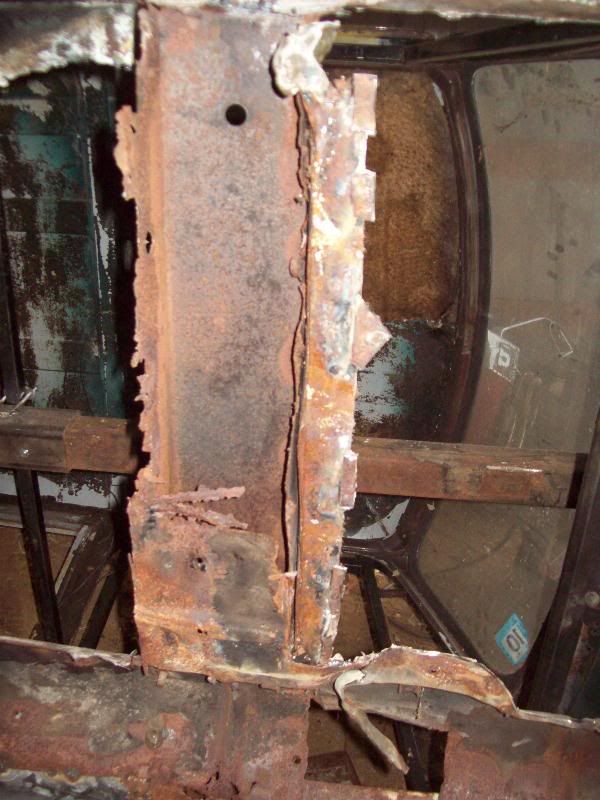
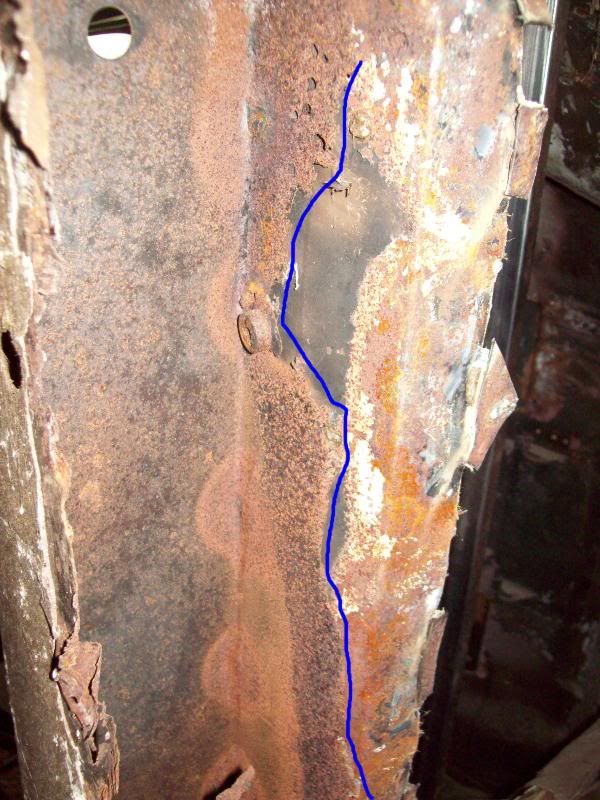
A blue line here to trace the edge of the original crossmember... which wasn't cut out or treated or anything.... Just a piece of metal glued on the front.
After considering the condition of the front toeboard at each end...
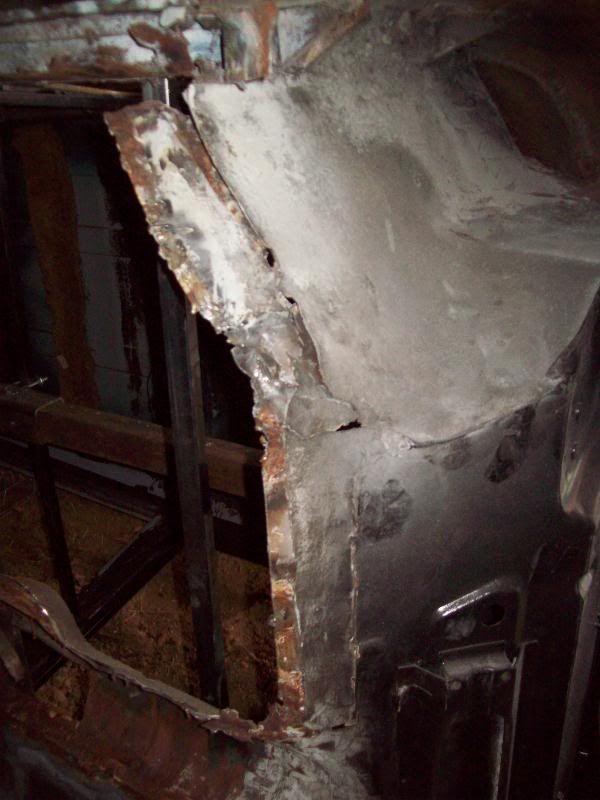
I came to a rather drastic consensus.. I needed to use the toeboard and maybe the entire tunnel and crossmember from this rusty old hunk of floor in the wagon-to-be-pup...
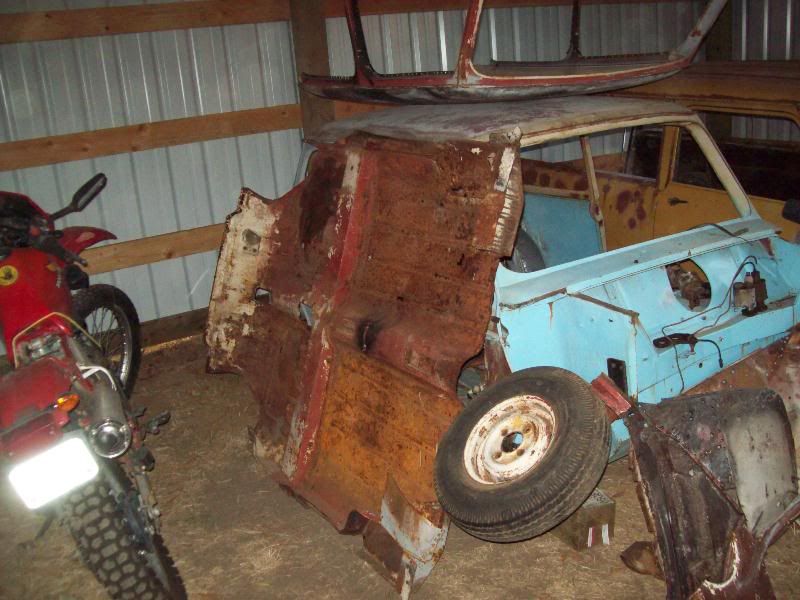
Which I then cut its floor panels out, although I didn't know exactly how I was going to get it all to work out. I have to get some form of a floor in this because I can't take the wagon off this spit untill it has a floor or something in it for strength and, well, so I have something on the bottom to sit it on.
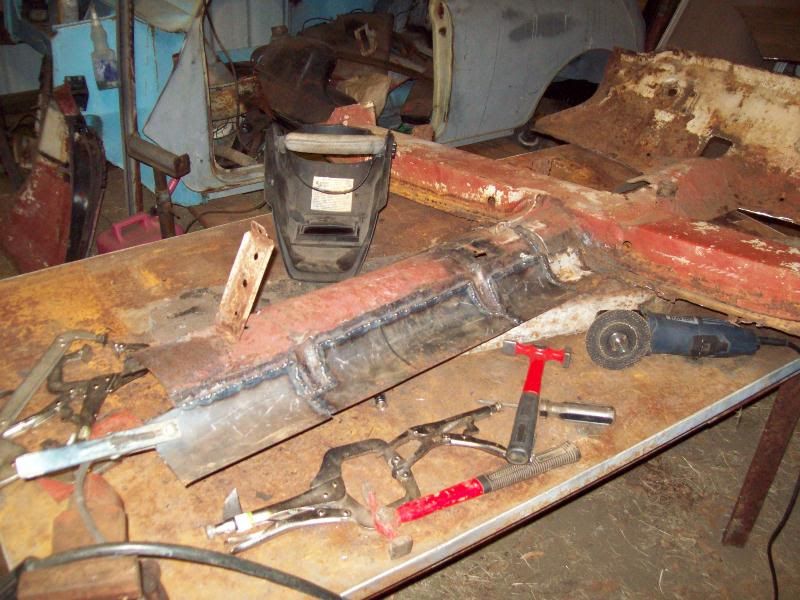
Now.. be nice of my table it worked fine until I drug out something better. One area of concern I did have with it however is the bent crossmember, I have since decided, I am putting enough effort into the tunnel I might as well as budget in a new crossmember... seing as I will likely have to replace around the whole perimeter of this crossmember if I tried fixing it due to those nasty oversills in the back.
So I started pealing off the overfloor and determining how much needed repair... or rather how much didn't need repair. You can see I recieved a bit of a table upgrade by this time, I only had to build one leg for it. You should also be able to make out where I was working on repairing another issue with this tunnel due to the fact that it came out of my cut-n-shut car, the front tunnel was just slid over the back tunnel.
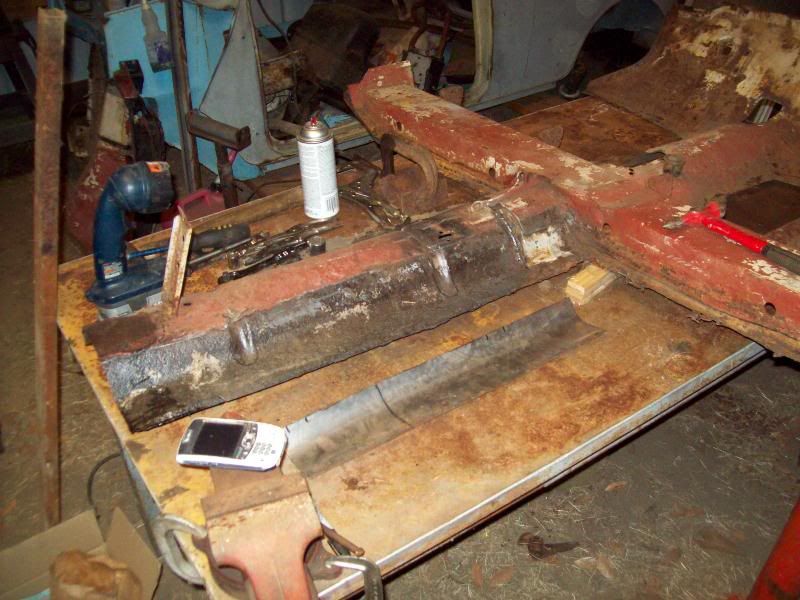
I then used a long hydraulic jack with about the right diameter tube to start forming 4 inch wide strips of sheet steel to form and replace the bottom edge of the tunnel, I am purposly leaving them extra wide as when I get the floors it will be easier and faster to trim metal then add more. I worked from the crossmember rearwards so I could make sure to keep the repair panels lined up.
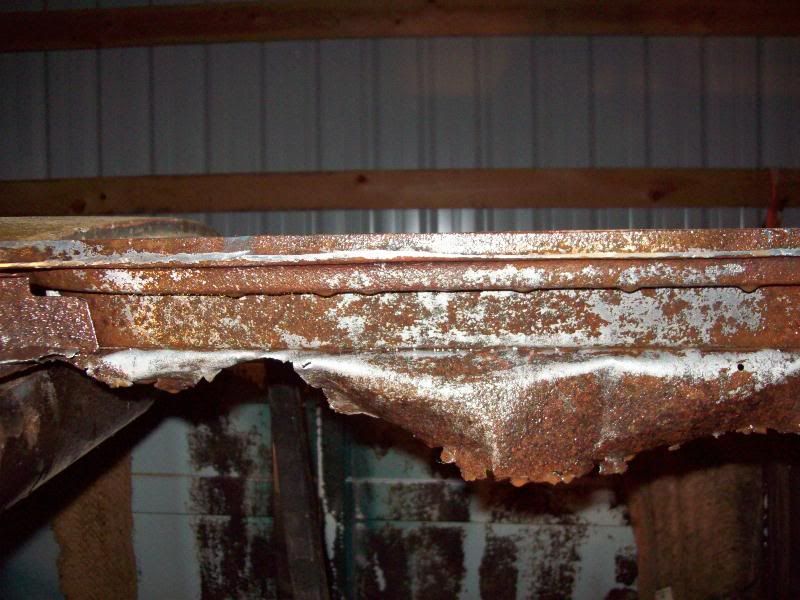
Oh here is another picture... that illustrates one of the main issues with this crossmember.
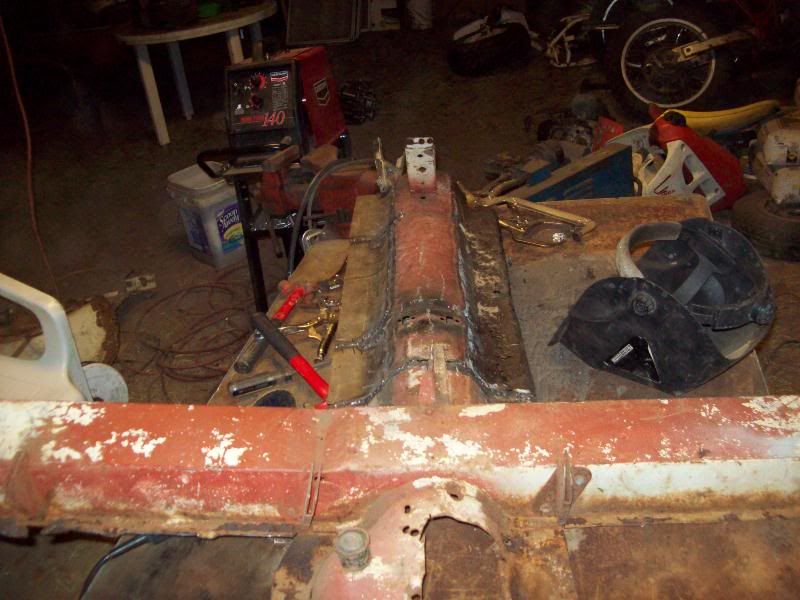
That took me to the otherside, which I decided that I really didnt need to cut it all at the same height like the other side and instead just put it where it needed it. Front with some tricky vicegrip entwining and my everpresent can of iced tea.
Middle...

And end...
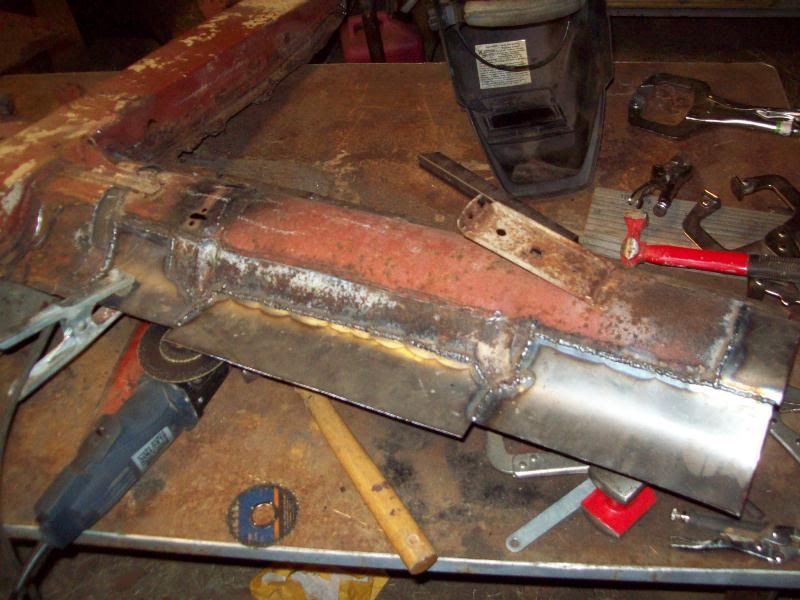
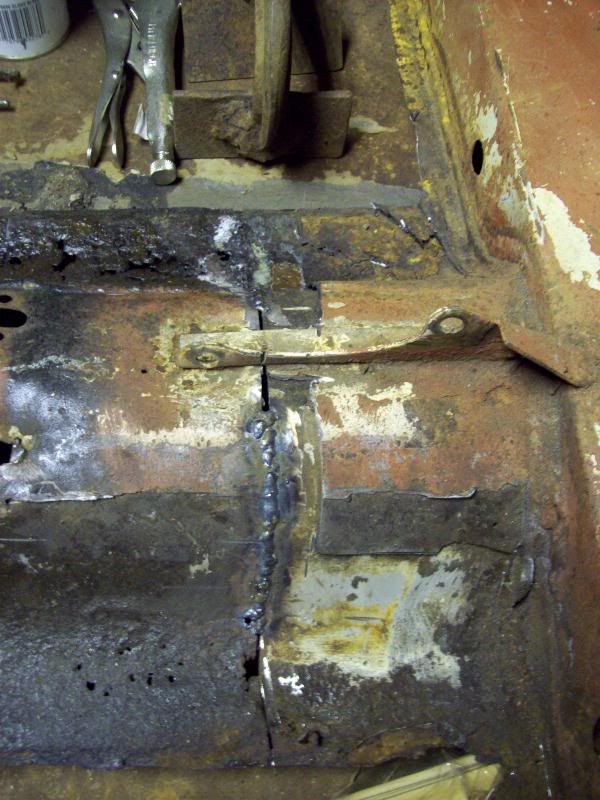
I think it looks all together better... albet more frankenstein like so far. I even worked at grinding a bit of the inside seams.
I am going to have to clean up the outside and go over the seams for any pinholes next, then work on the front half and toeboard.. probably even cut off the Crossmember. Once the tunnel is prepped and ready I will build some jigs in the wagon and carefully remove the crossmember the tunnel the toeboard and then offer up the one I have here and fix it in.
Untill next time,
Spam You Later.
Chris
But I actually started getting some clear metal and I think once treated and sealed These door frames should be salvageable.
Unfortunately as the majority of the floor... if you can call it that.. was still there and I didnt have a wire brush to fit on the grinder of an appropriate shape I only have done one half so far, so I worked at the front half of the right hand floor and managed to pull it out, though not in as good of condition as the back. (sorry it's blurry, but eh.. it's clear enough
)You want to talk about hidden horror... Let me show you this crossmember... hide your weak stomached friends.
A blue line here to trace the edge of the original crossmember... which wasn't cut out or treated or anything.... Just a piece of metal glued on the front.
After considering the condition of the front toeboard at each end...
I came to a rather drastic consensus.. I needed to use the toeboard and maybe the entire tunnel and crossmember from this rusty old hunk of floor in the wagon-to-be-pup...
Which I then cut its floor panels out, although I didn't know exactly how I was going to get it all to work out. I have to get some form of a floor in this because I can't take the wagon off this spit untill it has a floor or something in it for strength and, well, so I have something on the bottom to sit it on.
Now.. be nice of my table it worked fine until I drug out something better. One area of concern I did have with it however is the bent crossmember, I have since decided, I am putting enough effort into the tunnel I might as well as budget in a new crossmember... seing as I will likely have to replace around the whole perimeter of this crossmember if I tried fixing it due to those nasty oversills in the back.
So I started pealing off the overfloor and determining how much needed repair... or rather how much didn't need repair. You can see I recieved a bit of a table upgrade by this time, I only had to build one leg for it. You should also be able to make out where I was working on repairing another issue with this tunnel due to the fact that it came out of my cut-n-shut car, the front tunnel was just slid over the back tunnel.
I then used a long hydraulic jack with about the right diameter tube to start forming 4 inch wide strips of sheet steel to form and replace the bottom edge of the tunnel, I am purposly leaving them extra wide as when I get the floors it will be easier and faster to trim metal then add more. I worked from the crossmember rearwards so I could make sure to keep the repair panels lined up.
Oh here is another picture... that illustrates one of the main issues with this crossmember.
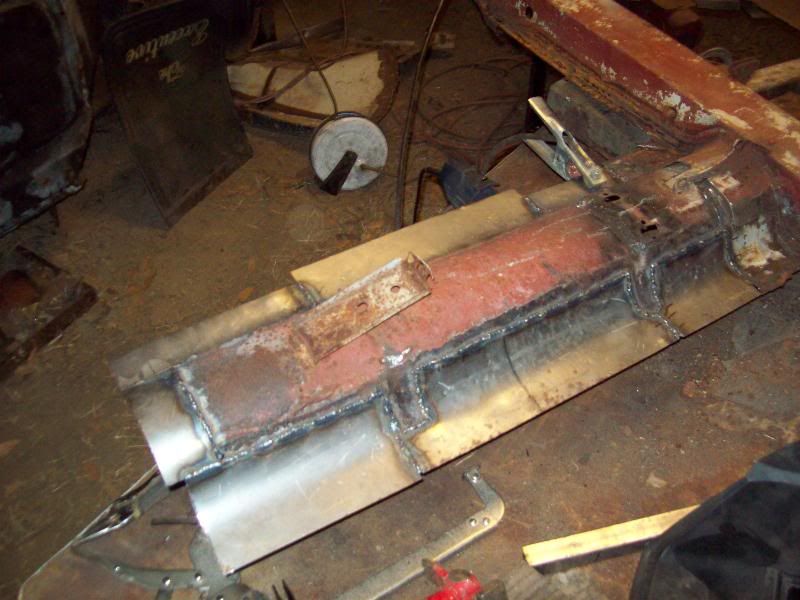
That took me to the otherside, which I decided that I really didnt need to cut it all at the same height like the other side and instead just put it where it needed it. Front with some tricky vicegrip entwining and my everpresent can of iced tea.
Middle...
And end...
I think it looks all together better... albet more frankenstein like so far. I even worked at grinding a bit of the inside seams.
I am going to have to clean up the outside and go over the seams for any pinholes next, then work on the front half and toeboard.. probably even cut off the Crossmember. Once the tunnel is prepped and ready I will build some jigs in the wagon and carefully remove the crossmember the tunnel the toeboard and then offer up the one I have here and fix it in.
Untill next time,
Spam You Later.
Chris
#111
CLM
-
- Members
-
- 817 posts
One Carb Or Two?
Posted 16 December 2011 - 02:02 AM
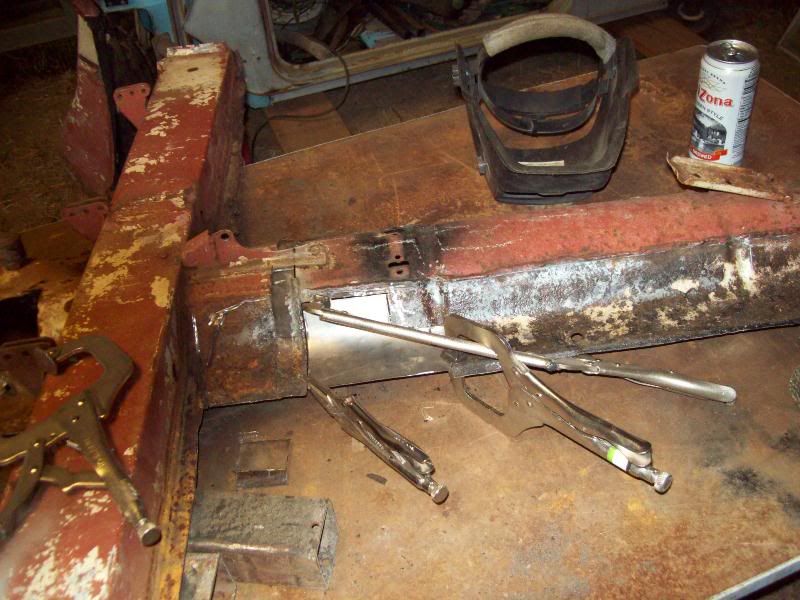
Since last time I posted, I have taken another panel out... though first I needed to make this to align the panel when I put the replacements in.
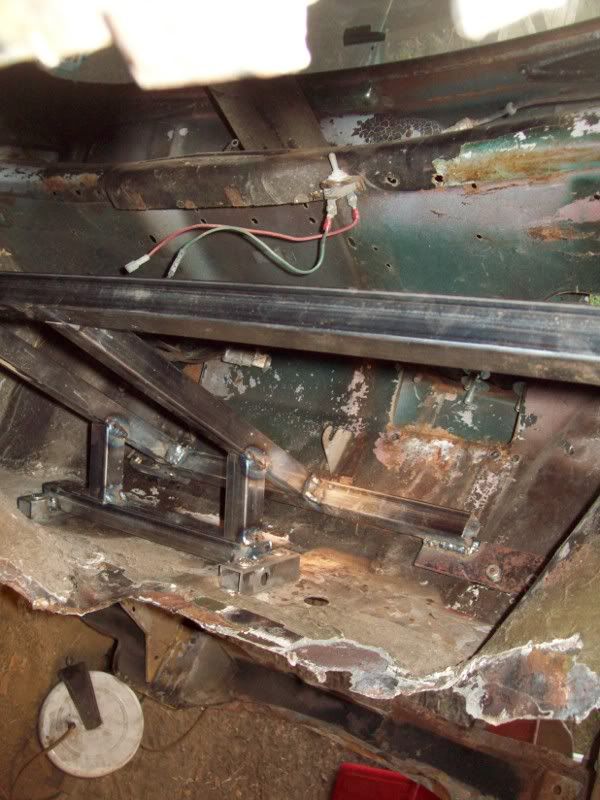
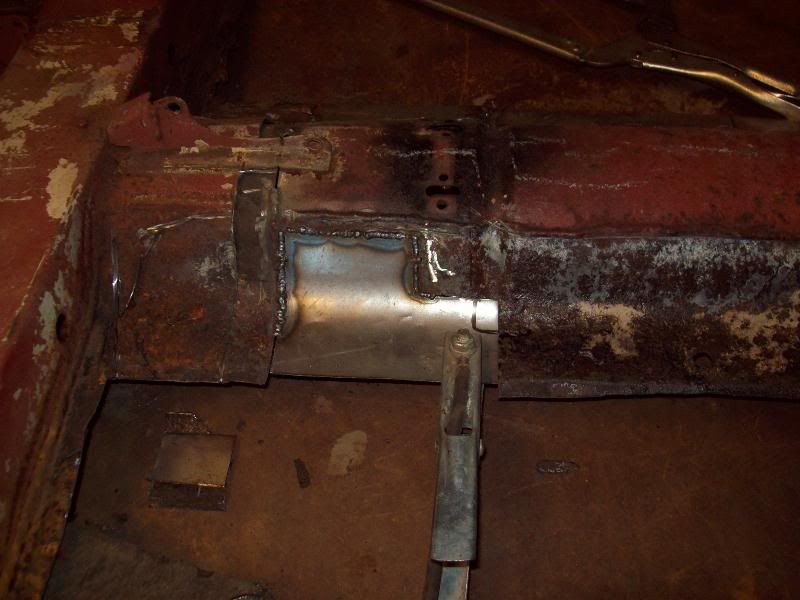
Then I took the panel out... only a small panel.
Just need to clean up the swarf around the edges now, and I would like to get the companion boxes pulled out.
Talk to you all later!
Chris
Then I took the panel out... only a small panel.
Just need to clean up the swarf around the edges now, and I would like to get the companion boxes pulled out.
Talk to you all later!
Chris
#112
new_zealand _minis
-
- Members
-
- 654 posts
Super Mini Mad
- Local Club: wellington new zealand
Posted 16 December 2011 - 09:33 AM
you have some nice work ahead ..
anyone would have taken them to the scrap long ago
good luck looking good sofar
..anyone would have taken them to the scrap long ago
good luck looking good sofar
#113
CLM
-
- Members
-
- 817 posts
One Carb Or Two?
Posted 16 December 2011 - 10:51 AM
you have some nice work ahead
anyone would have taken them to the scrap long ago
good luck looking good sofar
Lol thanks! Positive comments fuels my will to keep going!
Yeah they were all kinda.. ugly but we can't be cheap and choosy over here.. we just don't have the mini selection! The wagon though, in all reality was uglier then it really is. It only really needs a new floor, the a panels done and work around the rear windows... But I don't plan to leave it as a wagon so.. it's all my fault for the work I have ahead of me lol.
Once I can get this wagon solid again the real trials start... I have to swap load floors between this one and my van...

the work required.. to take them out.. complete.. and reuseable...and install them square again... boggles my MIND


Saving money by bleeding out on rusty sharp sheet metal edges... Tetanus here I come! I wonder if working on minis could be considered attempted suicide!
Chris
Edited by CLM, 16 December 2011 - 10:52 AM.
#114
johnsn
-

- Just Joined
-
- 69 posts
Stage One Kit Fitted
- Local Club: OMS
Posted 16 December 2011 - 11:35 PM
Saving money by bleeding out on rusty sharp sheet metal edges... Tetanus here I come! I wonder if working on minis could be considered attempted suicide!
Chris
If you don't bleed on your Mini once and a while, you're not really working on it.
It can be considered attempted suicide, but it usually doesn't work.

Keep going. You're my best source of ideas for alignment brackets.
john

Edited by johnsn, 19 April 2014 - 03:40 PM.
#115
jagman.2003
-

- Members
-
- 1,307 posts
One Carb Or Two?
- Location: In the shed.
- Local Club: Owner of my own club of Minis
Posted 17 December 2011 - 10:21 AM
Great work, glad to see your not scared to cut some rot out!
#116
CLM
-
- Members
-
- 817 posts
One Carb Or Two?
Posted 17 December 2011 - 07:42 PM
Great work, glad to see your not scared to cut some rot out!
Well.. your topic was VERY inspirational
Chris
#117
PaulColeman
-

- Members
-
- 712 posts
One Carb Or Two?
- Location: Bedford
Posted 17 December 2011 - 09:27 PM
You Sir, are quite obviously mad! I wouldn't have even considered taking that on - so I take my hat off to you. My car only has a tenth of the rust of yours and that's my limit.
Good luck with it, Paul.
Good luck with it, Paul.
#118
CLM
-
- Members
-
- 817 posts
One Carb Or Two?
Posted 17 December 2011 - 10:40 PM
My car only has a tenth of the rust of yours and that's my limit.
Well the thing is... this one wasn't rusty in the important areas for me. door frames and most of the load floor.. Paid $600 for the wagon shell and it's load floor, window surround, and door frames were worth that. The load floor is going in the van so I can have a concealed spare which allows me to repurpose the load floor from the van for this pup project, a load floor which would have cost me well over $1000 to buy new.
the mad part is... I am repairing it this way to keep it square... then I am cutting the roof and back off the floor and making a pickup with about $1500 (not counting shipping) worth of panels... mmmm pups. All in all I think the only panels not getting replaced on the wagon is the cantrails, the front window surround, the dash, the front bulkhead, the door frames... and maybe the front half of the roof... Once it has a solid floor it would not be that far at all to fix it up as a wagon... if I was sane. (though to keep a sane thought in the madness... once it's a pup, it will have less interior parts to buy from Newton Commercial..)
cHrIs

Edited by CLM, 17 December 2011 - 10:51 PM.
#119
minimuk
-

- Members
-
- 1,946 posts
Camshaft & Stage Two Head
- Location: Midlands
Posted 17 December 2011 - 11:18 PM
nice shell, what's left of it, this is going to be an ace project, not mad or suicidal,.... but just great keep it coming
#120
CLM
-
- Members
-
- 817 posts
One Carb Or Two?
Posted 18 December 2011 - 01:12 AM
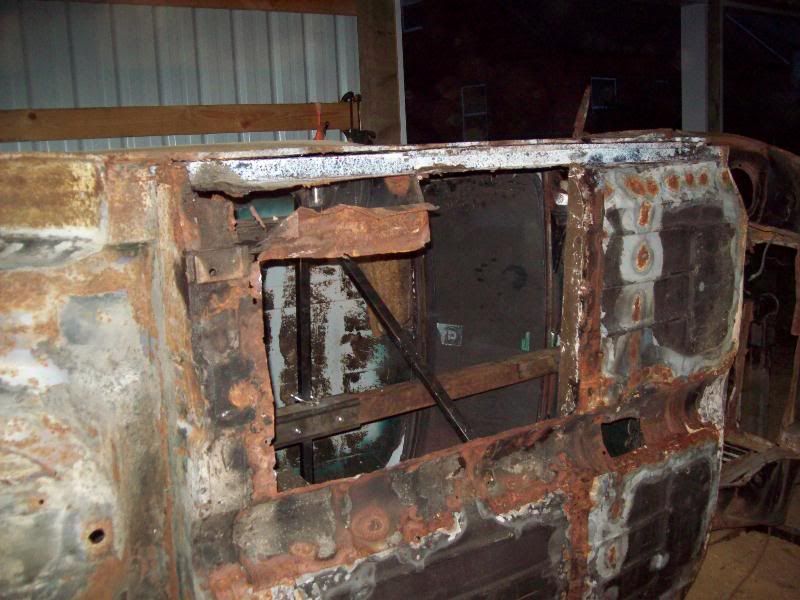
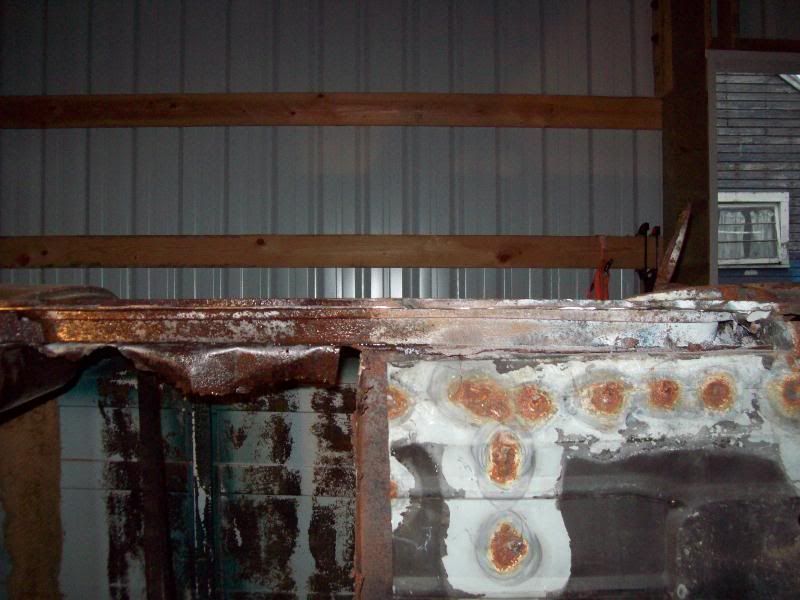
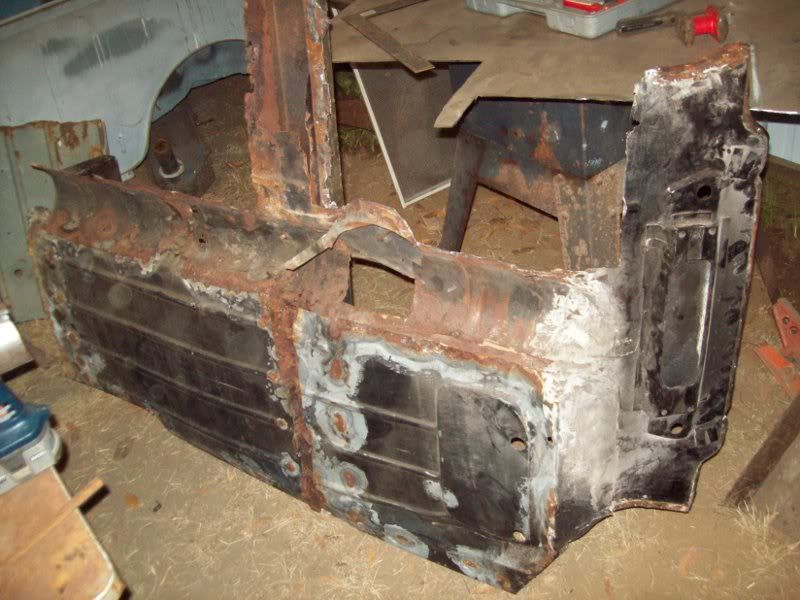
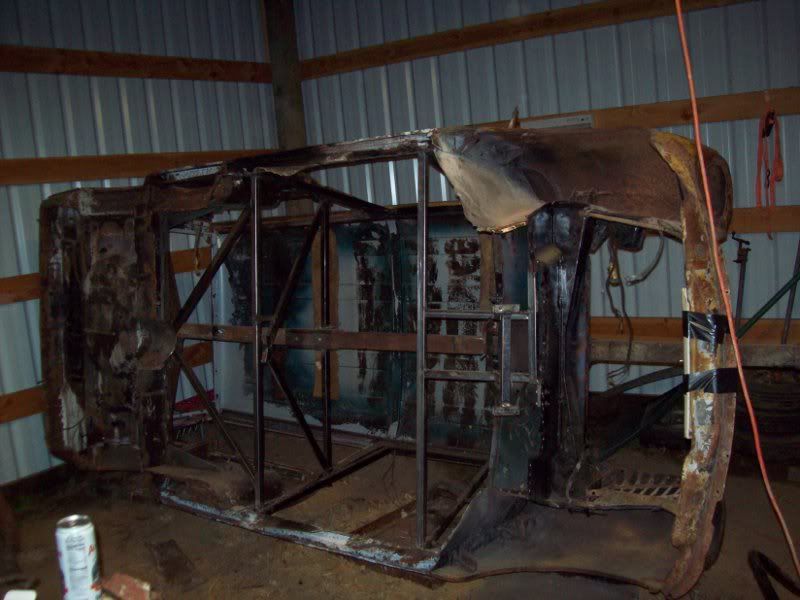
Well work for today, I decided the companion boxes had to come out, still have the inner sil stiffners in, but they aren't doing anything but loafing around like bums. It took a while trying to figure out how to remove the boxes without totally destroying everything, seeing as SOMEONE decided it was smart to design them in AS PART OF the bloody subframe closing panels.... and that they had to be BRAZED in... FInally decided I was going to need to bring home the sawzall and ended up grinding a slot at each side of the companion box then cutting the full width with the sawzall. That seemed to work, then crawl into the wagon, while it was on it's side.. on the spit... standing through the side window openings to drill out the spotwelds attaching the companionbox braces to the load floor and the companionboxes off of the rear wheel arches. I then tried grinding the welds on the ash trays off but it was no go, So I pulled out the allmighty sawzall again. Lovely tool. It took me probably 5 hours to get this off...

But only another half hour to get the second one off.
I am thinking about extending the closing panels up to the load floor when it goes in the van and making the companion boxes sandwich between the load floor and closers like it does in the saloon... the way they have it is insane

Here is where I ended today, boxes out, the inner sill stiffners and maybe the remains of the floor at the rear section tomorrow, then I want to rebuild that rotted out floor extention piece and get everything ready for the floor when it arrives.
Chris
P.S. Thank you Minimuk... but nice!? Surely you jest! And no I didn't just call you Shirley!
to drill out the spotwelds attaching the companionbox braces to the load floor and the companionboxes off of the rear wheel arches. I then tried grinding the welds on the ash trays off but it was no go, So I pulled out the allmighty sawzall again. Lovely tool. It took me probably 5 hours to get this off... But only another half hour to get the second one off.
I am thinking about extending the closing panels up to the load floor when it goes in the van and making the companion boxes sandwich between the load floor and closers like it does in the saloon... the way they have it is insane
Here is where I ended today, boxes out, the inner sill stiffners and maybe the remains of the floor at the rear section tomorrow, then I want to rebuild that rotted out floor extention piece and get everything ready for the floor when it arrives.
Chris
P.S. Thank you Minimuk... but nice!? Surely you jest! And no I didn't just call you Shirley!


1 user(s) are reading this topic
0 members, 1 guests, 0 anonymous users


