Bloody hell, epic cutting away !!! Good luck with it all, way tougher challenge than I could take on!!


1960 Morris 850 And Friends
Started by
CLM
, Aug 12 2010 01:20 AM
417 replies to this topic
#91

grahama
-

- Members
-

- 2,442 posts
Up Into Fourth
- Location: Warrington
- Local Club: None in my area !!
Posted 01 October 2011 - 08:05 PM
#92
johnsn
-

- Just Joined
-
- 69 posts
Stage One Kit Fitted
- Local Club: OMS
Posted 02 October 2011 - 06:54 PM
Quote Chris.
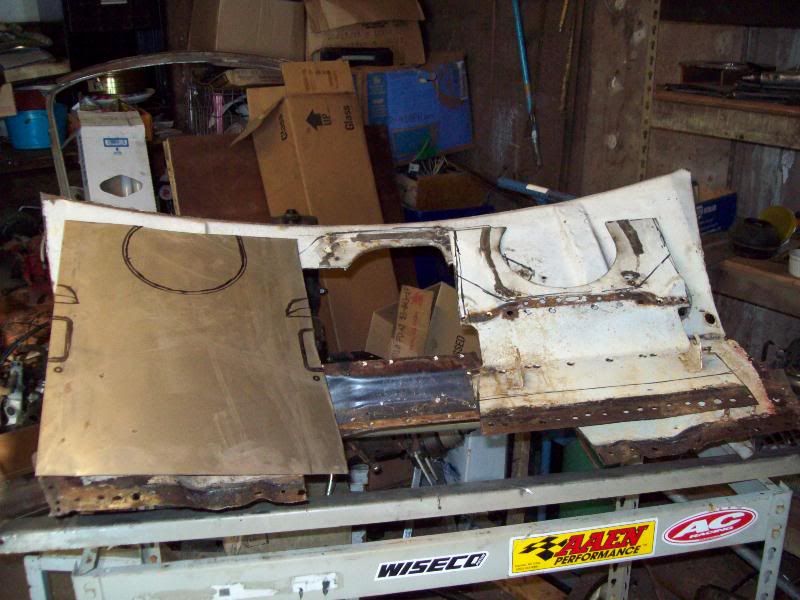
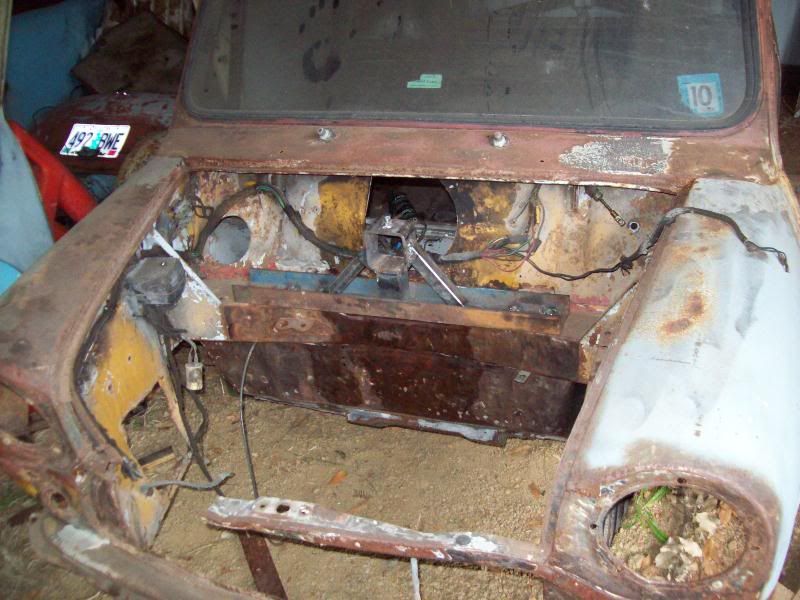
That left me with the bulkhead and the crossmember, I marked out the areas I am going to need to cut for the van to get your thoughts on it John.
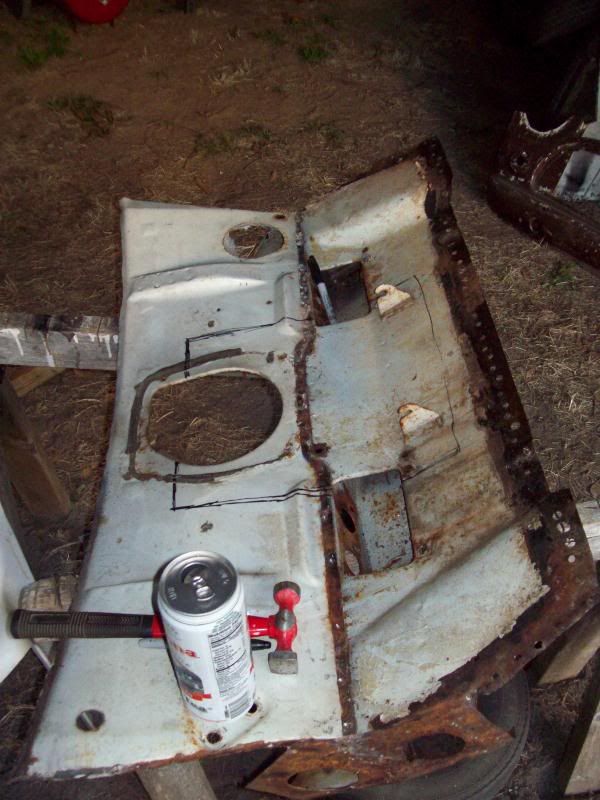
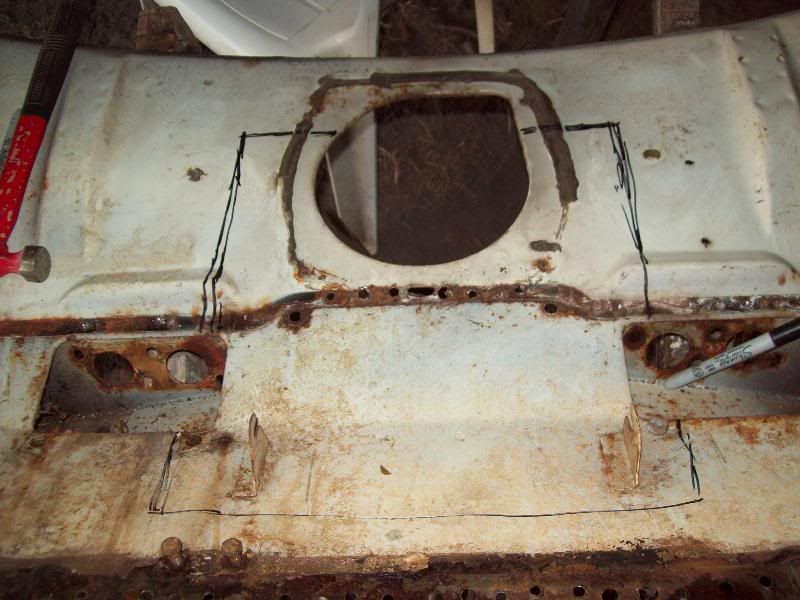
I should cut it right to the bottom of it for the van, but that will leave the remaining pieces somewhat flimsy. If I cut them off before removing the crossmember however I should be able to put some sheet back in there if you would like. I'm not sure, so havent cut anything yet.
Unquote.
Let's see.
Cut from the bottom to above the heater mounts on both sides first.
Then screw a peace of sheet metal that extends over the cuts.
Then cut the rest as marked.
Then if you screw another sheet metal over the speedo hole, you can cut the that strip at the top and transport it in two parts. After you you unscrew the sheet metal.
I can screw it back together and make filler parts.
Thanks
john
That left me with the bulkhead and the crossmember, I marked out the areas I am going to need to cut for the van to get your thoughts on it John.
I should cut it right to the bottom of it for the van, but that will leave the remaining pieces somewhat flimsy. If I cut them off before removing the crossmember however I should be able to put some sheet back in there if you would like. I'm not sure, so havent cut anything yet.
Unquote.
Let's see.
Cut from the bottom to above the heater mounts on both sides first.
Then screw a peace of sheet metal that extends over the cuts.
Then cut the rest as marked.
Then if you screw another sheet metal over the speedo hole, you can cut the that strip at the top and transport it in two parts. After you you unscrew the sheet metal.
I can screw it back together and make filler parts.
Thanks
john
Edited by johnsn, 02 October 2011 - 06:56 PM.
#93
CLM
-
- Members
-
- 817 posts
One Carb Or Two?
Posted 13 October 2011 - 01:51 AM
Well I managed to get the section out and something in there to hold the shape. I started by making a jig for myself so I can get the piece in the van correctly.
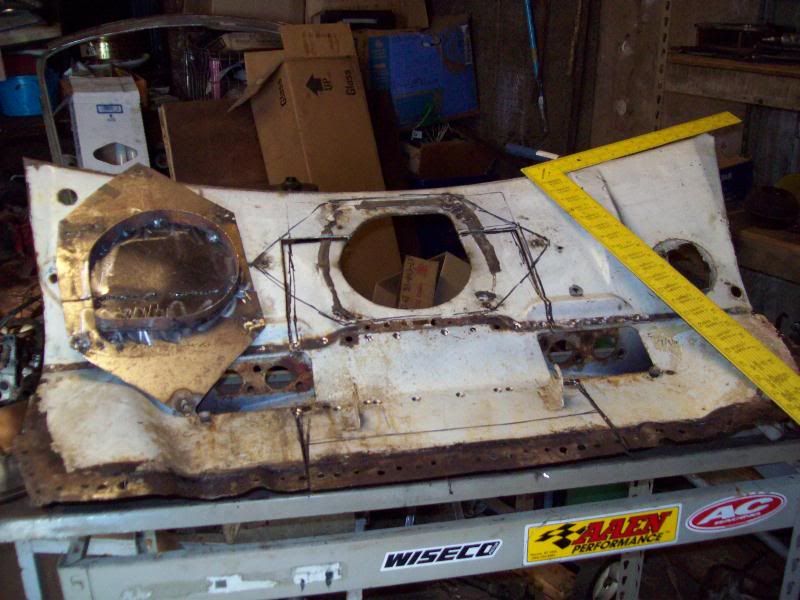
after which I cut the whole piece out and removed the spot welds so I could remove it leaving the rest still attached to the crossmember, I then layed it down on a sheet I had traced out and cut myself a replacement, You can keep it or cut it out John, but it's in there for now.
Using a post and some clamps I bent it to the right shape and drilled out the pedal box mounting holes so I could bolt it to the crossmember.
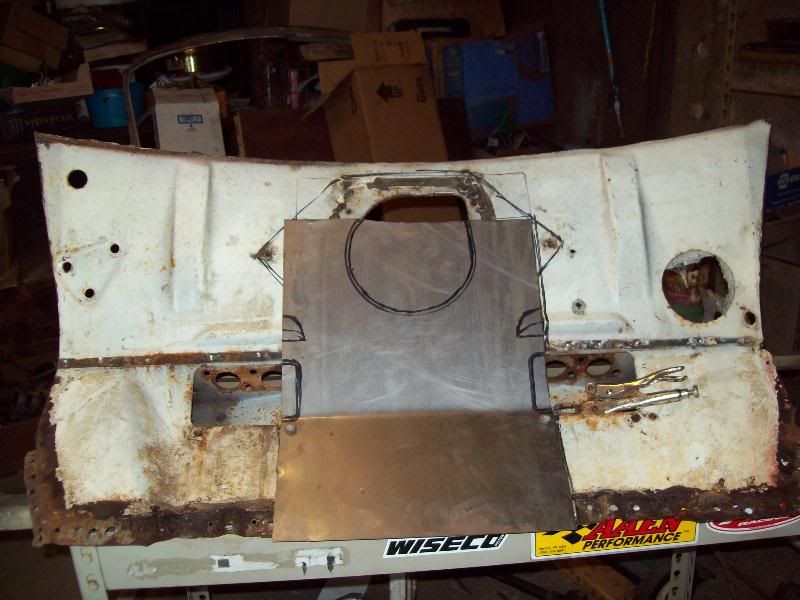
I then started carfully alligning things and tacking them together... the welds on the bottom were not working well, I cleaned the metal down washed it with carb spray and did what I could but eh, not my best welds. The upper ones turned out better but I only tacked them as I wasnt closing a gap like the bottom. I didnt cut out any of the other areas on it, just welded it in as a big sheet more for bracing then anything.
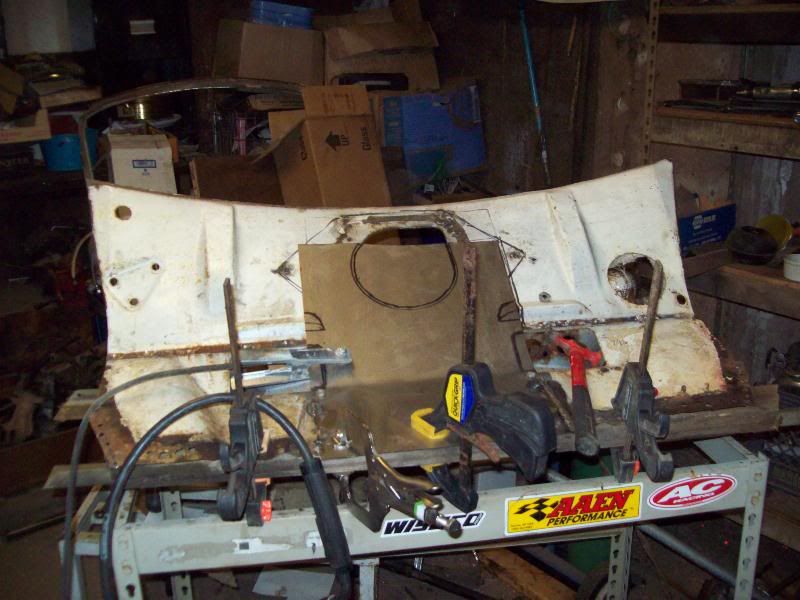
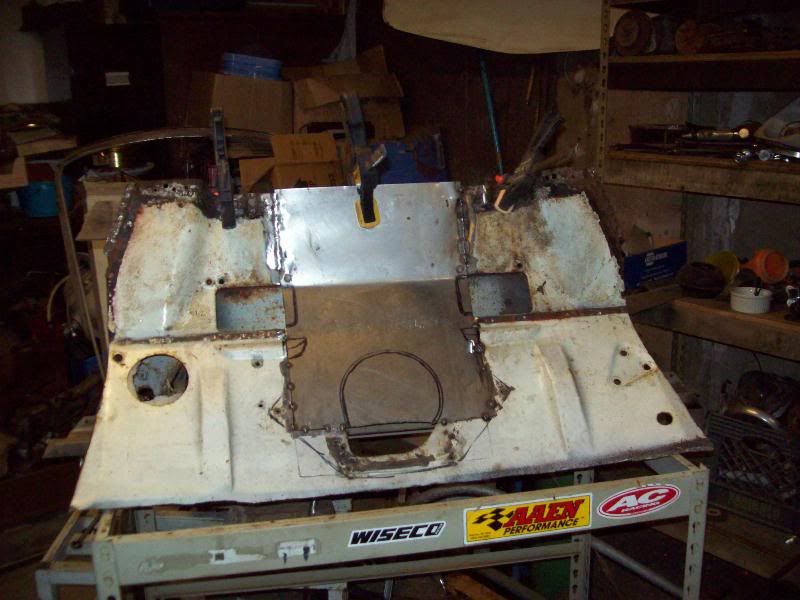
Just need to pop it off of the crossmember now and it's ready to go John, still no eta on the trip up.
Chris
after which I cut the whole piece out and removed the spot welds so I could remove it leaving the rest still attached to the crossmember, I then layed it down on a sheet I had traced out and cut myself a replacement, You can keep it or cut it out John, but it's in there for now.
Using a post and some clamps I bent it to the right shape and drilled out the pedal box mounting holes so I could bolt it to the crossmember.
I then started carfully alligning things and tacking them together... the welds on the bottom were not working well, I cleaned the metal down washed it with carb spray and did what I could but eh, not my best welds. The upper ones turned out better but I only tacked them as I wasnt closing a gap like the bottom. I didnt cut out any of the other areas on it, just welded it in as a big sheet more for bracing then anything.
Just need to pop it off of the crossmember now and it's ready to go John, still no eta on the trip up.
Chris
#94
johnsn
-
- Just Joined
-
- 69 posts
Stage One Kit Fitted
- Local Club: OMS
Posted 14 October 2011 - 10:21 PM
Looks good Chris.
I haven't got back to the 1100 yet, but I did find out that I don't need the right hand B pillar. I have one.
Keep up the good work.
john
I haven't got back to the 1100 yet, but I did find out that I don't need the right hand B pillar. I have one.
Keep up the good work.
john
#95
CLM
-
- Members
-
- 817 posts
One Carb Or Two?
Posted 21 October 2011 - 02:17 AM
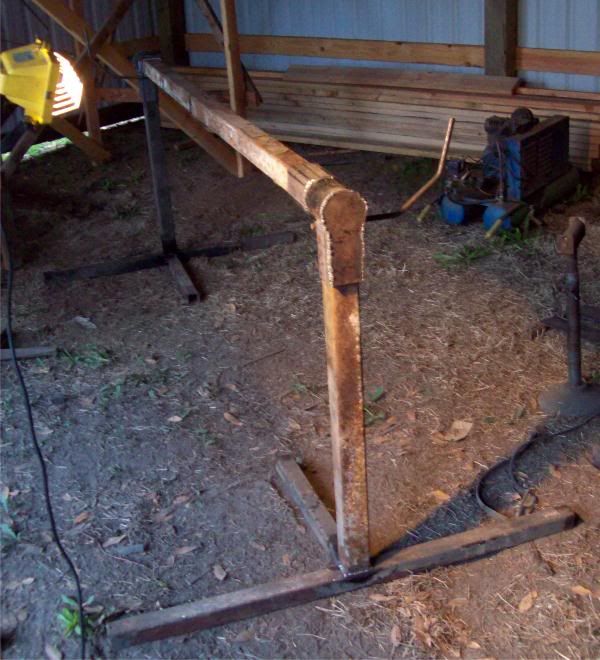
Not much on the mini scene lately, been gathering material for a rotisserie... I'm thinking this thing is going to be seriously overbuilt, Managing to salvage most of the steel from the internal frame of a 70's dodge based motorhome... A bit hefty, a bit rusty(ok more then a bit) the main sections under the floor was 2 1/2 poles 7 feet long. Not quite long enough for the 14 feet or so I will need singly, but plenty when joined together with a sleeve. some 2 or 2 and 1/2 square salvaged for the legs. Defiantly not scaffolding poles. The front seats had this real unique cam lock steel posts which I am going to use at each end of the pole to lock it in place and keep it from turning. Have also decided to use the square section of the pipe to my advantage and make the mounts to the car key into it. it won't be able to rotate around the pole 
Chris
Chris
#96
CLM
-
- Members
-
- 817 posts
One Carb Or Two?
Posted 12 November 2011 - 01:08 AM
Measure 12 times, think about it a few days then cut wrong, That is me, slooow slooow.. and now my back hurts... 
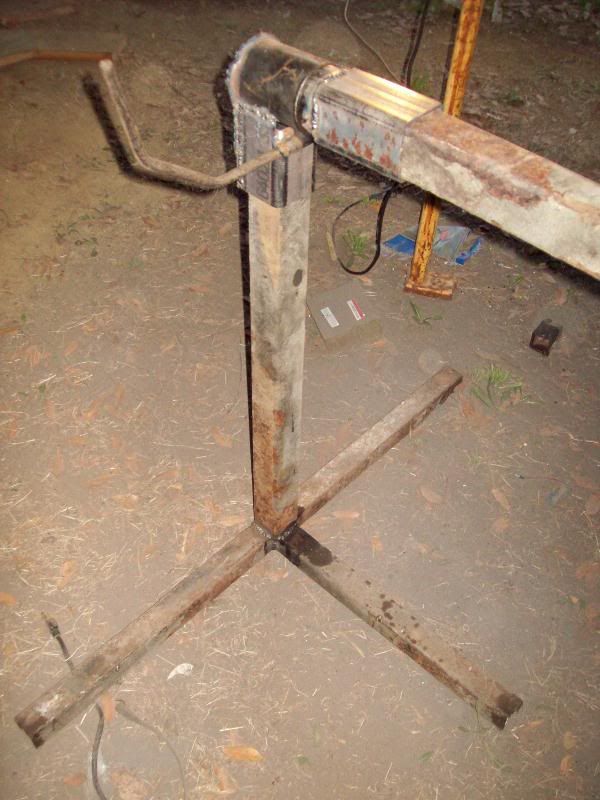
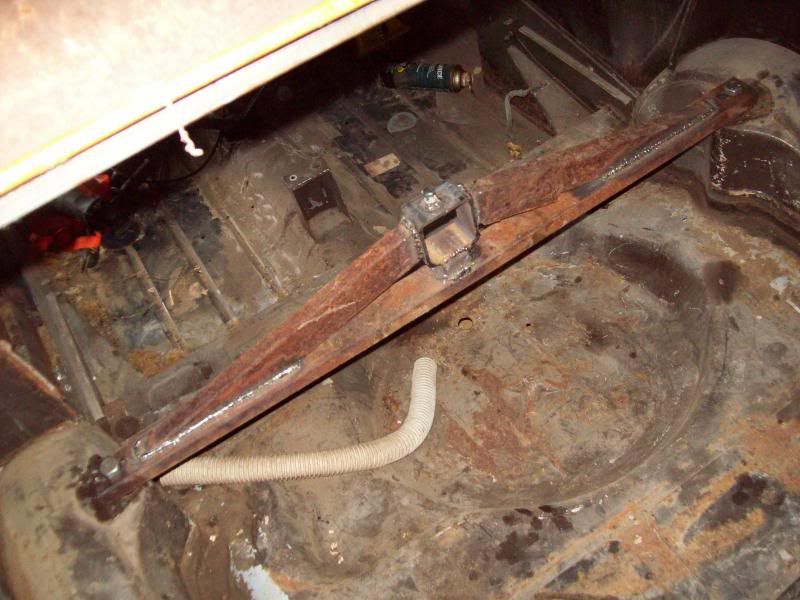
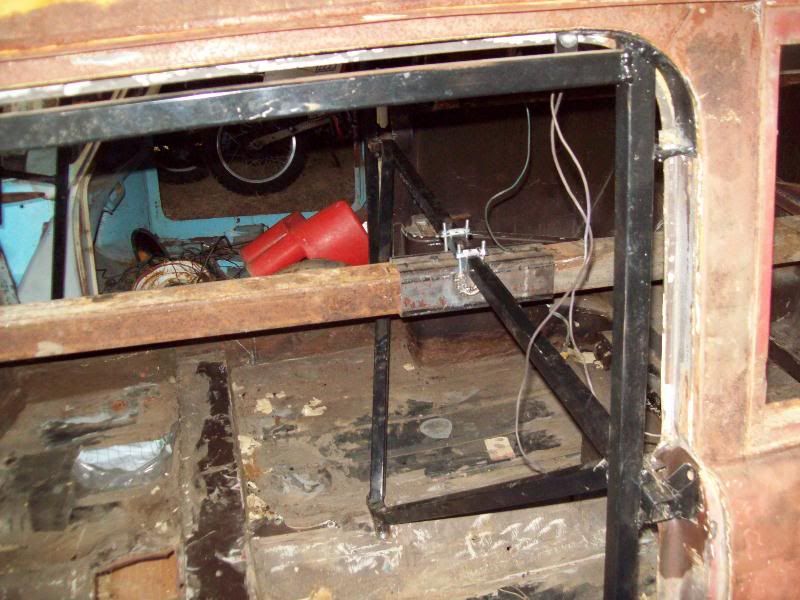
I managed to get the pieces I needed from the motorhome to build a spit, It may still be a little short, but it is easy enough to extend, and it should be pretty stout. The square pole should make having lots of clamps along the pole where the shell will mount pointless. The seat clamps seem to work well for keeping the pole from spinning so far.
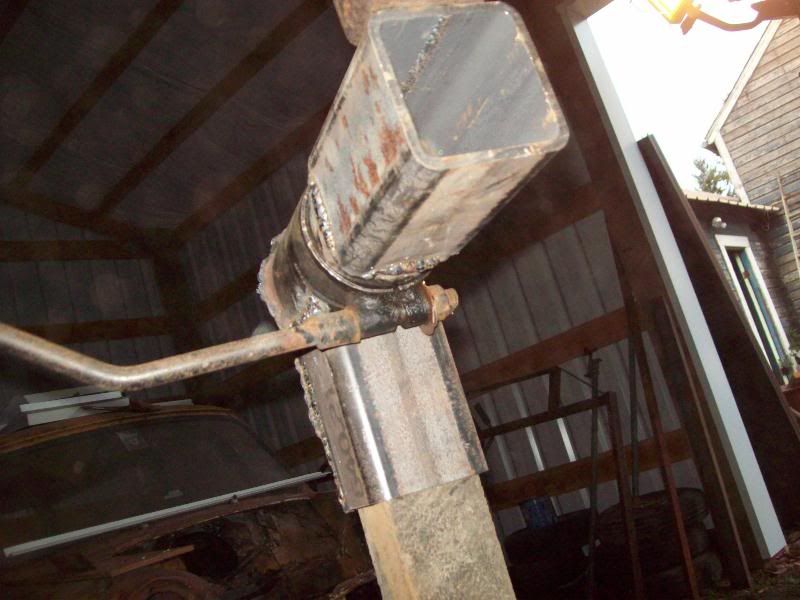
Now to make the bits to attach it to the shells.
(yes I know that pole is too short, I have 2 of them so they will be joined end to end)
Chris
I managed to get the pieces I needed from the motorhome to build a spit, It may still be a little short, but it is easy enough to extend, and it should be pretty stout. The square pole should make having lots of clamps along the pole where the shell will mount pointless. The seat clamps seem to work well for keeping the pole from spinning so far.
Now to make the bits to attach it to the shells.
(yes I know that pole is too short, I have 2 of them so they will be joined end to end)
Chris
#97
DAVEY_C
-
- Members
-
- 555 posts
Super Mini Mad
- Location: kildare, ireland
- Local Club: irish minis owner club
Posted 12 November 2011 - 11:44 AM
looking prity good chris, bookmarked to follow 
#98
CLM
-
- Members
-
- 817 posts
One Carb Or Two?
Posted 18 November 2011 - 01:51 AM
Things go so slow when you are building from bits of this and bits of that salvaged from various places instead of just building with all new material from a plan... however the spit is basically done aside from a pair of u clamps I am going to weld onto the joiner pipe so I can bolt it to my previously built door jig.
I started today by removing the doors from the wagon shell, and crushing my thumb in the process... it still hurts. The doors are seriously roached but they are being set to the side as I may repair them. I then went and removed the handbrake lever and the little cover plates for where the handbrake cable goes through And went to fitting my door frame jig in there that was originally built in a 1960 saloon... and... surprisingly with how bad things are it lined up and fit in this roached mk2 wagon shell.
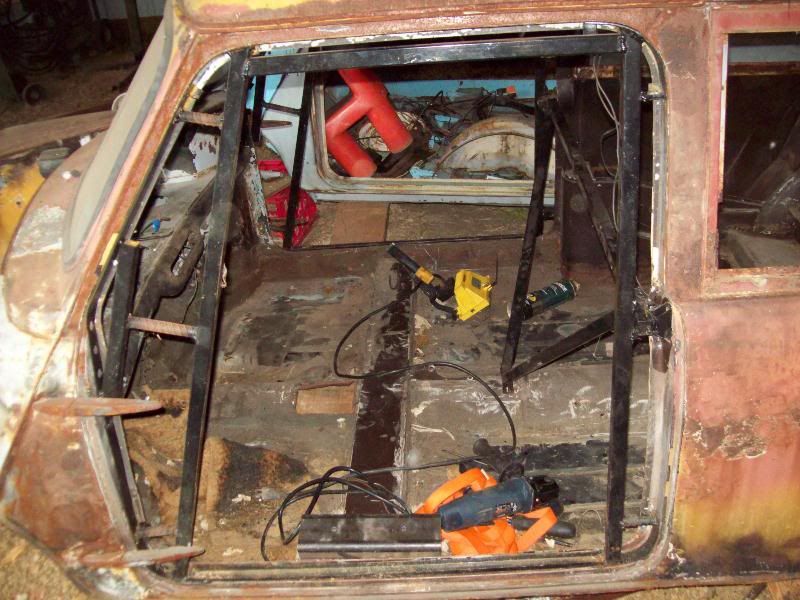
I then went ahead and installed my shell mounts I had built in the saloon, wanted to make sure when I had to use it on the saloon it would pass through the spit hole in the rear seat... so I built it there then used it on the wagon easier then building it in the wagon and rebuilding it when it didnt fit the saloon...
The mounts seem a bit beefier then others I have seen pictures of... but... well.. overbuilding isn't bad...
Once I got those in and was able to cut my spit poles to length and through drilled the ends so I could bolt them together I assembled it all, it is actually ready to be set on the frames now... I just ran out of light in the shop to do it tonight.
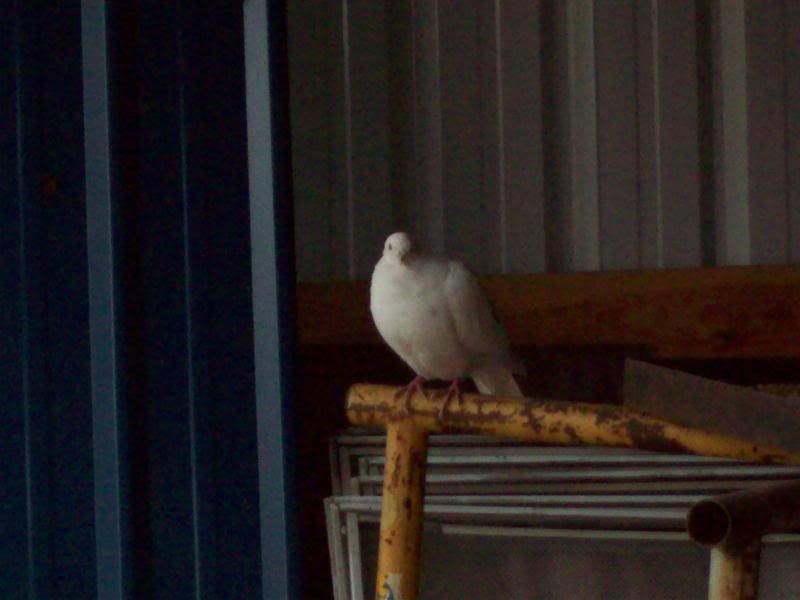
Oh, thought I would get a pic of the friend I have had visiting daily for the past month or so...
Chris
I started today by removing the doors from the wagon shell, and crushing my thumb in the process... it still hurts. The doors are seriously roached but they are being set to the side as I may repair them. I then went and removed the handbrake lever and the little cover plates for where the handbrake cable goes through And went to fitting my door frame jig in there that was originally built in a 1960 saloon... and... surprisingly with how bad things are it lined up and fit in this roached mk2 wagon shell.
I then went ahead and installed my shell mounts I had built in the saloon, wanted to make sure when I had to use it on the saloon it would pass through the spit hole in the rear seat... so I built it there then used it on the wagon easier then building it in the wagon and rebuilding it when it didnt fit the saloon...
The mounts seem a bit beefier then others I have seen pictures of... but... well.. overbuilding isn't bad...
Once I got those in and was able to cut my spit poles to length and through drilled the ends so I could bolt them together I assembled it all, it is actually ready to be set on the frames now... I just ran out of light in the shop to do it tonight.
Oh, thought I would get a pic of the friend I have had visiting daily for the past month or so...
Chris
#99
grahama
-
- Members
-
- 2,442 posts
Up Into Fourth
- Location: Warrington
- Local Club: None in my area !!
Posted 18 November 2011 - 07:39 AM
Just be careful joining the spit pole end to end, there is a fair weight on there and some additional strength wouldn't go a miss, belt and braces !! You have probably already thought of this looking at your work thus far, but thought I'd just mention it !!
Graham
Graham
#100
CLM
-
- Members
-
- 817 posts
One Carb Or Two?
Posted 18 November 2011 - 08:08 AM
I have a heavy wall slip tubing that just slides over the spit pole with a nice fit, almost 5 inches overlap per end bolted to prevent it pulling out, If the pole is going to fail it will fail in a spot other then there... As this is mostly all reclaimed steel from a early 1970's motorhome I am sure the tubes themselves are not as strong as that one piece I purchased to connect them. In fact you can see the connector piece in the first picture sitting on the seat crossmember. The square sections on both the front and rear mount is a slice of the same tube.
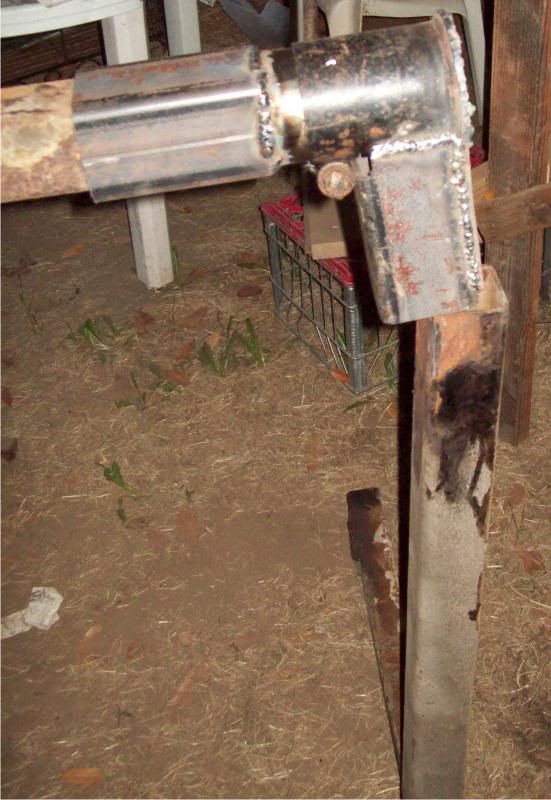
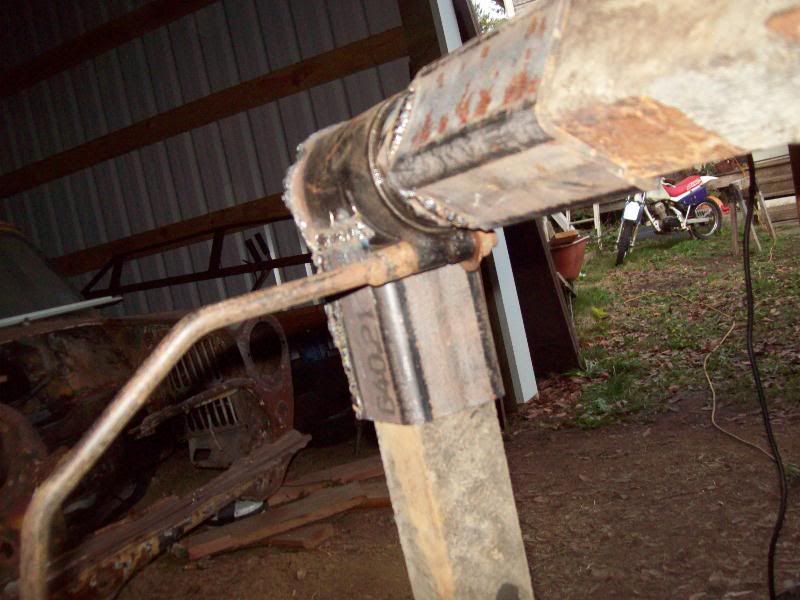
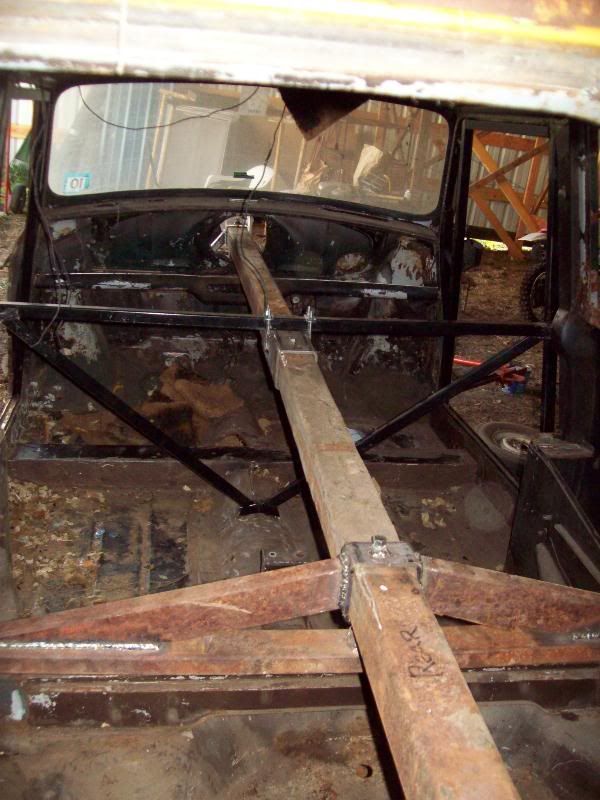
I am actually more worried about the sections that connect the round ends to the square pipe, it's a direct butt weld on the square to round stock with no overlap... those ones in the post from the 11th... which coincidentally has a good picture of the wall thickness considering it is 2 1/2 inch inside square ... or is that 3 inch... hmm I forget.. must be bed time..
Chris
I am actually more worried about the sections that connect the round ends to the square pipe, it's a direct butt weld on the square to round stock with no overlap... those ones in the post from the 11th... which coincidentally has a good picture of the wall thickness considering it is 2 1/2 inch inside square
... or is that 3 inch... hmm I forget.. must be bed time..Chris
Edited by CLM, 18 November 2011 - 08:12 AM.
#101
CLM
-
- Members
-
- 817 posts
One Carb Or Two?
Posted 18 November 2011 - 11:04 PM
HAHA! Success! Time to BBQ that mini!

Now we build up a nice fire and slowly rotate to sear in all the juices...
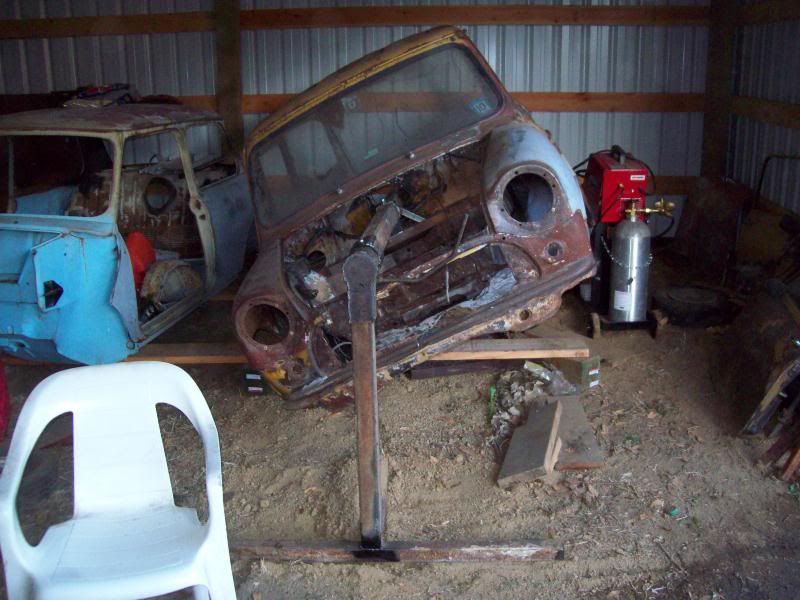
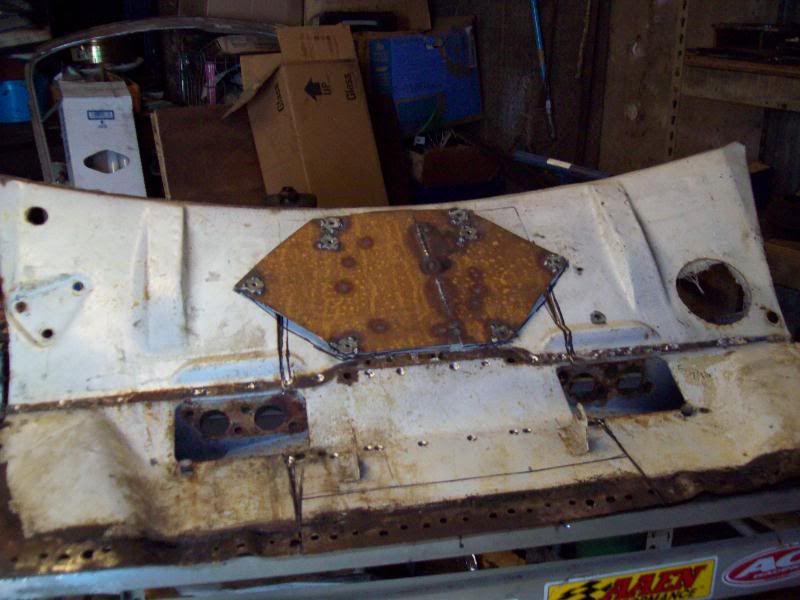
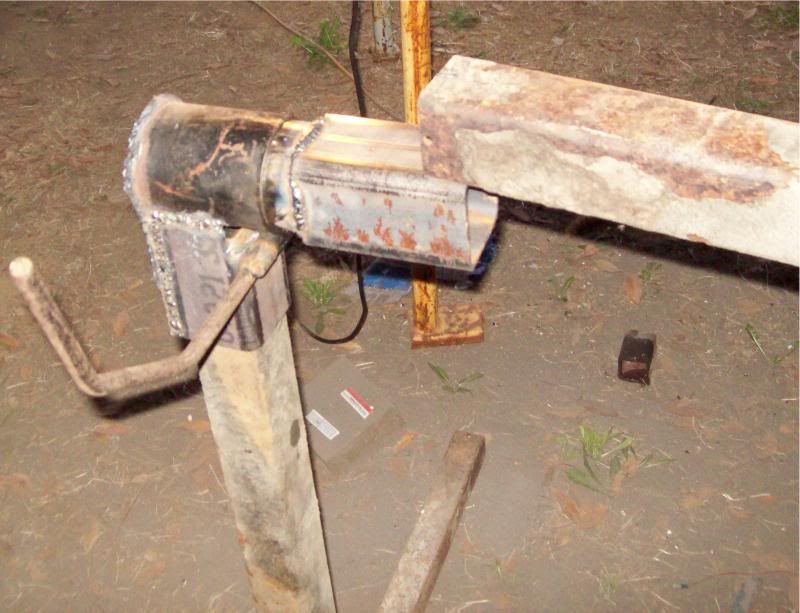
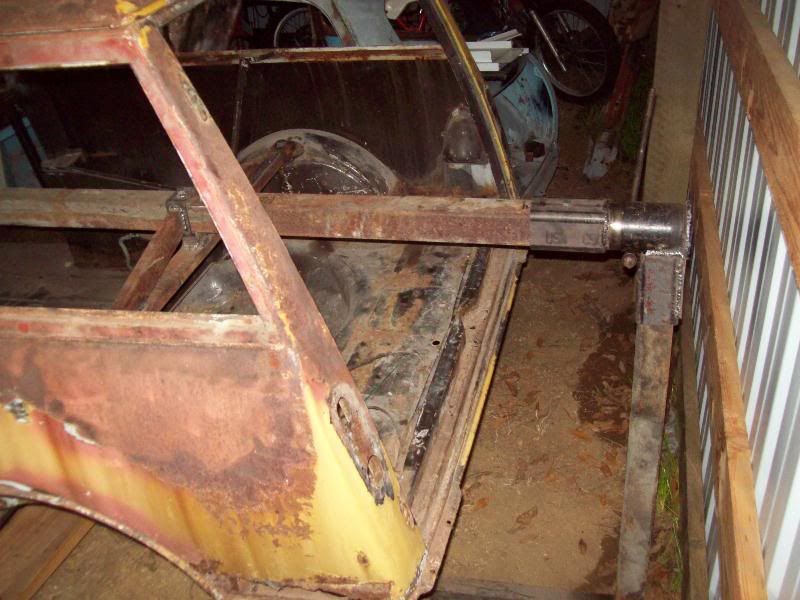
Whew Finally got a workable spit done, it turns like butter with very little pressure, and each of the locks clamp the whole thing tight.. Excellent. Though I do think I am still going to do the safety pins at the ends every 45 degrees from flat. Here's that center mount.
I think it will suffice to hold the poles together and in alignment.
Still a little worried about the ends, but I think they will work. Will likely be the weak point, but still plenty strong.
Next I am going to have to do something about the lack of lights in the shop, move some stuff around so I can move the 850 to the far side of the shop so I can make the shell rotate... then I get to rip that hideous floor out wheeeee.
Chris
Now we build up a nice fire and slowly rotate to sear in all the juices...
Whew Finally got a workable spit done, it turns like butter with very little pressure, and each of the locks clamp the whole thing tight.. Excellent. Though I do think I am still going to do the safety pins at the ends every 45 degrees from flat. Here's that center mount.
I think it will suffice to hold the poles together and in alignment.
Still a little worried about the ends, but I think they will work. Will likely be the weak point, but still plenty strong.
Next I am going to have to do something about the lack of lights in the shop, move some stuff around so I can move the 850 to the far side of the shop so I can make the shell rotate... then I get to rip that hideous floor out wheeeee.
Chris
#102
CLM
-
- Members
-
- 817 posts
One Carb Or Two?
Posted 19 November 2011 - 02:52 AM
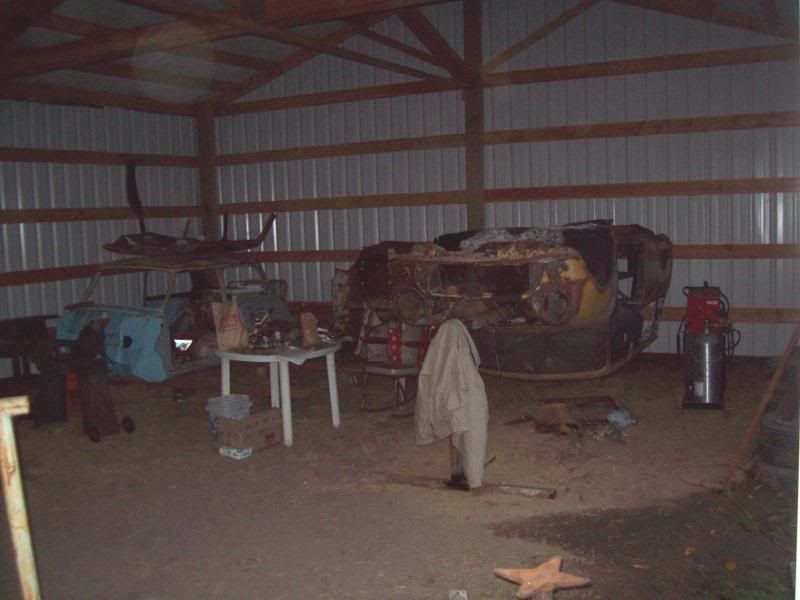
I got the shop a bit spiffed up, dad should be able to get the jeep in if he wants, I also have room to move the van out of the garage into the shop now.
I am thinking of putting together a couple small shelf units next to the wall where the wagon is, about 3 feet high or so so I can use the top like a workbench.
Tomorrow I need to see if I can get the Honda XR80 to run.
Chris
I am thinking of putting together a couple small shelf units next to the wall where the wagon is, about 3 feet high or so so I can use the top like a workbench.
Tomorrow I need to see if I can get the Honda XR80 to run.
Chris
#103
hughJ
-

- Members
-
- 727 posts
Soldiering Along
- Location: Highlands, Scotland
Posted 19 November 2011 - 07:00 PM
What a good sized workshop! The spit will make working so much easier. I was too mean a Scot to invest in one and too chicken to make one. All the best Chris.
Hugh
Hugh
#104
CLM
-
- Members
-
- 817 posts
One Carb Or Two?
Posted 20 November 2011 - 01:44 AM
lol Well I bet if you had more then one mini you were working on you would have invested in a spit Hugh.. moving them around by myself is a pain lol
And thank you
Chris
And thank you
Chris
#105
johnsn
-
- Just Joined
-
- 69 posts
Stage One Kit Fitted
- Local Club: OMS
Posted 20 November 2011 - 08:16 PM
I am actually more worried about the sections that connect the round ends to the square pipe, it's a direct butt weld on the square to round stock with no overlap... those ones in the post from the 11th... which coincidentally has a good picture of the wall thickness
Chris,
If you add some small plates on each side, I think they are called fish-plates, like the attached picture, you'll be fine.
Tell me more about the door jigs?
john
Attached Files
-
 spit4-B.jpg 72.05K
11 downloads
spit4-B.jpg 72.05K
11 downloads


2 user(s) are reading this topic
0 members, 2 guests, 0 anonymous users


