Back yards are over rated. You have to mow the lawn.
johh s


1960 Morris 850 And Friends
Started by
CLM
, Aug 12 2010 01:20 AM
417 replies to this topic
#331

johnsn
-

- Just Joined
-

- 69 posts
Stage One Kit Fitted
- Local Club: OMS
Posted 13 November 2012 - 12:07 AM
#332
clubby
-

- Members
-
- 650 posts
Super Mini Mad
- Local Club: BrEt
Posted 13 November 2012 - 01:44 AM
good luck ..
#333
CLM
-
- Members
-
- 817 posts
One Carb Or Two?
Posted 13 November 2012 - 08:32 AM
Thank you greatly clubby!
Chris
Chris
#334
johnsn
-
- Just Joined
-
- 69 posts
Stage One Kit Fitted
- Local Club: OMS
Posted 31 January 2013 - 06:09 PM
Hi Chris,
How are you? I got my Heritage certificate.
And I lost my job.
Hope your OK.
john s
How are you? I got my Heritage certificate.
And I lost my job.
Hope your OK.
john s
#335
DugganC17
-
- Members
-
- 359 posts
Speeding Along Now
Posted 19 February 2013 - 10:28 PM
watching this closely as you dont see many moke threads and do have a bit of a soft spot for mokes :)
#336
CLM
-
- Members
-
- 817 posts
One Carb Or Two?
Posted 25 February 2013 - 05:25 AM
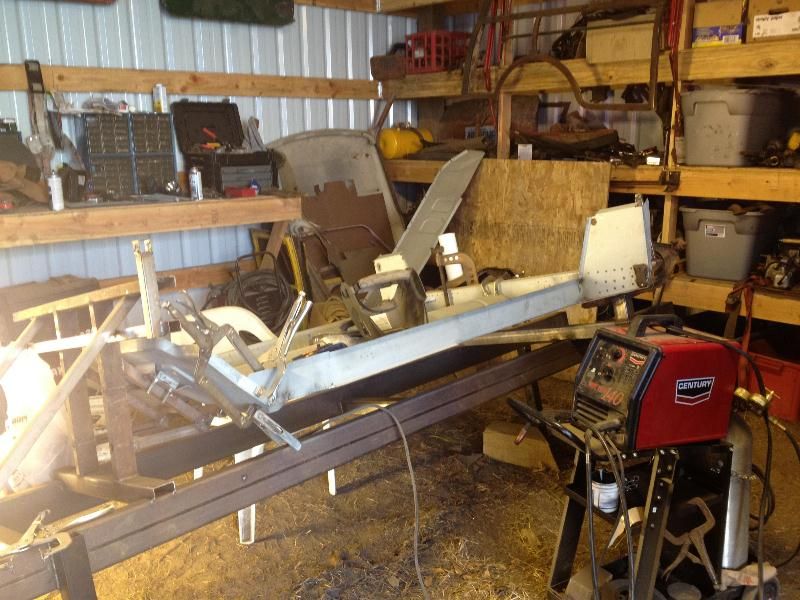
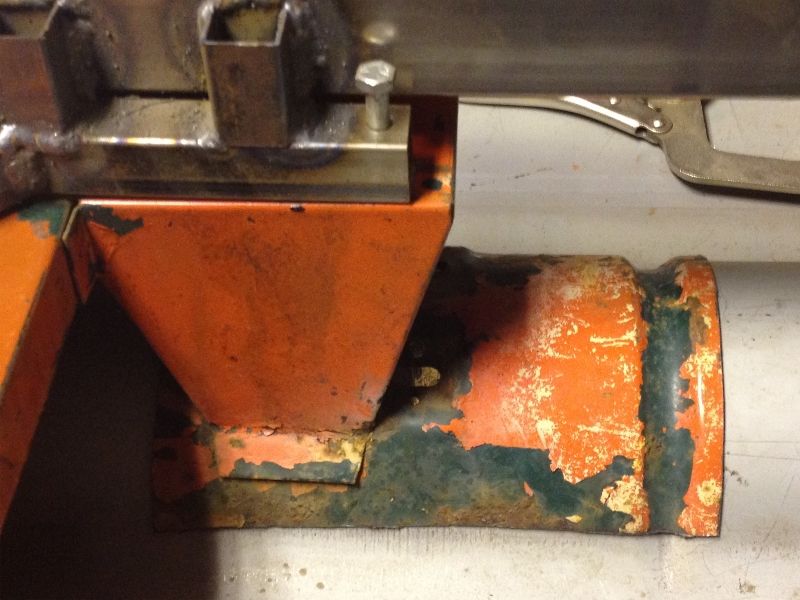
Hello all, It has been quite a hiatus When the rain was thick I was indoors avoiding tracking mud into the house. Earlier this month I decided I needed to work on the moke again so proceeded to clean up my working space in the shop. About that time I finally received the metal I needed to try to set up the spot welder.
Things however did not work out quite so well, while the welder has enough power to melt the metal I don't currently have the ability to apply enough pressure to get it to forge together right.. and it is EVEN worse with the pneumatic spot welder... :/ (single spot is the pneumatic the double spots is doing it by hand one on each side of the test pieces)
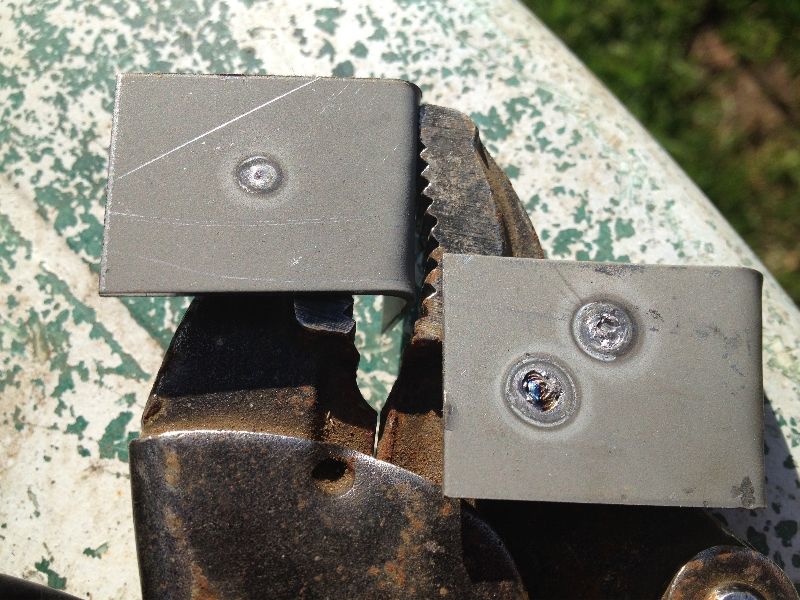
Not Good Not Good...
So I decide to push the welder off into the corner for now and weld it like I have in the past on the other shells, after all I don't plan on ever selling MY Moke.
The panels all test fit good, better actually then the standard mini panels tend to fit on to standard minis...
I started by welding the hull closer panels on followed by the pannier floor angle brackets on each side. Once this was done the main floor was turned over for additional welds on the underside, something I think I will need to do frequently I believe as my jig doesn't rotate :)
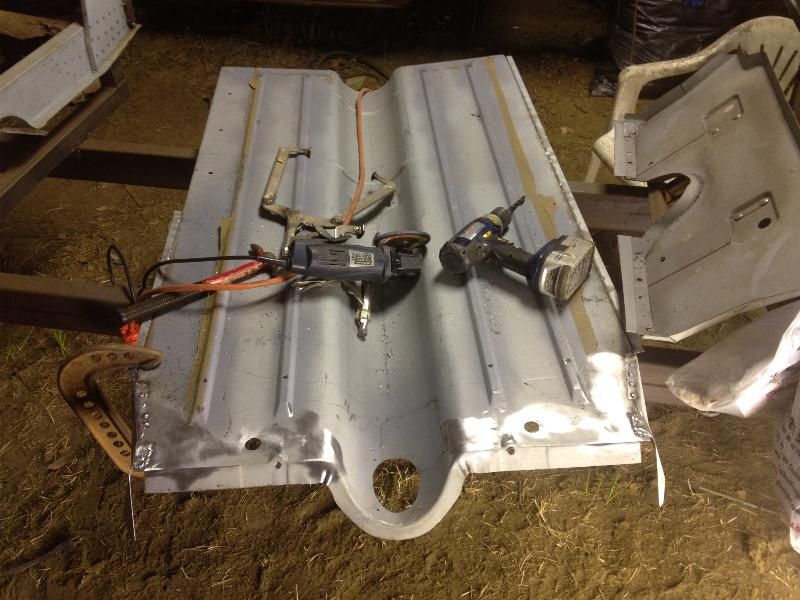
Once that was done and placed back into the heelboard and toeboard I welded those on both sides so they would be firmly attached when I pilled the floor to fully weld the toe and heelboards on. I also came up with the novel solution of propping one side of the jig up to better access welds, simple but effective :)
Once they were both welded on I was able to test fit the inner hull sides and they happily fit without clamps :)
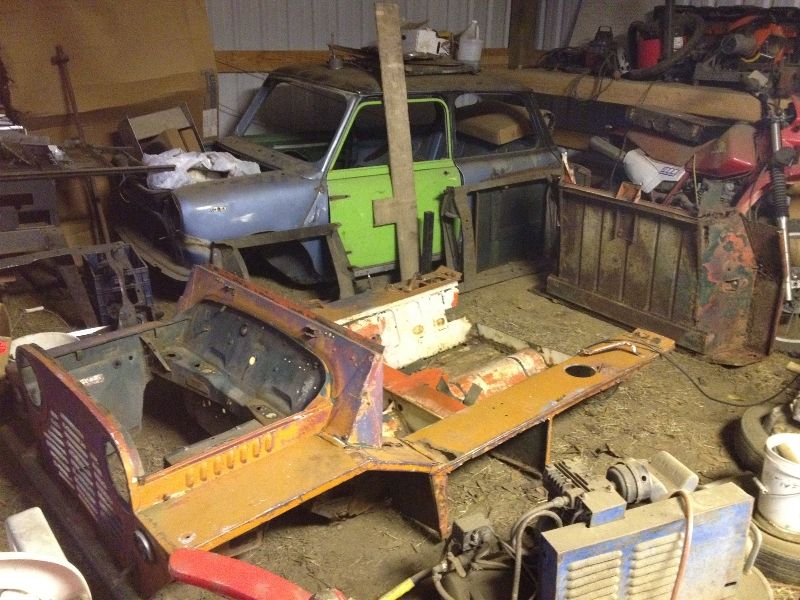
realizing I was likely going to need the seat crossmember much sooner then later, with much trepidation I attacked the moke with a cutting disk... -insert pictures of rust and destruction-
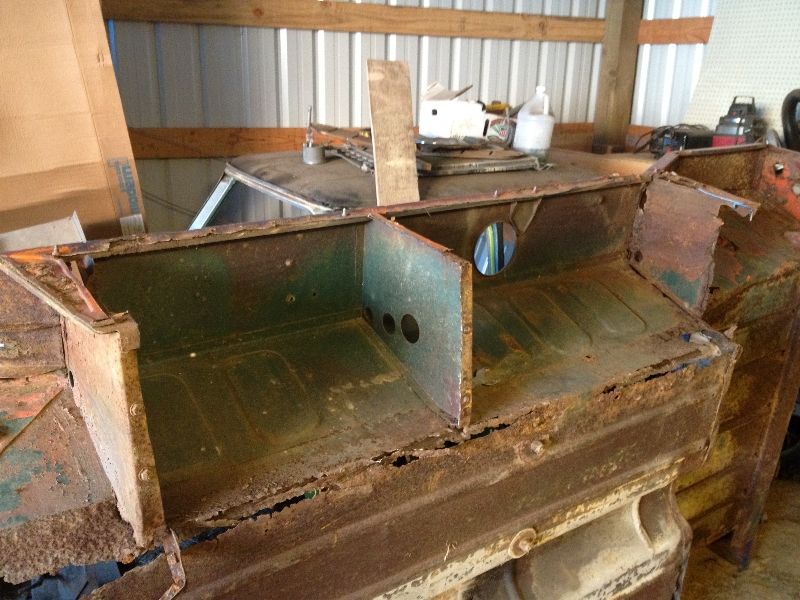
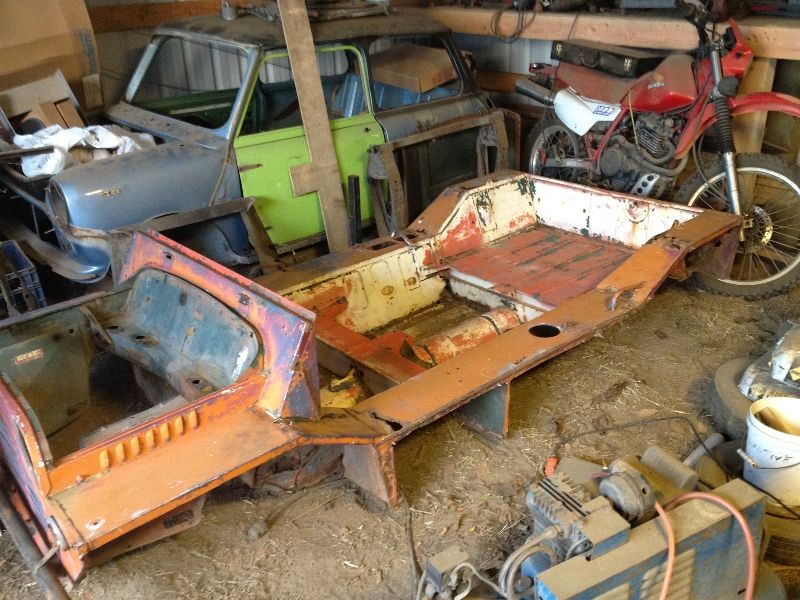
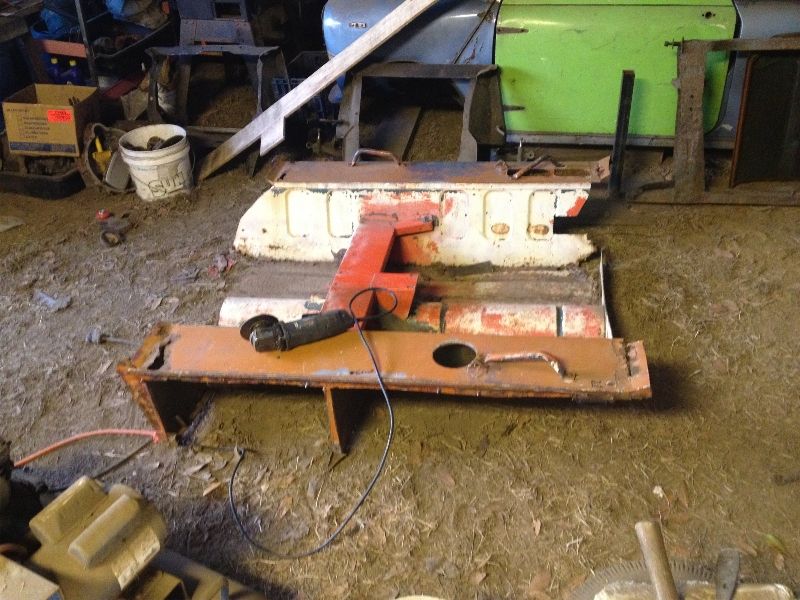

Finally! I got the seat crossmember and the pannier tops off! The one pannier divider from the LH side is by far the best shape and will get minor repairs and reuse, the matching one from the RH will get major repairs and then reuse.
Just for fun...
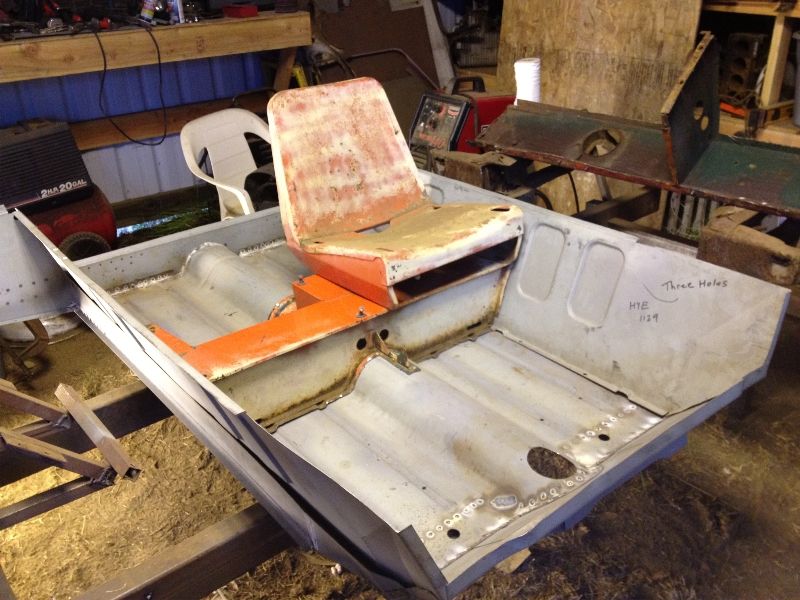
So I mounted the pan assembly back into the jig once the welds were clean inside and started jigging things up to test fit.

And I have to love how things are fitting together, the old tunnel section I have left on the seat crossmember to test how things fit? They line up perfectly with the holes already in the new pan, you can see light directly though them!
Next I need to weld the pannier dividers that are being replaced with new onto the sides of the pan so I can weld the hull sides in. Thankfully the seat crossmember is welded in differently then how I thought so it can be mounted after the hull sides. The pannier tops need cleaned up and repaired, and then I have to start repairing the flitch panels on the front end.
The front should be easy to get ready to use, it needs the flitches repaired, the areas behind the shock mounts repaired, a section on the LH bulkhead in front of the driver repaired, one fender replaced and the two sloping sections replaced. Minimal compared to any other section!
I also have started another order up with m-panels to get a moke load floor in as I have decided I need to replace it now instead of having to dig that far into the moke later to replace it. I am going to beat the rear panel back into a semblance of shape for now as it is easy to replace later.
Once again Sorry for the delays! :)
Chris
Things however did not work out quite so well, while the welder has enough power to melt the metal I don't currently have the ability to apply enough pressure to get it to forge together right.. and it is EVEN worse with the pneumatic spot welder... :/ (single spot is the pneumatic the double spots is doing it by hand one on each side of the test pieces)
Not Good Not Good...
So I decide to push the welder off into the corner for now and weld it like I have in the past on the other shells, after all I don't plan on ever selling MY Moke.
The panels all test fit good, better actually then the standard mini panels tend to fit on to standard minis...
I started by welding the hull closer panels on followed by the pannier floor angle brackets on each side. Once this was done the main floor was turned over for additional welds on the underside, something I think I will need to do frequently I believe as my jig doesn't rotate :)
Once that was done and placed back into the heelboard and toeboard I welded those on both sides so they would be firmly attached when I pilled the floor to fully weld the toe and heelboards on. I also came up with the novel solution of propping one side of the jig up to better access welds, simple but effective :)
Once they were both welded on I was able to test fit the inner hull sides and they happily fit without clamps :)
realizing I was likely going to need the seat crossmember much sooner then later, with much trepidation I attacked the moke with a cutting disk... -insert pictures of rust and destruction-
Finally! I got the seat crossmember and the pannier tops off! The one pannier divider from the LH side is by far the best shape and will get minor repairs and reuse, the matching one from the RH will get major repairs and then reuse.
Just for fun...
So I mounted the pan assembly back into the jig once the welds were clean inside and started jigging things up to test fit.
And I have to love how things are fitting together, the old tunnel section I have left on the seat crossmember to test how things fit? They line up perfectly with the holes already in the new pan, you can see light directly though them!
Next I need to weld the pannier dividers that are being replaced with new onto the sides of the pan so I can weld the hull sides in. Thankfully the seat crossmember is welded in differently then how I thought so it can be mounted after the hull sides. The pannier tops need cleaned up and repaired, and then I have to start repairing the flitch panels on the front end.
The front should be easy to get ready to use, it needs the flitches repaired, the areas behind the shock mounts repaired, a section on the LH bulkhead in front of the driver repaired, one fender replaced and the two sloping sections replaced. Minimal compared to any other section!
I also have started another order up with m-panels to get a moke load floor in as I have decided I need to replace it now instead of having to dig that far into the moke later to replace it. I am going to beat the rear panel back into a semblance of shape for now as it is easy to replace later.
Once again Sorry for the delays! :)
Chris
#337
hughJ
-

- Members
-
- 727 posts
Soldiering Along
- Location: Highlands, Scotland
Posted 25 February 2013 - 09:02 PM
Chris it is good to see you back and forging along. What a huge job. Hope we can see it move along now. This should be a really interesting one
Hugh
Hugh
#338
CLM
-
- Members
-
- 817 posts
One Carb Or Two?
Posted 26 February 2013 - 10:05 AM
Thanks Hugh, I see yours is also almost done, congrats! And ENVY ;)
Chris
Chris
#339
minimikej
-

- Members
-
- 347 posts
Speeding Along Now
- Location: Derbyshire
Posted 26 February 2013 - 11:53 AM
Great stuff! Keep going
#340
CLM
-
- Members
-
- 817 posts
One Carb Or Two?
Posted 27 February 2013 - 08:07 AM
Ok I will!
I have gotten the new pannier dividers I have welded on, two are missing they are still attached to the old pannier tops and will stay there I will install them when I install the pannier tops.
I also did something that may be somewhat controversial, I removed the seat belt anchors on the new hull sides. The car was not originally built with them being an early enough moke so they are not required. Grandfathered features whee! I will put seat belts in it however, they will go in with the roll bar when it is fitted.
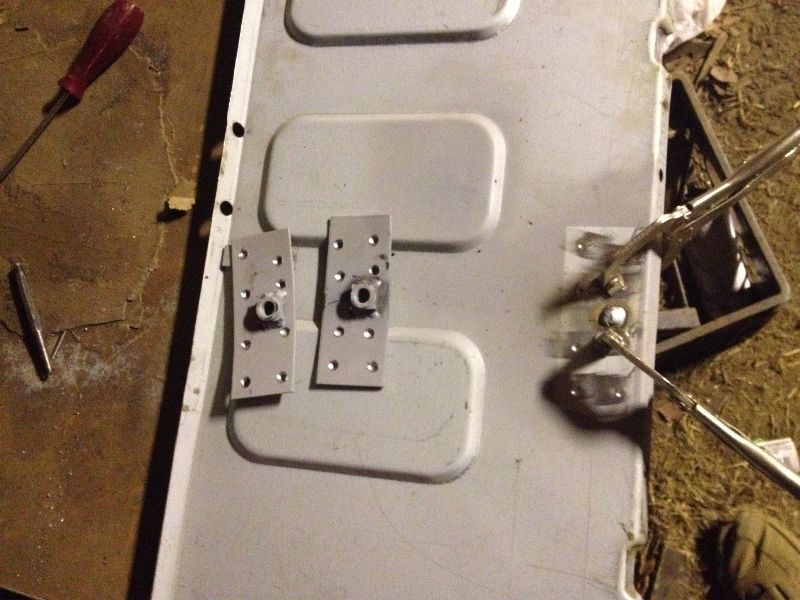
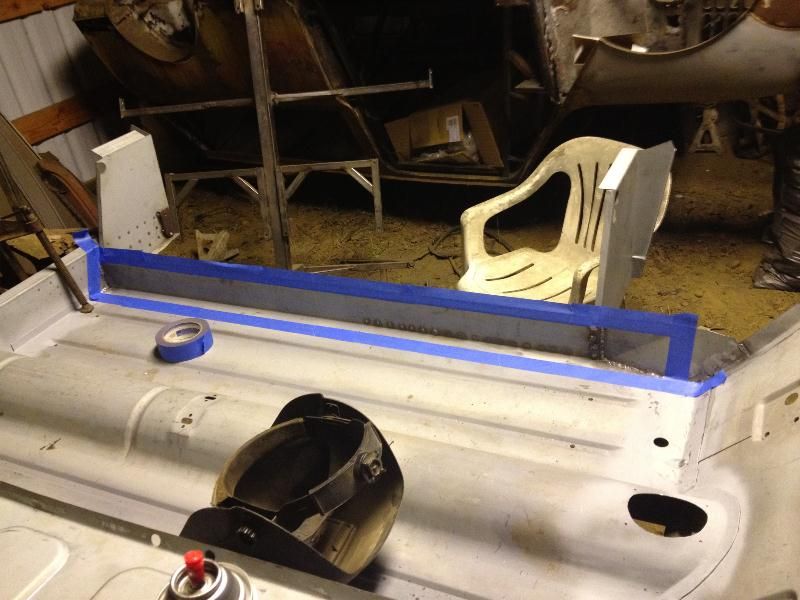
Once those were out I needed to start prepping the hull sides for welding in, this requires prepping the sill voids where I can't access once it's built. This means paint! and paint means MASKING! I need the paint to not be between the joints, I will paint those later with weld through zinc primer.
The order I am putting together for the rear panels, the last 4 I am not sure exactly which those are so M-parts is sending me some photos via email.
1 x HYE0857 Rear Floor Panel - £75.00 +
1 x ALA7026 Channel capping Rear RH - £41.16 +
1 x ALA7102 Rear Seat rear support bracket LH - £6.50 +
1 x ALA7103 Rear Seat rear support bracket RH - £6.50 +
1 x HYE0859A Rear floor cross member assembly - £35.00 +
2 x HYK3553 Front wing sloping section reinforcement - £8.00 each +
1 x ALA7108 rear floor front support piece - £10.00 +
2 x BHM9665 Handbrake cables - £8.75 each
1 x AHH5631 brake pipe - £7.51
1 x BCA4002 brake pipe - £9.01
1 x 2A2183 brake pipe - £10.47
234.65
1 x HYK1787 Reinforcing plates rear wing RH -£15.00 +
1 x HYK1788 Reinforcing plates rear wing LH - £15.00 +
1 x ALA7368RH reinforcement plate hull top - £8.76
1 x ALA7368LH reinforcement plate hull top - £8.76
47.52
282.17 - about $430 or so.
Untill next time, Chris
I have gotten the new pannier dividers I have welded on, two are missing they are still attached to the old pannier tops and will stay there I will install them when I install the pannier tops.
I also did something that may be somewhat controversial, I removed the seat belt anchors on the new hull sides. The car was not originally built with them being an early enough moke so they are not required. Grandfathered features whee! I will put seat belts in it however, they will go in with the roll bar when it is fitted.
Once those were out I needed to start prepping the hull sides for welding in, this requires prepping the sill voids where I can't access once it's built. This means paint! and paint means MASKING! I need the paint to not be between the joints, I will paint those later with weld through zinc primer.
The order I am putting together for the rear panels, the last 4 I am not sure exactly which those are so M-parts is sending me some photos via email.
1 x HYE0857 Rear Floor Panel - £75.00 +
1 x ALA7026 Channel capping Rear RH - £41.16 +
1 x ALA7102 Rear Seat rear support bracket LH - £6.50 +
1 x ALA7103 Rear Seat rear support bracket RH - £6.50 +
1 x HYE0859A Rear floor cross member assembly - £35.00 +
2 x HYK3553 Front wing sloping section reinforcement - £8.00 each +
1 x ALA7108 rear floor front support piece - £10.00 +
2 x BHM9665 Handbrake cables - £8.75 each
1 x AHH5631 brake pipe - £7.51
1 x BCA4002 brake pipe - £9.01
1 x 2A2183 brake pipe - £10.47
234.65
1 x HYK1787 Reinforcing plates rear wing RH -£15.00 +
1 x HYK1788 Reinforcing plates rear wing LH - £15.00 +
1 x ALA7368RH reinforcement plate hull top - £8.76
1 x ALA7368LH reinforcement plate hull top - £8.76
47.52
282.17 - about $430 or so.
Untill next time, Chris
#341
CLM
-
- Members
-
- 817 posts
One Carb Or Two?
Posted 28 February 2013 - 07:52 AM
Hey all.
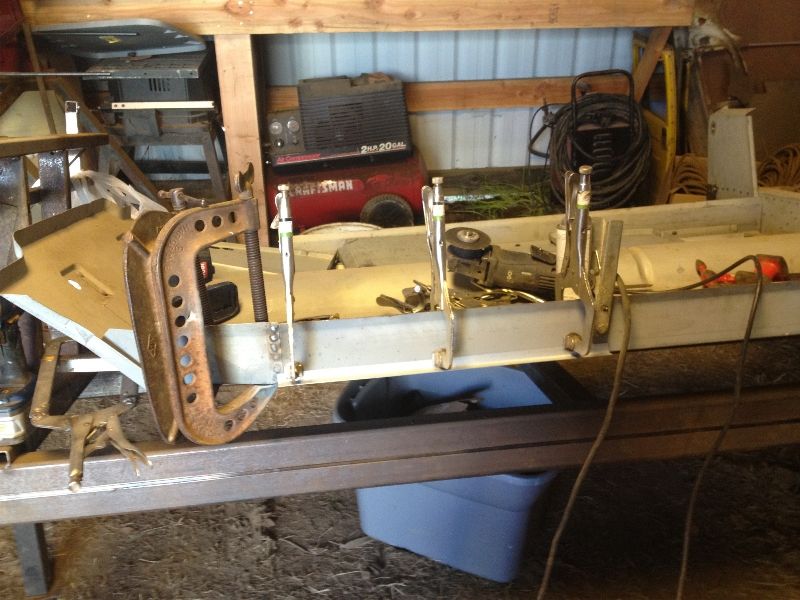
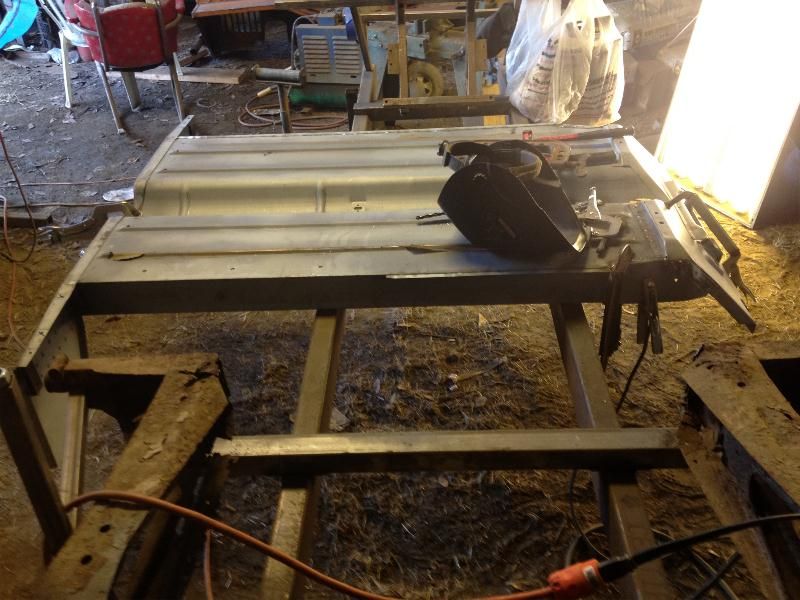
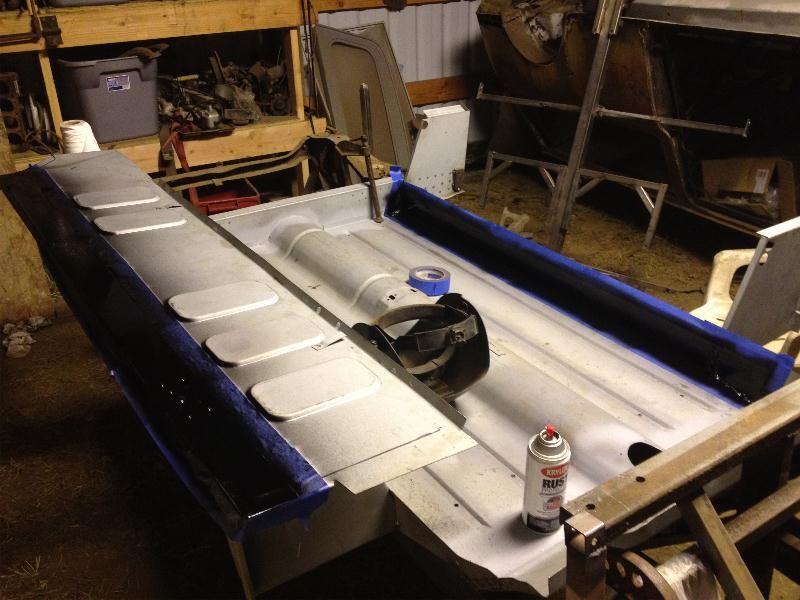
Not much today picture wise, but it seems like a bit was done. I worked a bit on the seat crossmember, cleaning up the underside and getting it ready to weld in. I also partially welded on the LH hullside at every point I could reach.

Once the other side and the seat mount is welded in I will need to pull the assembly off the jig once again to weld from the bottom.
I did however run out of weld through primer as I was getting ready to fit the other hullside so it stays off until I can pick up some more tomorrow... and some more gas for the welder
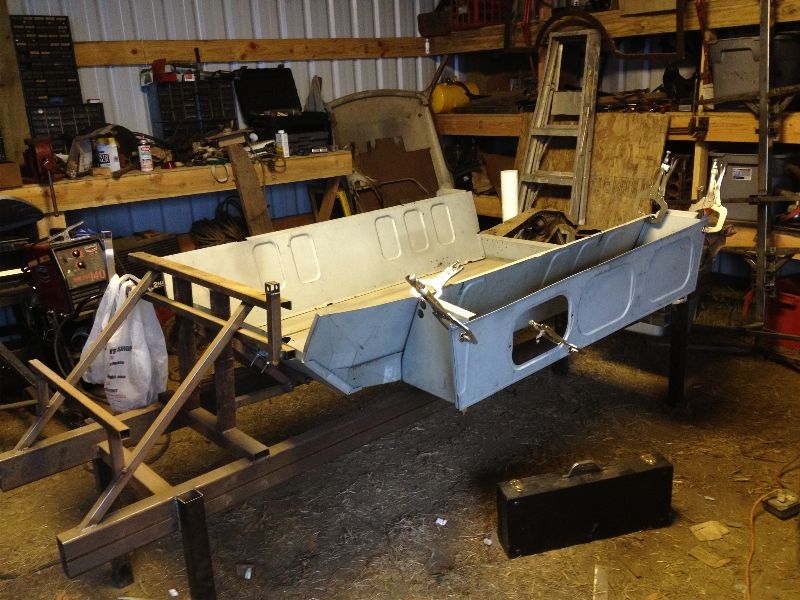
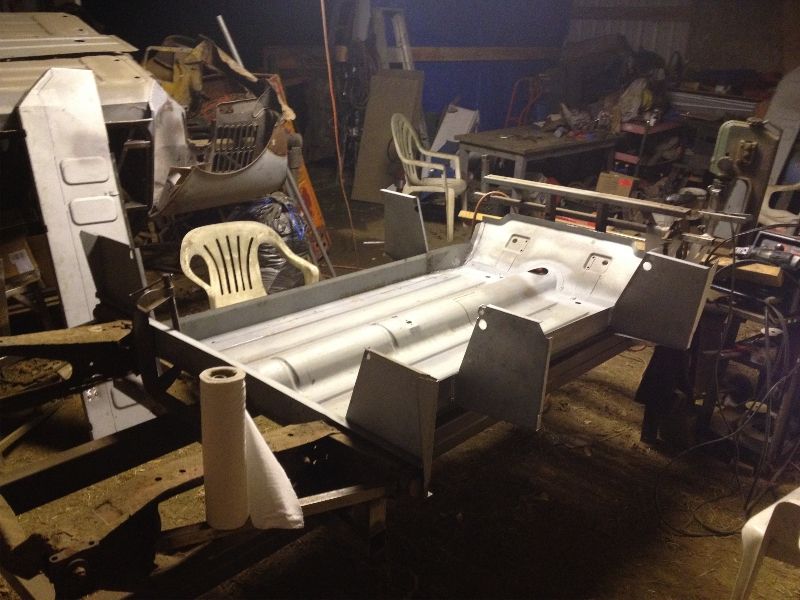
Lacking anything else I could do at this point I clamped on a couple panels just for grins :)
It is starting to slightly resemble a moke!?
Chris
Not much today picture wise, but it seems like a bit was done. I worked a bit on the seat crossmember, cleaning up the underside and getting it ready to weld in. I also partially welded on the LH hullside at every point I could reach.
Once the other side and the seat mount is welded in I will need to pull the assembly off the jig once again to weld from the bottom.
I did however run out of weld through primer as I was getting ready to fit the other hullside so it stays off until I can pick up some more tomorrow... and some more gas for the welder
Lacking anything else I could do at this point I clamped on a couple panels just for grins :)
It is starting to slightly resemble a moke!?
Chris
#342
CLM
-
- Members
-
- 817 posts
One Carb Or Two?
Posted 02 March 2013 - 05:22 AM
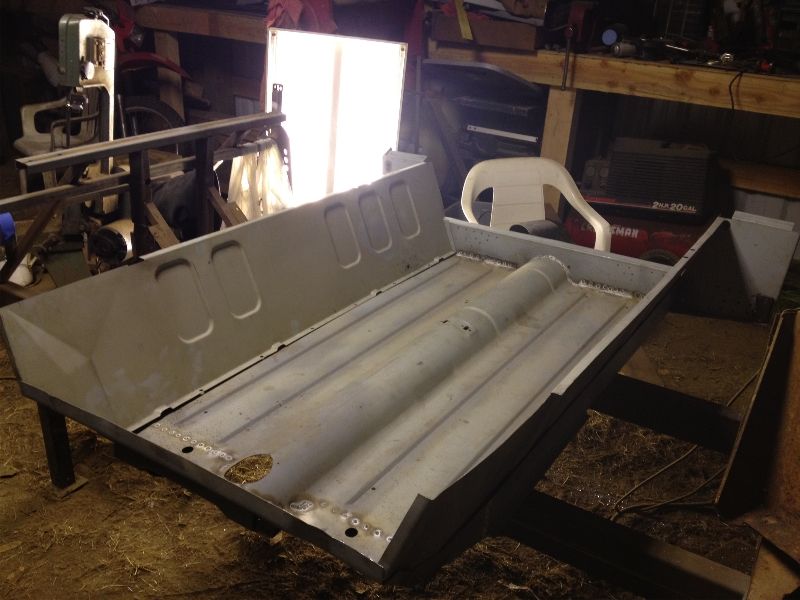
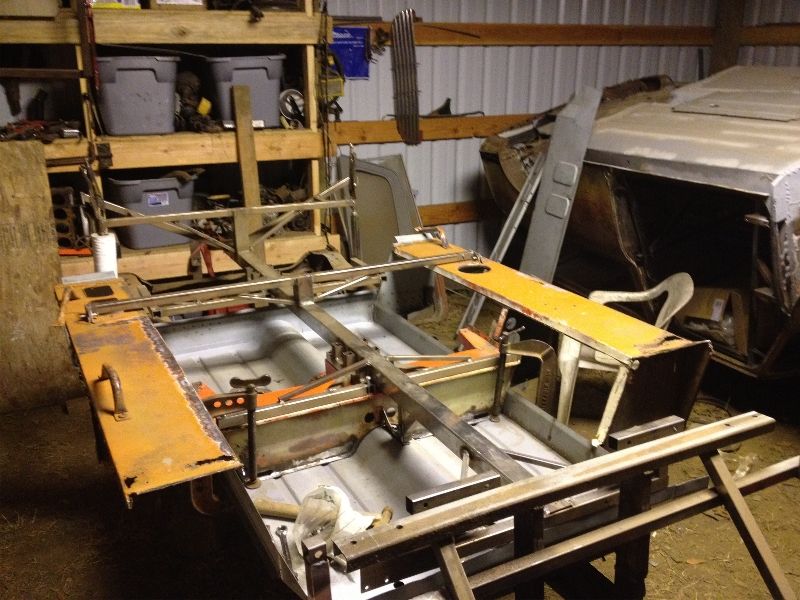
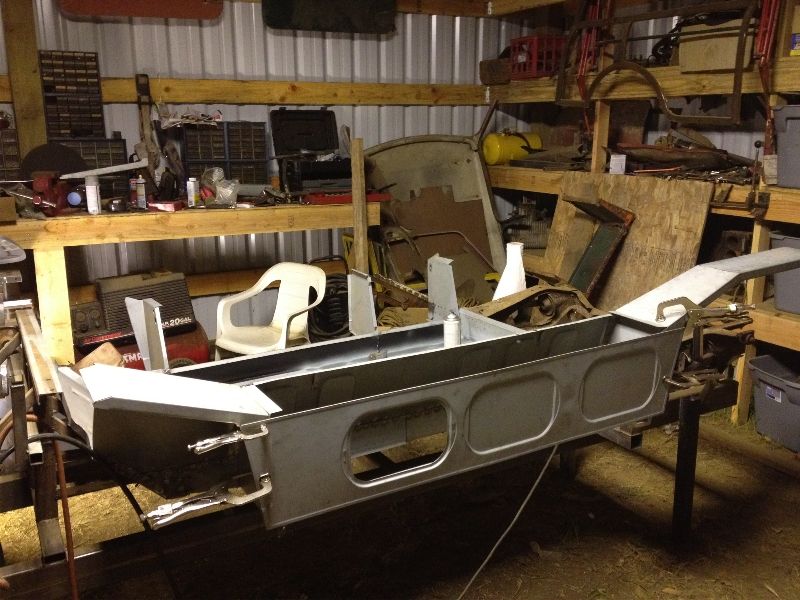
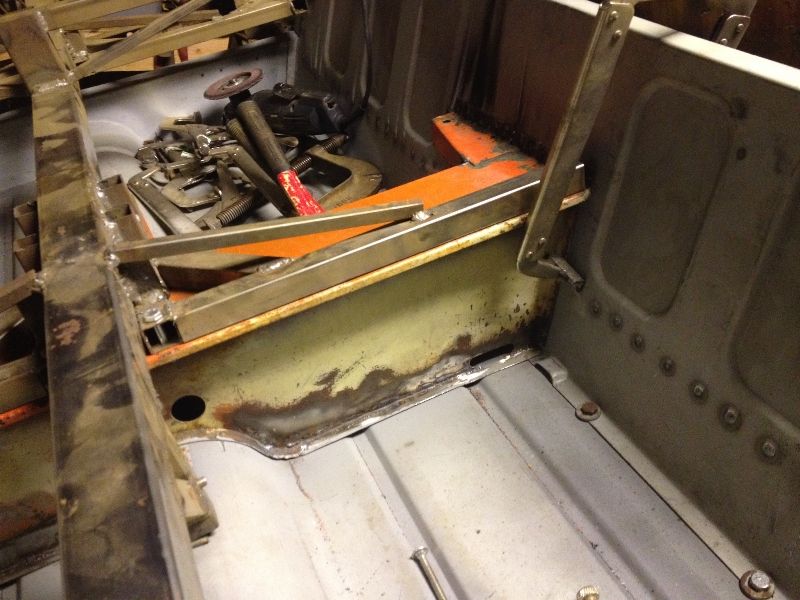
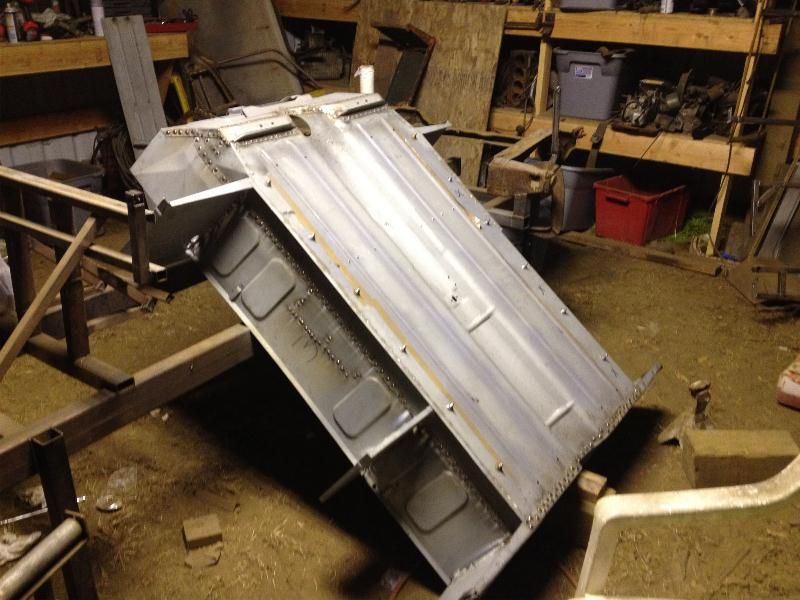
I was able to get both hull sides welded in to the point that I could start fitting the seat crossmember!
This is a mile post of this build, the first original part that is being attached to the shell :)

There is also a monsterous load of weld cleanup to do... GOD I wish I could have gotten the spot welder functional!
Once the seat crossmember is fully mounted from the top I need to pull the pan out and weld from the bottom, and once that's done I get to start repairing the front end! Oh JOY.
Hopefully I can get the final panels from m-parts sometime in the next couple of weeks.
The Seat crossmember is fairly nice fitting.... :)
Chris
This is a mile post of this build, the first original part that is being attached to the shell :)
There is also a monsterous load of weld cleanup to do... GOD I wish I could have gotten the spot welder functional!
Once the seat crossmember is fully mounted from the top I need to pull the pan out and weld from the bottom, and once that's done I get to start repairing the front end! Oh JOY.
Hopefully I can get the final panels from m-parts sometime in the next couple of weeks.
The Seat crossmember is fairly nice fitting.... :)
Chris
#343
hughJ
-
- Members
-
- 727 posts
Soldiering Along
- Location: Highlands, Scotland
Posted 02 March 2013 - 07:25 PM
Moving along Chris and looking good.
Hugh
Hugh
#344
CLM
-
- Members
-
- 817 posts
One Carb Or Two?
Posted 04 March 2013 - 10:41 AM
Thanks Hugh, Slowly but surely!
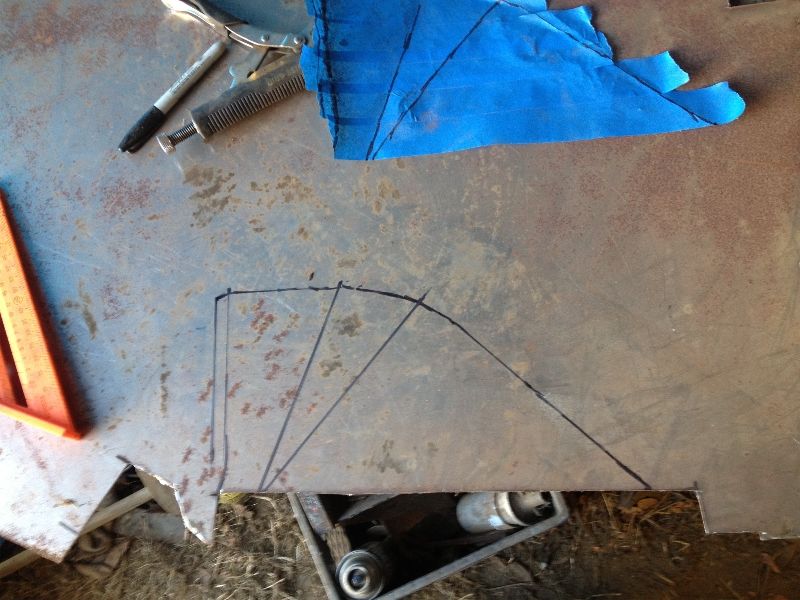
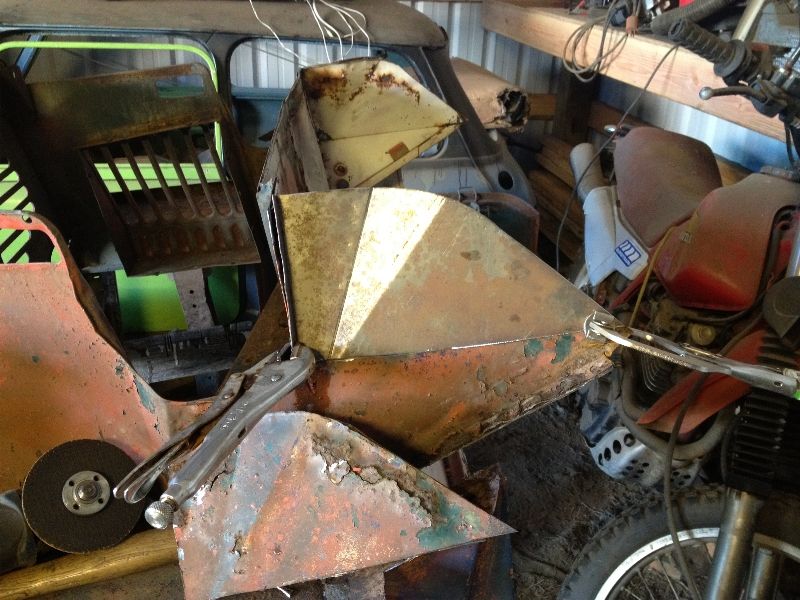
Hey all, big day, I started working on the repairs the front end needs before it can be attached, I homed in on the rusty flitches to start with. Made myself a nice masking tape pattern, transferred it to steel, fitted and started welding... with my amperage too high holes everywhere! wheee. Turned the heat down and managed to weld it all on, there will be a bit of cleanup but it has penetration...
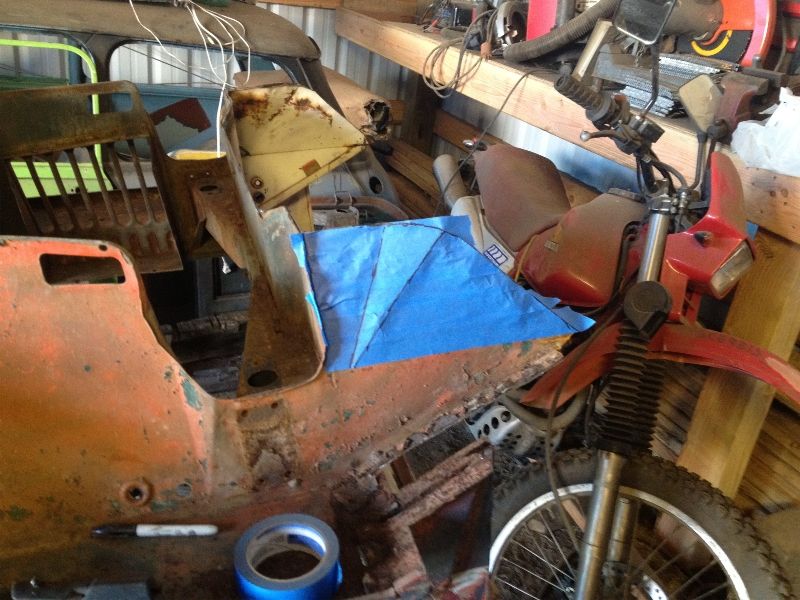
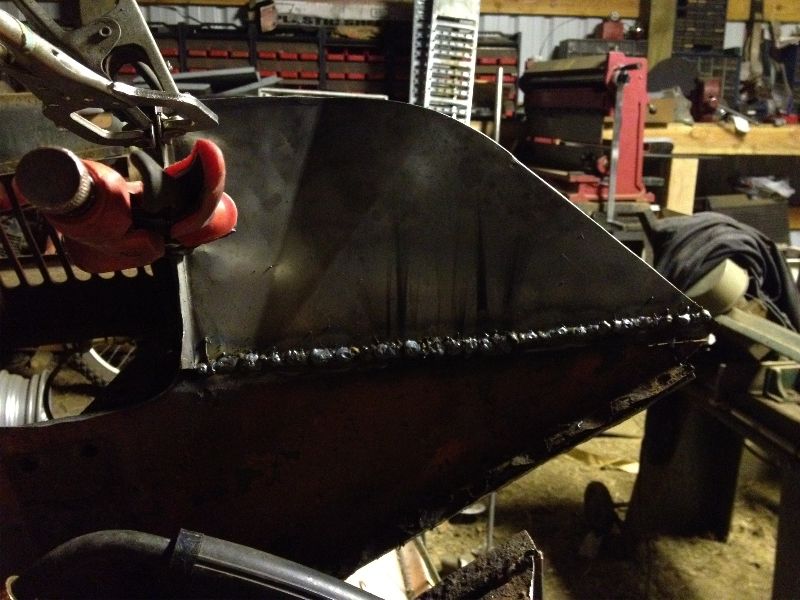
When I was cutting metal off of the front end I came to a rather nasty surprise, the insides of the window strengtheners are rather pitted and they need to be replaced, I do think they will last this summer however and being on the top of the moke they are rather easy to get to for replacement.
I have to get this rolling by June D: In an incomplete state if need be.. But drive able. 250 miles away there is going to be Mini Meet West 2013 I have to go in the moke! =)
My Dad showed up in the evening hours and we pulled the tub off of the jig and turned it over so I can get to the welds along the bottom of the seat cross member and the hull sides.
Until next update.
The cut burned smashed bloody
Chris
Hey all, big day, I started working on the repairs the front end needs before it can be attached, I homed in on the rusty flitches to start with. Made myself a nice masking tape pattern, transferred it to steel, fitted and started welding... with my amperage too high holes everywhere! wheee. Turned the heat down and managed to weld it all on, there will be a bit of cleanup but it has penetration...
When I was cutting metal off of the front end I came to a rather nasty surprise, the insides of the window strengtheners are rather pitted and they need to be replaced, I do think they will last this summer however and being on the top of the moke they are rather easy to get to for replacement.
I have to get this rolling by June D: In an incomplete state if need be.. But drive able. 250 miles away there is going to be Mini Meet West 2013 I have to go in the moke! =)
My Dad showed up in the evening hours and we pulled the tub off of the jig and turned it over so I can get to the welds along the bottom of the seat cross member and the hull sides.
Until next update.
The cut burned smashed bloody
Chris
#345
ba-tat
-

- Noobies
-
- 53 posts
Stage One Kit Fitted
Posted 04 March 2013 - 09:08 PM
Love this build and particularly the fabrication. Thanks for updating.


1 user(s) are reading this topic
0 members, 1 guests, 0 anonymous users


