Really getting stuck into this Moke now. Is that the original green paint underneath the flaky stuff?


1960 Morris 850 And Friends
Started by
CLM
, Aug 12 2010 01:20 AM
417 replies to this topic
#301

jagman.2003
-

- Members
-

- 1,307 posts
One Carb Or Two?
- Location: In the shed.
- Local Club: Owner of my own club of Minis
Posted 20 September 2012 - 07:16 AM
#302
CLM
-
- Members
-
- 817 posts
One Carb Or Two?
Posted 20 September 2012 - 07:19 AM
Yes, it's was originally a rather standard mk1 Moke in standard green color with 4 seats, I need to get the frame jig top fabbed up before the rain.
Chris
Chris
#303
CLM
-
- Members
-
- 817 posts
One Carb Or Two?
Posted 21 September 2012 - 06:12 PM
Woohoo! I Own a Moke!
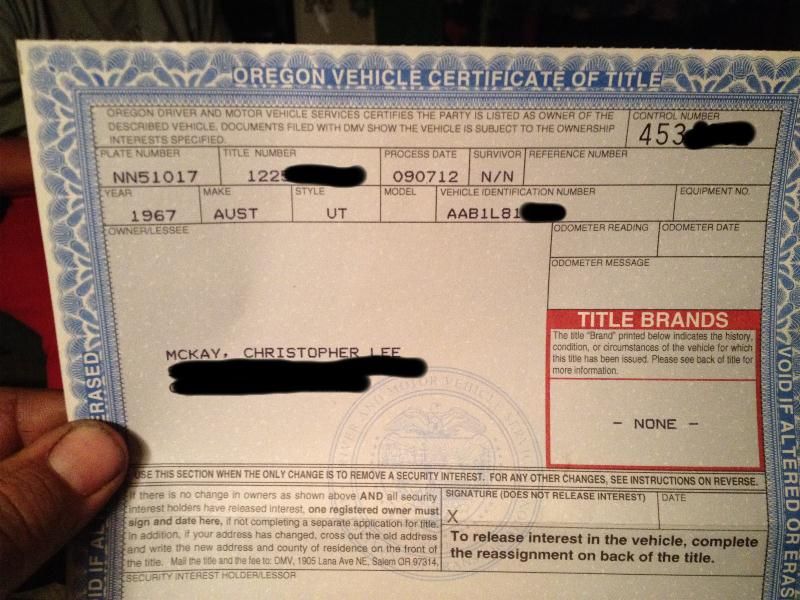
14 days processing with somewhat dubious paperwork must be a record!
Ahem.. Back to the job, a title on a big 4 wheeled rust flake is nothing to celebrate about.
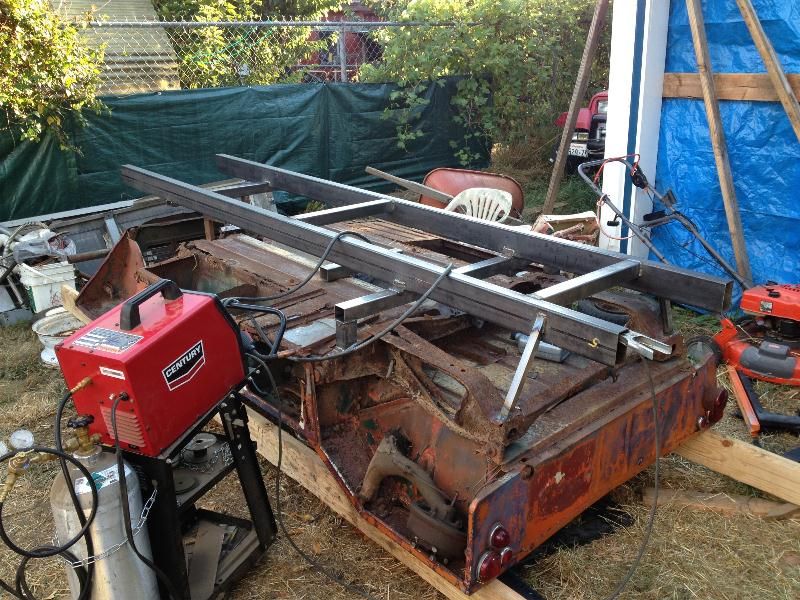
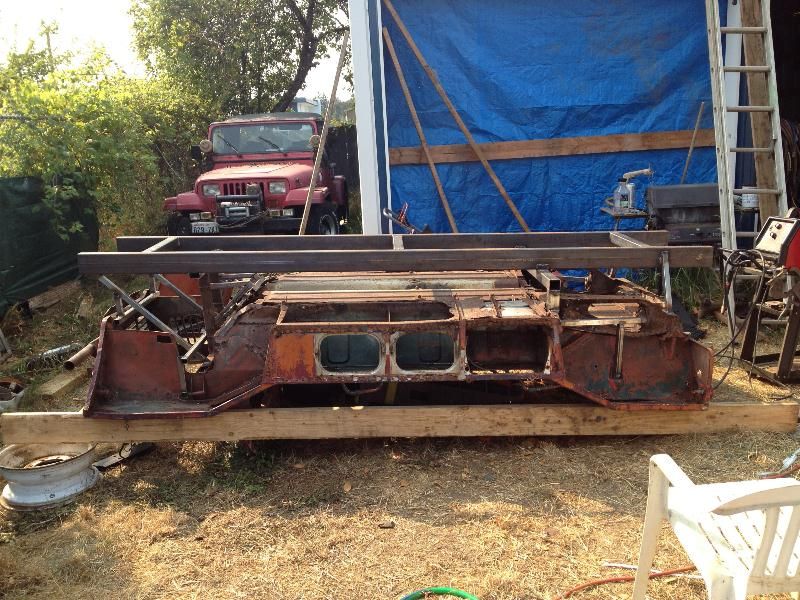
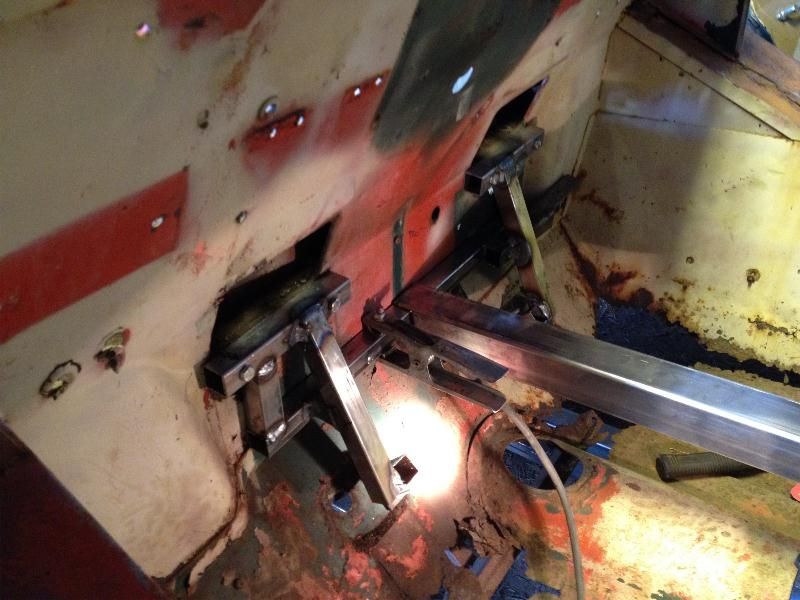
Yesterday It was badly overcast and threatening rain, but I had to work anyways, I need to get my bottom jig done outside of the shop so rush rush rush. Well rush if I wasn't making it all up as I go along. But anyways, I managed to borrow a decent bubble level to help me twist the car back into a semblance of straight. Following the leveling procedure I built up the first part of the rear jig, I am using the badly rusted subframe as part of the jig for this project because the subframe mounts in the body are rather.. erm.. suspect of being not up to the job.
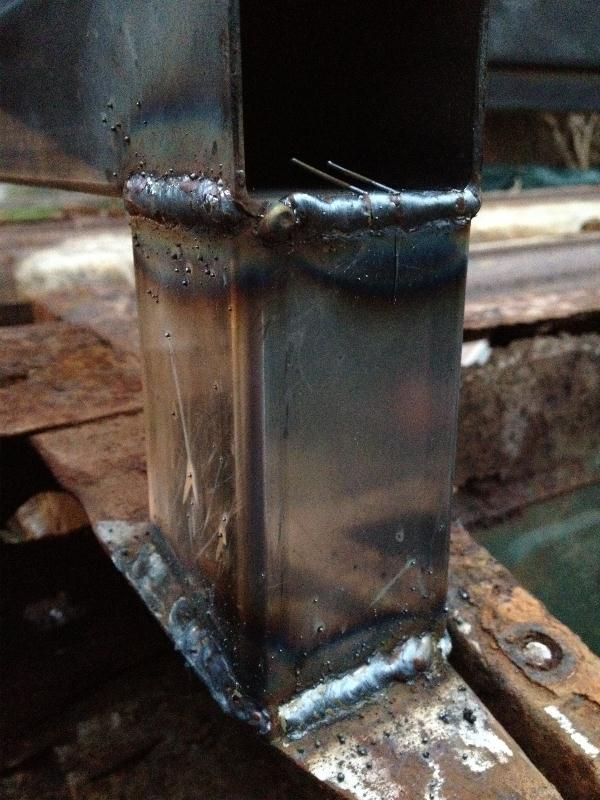
I also leveled and welded a spreader bar to my front subframe jig so it will mount to the jig frame rails, and with the frame rails set into place it looks like it should function nicely.
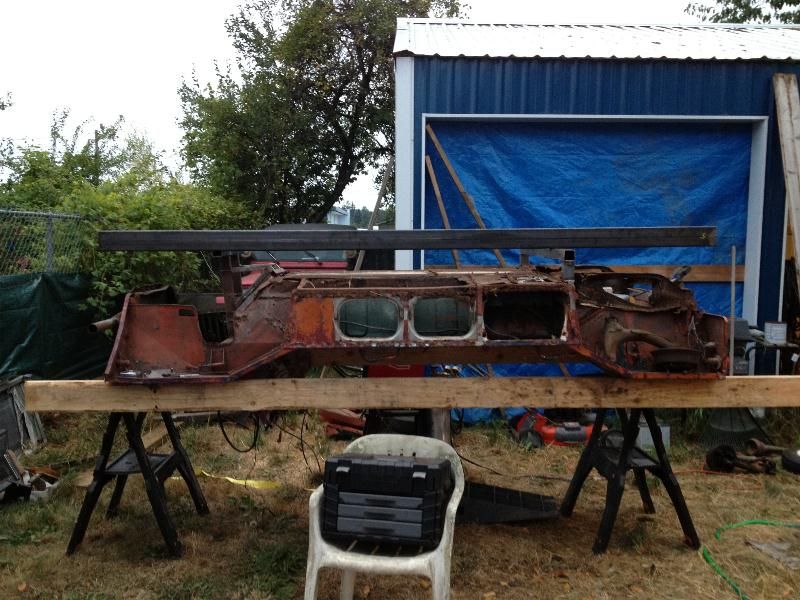
10 foot long .120 wall 2x4 tube is heavy stuff by the way... in case you didn't know!
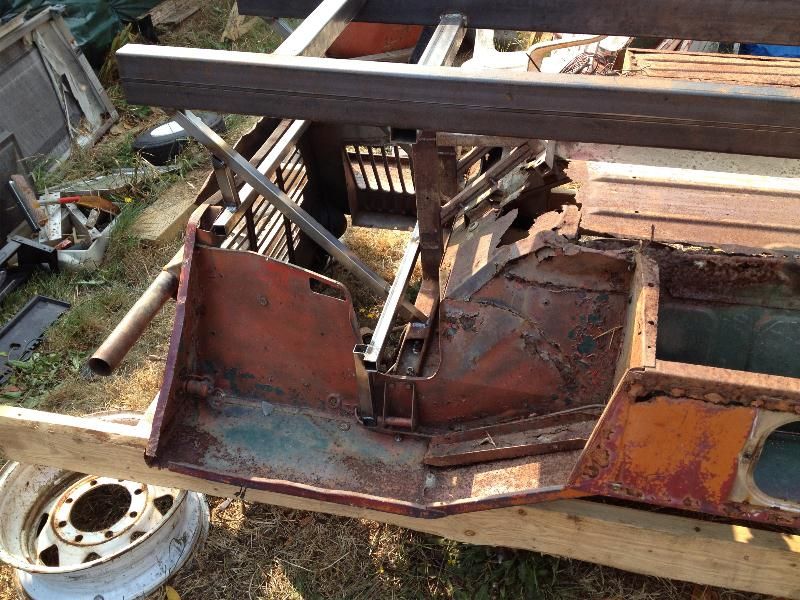
Also I discovered more ambiguous construction on my Moke, the pannier outer sills I received appear to have a bend at the end where they lap over the end bulkheads in the pannier. Well only 3 of the 4 connections still exist in this Moke, the battery having eaten the fourth one. And they seem to be assembled somewhat haphazardly one way or the other.
left rear lapped over the bulkhead
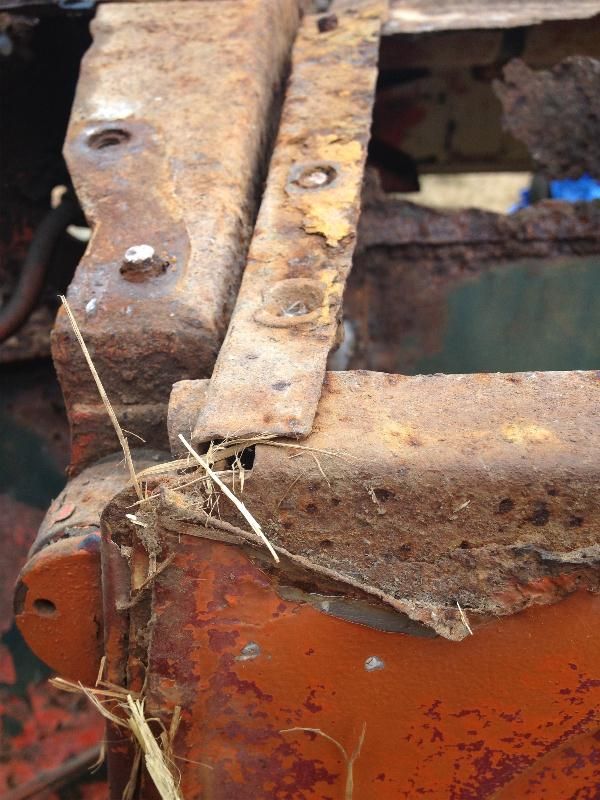
left front lapped under the bulkhead
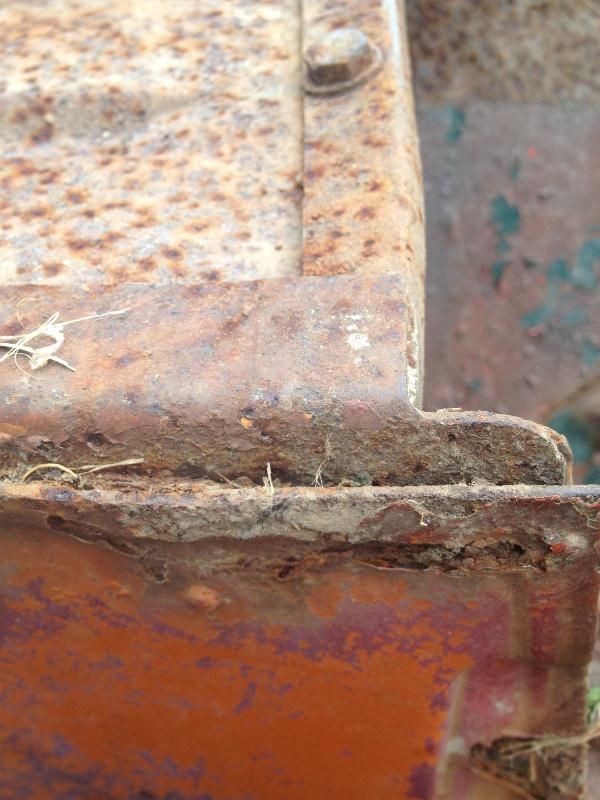
right front lapped over the bulkhead
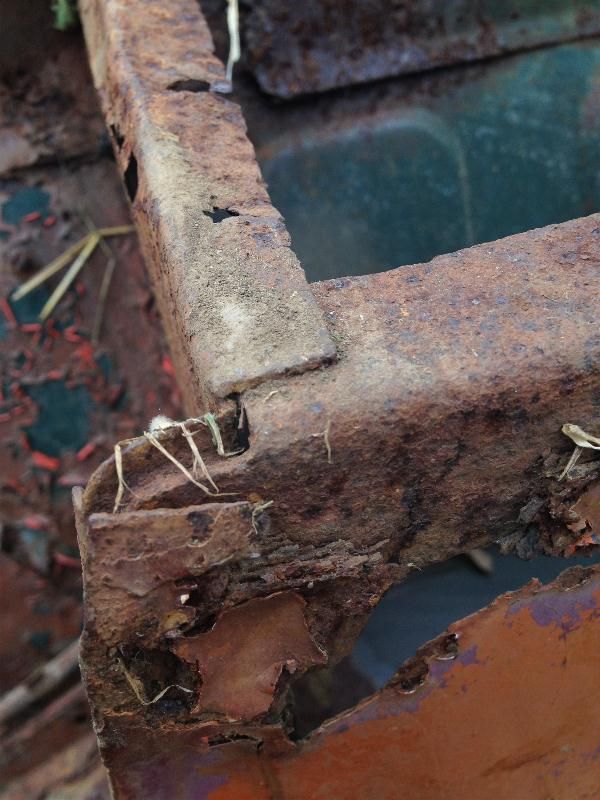
We don' need no steenkin' Quality Control!
Chris
14 days processing with somewhat dubious paperwork must be a record!
Ahem.. Back to the job, a title on a big 4 wheeled rust flake is nothing to celebrate about.
Yesterday It was badly overcast and threatening rain, but I had to work anyways, I need to get my bottom jig done outside of the shop so rush rush rush. Well rush if I wasn't making it all up as I go along. But anyways, I managed to borrow a decent bubble level to help me twist the car back into a semblance of straight. Following the leveling procedure I built up the first part of the rear jig, I am using the badly rusted subframe as part of the jig for this project because the subframe mounts in the body are rather.. erm.. suspect of being not up to the job.
I also leveled and welded a spreader bar to my front subframe jig so it will mount to the jig frame rails, and with the frame rails set into place it looks like it should function nicely.
10 foot long .120 wall 2x4 tube is heavy stuff by the way... in case you didn't know!
Also I discovered more ambiguous construction on my Moke, the pannier outer sills I received appear to have a bend at the end where they lap over the end bulkheads in the pannier. Well only 3 of the 4 connections still exist in this Moke, the battery having eaten the fourth one. And they seem to be assembled somewhat haphazardly one way or the other.
left rear lapped over the bulkhead
left front lapped under the bulkhead
right front lapped over the bulkhead
We don' need no steenkin' Quality Control!
Chris
#304
CLM
-
- Members
-
- 817 posts
One Carb Or Two?
Posted 22 September 2012 - 03:08 AM
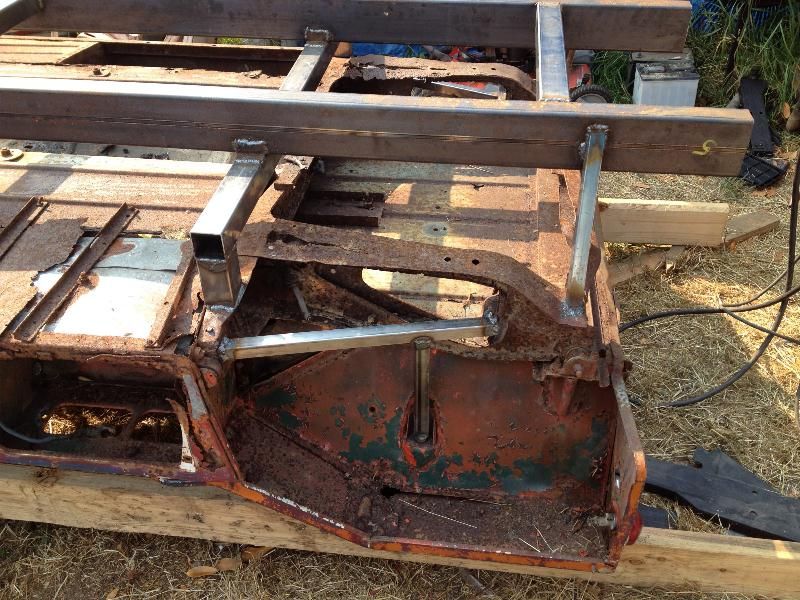
Bit of an update, the jig is probably 1/2 done. I still need to finish the front subframe points, the shock top points and then legs.
Chris
Chris
#305
hughJ
-

- Members
-
- 727 posts
Soldiering Along
- Location: Highlands, Scotland
Posted 22 September 2012 - 07:09 PM
Chris - looks like you mean business here!! All the best, Hugh
#306
CLM
-
- Members
-
- 817 posts
One Carb Or Two?
Posted 22 September 2012 - 09:55 PM
I mean to have a nice moke just as fast as my skills can handle... I sure could have picked a sounder one though!
Nice to see you around these parts again Hugh :)
Chris the Insane
Nice to see you around these parts again Hugh :)
Chris the Insane
#307
jagman.2003
-
- Members
-
- 1,307 posts
One Carb Or Two?
- Location: In the shed.
- Local Club: Owner of my own club of Minis
Posted 24 September 2012 - 12:14 PM
Fair play that's some serious construction. Good to know you'll have a straight Moke at the end.
#308
CLM
-
- Members
-
- 817 posts
One Carb Or Two?
Posted 24 September 2012 - 11:56 PM
Thanks Jagman, but I really want to get to the sheet metal work.. doing this jig makes me feel like I am stalling for some reason..
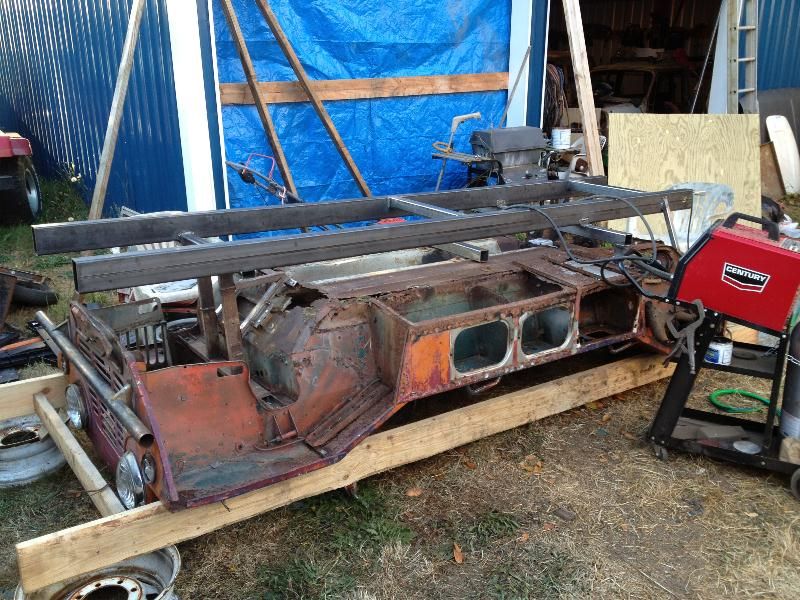
Well I have finished the bottom of the frame jig more or less. I don't have the legs on it, but I'm not quite sure what height I want it at so that will come later. I managed to tie in all the points I wanted except for the "front of front subframe" mounts as I questioned their condition. There was a bit of distortion at those points. At this point I just need to flip it over and trailer it into the garage... once I get my 1960 saloon shell out.
Questions comments critiques?
Chris
#309
minimikej
-

- Members
-
- 347 posts
Speeding Along Now
- Location: Derbyshire
Posted 25 September 2012 - 08:39 AM
Proper job! I will be following this thread, always wondered how Mokes were put together..
#310
CLM
-
- Members
-
- 817 posts
One Carb Or Two?
Posted 26 September 2012 - 01:18 AM
So was I, since getting this one they seem much more insubstantial then I thought they were, and I am not talking about the rust holes!
Chris
Chris
#311
CLM
-
- Members
-
- 817 posts
One Carb Or Two?
Posted 26 September 2012 - 10:08 PM
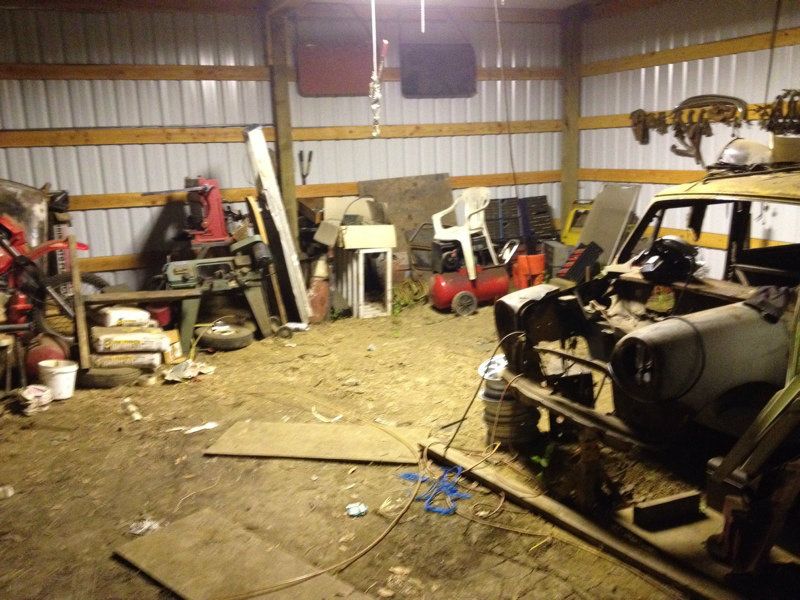
Well I have gotten the early shell out and on it's way to where it is going to be stored.. I wish the storage place was in someone elses workshop.
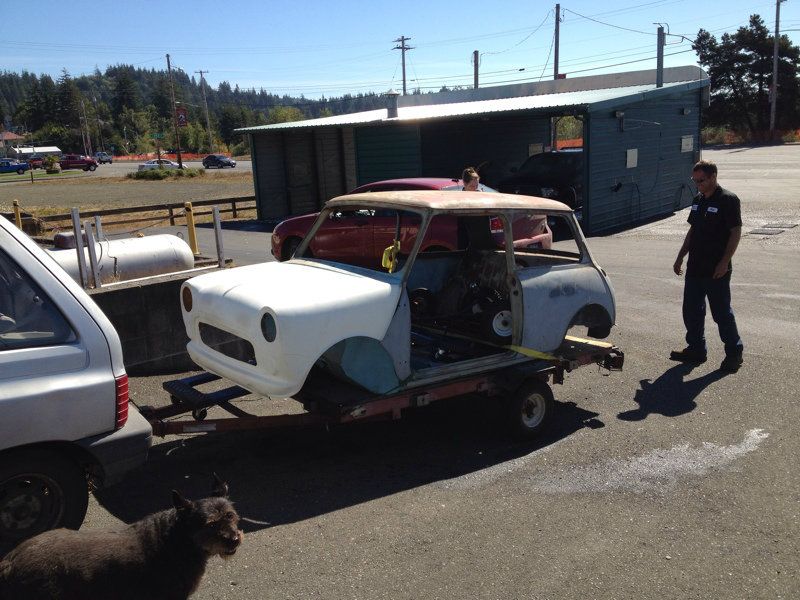
That leaves a largish open area to clean out for working on the moke :)
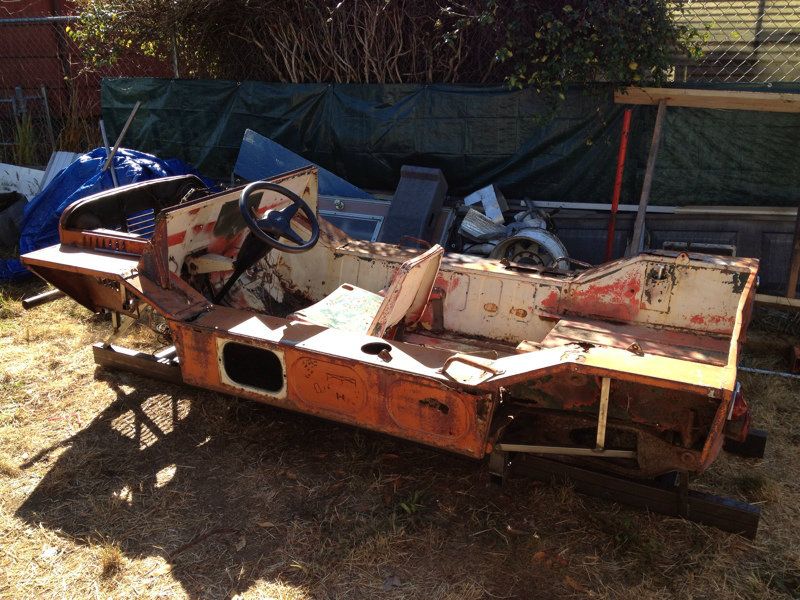
Along with that I got the moke rolled upright which oddly was not all that hard, me and a neighbor just rolled it on over it was not really overly heavy. I am about to drag it up on the trailer so I can move it into the shop (after taking it to the club meeting... tommorow ) Being rather fiddly type I just had to bolt a seat on and try out the fitment of my new mk4 steering wheel.
Chris
That leaves a largish open area to clean out for working on the moke :)
Along with that I got the moke rolled upright which oddly was not all that hard, me and a neighbor just rolled it on over it was not really overly heavy. I am about to drag it up on the trailer so I can move it into the shop (after taking it to the club meeting... tommorow
) Being rather fiddly type I just had to bolt a seat on and try out the fitment of my new mk4 steering wheel. Chris
#312
CLM
-
- Members
-
- 817 posts
One Carb Or Two?
Posted 28 September 2012 - 10:22 PM
Passenger Assisted Headlamp dipping, All the rage!
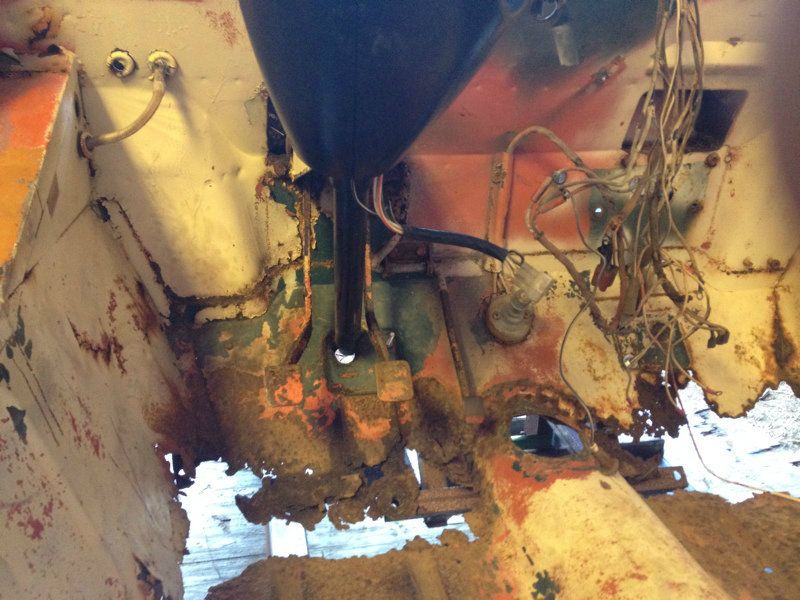
It appears to have been done from the factory as it has the cable guard that doesnt appear to fit on LHD fittment!?
Chris
It appears to have been done from the factory as it has the cable guard that doesnt appear to fit on LHD fittment!?
Chris
#313
CLM
-
- Members
-
- 817 posts
One Carb Or Two?
Posted 03 October 2012 - 09:07 AM
I have not done much work on the Moke for the past couple of days while I build the shelving unit, 12ftx10ftx2ft out of 3/4 inch ply and 2x6's ouch. But I did receive a panel order I made unexpectantly on Mini Mania's website. They had the front angled sections on clearance for $35 a piece, I ended up ordering both along with the right hand front wing and a couple of bonnet hinge rubber pieces. All together including shipping $150, I was pleased.
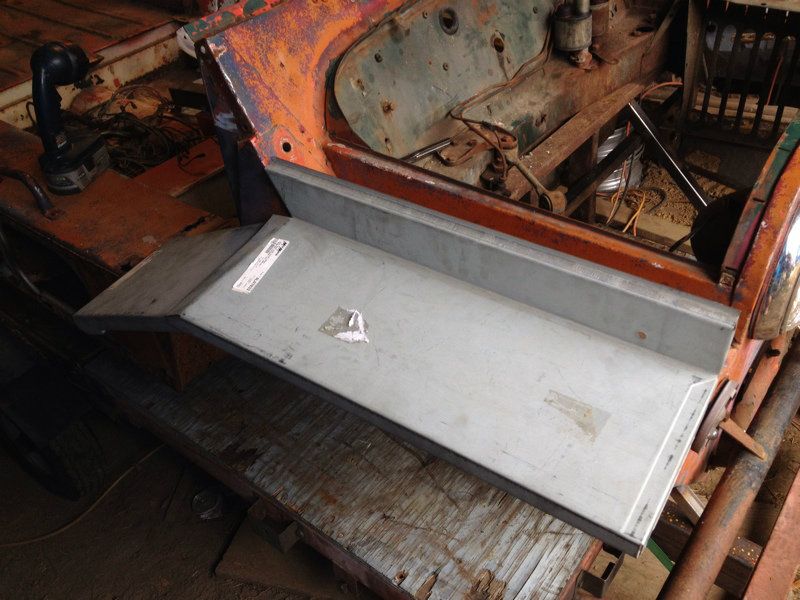
The one annoyance I see however is that to retain the body number I am going to either have to transfer it to this new panel or split this down the length and weld the two halves together, minor issue.
Once I had the Moke off of the trailer I finished stripping all of the lights off of the back and went to pull the last of the interior bits out. Who was it that chose these huge number 4 philips head screws for the Moke? I could just... just... have strong words in their general direction! I have one in the right hand drive pedal box mount location that absolutely refuses to budge.
Also it seems a previous owner replaced the brake master cylinder some time back and used a bolt with two nuts in place of the clevis pin, that was a pain to unbolt.
Apparently there was some issues with the engine steady...
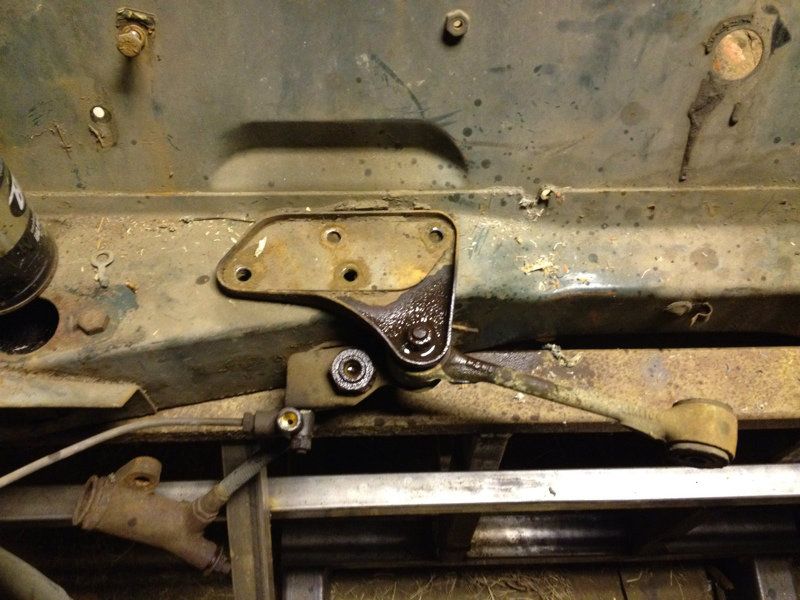
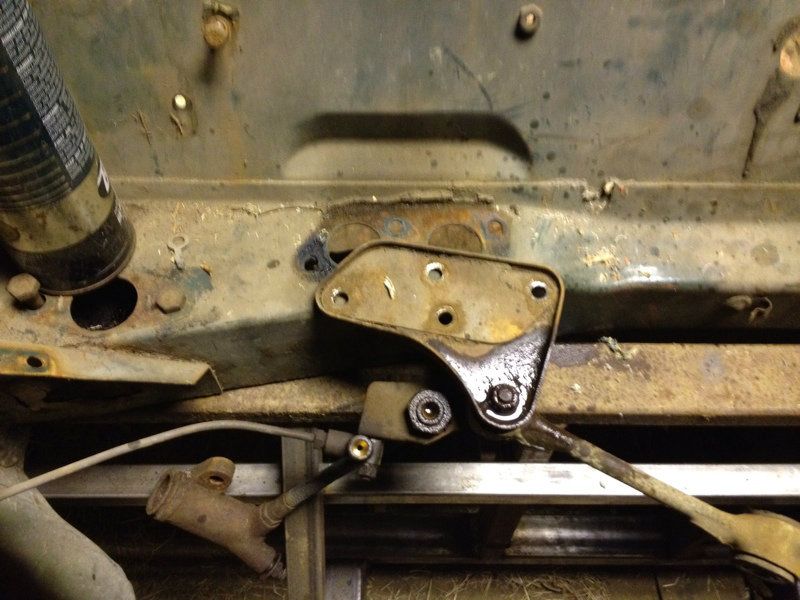
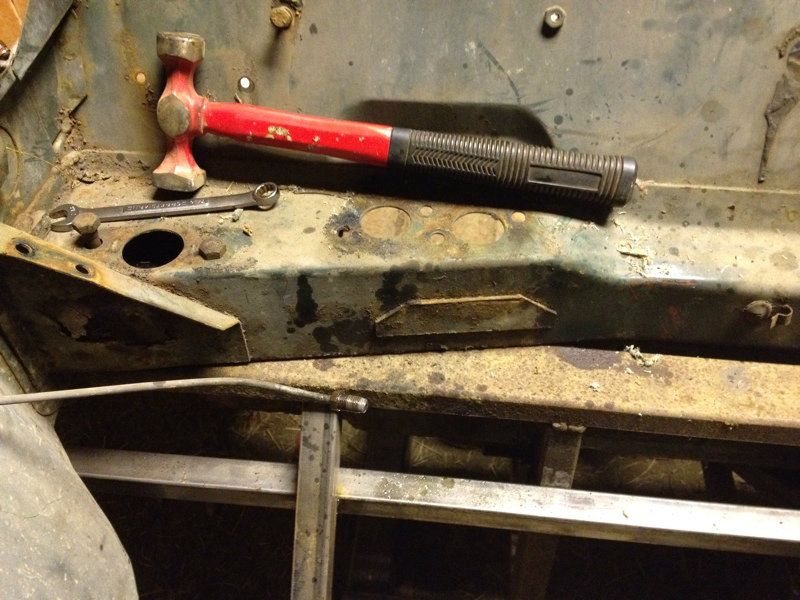
Well, I was worried it would be difficult to remove the engine steady... it wasn't... but... Houston, We have a problem!
Chris
The one annoyance I see however is that to retain the body number I am going to either have to transfer it to this new panel or split this down the length and weld the two halves together, minor issue.
Once I had the Moke off of the trailer I finished stripping all of the lights off of the back and went to pull the last of the interior bits out. Who was it that chose these huge number 4 philips head screws for the Moke? I could just... just... have strong words in their general direction! I have one in the right hand drive pedal box mount location that absolutely refuses to budge.
Also it seems a previous owner replaced the brake master cylinder some time back and used a bolt with two nuts in place of the clevis pin, that was a pain to unbolt.
Apparently there was some issues with the engine steady...
Well, I was worried it would be difficult to remove the engine steady... it wasn't... but... Houston, We have a problem!
Chris
#314
CLM
-
- Members
-
- 817 posts
One Carb Or Two?
Posted 08 October 2012 - 05:48 AM
Hey all, It's been a few days. But I have the shelves done more or less in the shop, they turned out fairly well.
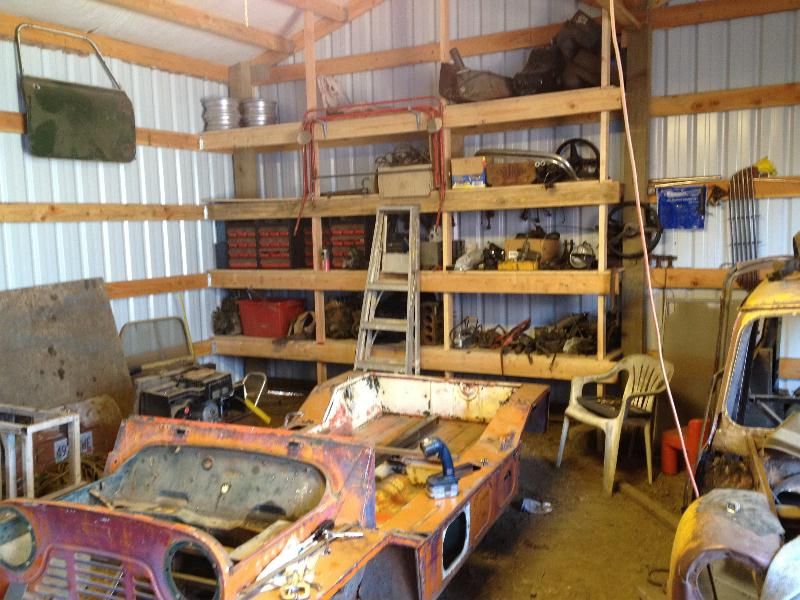
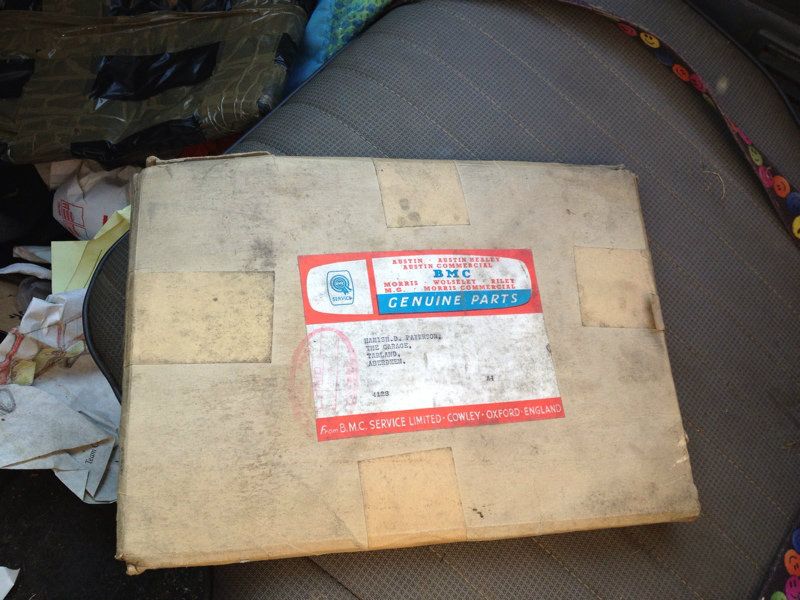
I also got this last week, but photobucket was having issues so couldn't show it. I purchased a NOS workshop manual in original box to replace my water damaged original pages for £4.99 plus not much shipping. I am afraid to take it out of the box now!

Once I got the shelf up and a bunch of stuff moved onto it I was able to drag the Moke off of the trailer and set to work on it, I had to pull the last of the loom out and the pedal box out. I swear whoever decided to fill this thing with #4 philips head screws..... But I won in the end, vice grips trump shoddy striptastic screws!

As it is I have been working for the past several days to get the inner jig built, it is probably 3/4 or 2/3 done at this point, but it is looking ok :)

There are more pics in my photobucket I just didnt want to flood you all with pics. I am hoping to be done with this inner jig shortly so I can actually pull the shell off and start fitting panels together, I can't wait!
I am however on the fence about picking up the new welder I have my eye on, the prospect of being able to "not have to grind down thousands of plug welds" is very appealing. That and I have several projects to use it on. I have some good first hand reviews on it from family friends. What do you think? I plan to not use it to make two welds at once, but to reach around funky shaped structures making one weld at a time.
http://lencoautomotive.com/index.php?q=product&p=l-4000
Chris
I also got this last week, but photobucket was having issues so couldn't show it. I purchased a NOS workshop manual in original box to replace my water damaged original pages for £4.99 plus not much shipping. I am afraid to take it out of the box now!
Once I got the shelf up and a bunch of stuff moved onto it I was able to drag the Moke off of the trailer and set to work on it, I had to pull the last of the loom out and the pedal box out. I swear whoever decided to fill this thing with #4 philips head screws..... But I won in the end, vice grips trump shoddy striptastic screws!
As it is I have been working for the past several days to get the inner jig built, it is probably 3/4 or 2/3 done at this point, but it is looking ok :)
There are more pics in my photobucket I just didnt want to flood you all with pics. I am hoping to be done with this inner jig shortly so I can actually pull the shell off and start fitting panels together, I can't wait!
I am however on the fence about picking up the new welder I have my eye on, the prospect of being able to "not have to grind down thousands of plug welds" is very appealing. That and I have several projects to use it on. I have some good first hand reviews on it from family friends. What do you think? I plan to not use it to make two welds at once, but to reach around funky shaped structures making one weld at a time.
http://lencoautomotive.com/index.php?q=product&p=l-4000
Chris
#315
CLM
-
- Members
-
- 817 posts
One Carb Or Two?
Posted 10 October 2012 - 06:00 AM
I am up here in Portland right now and almost ended up getting a new project once I figured out what it was. A friend had an early shell he was going to cut up and I was going to buy half of it untill I got poking at it. We determined it was an oct-dec 1959 shell and actually found part of the vin number stamped into the shell... however... we don't know if it is an Austin or Morris, we do however know it was a red. Smurf had the bright idea of going to BMH and having them look up both Austin and Morris and tell us which one was red! Brilliant! This rusty shell is now out of my price range but it was a fun find. :)
Chris
Chris


1 user(s) are reading this topic
0 members, 1 guests, 0 anonymous users


