Jump to content


Photo
- - - - -

1960 Morris 850 And Friends


  • Please log in to reply
417 replies to this topic

#166 CLM

CLM

    One Carb Or Two?

  • Members
  • PipPipPipPipPipPipPip
  • 817 posts

Posted 03 February 2012 - 06:16 AM

Hehehe I am somewhat delirious, I have been on the road from 5am till about 9pm. I managed to cover most of the route, I have gone all the way up to Renton to deliver the wheels to Buddylove and picked up a few repair panels for the van a few miles from where my grandmother used to live.

So... does this look like enough repair panels? :wacko:

Posted Image

Truth be told it is in better shape then the van, but mk4 saloons are quite a bit less rare then vans.. seeing as the van is also a mk4 O_O

The floors are actually not as bad as I thought they were, the inner wings are a bit worse, and the nose panels are quite religious. On the other hand the boot floor... what has not been cut out, is in great shape... wait I don't need any saloon boot floor in the van! Doh! Though the battery box is also in good shape and can be slated for my mk1

I also picked up a good (read as 'non-pretzel') rubber mounted front subframe that I can use to make sure all the mounts on the one I am modifying for the 3pot line up like they should! And.. wait for it... wait for it... A hand brake for the single line van! Woot woot... Sorry, delirious... remember, as previously mentioned...

Oh well, that's enough for me, I should go and fall unconcious now.. as there is stuff I have to do tomorrow.

Chris

#167 L. Brown

L. Brown

    Learner Driver

  • Noobies
  • PipPip
  • 22 posts

Posted 03 February 2012 - 06:23 AM

yeah I think mk4 was late 1976 to 1988.

#168 CLM

CLM

    One Carb Or Two?

  • Members
  • PipPipPipPipPipPipPip
  • 817 posts

Posted 03 February 2012 - 09:18 PM

That's what I am under the impression of, the mk3 would have been solid mount subframe and mk4's brought out the rubber ones.

Chris

#169 CLM

CLM

    One Carb Or Two?

  • Members
  • PipPipPipPipPipPipPip
  • 817 posts

Posted 04 February 2012 - 04:06 AM

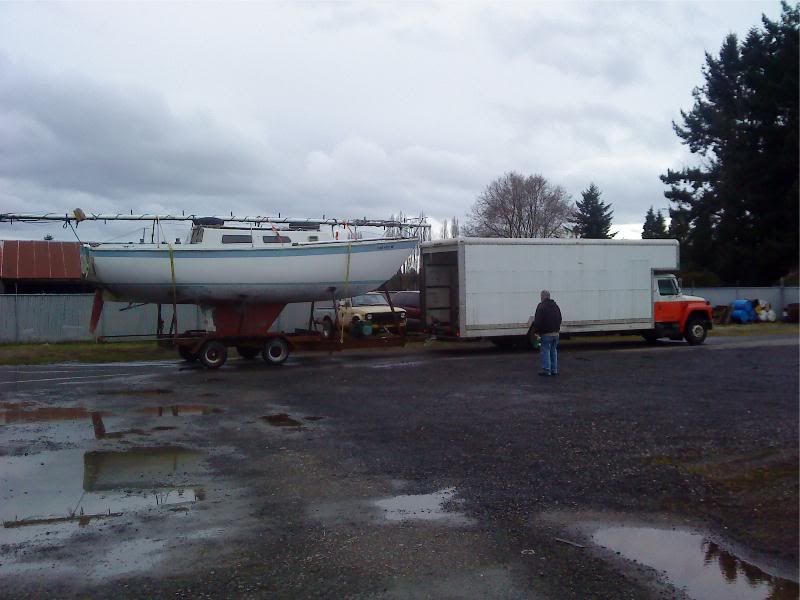
Well, I slept till noon today and then did some cleaning on the sailboat my father wants to sell. I need to do some more tomorrow, and I am not a fan of the selling of it we shall see.

A funny story about the sailboat happened today. It has been sitting in the same place for maybe 3 years with the mast up on a stand on top of it, I climbed up in the sailboat to clean out the interior and call my dad to talk to him, as soon as I hang up there is an ungodly crash. When I go outside to investigate, the mast is no longer laying on the deck of the boat... It had fallen to the ground... right over my car! Luckily the forward end of it was tied to the pulpit so it didnt end up laying on my car... But still, many years it sat there happily, we live 250 miles from it, the day I go in to clean it up and call to talk to dad... it falls off right as I hang up. Nice coincidence! Scary though!

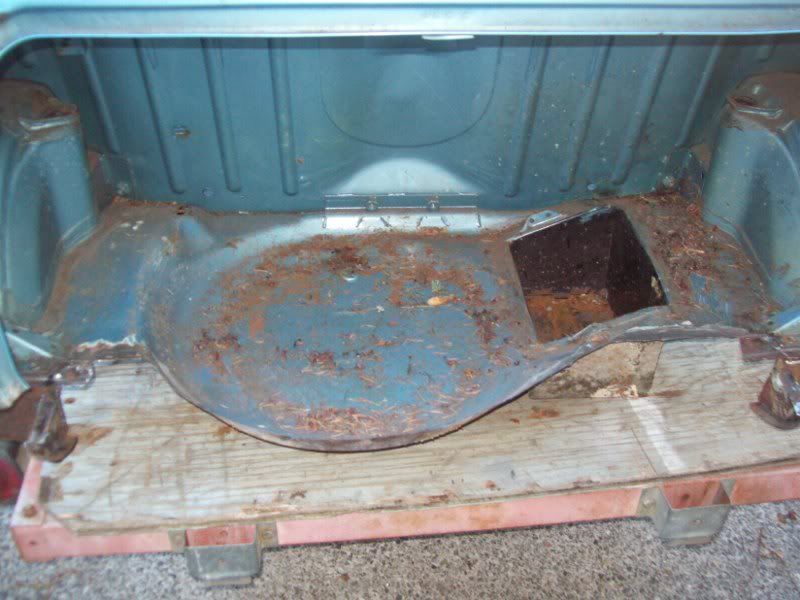
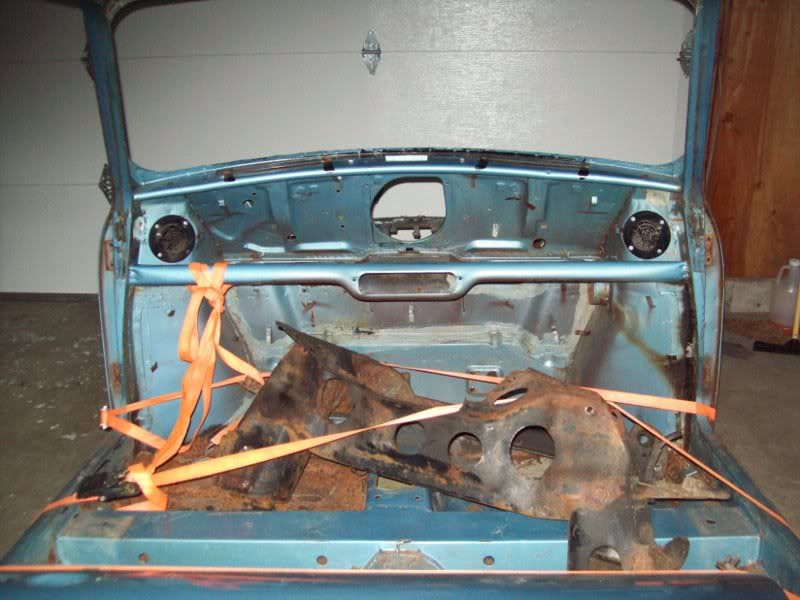
I have some more pics of the doner shell I took today, it's really not all that bad considering what they had it listed as. The boot floor, what remains, virtually has no rust in it.

Posted Image

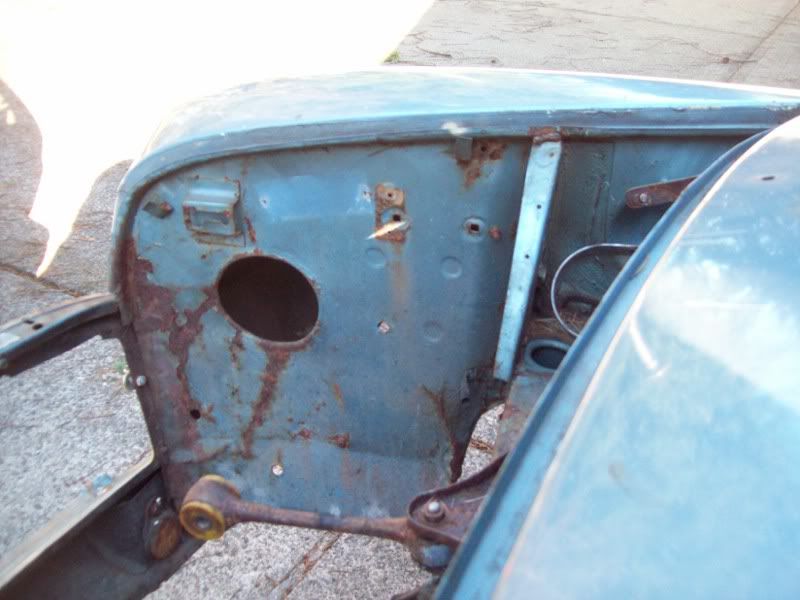
The a panels are gone but that's not too bad, it would need scuttle ends as well.

Posted Image

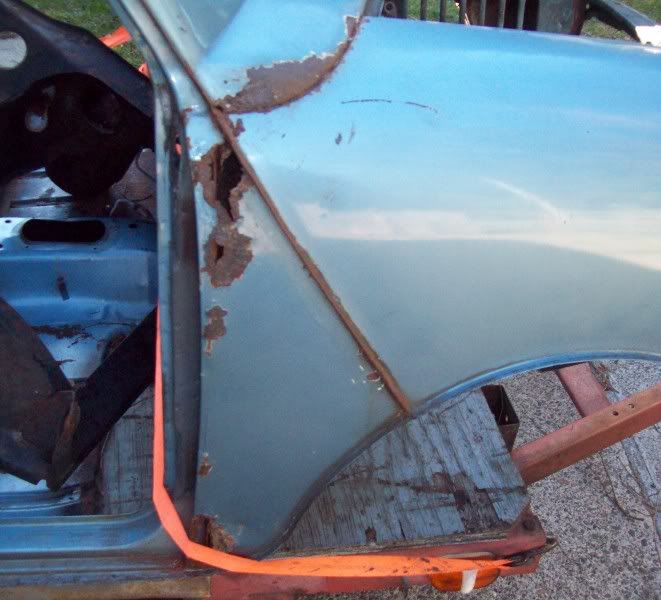
The inner wings are for the most part intact, even the face level vents have no rust around them..

Posted Image

the inner wing appears to have been crumpled before and straightened quite well actually as the front end (aside from the rust) Looks quite good.

Posted Image

I do think I am just going to repair the rust on the front end and use it intact on the van, repairing it should be a sight easier then building that rear door I did :P

Posted Image

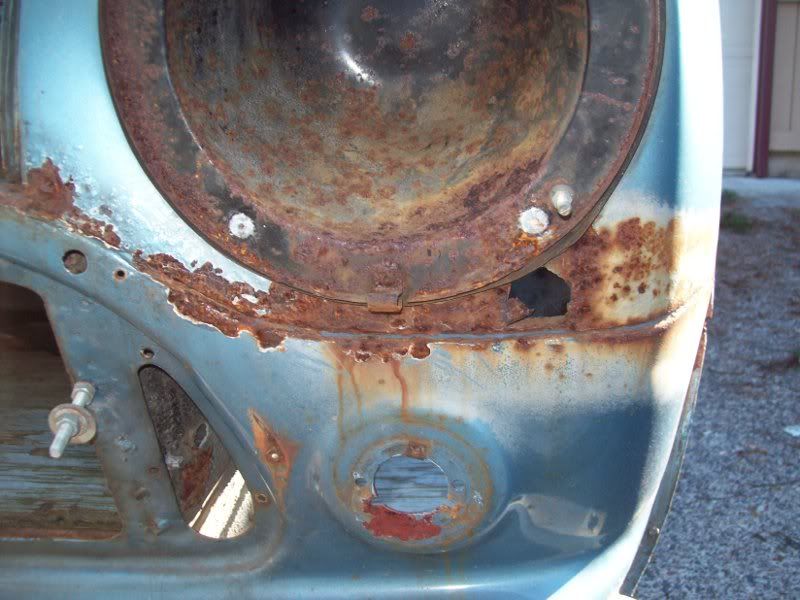
It is a shame really, it's really not that bad. It would be fairly straight forward to repair everything but the holes in the roof, and I dont think that would be too bad to do either. It is in far better shape then the van... but the van is still rarer then a mk4 saloon shell... which you still can get from BMH new.

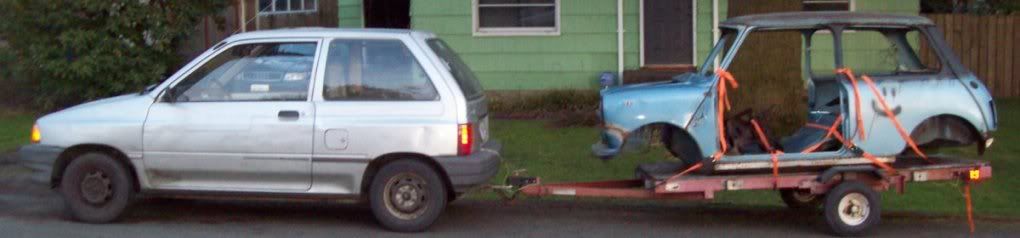
Oh, and look what I got in my Festivapickupdeliveryvancar!

Posted Image

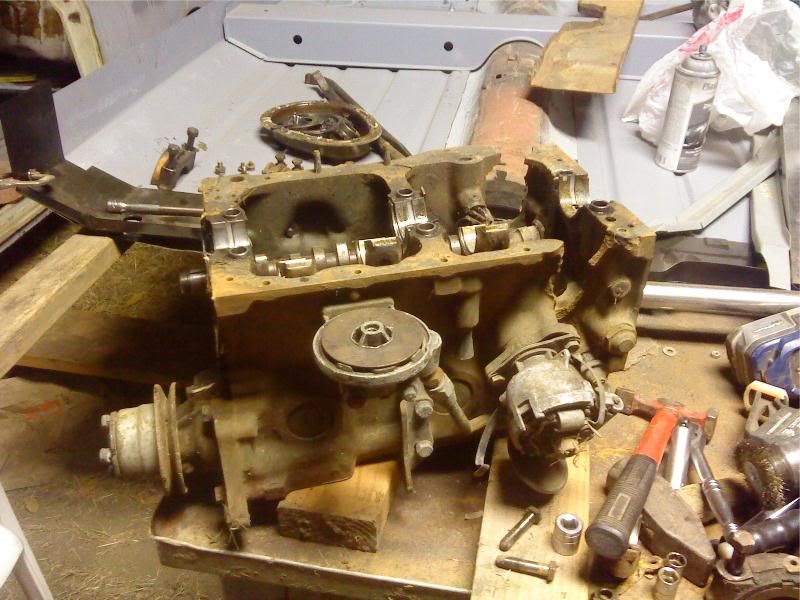
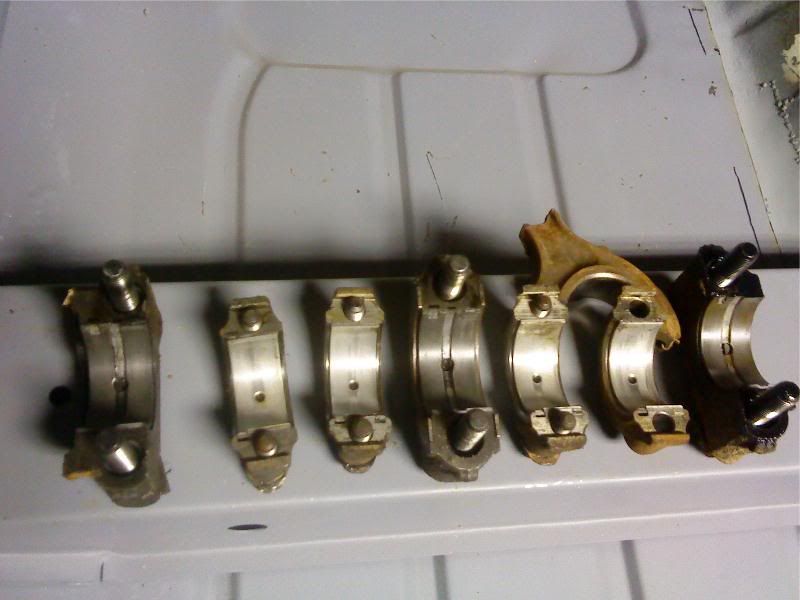
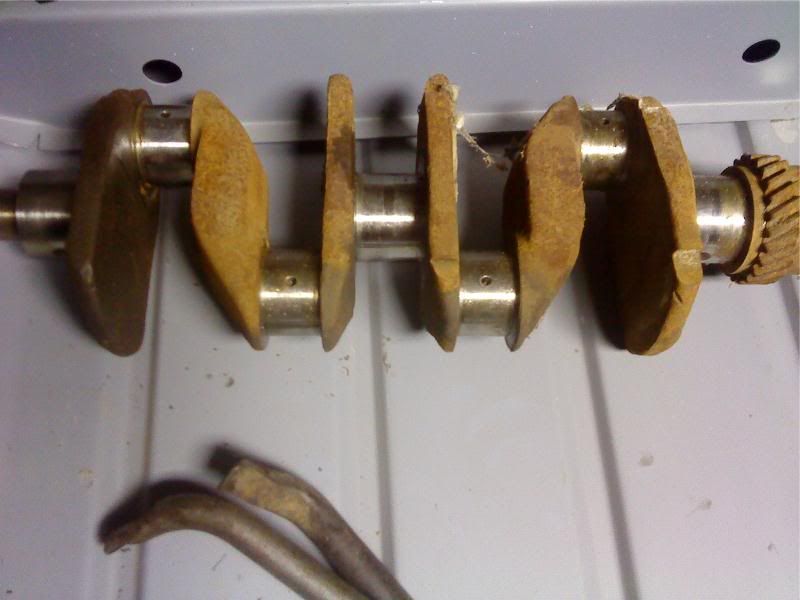
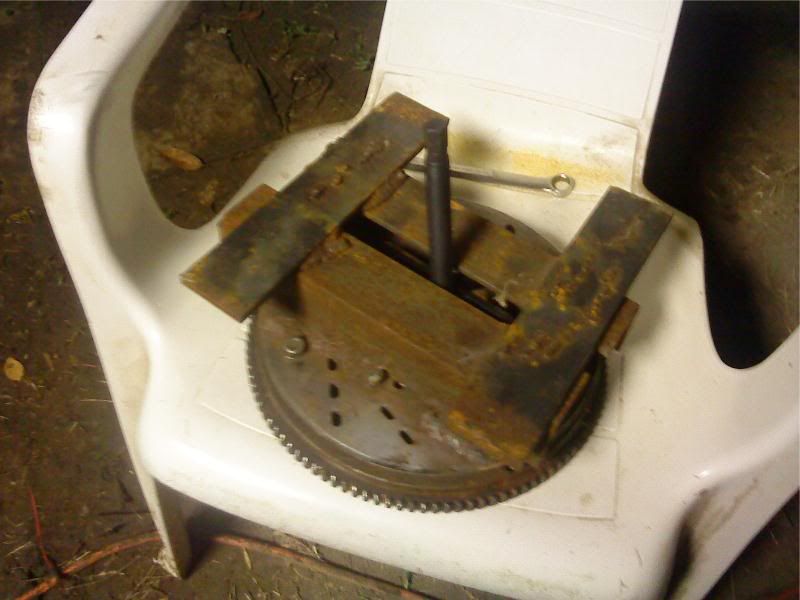
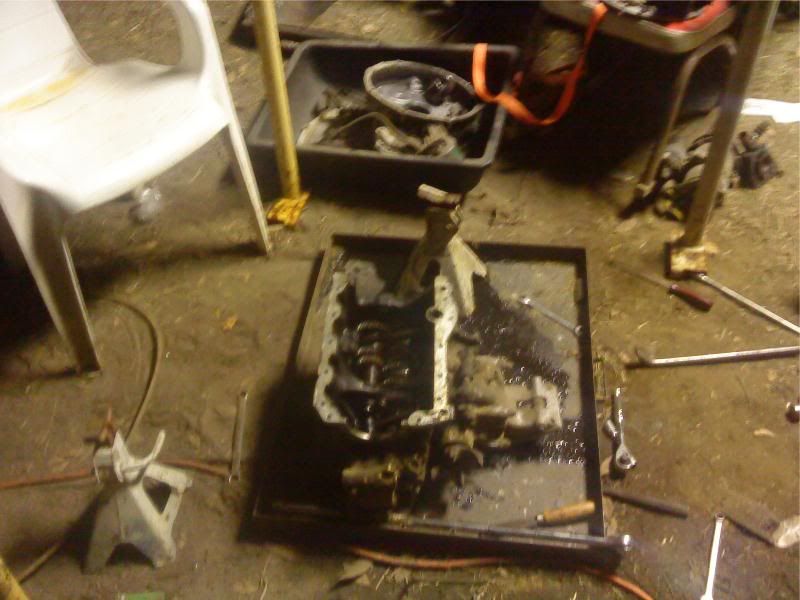
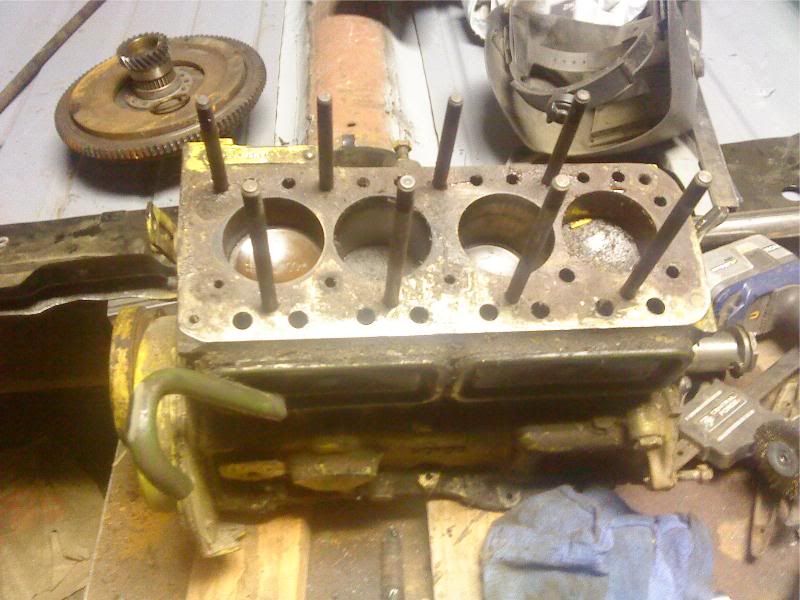
Mmm 1100 goodness(hopefully ;) ) I need to split it from the transmission and return the transmission to John, but that's not a problem (knock on wood)

Chris

#170 CLM

CLM

    One Carb Or Two?

  • Members
  • PipPipPipPipPipPipPip
  • 817 posts

Posted 06 February 2012 - 02:53 AM

I am home finally... no pictures because some sod went into my car last night and stole my new coat and the camera! :( No idea when I will get a new one and my phone takes less then decent pictures. I am not sure how long it will be until I can get a new one so pictures may dry up for a while :/

Chris

#171 hughJ

hughJ

    Soldiering Along

  • Members
  • PipPipPipPipPipPipPip
  • 727 posts
  • Location: Highlands, Scotland

Posted 06 February 2012 - 09:51 PM

Chris that is horrible. I don't understand the low life that do not work for something and help themselves to others property, nor do I want to understand it. Really sorry. So you are going to dismantle another Mini for spares. How can you face it?

All the very best Chris

Hugh

#172 CLM

CLM

    One Carb Or Two?

  • Members
  • PipPipPipPipPipPipPip
  • 817 posts

Posted 06 February 2012 - 10:41 PM

How can I face it? Well It's already been dismantled and is just a bare shell I am basically rationalizing it as I am taking a rather common mk4 saloon shell and am letting it give up it's existence so that my very much rarer mk4 van may be repairable.

Seeing as the van as it sits needs;
*full floor pan
*floor crossmember
*toeboard
*front bulkhead
*front parcel shelf
*front parcel shelf face
*front crossmember
*front inner wings
*front outer wings
*front panel
inner a panels
outer a panels
door frame bottoms
sill panels
scuttle
lower quarter panels
lower rear corners
load floor corner repairs
rear door step repair
whole rear valance setup
rear closing panels

And with the piece from the saloon I can cut out every line with * of what's left, the only pieces that are around $50 will be the door bottoms and the inner a panels everything else will be much cheaper, I will however need to add front floor quarter repairs, but at about $30 a side that's much cheaper then a $500 floor pan. So for $275 for the shell with doors I made out like a bandit, an extra $105 for the front subframe and I am happy.

But that likely wont be the end of the shell as my neighbor has shown an interest in getting one of my shells to make a radically modified mini with a powertrain swap from something that wouldn't normally fit in a mini.If I can remove the parts I want well enough and brace the shell correctly it should be able to be fitted onto a tube type frame setup with whatever he wants in it. I cringed thinking of him doing it to the early shell, He cant have my rotten wagon shell or my van shell, so this one fits the bill quite decently.

But to put your mind at ease a bit, I am going to fix the floor while it is in the shell to make sure things stay lined up and may just dry-build the components I am putting into the van in this shell to begin with seeing as they are both mk4 shells... and if I end up doing that I may just repair the few rusted areas and drive it for a month or two until I have another shell in good enough shape.

If I do that, it is going to basically be colored and done up like my mk1 more or less, basically reshelling it until I get the wagonpup shell In good enough nick to be assembled as sort of a weird hybrid of van and wagon. You may have seen wooden load floor vans.. but metal load floor wagons? lol

Oh... I may have found another problem getting everything to line up in my floor I am doing for that wagon, The door frame may well still be bent, but the floor half from mini machine, the top of the inner sill is not flat, it's concave! More monkey-wrenches thrown into the works... I may need to get outer sill panels to help line stuff up... I need more arms :P

Chris

Edited by CLM, 06 February 2012 - 10:42 PM.


#173 CLM

CLM

    One Carb Or Two?

  • Members
  • PipPipPipPipPipPipPip
  • 817 posts

Posted 08 February 2012 - 03:29 AM

Just using my phone for pictures as per my stolen camera, Thought you guys would like to laugh at me doing this so I thought I would post some pictures. I picked up a badly blown 1100 engine as I was hoping the crankshaft might be serviceable.

Posted Image

It got late tonight so I decided to pull it apart and yard the crank out, the caps came off and the shells look beautiful, even the broken rod spun on the crank smoothly.

Posted Image

Judging by the condition I think I will wrap up the crank and stick it in the closet, if I am needing one I can pull it out and have it magnafluxed and checked for cracks and bends at that time. The journals look to only need a bit of a polish, they are at 20 on the mains and 10 on the rods as read off the shells.

Posted Image

Ok, now everyone can start in and tell me that trying to salvage the crank is a joke and to buy a new one... or something like that. It was a gamble and the crank was in better condition then I could hope for. The engine blew when a piston let go at the wrist pin.

Chris

#174 CLM

CLM

    One Carb Or Two?

  • Members
  • PipPipPipPipPipPipPip
  • 817 posts

Posted 10 February 2012 - 09:36 AM

Hello all,

I managed to get the 1100 short block pulled off of the transmission tonight, can anyone guess what the hardest part was?

...Anyone?

......Anyone?

Nope, Not the flywheel, My fancy puller had it whimpering in fear!

Posted Image

A friend built that 6 or 7 years ago out of some 1/4 inch or thicker angle and strapping and a large motorcycle disk brake designed to capture a puller under it, I needed it when I couldn't get my 850's flywheel off, this one just took a bit of pressure and a tap through the starter hole and pop.

The most difficult and annoying part was the 3 fasteners holding the transmission to the block, the two behind the shift linkage and the one hidden under the timing chain. Madness, sheer madness in it's design!

But using a Stand I had to hoist the engine up in the air so the transmission could go down a few taps and I had this..

Posted Image

Posted Image

I will probably tear down the engine and pack it's bits into a Rubbermaid container so I can store it safely in the house... torn down so I can carry it up the stairs without bodily harm :wacko:

Bye for now,

Chris

Edited by CLM, 10 February 2012 - 09:38 AM.


#175 SomethingNew71

SomethingNew71

    Speeding Along Now

  • Traders
  • PipPipPipPipPip
  • 453 posts
  • Location: Charlotte, NC, USA
  • Local Club: Carolinas Classic Minis United

Posted 10 February 2012 - 03:40 PM

I have no idea how you would salvage the crank but I believe in you!! Give it a shot. If you get it restored make sure you take some pictures and document the process as I would love to know how you did it.

#176 grahama

grahama

    Up Into Fourth

  • Members
  • PipPipPipPipPipPipPipPipPip
  • 2,442 posts
  • Location: Warrington
  • Local Club: None in my area !!

Posted 10 February 2012 - 06:58 PM

Loving engine work at the moment, sooo interesting !! Will keep an eye on this build now engines involved lol

Graham

#177 CLM

CLM

    One Carb Or Two?

  • Members
  • PipPipPipPipPipPipPip
  • 817 posts

Posted 11 February 2012 - 11:08 AM

Engine is only involved at this point because I got my grubby little paws on it, still more body work I am afraid ahead. The engine is going in safe storage. I have an austin america 4sync transmission I need to resuscitate before worrying about the engine. It hat set on my front porch for a couple years and for some reason doesn't spin freely anymore though it still "looks" fine... but it is my only remote transmission so needs to be fixed. I have 2 magic wand trannys, but they won't work so well with a rod change tunnel...

Chris

#178 buddylove

buddylove

    Camshaft & Stage Two Head

  • TMF+ Member
  • PipPipPipPipPipPipPipPip
  • 1,639 posts
  • Location: North America
  • Local Club: SAMOA

Posted 11 February 2012 - 11:43 AM

Nice progress, Chris. Keep plugging away at it! I want to see you at one of the ABFM's around here in one of your Mini's.

#179 CLM

CLM

    One Carb Or Two?

  • Members
  • PipPipPipPipPipPipPip
  • 817 posts

Posted 12 February 2012 - 09:27 AM

Thanks, but I think it will be a LONG time before that happens! Long drive and.. erm, none are even close to being driveable at this moment.

I started tearing apart my 22g1128 4 sync remote change transmission tonight, the layshaft is toast it has a huge grove worn in one side where one of the bearings ate it's way through, it's a shame though, the teeth on the gear looked perfect. But due to the damage to the bearings and what they did to the races it's not usable in my opinion. I do have one problem though I don't know if it's the 22g927 or the 22g1040 laygear as it has no markings at all. The laygear just has an overall black coating, no stampings. The transmission, I believe, came from an austin america 1275(mg1300?) and has the rubber sandwich mount for the remote change housing, a 3.756:1 final drive, and yoke joint outputs. I have a bit of time before I can buy anything so time to research.

While disassembling it I did lose 3 of the syncro balls.. and I managed to drive out the final drive bearing using an old connecting rod bearing shell... :shifty:

Chris

#180 CLM

CLM

    One Carb Or Two?

  • Members
  • PipPipPipPipPipPipPip
  • 817 posts

Posted 26 February 2012 - 02:54 AM

Heya all, not much done at all this month, I have spent the majority of it trying to get our Sailboat down from Washington, it's now safely tucked into dry storage in the Charleston Oregon boat basin about 25 miles from the house, I still have to do more cleanup at my mothers house before we can bring it home, but I just don't have any gas money right now moving the boat has put us on Financial E this month.

Posted Image

So I messed around a bit with my floor today, I talked to Ian at M-Machine on how the fit of the floors should be and he gave me some pointers, so lining it up with the front subframe mount holes the seat crossmember and the floor extension I squared it up and tacked it together though not before I went and welded the parking brake bracket to the tunnel. Then before I test fitted the floor in I welded in my heater bracket in the stock location and filled the three holes one of the PO's had drilled.

Posted Image
Posted Image

It all seems to fit better then I thought it did earlier, time will tell.

Chris


3 user(s) are reading this topic

0 members, 3 guests, 0 anonymous users