Jump to content


Photo
- - - - -

Mk1 Austin Mini


  • Please log in to reply
75 replies to this topic

#16 buddylove

buddylove

    Camshaft & Stage Two Head

  • TMF+ Member
  • PipPipPipPipPipPipPipPip
  • 1,639 posts
  • Location: North America
  • Local Club: SAMOA

Posted 24 August 2010 - 10:52 PM

Received my Mini Spares order on Friday. Super impressed with them, they shipped it out on Wednesday from the UK (4000 miles from me), so it came super fast. Already popped the starter in, and its turning over the motor well. It still isn't starting so I pulled the plugs out and they are pretty fouled. NGK BP7ES were in it already, but I decided to try out BP6ES just to see if it would help at all. Also the electric fuel pump decided to stop turning on, so I don't know if that is because I bumped a wire in the engine bay or not.

The replacement panels and exterior trim pieces came as well, but I haven't opened that package up yet.

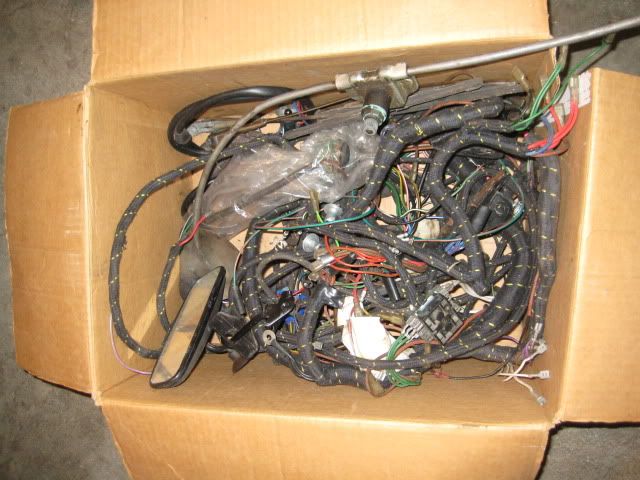
I also swung by Pigpen's place and picked up some interior panels, brackets for the passenger seat, a couple wiring harnesses for the whole car, and a fuel cap :D Thanks again for all the help Tom, as I had no idea what I fully needed until we started talking. :D

#17 buddylove

buddylove

    Camshaft & Stage Two Head

  • TMF+ Member
  • PipPipPipPipPipPipPipPip
  • 1,639 posts
  • Location: North America
  • Local Club: SAMOA

Posted 26 August 2010 - 10:17 PM

Put the new spark plugs in last night. Today, my wife and I traced the wiring for the fuel pump. It ended up being loose wiring at the ignition switch, so that is all sorted now and the fuel pump sounds stronger then before. Cranked the motor over a couple times, and got it to run for about 2 seconds. The battery was already pretty low though and the starter fluid was running on fumes. I am hoping that after the charge up and a new can of starter fluid, it will spring to life tomorrow.

#18 buddylove

buddylove

    Camshaft & Stage Two Head

  • TMF+ Member
  • PipPipPipPipPipPipPipPip
  • 1,639 posts
  • Location: North America
  • Local Club: SAMOA

Posted 27 August 2010 - 07:34 PM


Just got it running today, looks like I need a new battery.

Edited by buddylove, 27 August 2010 - 07:35 PM.


#19 Teapot

Teapot

    TMF Legend

  • Members
  • PipPipPipPipPipPipPipPipPipPip
  • 5,010 posts
  • Location: Seaton, East Devon

Posted 27 August 2010 - 07:54 PM

Happy day :dozing: Congrats

#20 buddylove

buddylove

    Camshaft & Stage Two Head

  • TMF+ Member
  • PipPipPipPipPipPipPipPip
  • 1,639 posts
  • Location: North America
  • Local Club: SAMOA

Posted 28 August 2010 - 01:10 AM

Thanks :thumbsup:

#21 buddylove

buddylove

    Camshaft & Stage Two Head

  • TMF+ Member
  • PipPipPipPipPipPipPipPip
  • 1,639 posts
  • Location: North America
  • Local Club: SAMOA

Posted 02 September 2010 - 12:28 AM

Replaced the battery yesterday with a Optima Red top, and found out that half of the floor of the battery box is missing. Yuck. It fired up under its own power though.

Siphoned out the old fuel today and filled it up with 91 Octane from Chevron, its running a lot better and is much easier to start. I was able to get it started without using starter fluid.

It does seem to have some sort of heat soak / hot start issue. I let it run for awhile and then shut it off, then waited a couple minutes and started it again. After that, I shut it off again and tried to start it again with no luck. I then waited about 45 minutes and it started up on the first try.

Here are a few photos of what I have accumulated so far.

Fiberglass flip front that needs some fiberglass love, future project.
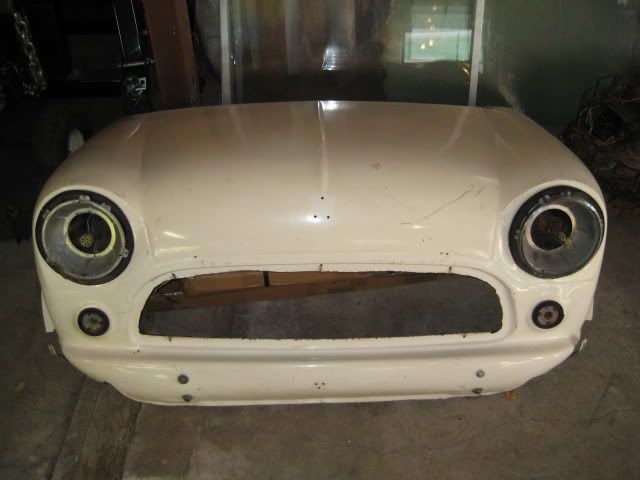
Posted Image


Replacement panels and seals from Mini Spares.
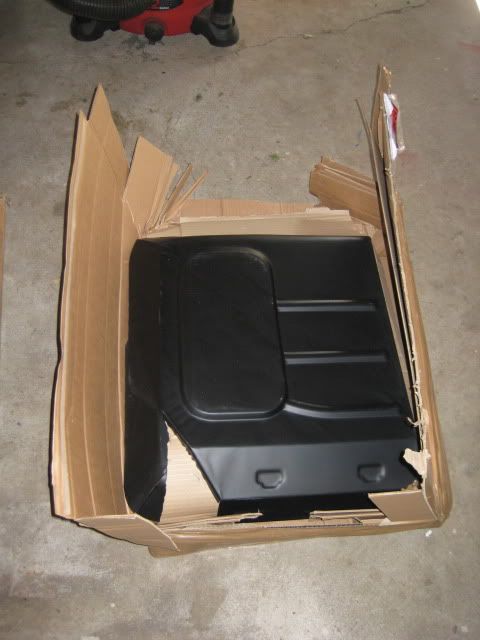
Posted Image


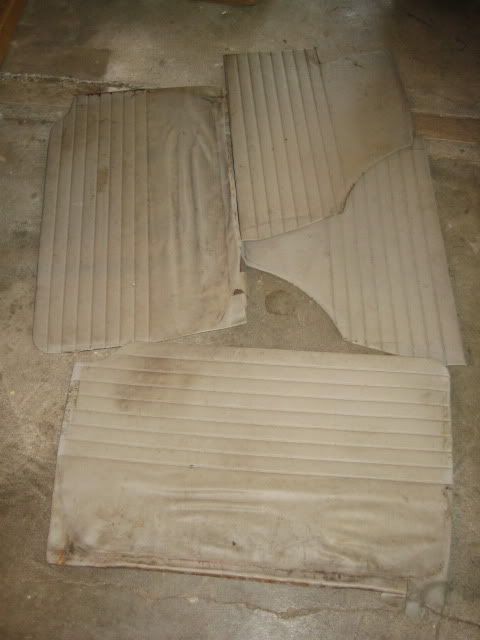
Mk1 Cooper S Panels from Pigpen. They could use a good clean, and new backing.
Posted Image


2 Complete Wiring Harness and some other odds and ends from Pigpen.

Posted Image

#22 buddylove

buddylove

    Camshaft & Stage Two Head

  • TMF+ Member
  • PipPipPipPipPipPipPipPip
  • 1,639 posts
  • Location: North America
  • Local Club: SAMOA

Posted 07 September 2010 - 06:55 PM

Took the Mini over to the local mini mechanic yesterday to get some things figured out.

Cylinders 1 - 4.

135

215

230

200

Obviously something is going on with cylinder 1, we are hoping for a sticking valve, but it could be something more serious like a piston ring. The head needs to be pulled anyways to figure out the compression, so that will be getting checked out weekend after next.

Return spring on the clutch is missing and it has some sort of aftermarket unit. It should be able to be modified to fixed properly.

The drive train and engine are out of a Austin America, most likely a 1300 unit. The head is the Austin America equivalent of a 12G940 head.

Down pipe off of the engine is a LCB, good to know for when I replace the exhaust as the muffler has tons of holes in it.

The motor is very firmly put in place, it has 2 engine steadies on the top and 2 engine steadies on the bottom.

Needs a new switch for the brakes, it has a very early unit. The brakes need to be bled anyways, so that will get replaced with all of that happens.

Incorrect coolant cap. It has a 7lb cap and needs a 13lb one. I will probably do away with the expansion tank setup and just let it run to the ground like normal.

The coolant temp sensor is currently blocked of, so that will need to be replaced with a new sensor.

Heater valve is also blanked out, that will need to be replaced so I can run a heater.

Original mk1 gas tank and sending unit. I will most likely be running a new speedometer / fuel gauge, so I will need to find a later model gas tank and fuel sending unit.

Facet fuel pump, may need a fuel pressure regulator if I switch out for a SU carb. Also, the fuel lines are enlarged, most likely to flow more fuel to the Weber.

Cooper S brakes have new pads on them, hoping a good bleed of the brakes will firm them up. If not, I'll need to get the calipers rebuilt.

The rear proportioning valve is pretty rusted, but does not need to be replaced immediately.

Trailing arms are original mk1 units and are in good shape.

Both front and rear subframes are in decent shape, but I should por15 them as they are showing surface rust in some areas.

Both the left side wheel bearings are bad, the rear one is really bad and needs to be replaced asap before any sort of serious driving occurs. Also the left CV Joint has a ripped boot and will need to be replaced asap, as the axle itself is still in good condition.

Main project for the next 2 weeks is to investigate the rear wheel bearing further and do a good clean of the underside of the engine bay to help track down the oil leak.

Thanks for reading!

#23 buddylove

buddylove

    Camshaft & Stage Two Head

  • TMF+ Member
  • PipPipPipPipPipPipPipPip
  • 1,639 posts
  • Location: North America
  • Local Club: SAMOA

Posted 08 September 2010 - 10:16 PM

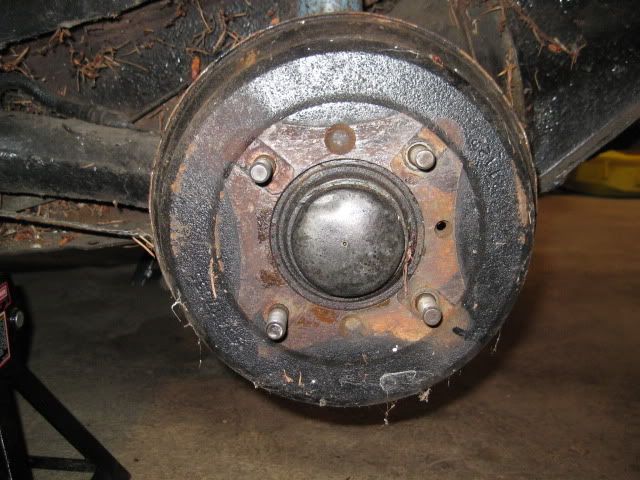
I tried to get the drum cover off, but it wouldn't budge. The manual says to remove the two screws in front and adjust the brake adjuster in the rear. The adjuster didn't want to budge too much and how you see the front of the drum is how I found it, no screws.


Posted Image


Any ideas?

#24 buddylove

buddylove

    Camshaft & Stage Two Head

  • TMF+ Member
  • PipPipPipPipPipPipPipPip
  • 1,639 posts
  • Location: North America
  • Local Club: SAMOA

Posted 08 September 2010 - 10:17 PM

Double post.

Edited by buddylove, 08 September 2010 - 10:18 PM.


#25 olds_kool_lews

olds_kool_lews

    Up Into Fourth

  • Traders
  • PipPipPipPipPipPipPipPipPip
  • 3,601 posts

Posted 08 September 2010 - 11:08 PM

if the brake adjuster is seized, get some heat on it from a blow torch etc, and plenty of wd40/penetrating oil, then loosen it bit by bit, n eventually the drum will start to budge! failing that destroy it with a big hammer lol

#26 buddylove

buddylove

    Camshaft & Stage Two Head

  • TMF+ Member
  • PipPipPipPipPipPipPipPip
  • 1,639 posts
  • Location: North America
  • Local Club: SAMOA

Posted 08 September 2010 - 11:27 PM

Thanks >_<

I'll soak it over night tonight. I tried a few different size wrenches on it, does anyone know the exact correct size the the adjuster bolt?

#27 Colliazz

Colliazz

    Stage One Kit Fitted

  • Noobies
  • PipPipPip
  • 53 posts
  • Local Club: Welsh mini club

Posted 10 September 2010 - 01:44 PM

Ho9ws doesn't it have any brace bars ?? :/

#28 buddylove

buddylove

    Camshaft & Stage Two Head

  • TMF+ Member
  • PipPipPipPipPipPipPipPip
  • 1,639 posts
  • Location: North America
  • Local Club: SAMOA

Posted 10 September 2010 - 10:44 PM

Ho9ws doesn't it have any brace bars ?? :/


It has one on the driverside, but I do agree it needs more.

#29 buddylove

buddylove

    Camshaft & Stage Two Head

  • TMF+ Member
  • PipPipPipPipPipPipPipPip
  • 1,639 posts
  • Location: North America
  • Local Club: SAMOA

Posted 14 September 2010 - 05:04 PM

I got the cover off and pulled the dust cover off. The nut was only hand tight but did have the pin holding it on. I torqued it to 60 ft lbs, but it seems to be binding just a bit now so it will definitely need to be replaced. I am going to need to drive it back down to the mini mechanics on Sunday, so I am going to put it back together for now.

The screws to hold the drum cover on were missing. Does anyone know the proper size screws?

#30 buddylove

buddylove

    Camshaft & Stage Two Head

  • TMF+ Member
  • PipPipPipPipPipPipPipPip
  • 1,639 posts
  • Location: North America
  • Local Club: SAMOA

Posted 20 September 2010 - 07:54 AM

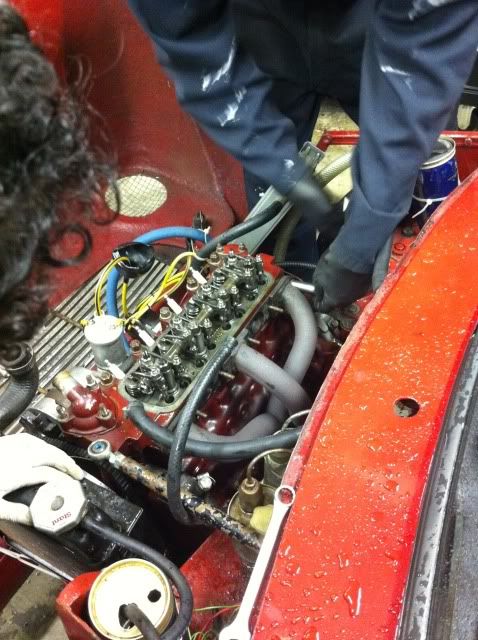
Under the supervision of Chuck, we got the head off and disassembled it. Next, the head will be going off to the machine shop to have the cc's measured so we can get a good idea of what compression ratio the motor is at, it will also be getting checked over and given a good clean. This is the first time I have actually torn into the internals of a motor and it was quite fun.

Posted Image

Posted Image

Posted Image

Posted Image

Posted Image

Posted Image

Posted Image

Posted Image


2 user(s) are reading this topic

0 members, 2 guests, 0 anonymous users