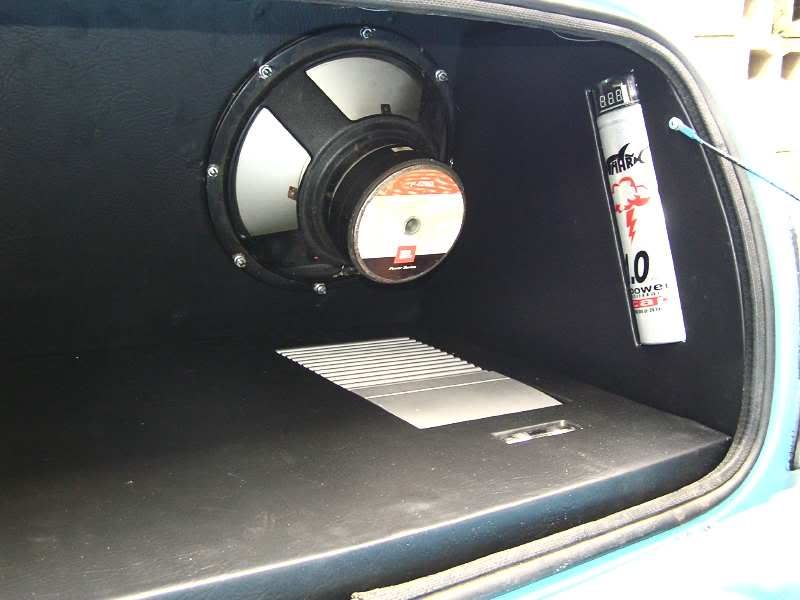
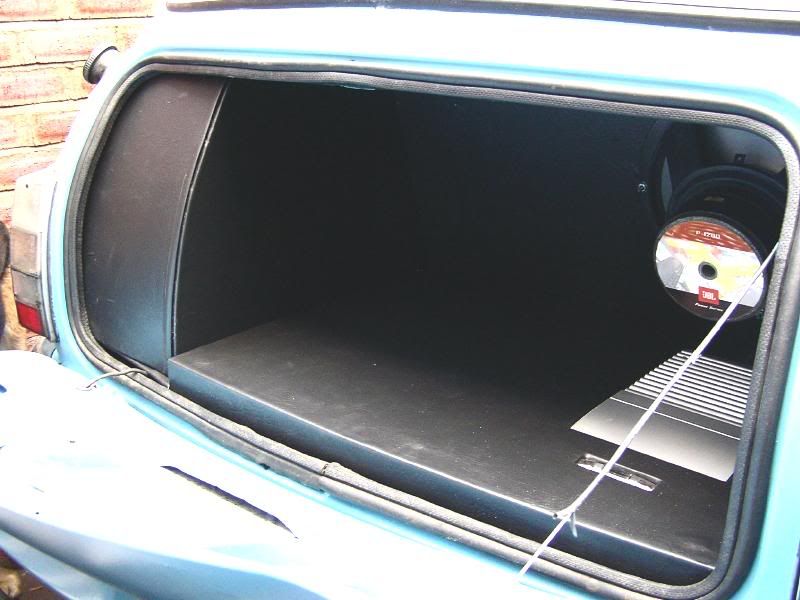
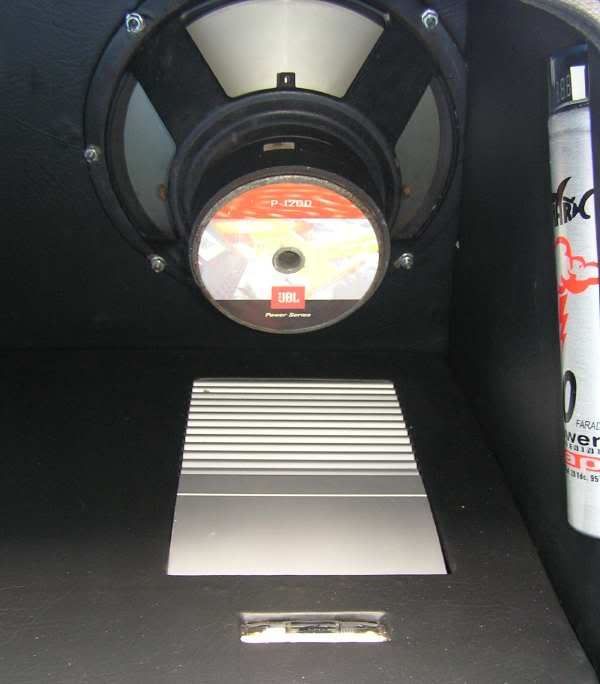
Here’s a quick guide to fitting a free-air sub in a mini, this is a guide to how I fit mine, others may do it differently but this should give you a good idea of what’s involved.
First thing to consider is what size and how many subs you are going to use, the subs need to be capable of running free-air (aka infinite baffle) to avoid damaging both sub and amp. There are a few manufacturers that produce free-air subs and some subs are stated as also being suitable for free-air application.
The next thing you need to decide is where you want to fit it, I’ve fitted mine so that it fires through the seat back/rear bulkhead, there are a couple of reasons for this, one is that it enables me to use a 12” (or a 15 at a squeeze) sub, the other is its hidden from potential thieves. You can also fit them in the rear shelf, you could fit a pair of 8’s (one either side) or a single 10” (in the centre of the shelf), you may need to remove the rear window although it is possible (just a little harder) with the window in situ.
To cut the hole you can use a jigsaw with a metal cutting blade (please where a mask!) or a pair of tin snips (although not as neat as the Jigsaw). When cutting any metal from the rear shelf you need to put some strength back in (because in a rear impact its pretty structural). You can bend a lip into the hole when you cut it, this can be done with a blow gun (like gas fitters use) and a pair of pliers (although I’d recommend stripping the interior and taking the window out), this would add a bit of strength back to the shelf. Also when you fit the baffle board ( I’ll get to baffle boards in a minute) it’s a good idea to bolt the sub through the board and into the shelf which will replace any strength lost.
Sealing the boot
One of the most important parts of a free-air installation is getting the boot sealed properly, the boot acts as an enclosure for the sub so the better the seal the better the performance.
Now first thing to attend to is the area on the rear bulkhead where it meets the side panel, there is usually around a quarter inch gap here which really kills the bass if not filled. There is sometimes a piece of sponge inserted into this gap, remove it and then fill with either seam sealer or silicone, I used silicone and a paint brush to seal mine, for best results do it from both sides if you can (this necessitates moving the fuel tank and rear seat back).
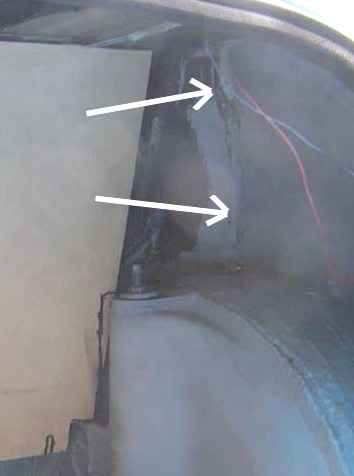
You also need to fill the seat belt mounting holes (if no seat belts are fitted), I used silicone for this also as its easy to remove at a later stage. Any other holes you can find in the boot also need to be filled for optimum performance, I fitted cable glands for all cables and pipes to go through although this is not strictly necessary.
Its worth checking that the boot fits properly too and the boot seal is in good condition with no hardening or gaps.
Sound deadening/anti drumming
When fitting a free-air sub panel drumming is something you need to pay particular attention to, because the sub is effectively using the boot as an enclosure any large or flat panels will tend to vibrate causing the sub to be less effective and also making a crappy vibrating noise when your music is playing. You need to pay attention to the seat back/rear bulkhead, the rear shelf, spare wheel well and bootlid.
To deaden the panels there are a number of options, dynamat is regarded as the ultimate in car audio circles, not only will it deaden vibration but it also helps to reduce road noise. Its not cheap though a 19 1/4" x 32 1/2" sheet will set you back £14.99 and that’s for the cheaper stuff. You can also get bulk packs which are better value for money. As a budget option you can use self adhesive lino tiles applied with a heat gun, these offer good anti drumming capabilities at a low cost, that’s what I have used with excellent results.
Okay so you’ve decided where to fit your sub and you’ve cut the hole you now need to make a baffle board, the baffle board is what you sub mounts too, ideally its needs to be about ¾” mdf or plywood, I used mdf on mine (mainly because that was what’s available).
Rear shelf mounting
To make a baffle board for the rear shelf take out the old shelf, place it on top of your mdf and draw round it. Now you need a Jigsaw to cut the mdf to the desired shape. Once cut out trial fit the board to make sure it fits, you may need to trim the edge that meets the rear screen due to the thickness of the board. The board should not be too tight a fit because you need to allow for the covering material. Once laid in place draw through the hole for the rear shelf and then line that up to the correct size of hole for the sub, draw the line for the sub to fit and then cut out.
Pictures not of rear shelf install


Now trim the board with what ever material you desire, some examples are acoustic/thin carpet, velour, leather, alcantra or velvet.
To mount the sub and baffle board in position there are a couple of ways of doing it, you can either attach the sub to the board and then fit, or fit the board and put the sub in after. A generous amount of sealant should be applied between the baffle and shelf to ensure a decent seal, especially around the hole.
Rear bulkhead/seat back mounting
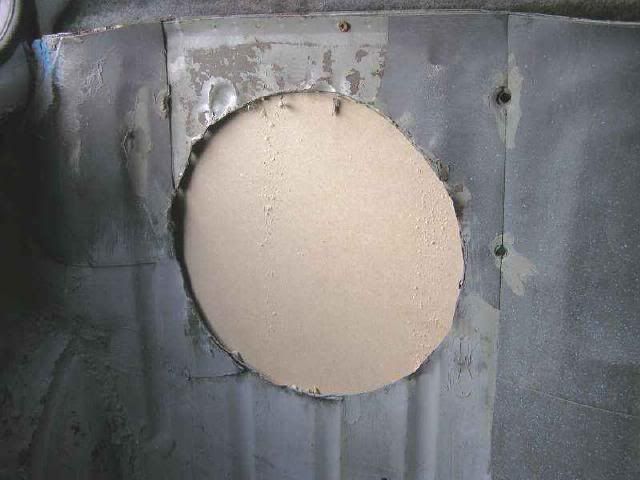
To make a baffle board for the rear bulkhead you need to measure the area you want to cover and make a board to fit that, I did mine as part of a boot liner which tidy’s up the boot too, it’s a bit of trial and error to get the board a good fit but well worth the effort. Once cut to size you need to draw through the hole in the bulkhead for the sub cut-out, once this is done line it up against the correct size hole for the sub (they should ideally be the same).


Now cut the hole out and trial fit the board to make sure everything lines up. You now need to work out how to fix the board on, I used bolts with some special nuts which dig into the board which I bought from b&q, this means that there are no nuts or fixings showing in the boot and makes things look more professional, you can use wood screws of the correct length instead screwed into the mdf throught holes in the bulkhead.
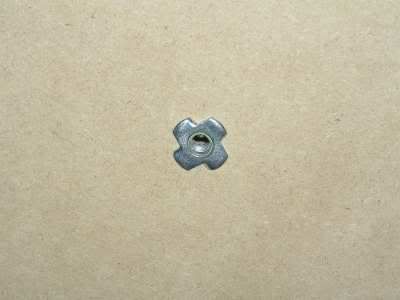
Once the fixing points are in place you can trim the board with what ever material you desire, some examples are acoustic/thin carpet, velour, leatherette, alcantra or velvet.
To mount the sub to the baffle board you fit the board and put the sub in after, I drilled the holes through the baffle board and rear bulkhead for the sub to mount to (with the sub fitted after the board), this keeps the bulkhead tight against the baffle, helping to seal it and putting any strength lost back into the panel. A generous amount of sealant should be applied between the baffle and bulkhead to ensure a decent seal, especially around the hole.
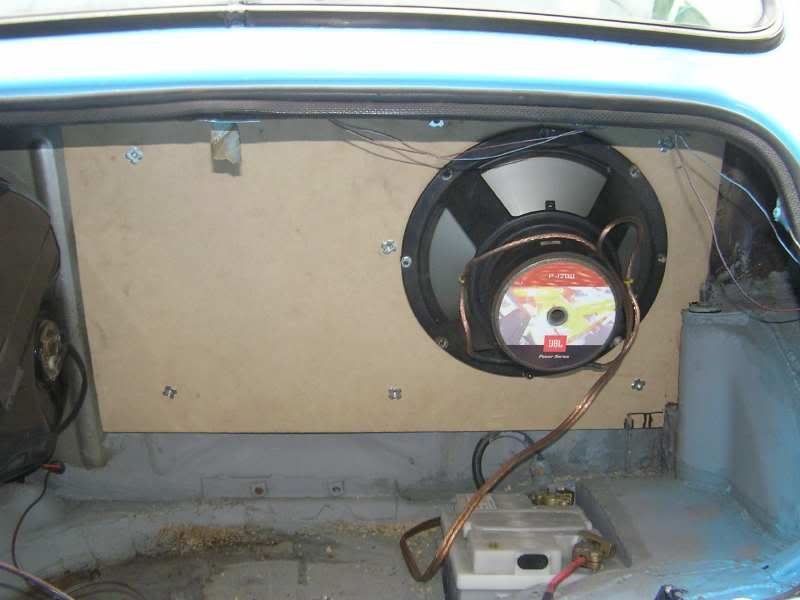
With all this done you are pretty much ready to go.
There may be a few things I’ve missed from here so if there are any questions please PM me and I’ll add relevant answers to this guide.
Always use relevant safety equipment, remember that sheet steel when cut can be razor sharp and steel splinters in your eyes necessitate a rather painful trip to the hospital.
Here’s a few pics of the finished article completely trimmed in black leatherette.
