Jump to content


Photo
- - - - -

1979 Rust Heap Clubman Rebuild


  • Please log in to reply
625 replies to this topic

#541 rich2

rich2

    Speeding Along Now

  • Members
  • PipPipPipPipPip
  • 351 posts

Posted 21 August 2017 - 09:23 PM

Long time no update! (As usual!)


So I finished cleaning up the gear linkage.
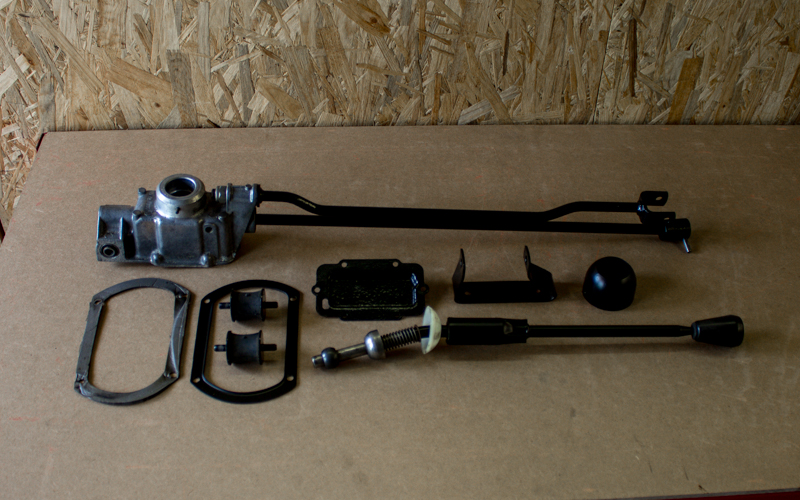
 

36551348262_95603b29ab_o.jpg


And got that put back together. Really need to get hold of a decent gear knob at some point because the one I have is old and manky.
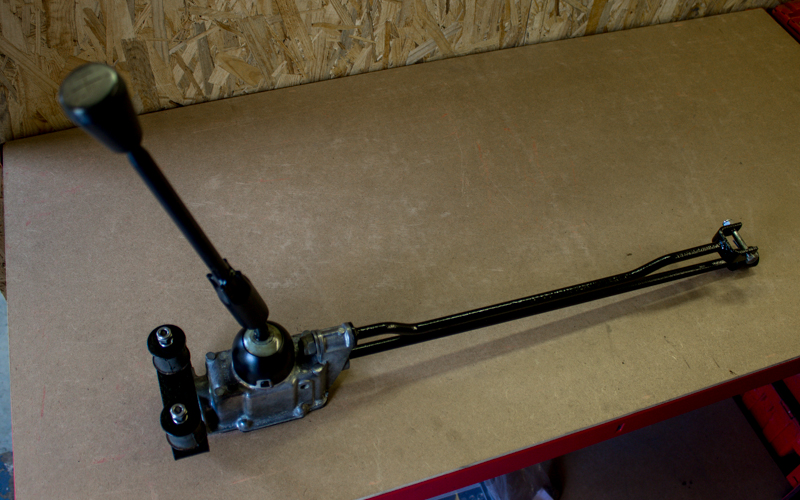
35911671993_c23038fa1e_o.jpg


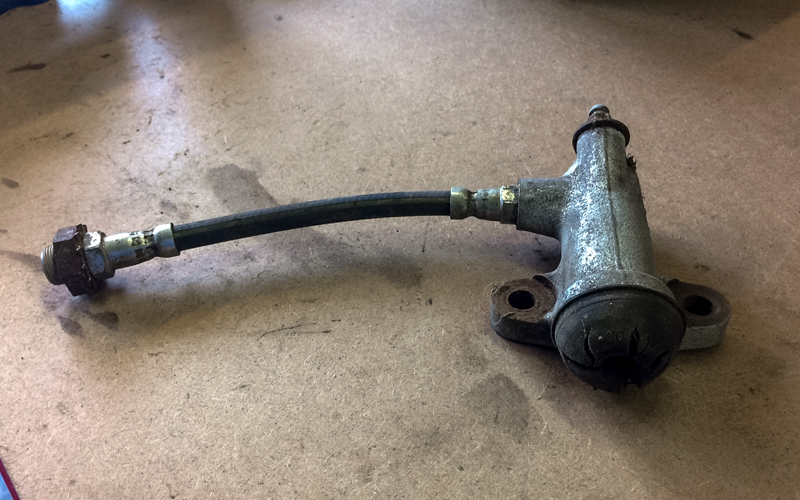
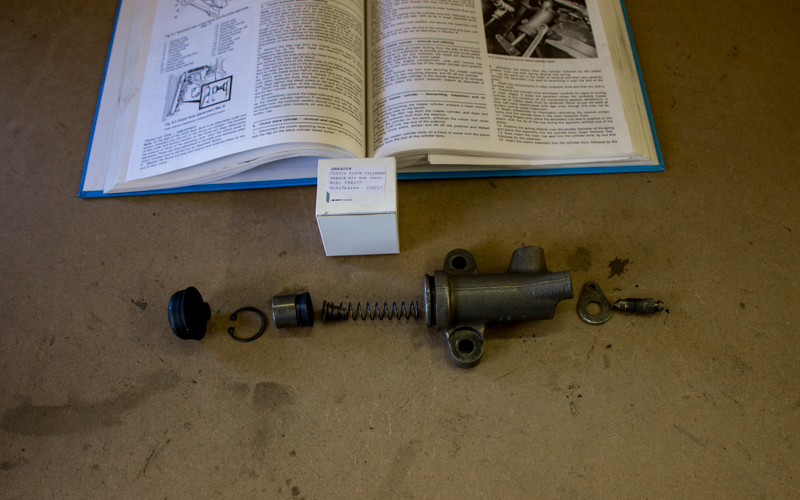
Next on the list was to take a look at the hydraulics. I decided to try rebuilding the clutch slave cylinder with a minispares repair kit, since the bore seemed to be in OK condition.
 
36581988301_f5a7891e24_o.jpg


Here are all the bits cleaned up ready to go together.
36551346092_dd1bc16386_o.jpg


And the finished article. 
 
36551343392_228d3d9e3a_o.jpg


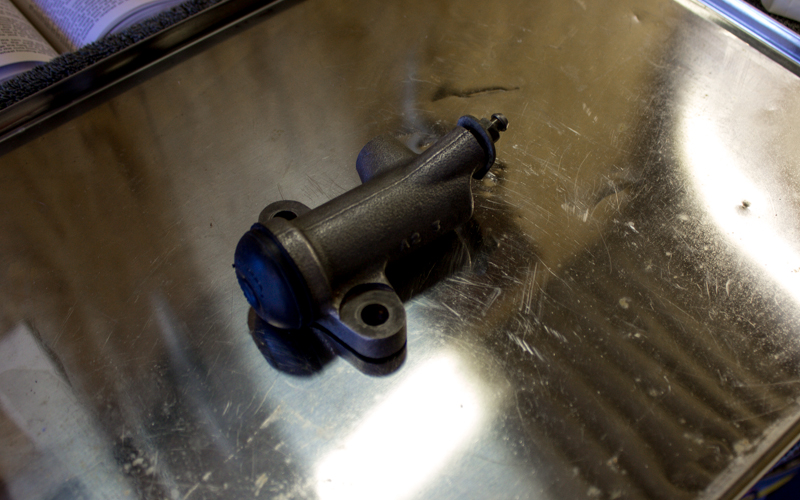
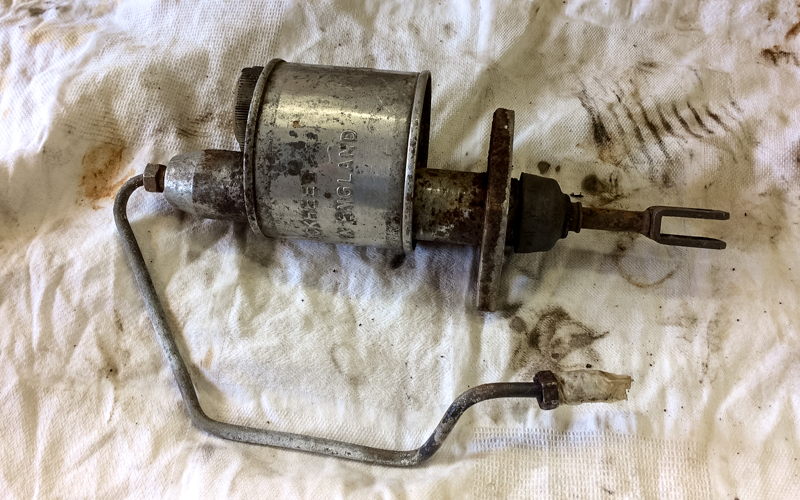
Then onto the master cylinder. It started off in a very grotty state as you can see, but again, since the important bits seemed to be OK I got another repair kit.
36581989751_c29fd24cd8_o.jpg


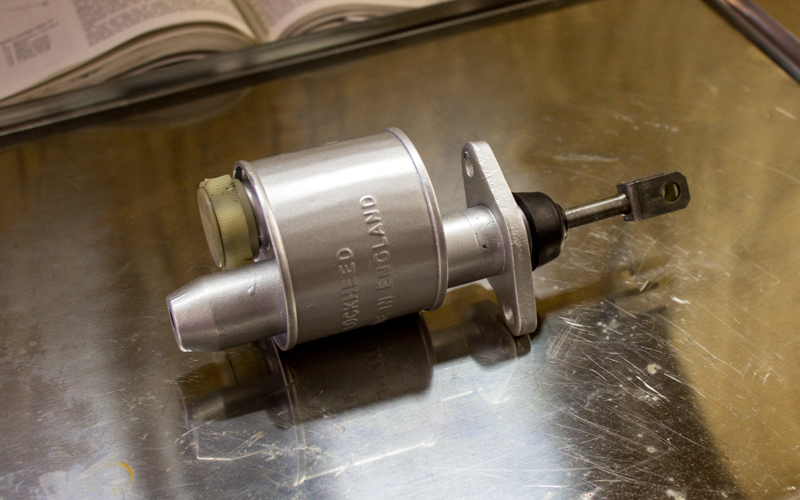
I soaked the cylinder in malt vinegar for a week to get rid of as much corrosion as possible, then wire brushed, primed and painted. Here is the rebuilt cylinder.
36325545150_5245aa5657_o.jpg
 

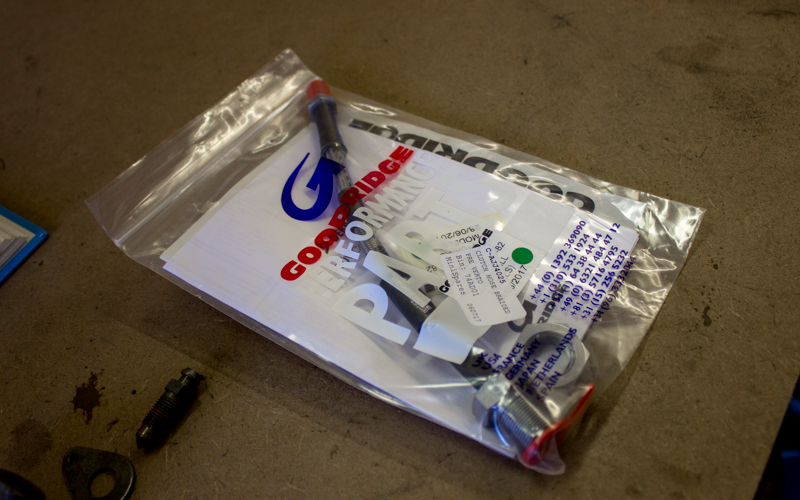
Needed a new hose, and the braided version was only a few quid more. So nice! I can see how buying performance parts gets addictive.
35911669603_af582450a8_o.jpg
 

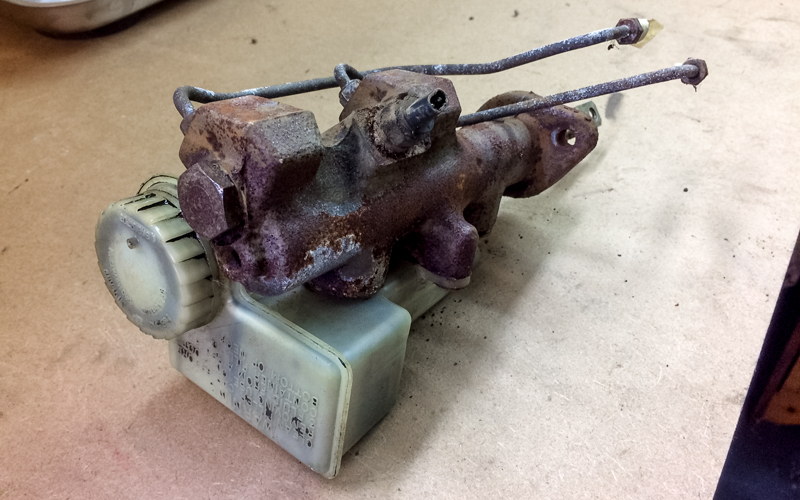
As for the brake master cylinder, I decided not to try to rebuild this thing in the end.
35886168314_138a1a026b_o.jpg


I took it all to pieces - unfortunately destroying the plastic pressure switch in the process, which is out of production. I thought about getting a rebuild kit and the newer cap with integrated warning switch, then just blanking the old hole with a bolt. After much umming and arring, and after reading some stuff which claimed the design of the cylinder wasn't too great in the first place, I decided to spend a few quid more and get a new GMC227 yellow tab version.


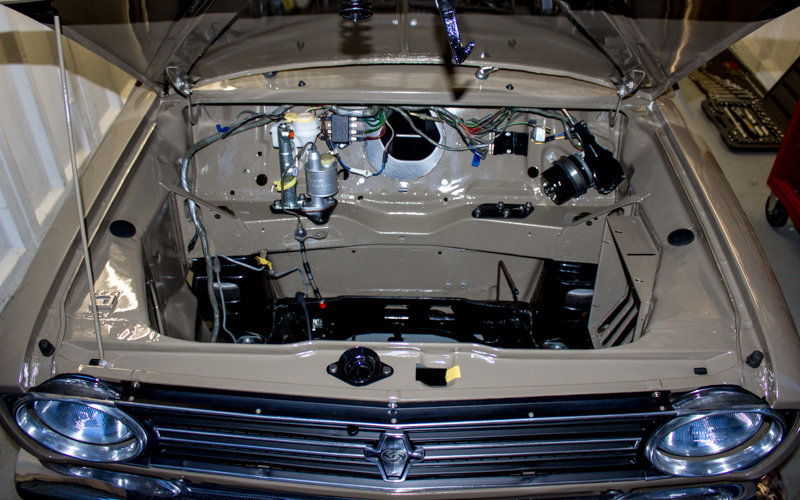
So this is the engine bay so far. Oh yes I also cleaned up and painted the wiper motor.
 
36582023001_1961102519_o.jpg


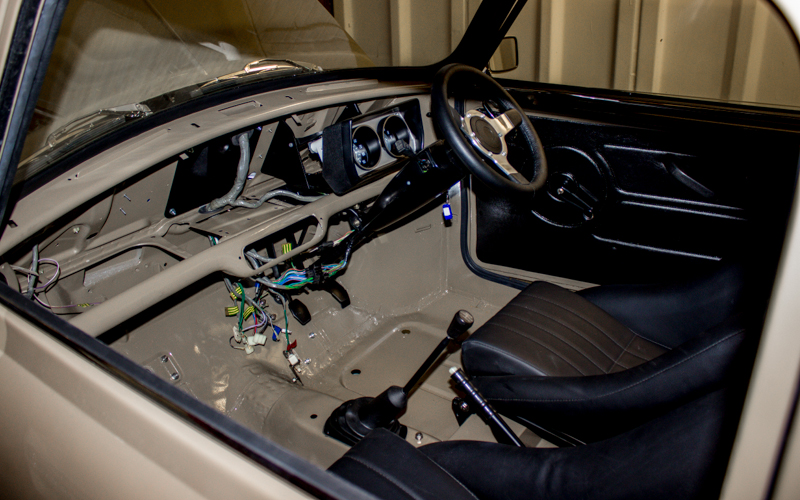
...and here is the interior with gear stick in, handbrake connected up, pedal box and dials in place. I've also got the front and rear looms in and have begun connecting things up. :)
 
36325544060_8b79cec98f_o.jpg


Coming soon: finally going to start working on the engine!
36551337112_6ab54c7fe8_o.jpg


#542 rich2

rich2

    Speeding Along Now

  • Members
  • PipPipPipPipPip
  • 351 posts

Posted 22 August 2017 - 12:30 PM

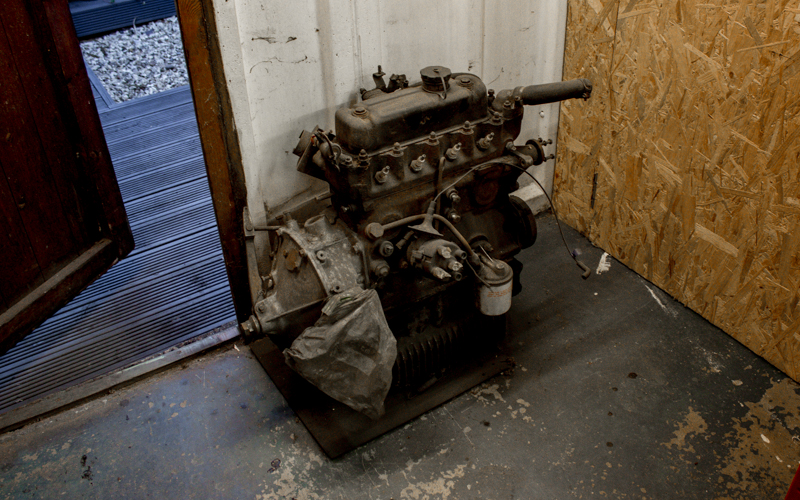
Right then! Engine strip-down!


I picked up the awesome Ultimate Mini Builder DVD to help me with this. I'm not building a 1380 engine, but it really helped to see someone doing the strip-down process. 


Here is the starting point.


36325542920_0fe1666d11_o.jpg


I locked the flywheel with an old piece of metal and removed the front pulley, then the timing cover and timing gears and chain. 


36551333202_0b9043e9fe_o.jpg


Picked up the essential flywheel tool to remove the flywheel - pre-verto on my car.


36551329402_f0c144a38b_o.jpg


No big bangs here, it just eventually gave way and eased off.


36325540600_0203e5a15d_o.jpg


Behind that, things appeared to be in good order. :)


36720927565_20c54820cb_o.jpg


On to removing the rockers and push rods, keeping them in order.


36325539140_f5e91cd209_o.jpg


Then off came the head. Looks manky in there, but given that there is no obvious damage, I am hoping this all looks OK to be reconditioned and rebuilt. The crank turned smoothly.


36674602536_0ed2492fd1_o.jpg


Gearbox. No missing teeth. Again everything appears to be able to turn smoothly.


36325537920_6c79e309bd_o.jpg


Block on the bench ready to remove crank and pistons.


36674599316_a63731750b_o.jpg


Crank bearings appear to be in good condition. Well lubricated and no obvious wear.


36720919935_655f8af128_o.jpg


Con rods and pistons out and labelled.


36581997531_395fca81d5_o.jpg


Many dirty bits! Maybe I should invest in a parts washer.


36674595116_e4c01d08a7_o.jpg

I've never rebuilt an engine before, so this weekend I am off to talk to some professionals to find out what to do next! :)


#543 Northernpower

Northernpower

    Mr. 7-Port

  • Members
  • PipPipPipPipPipPipPipPipPip
  • 2,410 posts
  • Name: Graham
  • Location: North Yorkshire (God's County)
  • Local Club: Its out there somewhere

Posted 22 August 2017 - 12:35 PM

What's the condition of the bushes in the primary gear?


#544 sonikk4

sonikk4

    Twisted Paint Polisher!!!

  • Admin
  • PipPipPipPipPipPipPipPipPipPipPip
  • 15,970 posts
  • Name: Neil
  • Location: Oxfordshire

Posted 22 August 2017 - 03:50 PM

Rocking along Rich, before you now it the engine will be done and off you go.


#545 johnR

johnR

    Up Into Fourth

  • Members
  • PipPipPipPipPipPipPipPipPip
  • 2,288 posts
  • Location: Dorset

Posted 22 August 2017 - 06:15 PM

You're where I've got to with my 1275 engine - I've just bought an engine stand on wheels and made an adaptor plate to suit the A+.
Are you changing the cam and having work done to the head?
JohnR

zTjdch0.jpg

Edited by johnR, 22 August 2017 - 06:17 PM.


#546 rich2

rich2

    Speeding Along Now

  • Members
  • PipPipPipPipPip
  • 351 posts

Posted 22 August 2017 - 07:19 PM

Northernpower: that's a good question, and something I will need to find out. It *looks* undamaged to my non-expert eyes but I need to find out if what to look for to make sure it's acceptable.

Neil: Yesss! The finish line is almost in sight! I am excited!

JohnR: yes I would love to get one of those. Bill Sollis uses one and it looks like it would make life easier. :)

#547 rich2

rich2

    Speeding Along Now

  • Members
  • PipPipPipPipPip
  • 351 posts

Posted 14 September 2017 - 08:25 PM

My stripped 1098 engine is now away at a trusted engine shop being worked on by the experts. It turns out it wasn't in very good nick after all! Work being done is as follows:

Full wash, acid dip and 'ultra clean'.
Unleaded head recon.
Crank polish.
Balance crank, pistons, flywheel.
Rebore block to +0.060".
Deck block.
Fit new cam bearings.
Rebuild to short motor.

New stuff on my shopping list is as follows:

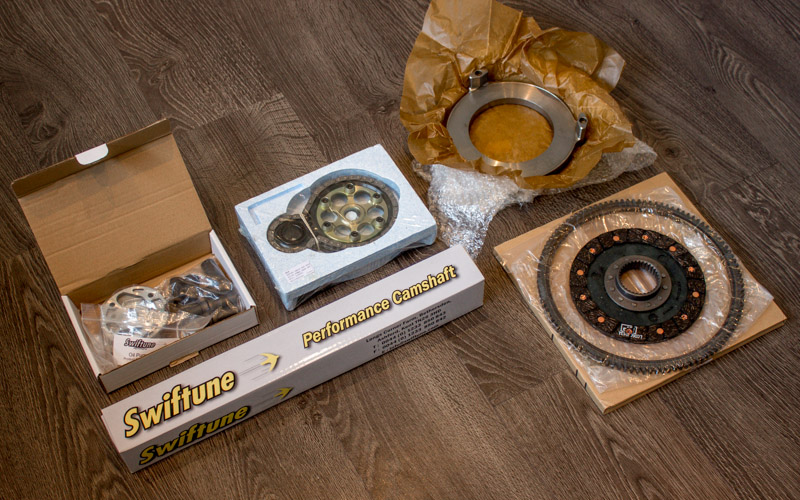
Swiftune SW5 cam kit with followers and oil pump.
Duplex vernier timing chain
Pistons @ +0.060".
Clutch plate, pressure plate, flywheel gear ring.
Minisport 1.3:1 roller rockers.
Water pump.
Electronic fuel pump.
Idler gear.
Alloy inlet manifold
LCB exhaust manifold
RC40 exhaust

I am going to rebuild the gearbox myself at home, following the guidance of the Ultimate 1380 build DVD. That will include new baulk rings and centre oil pickup.

Good job I saved up a bit of cash for all this! :0

Edited by rich2, 14 September 2017 - 08:27 PM.


#548 johnR

johnR

    Up Into Fourth

  • Members
  • PipPipPipPipPipPipPipPipPip
  • 2,288 posts
  • Location: Dorset

Posted 14 September 2017 - 09:55 PM

Can I ask what sort of price you were quoted for this work as it's very similar to what I hope to have done this winter? Presumably they'll de-shroud the valves at the same time?

#549 rich2

rich2

    Speeding Along Now

  • Members
  • PipPipPipPipPip
  • 351 posts

Posted 15 September 2017 - 07:51 AM

johnR: you have PM. 


#550 g111mds

g111mds

    Speeding Along Now

  • Members
  • PipPipPipPipPip
  • 432 posts
  • Location: Edinburgh

Posted 15 September 2017 - 08:25 PM

Enjoyed reading your thread through from the start today. Fantastic fabrication work, and truly lovely build you have on the clubman.

#551 rich2

rich2

    Speeding Along Now

  • Members
  • PipPipPipPipPip
  • 351 posts

Posted 16 September 2017 - 08:09 AM

g111mds: cheers mate!

#552 Homersimpson

Homersimpson

    One Carb Or Two?

  • Members
  • PipPipPipPipPipPipPip
  • 815 posts
  • Location: Redditch

Posted 16 September 2017 - 03:34 PM

Just read through this entire thread, all I can say is what a fantastic job you have made of it.  I love the colour as its not one you see very often.


#553 rich2

rich2

    Speeding Along Now

  • Members
  • PipPipPipPipPip
  • 351 posts

Posted 16 September 2017 - 05:20 PM

Homersimpson: Thanks! Glad you like it! :)

#554 rich2

rich2

    Speeding Along Now

  • Members
  • PipPipPipPipPip
  • 351 posts

Posted 24 September 2017 - 04:26 PM

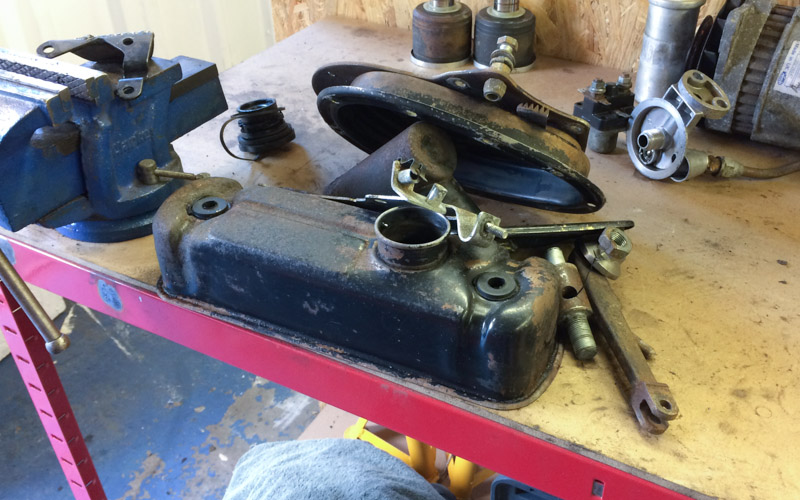
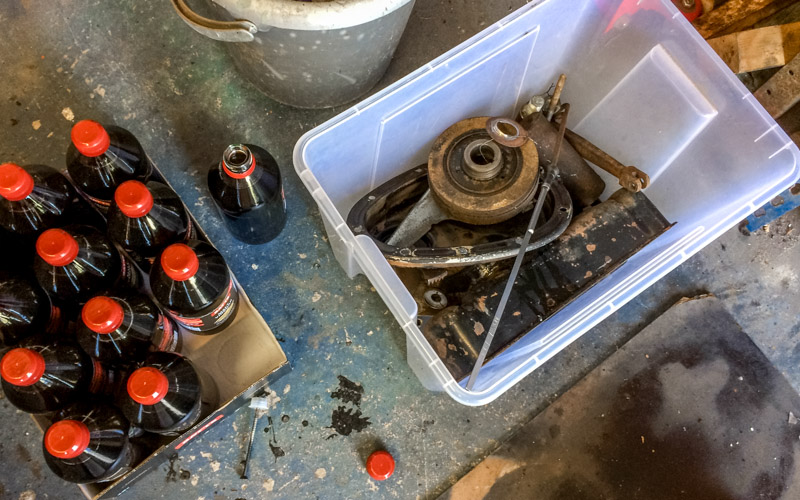
With most of the engine away with the experts, I am left with a pile of dirty rusty parts to clean up. Joys!


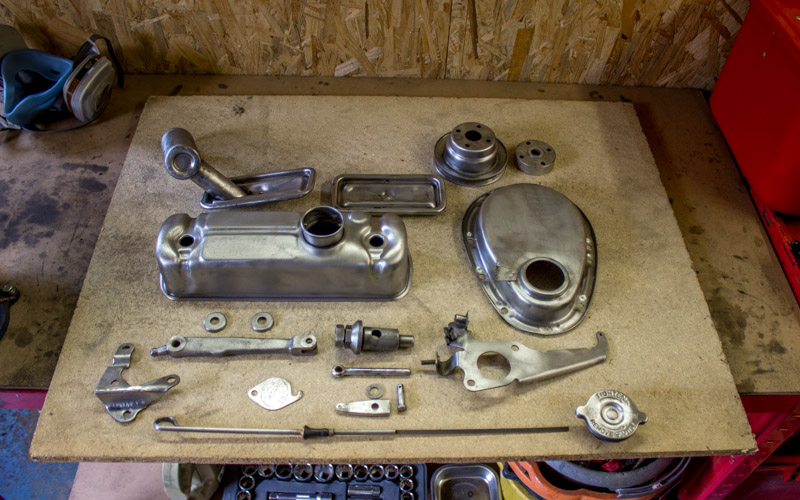
I am sticking with this rocker cover rather than buying a new one because I like the original and understated look of it. Moreover, this engine build is getting well dear, so I'm trying not to bankrupt myself by forking out for things which I can restore with a bit of elbow grease.


37428752035_dc48183bd5_o.jpg


Everything went in this box for a fortnight with some nice Lidl vingar.


36616829323_c7d70544de_o.jpg


Then I hosed it all down and finished it off with a wire brush. The parts below are now getting painted in temperature resistance gloss black. (Not the clutch bits or the carb plate, actually)


36576385024_b359b33eea_o.jpg


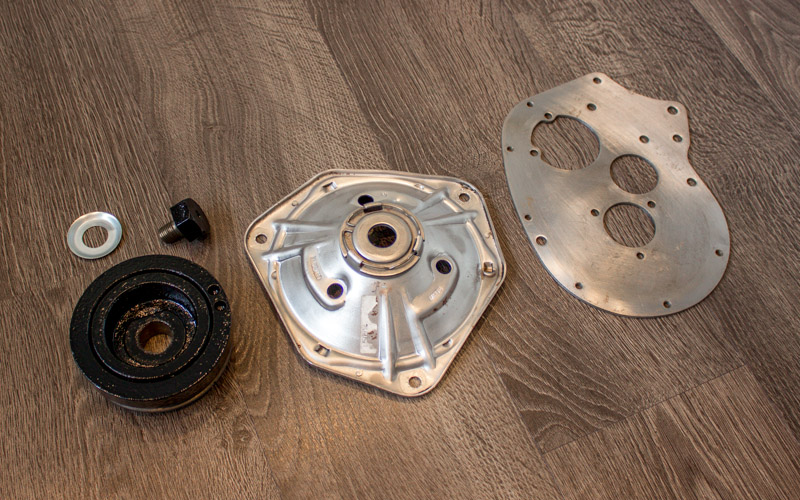
Here is the cleaned up front pulley, clutch diaphragm (waiting to hear if this is usable) and the back plate thingy that goes behind the timing chain. I'll paint the exposed bits of that when its in situ, I think.


37239243616_0aab50c8ef_o.jpg


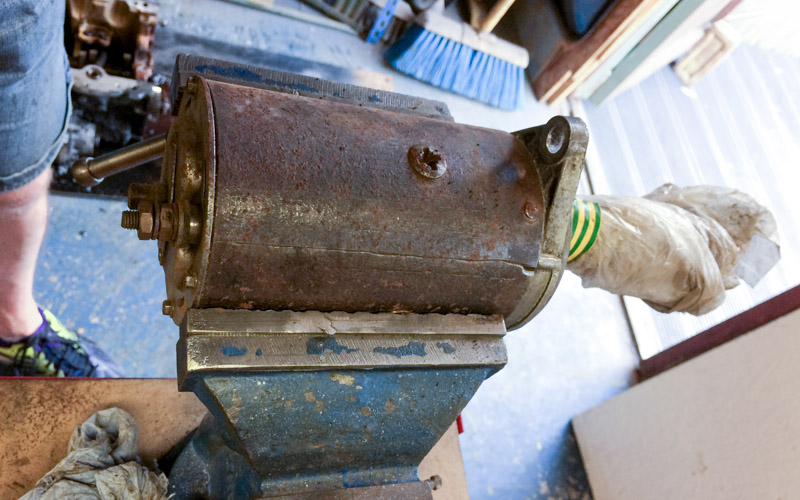
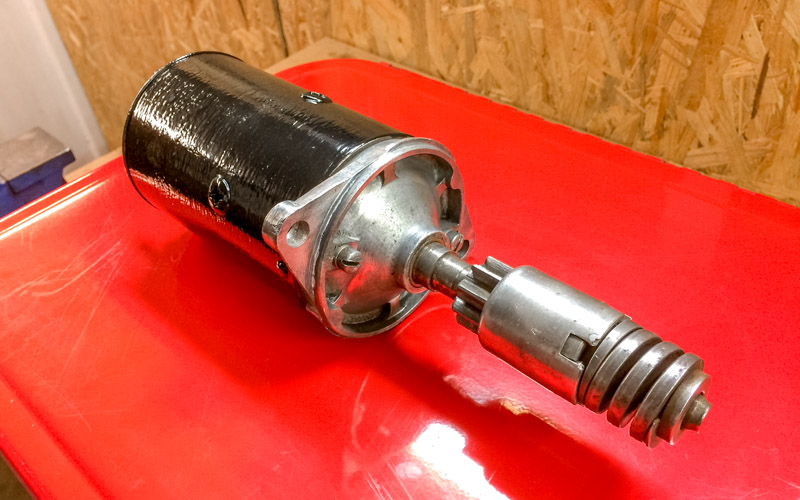
I also took a wire brush to the starter motor body. (I had already done this earlier in the project, but I didn't paint it at the time, so its rusted itself up again since.) *EYEROLL*


36616753643_79d6888389_o.jpg


Looks a bit more presentable now.


36576482254_a56ceba174_o.jpg


I also received a few of the bits I had ordered. I went for the duplex chain because they used one on the Ultimate 1380 build DVD so I thought it was an obvious choice. Plus, adjustable. Then I read in this months mini magazine that Keith Calver is not a fan at all, and says people fit them because of 'folklore'. *SIGH* Oh well.


Still waiting on the roller rocker assembly from minisport.


36616828433_1590d24a69_o.jpg


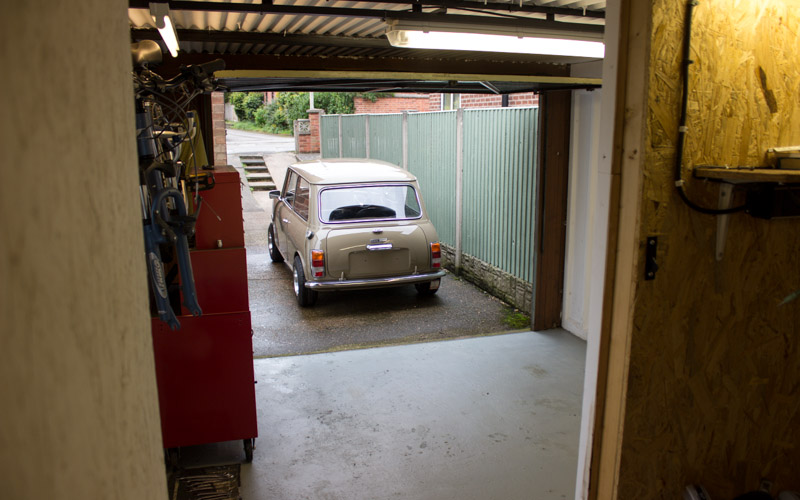
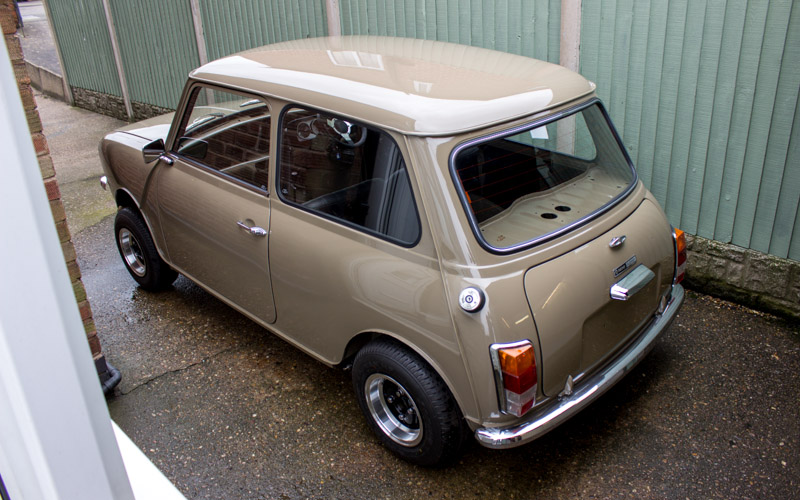
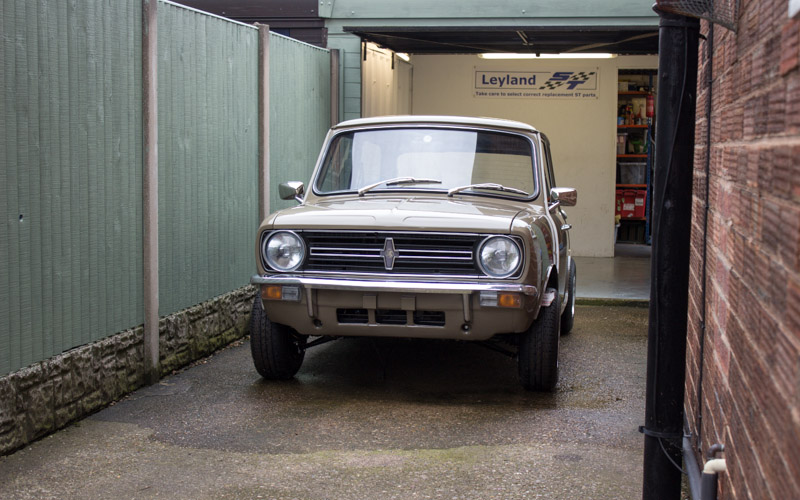
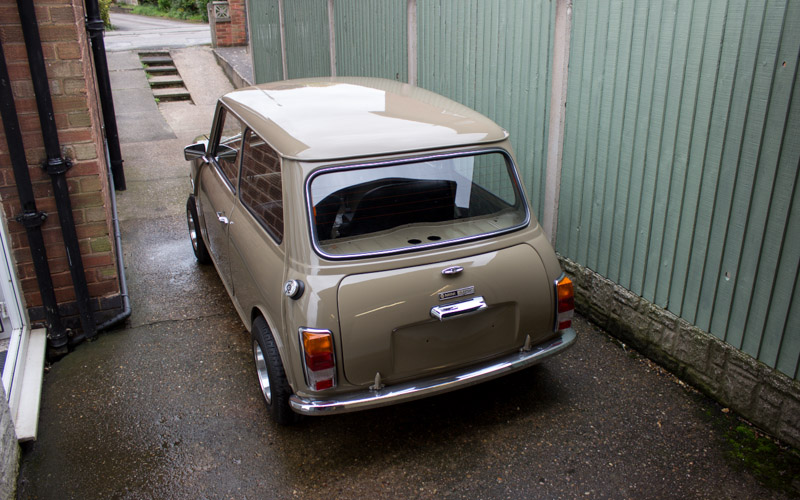
As the car has been sitting in the garage for over a year since it was painted, it was starting to look a bit dusty so I pushed it out onto the driveway to give it a wash.


37239242976_b22c6d9a61_o.jpg


36616755363_c5bbbc0d6f_o.jpg


Can't wait to get the engine in just to weight the front end down a bit!


36616754513_7508404f54_o.jpg


36616754973_97e15b9a54_o.jpg


#555 sonikk4

sonikk4

    Twisted Paint Polisher!!!

  • Admin
  • PipPipPipPipPipPipPipPipPipPipPip
  • 15,970 posts
  • Name: Neil
  • Location: Oxfordshire

Posted 24 September 2017 - 05:55 PM

Shiny Rich, looking very good.


2 user(s) are reading this topic

0 members, 2 guests, 0 anonymous users