Been a while since I've been on the forum but glad to see your still doing your usual high standard of work Rich. You've gone into some detail with that bonnet job there and it looks like you've cleaned out Lidl's entire stock of Malt Vinegar too!!

1979 Rust Heap Clubman Rebuild
#331

Posted 22 May 2013 - 08:51 PM
#332

Posted 22 May 2013 - 10:07 PM
hi, great work!! goodluck with the build!
can you tell what are those clamps that you used in order to keep the outer sill fixed to the car? )=(sort of rivits)
thanks
joseph abela
Malta
#333

Posted 23 May 2013 - 06:33 AM
Glad to see it's not just me who like the look of mini parts in the house. My wife loves it too lol. Great work on the bonnet, just need jigsaw skills to put back together now.
Graham
#334

Posted 23 May 2013 - 06:51 AM
great looking build so far!
Youve got some good fab skills!
Cant wait for the finished product!
#335

Posted 23 May 2013 - 07:39 AM
Thanks everyone! I've been a bit busy doing some work on the house over the past few weeks, but I've managed to get some minor progress in on the mini. I'll post some photos soon.
Ben_O: Thanks! Believe me - I'd love to get some more specialist cutting/fabrication tools, but I'm just trying to do the best I can with what I've got right now. I'm just more interested in doing it as well as possible than finishing it quickly. :)
Nossedout: They are clecos (aka skin pins). I got mine from here I think: http://www.frost.co....CFU5b3godqg0Adg Not cheap but very handy for that sort of work!
Edited by rich2, 23 May 2013 - 07:39 AM.
#336

Posted 23 May 2013 - 08:01 AM
Nossedout: They are clecos (aka skin pins). I got mine from here I think: http://www.frost.co....CFU5b3godqg0Adg Not cheap but very handy for that sort of work!
These are handy when you work with aircraft for a living
Edited by dominicdee, 23 May 2013 - 08:01 AM.
#337

Posted 23 May 2013 - 07:26 PM
rich2, thanks! much appreciated!
Joseph
#338

Posted 28 May 2013 - 08:03 PM
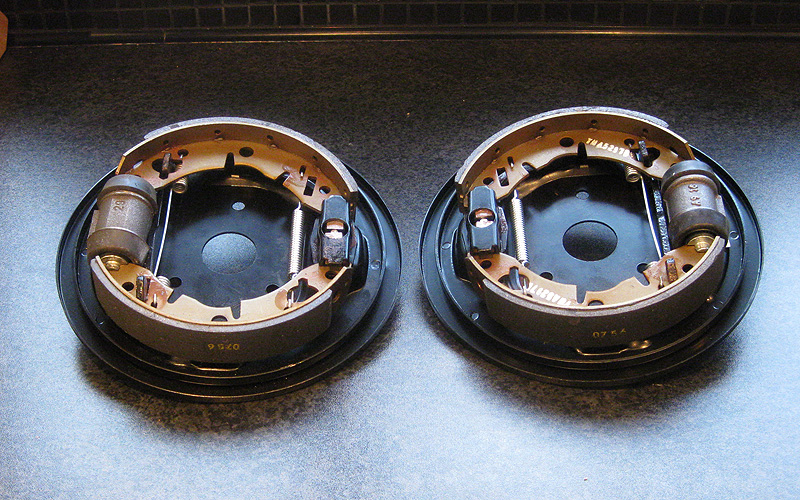
Brief intermission from bodywork! Decided to do something mechanical! First up: rear brakes. The only serviceable original parts that were on the car were the handbrake levers and one wheel cylinder. Everything else is new. Glad I picked up the little tool at Himley (bottom right) to fit the cylinder retaining clip. :) The Haynes manual was also very handy.

Not to shabby. Must admit I find doing this stuff really satisfying. Its like adult lego!
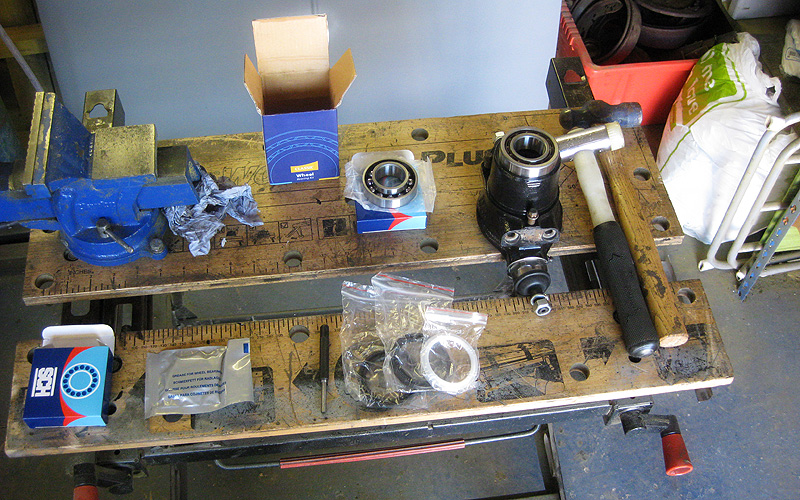
Then I drifted the new wheel bearings into the swivel hubs with the help of a rubber mallet. I had already shimmed up and fitted new ball joints.
I cheated with the front brakes and bought them pre-built because it worked out cheaper.

Not to shabby considering the humble rusty origins of these swivel hubs! The only original parts here are the hubs, steering arms and some bolts. I found some nice stainless steering arm retaining plates at smiffy's bits, but you can't see them here because I took the photo from the wrong angle. Derp.

Finally, on I was up late having a beer and browsing ebay when my finger slipped and I accidentally bought these awesome 100+ alloys!
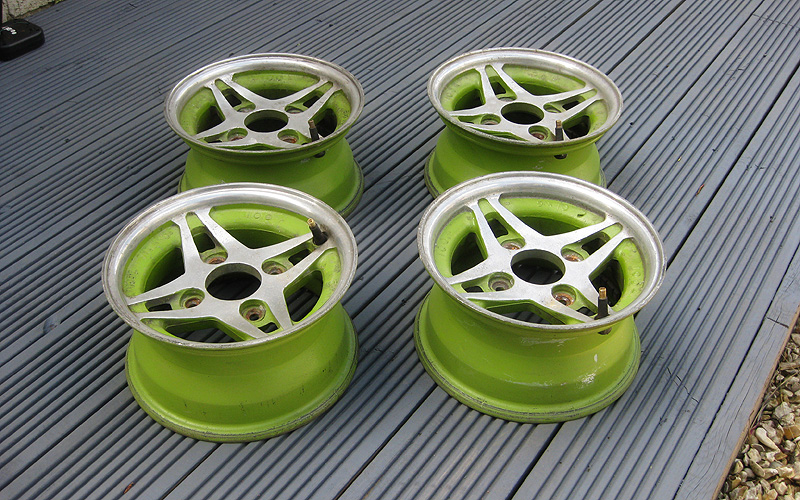
They are in need of some reconditioning, and of course the green has to go and be replaced with black; but this is exactly the kind of wheel I have been looking for. Of the period, 10 x 5, and not available to buy new. :)
#339

Posted 28 May 2013 - 08:05 PM
Admire you for sticking with the front drums Rich and i like the wheels mate.
#340

Posted 28 May 2013 - 08:33 PM
The bonnet is finally rust treated, back together, and in primer. At last. I got it to this stage before realising I should probably check the profile against the wings. OF COURSE the curvature was now quite a way off. Not good.
Then I remembered hearing that fitters at Longbridge used a chunk of wood to lever doors into the aperture when they didn't fit. Throwing caution to the wind I hand bent the profile of the bonnet into shape and all was well. Sounds dirty but it is fine now. (The hinges are in place here because I was checking the fit to the scuttle).

I bought some tubes of this PU18 sealant from ebay as recommended by a TMF member. This was used to stick the brace to the skin as it is only welded at the edges. I can also use it for seam sealing which is nice.

With the bonnet in one piece, I could fit the hinge brackets I made up ages ago. I positioned them by sitting in the engine bay with the bonnet, scuttle and wings clamped in place. Can't believe I didn't take a photo of the car like this. Oh well.

With the hinge brackets sorted, the scuttle could go on. I deleted the extra wiper holes first by welding in some little discs of steel.

Job done.

The profile of the new scuttle married up quite well with the A pillar. I will tidy this up further at a later date.

Sadly, while I was working in this area, I noticed that rust was starting to come through the primer on the front bulkhead. Not happy at all. There was basically only one thing to do.

Back to bare metal.
Then proper rust treatment with my favourite POR15. Seriously. I should be on commission. You can paint over this stuff, so its all good.


Surfaces where the wings will be fitted are also painted and ready.

The wings are going on next! Rock and indeed Roll. :)
#341

Posted 28 May 2013 - 08:36 PM
Thanks Neil! On one hand, the performance of drum brakes is obviously not a patch on discs, but on the other, they are more original spec, and most importantly cheaper. Which is an issue! :)
#342

Posted 28 May 2013 - 08:38 PM
looking great can not wait to see it in some paint. cheers tom
#343

Posted 28 May 2013 - 08:41 PM
Thanks Neil! On one hand, the performance of drum brakes is obviously not a patch on discs, but on the other, they are more original spec, and most importantly cheaper. Which is an issue! :)
I understand where you are coming from money wise Rich but after having done the disc conversion i would not have drums again. The 68 mile journey i did in Paddy when i picked him up was eventful to say the least with front drums.
#344

Posted 29 May 2013 - 07:00 AM

They are in need of some reconditioning, and of course the green has to go and be replaced with black; but this is exactly the kind of wheel I have been looking for. Of the period, 10 x 5, and not available to buy new. :)
ooooooo these are nice!
#345

Posted 02 June 2013 - 08:09 PM
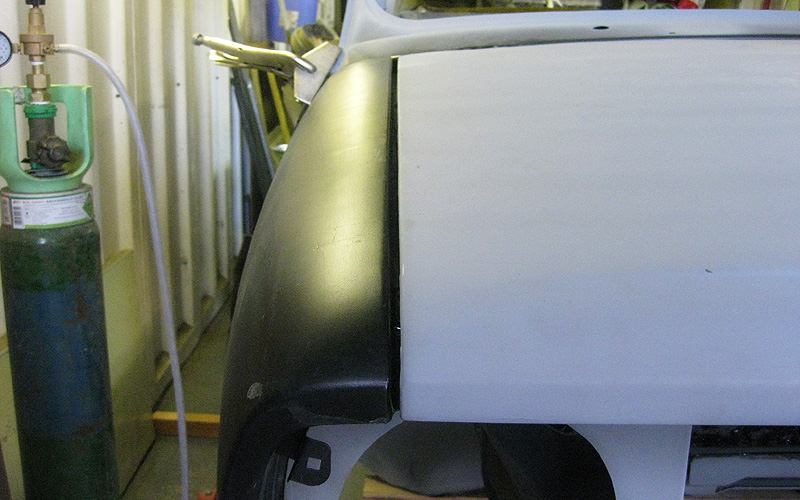
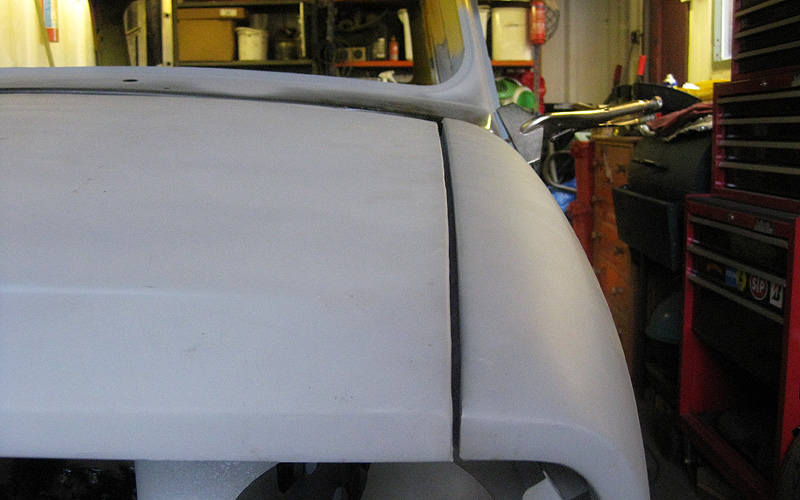
Started trying to get the wings in place this weekend. Not an easy task! I'm trying to get the bonnet gaps as sweet as possible by fitting the wings in exactly the right place. I think I've made some progress, but I've got a little way to go yet...
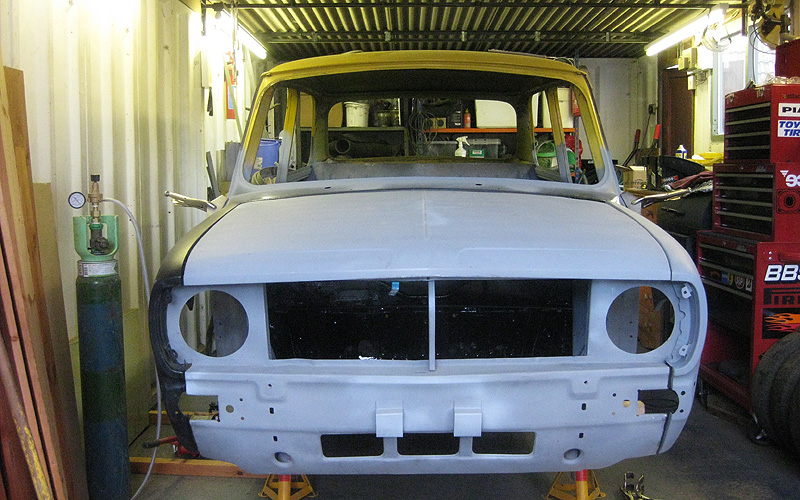
In the photo above I think the bit of the OS wing that connects to the headlight surround should be behind, like I have set it up on the other side. I haven't been able to find any photos to verify it though. When I got the car this bit didn't even exist! Does anyone know?
NS gap is not too bad but I want to get it closer!
OS gap is also not too bad but some bonnet fettling is needed to match the profile of the wing.
The gap from bonnet to scuttle is pretty huge but maybe its supposed to look like this? I should have paid more attention to other clubbys at Himley! I'll see if I can force the wings backwards further to close it up an extra couple of mm.
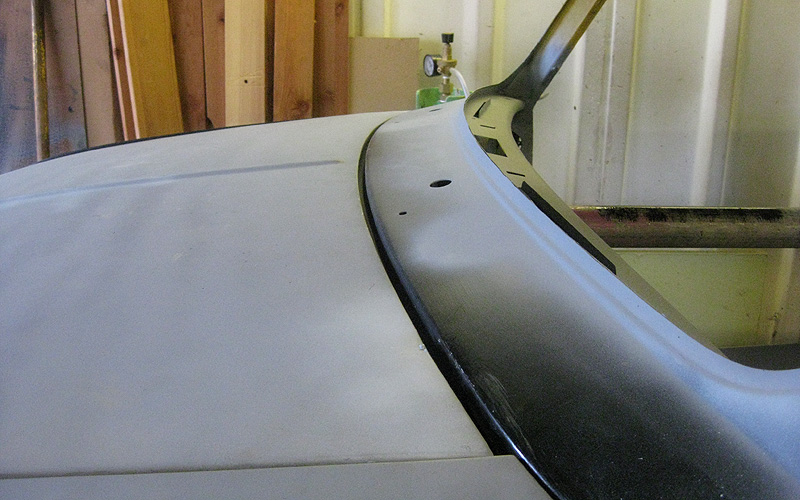
I think the time and effort fettling this area will be worth it because I really want to avoid having to cut/extend the bonnet if at all possible.
3 user(s) are reading this topic
0 members, 1 guests, 0 anonymous users
-
Bing (2)


