
1979 Rust Heap Clubman Rebuild
#316

Posted 11 March 2013 - 10:59 PM
#317

Posted 13 March 2013 - 05:07 PM
#318

Posted 14 March 2013 - 01:14 PM
#319

Posted 07 April 2013 - 05:46 PM
I had always thought the bonnet that came with the car was OK, and wouldn't need any work. I should be so lucky.

Oh dear. Apparently the factory had neglected to paint the bare metal before putting the thing together.

Thankfully I reckon I can deal with the situation without too much pain as the rust is superficial. I was surprised to find that the brace is mostly 'glued' to the skin with some mystery substance. Does anyone know what this is? I will need to get some to stick it back on at some point! The only welds were at the edges, so it came off quite easily. Will set about fixing all this stuff up as my next job.

Also made a little purchase from the For Sale section this week as my radius arms have had it.

Now I just need some rear brakes and a few more bits and pieces and I will have everything I need for both subframes. :)
#320

Posted 07 April 2013 - 08:30 PM
#321

Posted 07 April 2013 - 09:40 PM
#322

Posted 28 April 2013 - 08:16 PM
Just a small update on the progress with the bonnet.
I decided there would be no hiding from the rust in the bonnet, so the only thing for it was to strip it down and deal with it properly. Here are the dismantled bracing parts in my high-tech chemical bath. (Chemical bath consists of some planks of wood and a shower curtain)
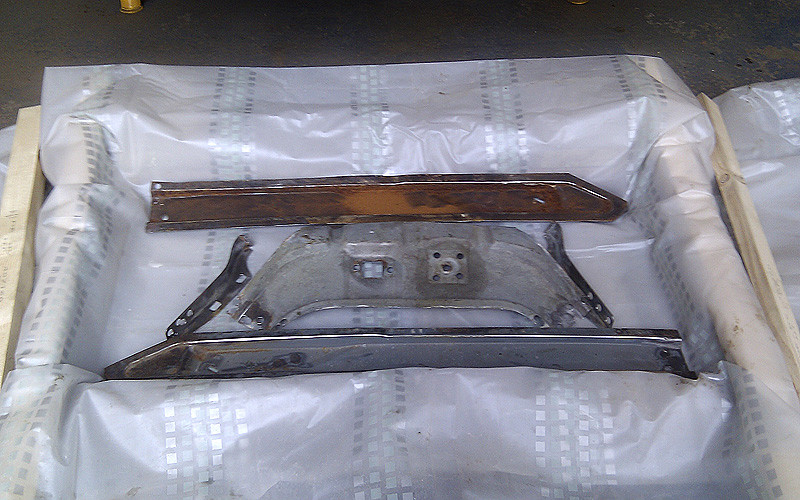
In goes copious Lidl malt vinegar.
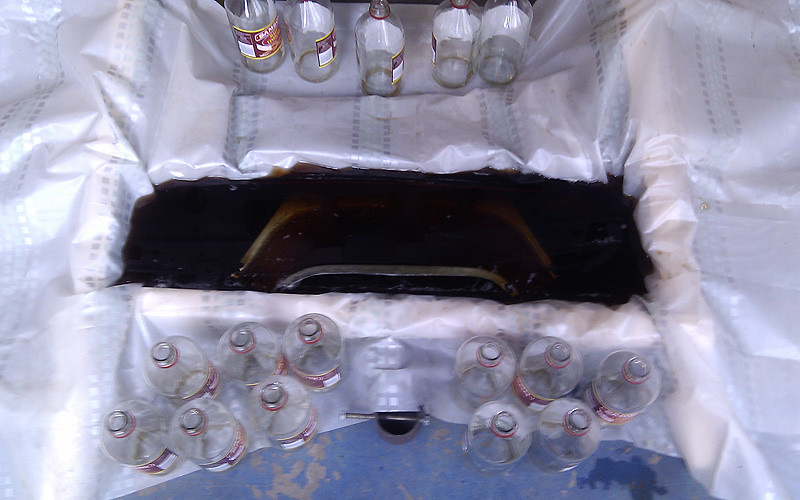
One week and a hose down later... rust free metal! (ish.)
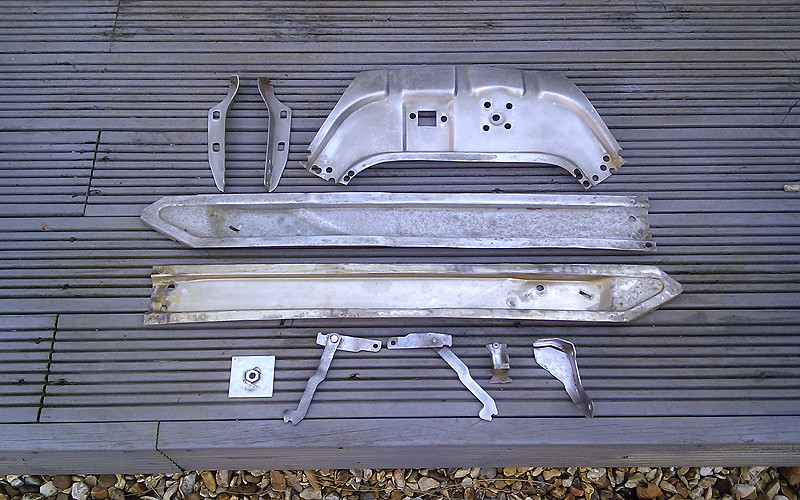
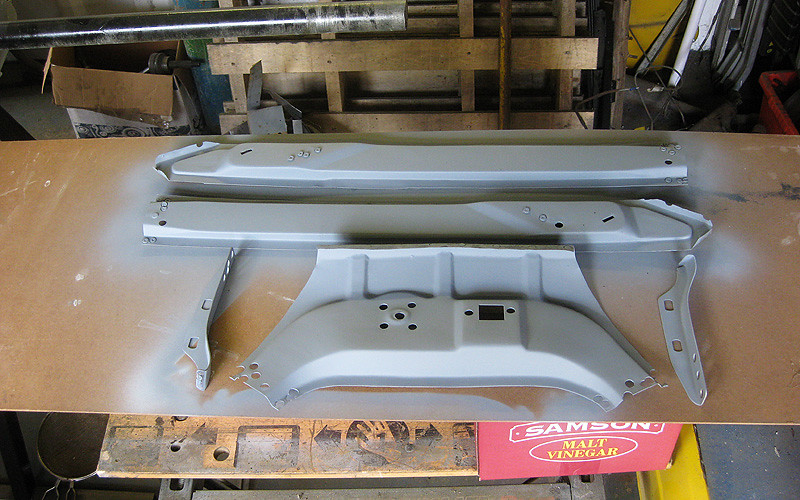
The outward facing sides were treated with Kurust and primed. The inside surfaces will be POR15'd as they are hidden from view. I have purposefully left the old welds in place in an effort to reassemble this item as accurately as possible.
Meanwhile, I realised the edges of the bonnet skin are reinforced with an extra thickness of steel for rigidity, which had formed a rust sandwich. So those had to be drilled off. I'll make some new ones later.
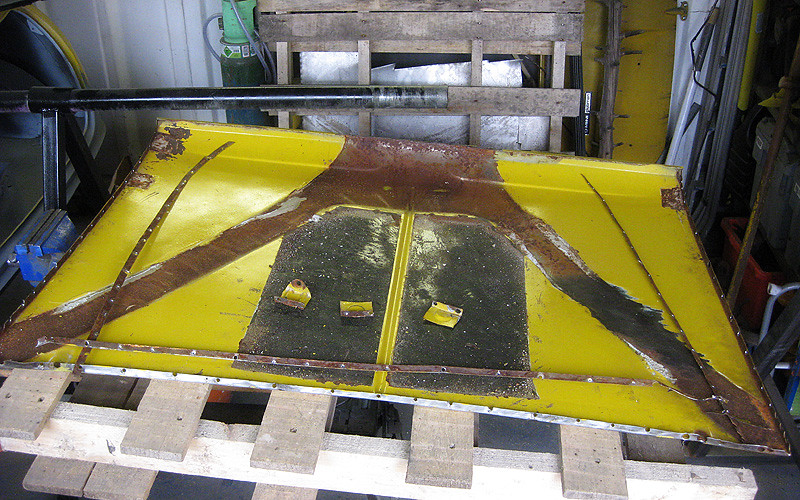
Then out came the nitromors and strip & clean disc on the angle grinder to remove the old paint. Much noise and dust ensued. My neighbours hate me.
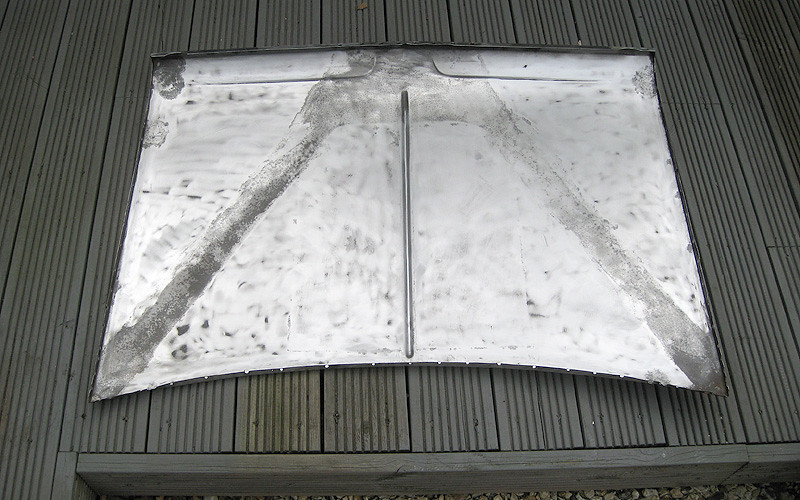
Felt I was on a roll, so I went for the double and boshed the other side too. This panel has now joined the growing stockpile of mini parts living inside the house while it waits to be painted. :)

Looking forward to Himley Hall in a couple of weeks! Might accidentally drop some cash on a part or two. Don't tell my wife!
#323

Posted 28 April 2013 - 08:26 PM
Good effort there mate. i really hope i don't have to go that far with my replacement bonnet for Paddy.
#324

Posted 29 April 2013 - 08:42 AM
just goes to show the effort that is required to do a great job!! very well done, keep the updates coming ![]()
#325

Posted 29 April 2013 - 03:35 PM
Still epic! Love it ![]()
#326

Posted 29 April 2013 - 05:36 PM
#327

Posted 30 April 2013 - 06:22 PM
Propper job there Rich, I dreaded taking the bonnet apart, I have got to do the same in a few weeks (after Himley) thank you for sharing this, I might electrolyse the lot though instead of using vinegar, leave that for the chips......See you at Himley
#328

Posted 02 May 2013 - 03:07 PM
Will be following and can't wait to see the end result!
#329

Posted 04 May 2013 - 07:30 PM
Rich I still can't get over the care you take. I am so ashamed at the lash up job I did with my bonnet. All the best with this fantastic restoration. I always enjoy your reports.
Hugh
#330

Posted 05 May 2013 - 06:45 PM
WOW!!
You should be so proud of yourself to start off with no previous experience and only basic tools and produce such quality work. You are an inspiration!
I'm Very impressed with the attention to detail and the finishes achieved.
I know everybody has already praised your fabrication skills but I'm going to say it again, everything is second to non. You really have the patients of a saint to be recreating such precise parts, especially that inner wing, parcel shelf brace! Looks like a heritage part! oh and the round holes in the hinge panel stiffener, couldn't believe my eyes when I read that you drilled a series of small holes the finished off with a file! they look like they have been cut with a step cutter!
I wish I was as far as this into my project but I don't have any panel suppliers near to me and being on the Isle of Wight, They really sting you on the postage so I have to order very carefully to avoid having to buy too many panels at once and bankrupt myself but still have enough bits to proceed!! aarrgh!
I will defiantly be keeping track of this project.
Good luck
Ben
1 user(s) are reading this topic
0 members, 1 guests, 0 anonymous users


