Jump to content


Photo
- - - - -

1979 Rust Heap Clubman Rebuild


  • Please log in to reply
625 replies to this topic

#271 hughJ

hughJ

    Soldiering Along

  • Members
  • PipPipPipPipPipPipPip
  • 727 posts
  • Location: Highlands, Scotland

Posted 07 January 2013 - 08:38 PM

Rich I am still following you and still amazed at what you do. That is an amazing floor replacement. You said above "so not very exciting" - I would disagree - I find it all exciting. Thanks for putting it up here.

Hugh

#272 Andymini

Andymini

    On The Road

  • Noobies
  • PipPip
  • 48 posts
  • Location: Montrose

Posted 07 January 2013 - 10:43 PM

Well I have just read this from start to finish! And all I can say is amazing and give me hope for my GT that I bought. Pick it up this Sunday can't wait to get stuck in and will be using your thread for reference.

#273 PNL629G

PNL629G

    On The Road

  • Noobies
  • PipPip
  • 48 posts

Posted 08 January 2013 - 12:00 AM

I too have read the whole thread tonight! Wow - amazing work, really high standard and to think where you started off from! Only thing about reading these (great!) long threads is that I'll only be able to follow in real time... Thanks for taking the time to photograph and post. My only critisism would be that your wedding ring looks shop bought... could you not have knocked one up? ; )

#274 josh.goddard

josh.goddard

    Speeding Along Now

  • Members
  • PipPipPipPipPip
  • 398 posts
  • Local Club: Derbyshire Classic Mini Club

Posted 12 January 2013 - 08:32 PM

Hi
Just read this from start to finish and i have got to give you credit some good fabrication skill gone on there.
keep up the work.

Josh

#275 F1L8EY

F1L8EY

    Super Mini Mad

  • Members
  • PipPipPipPipPipPip
  • 600 posts
  • Location: Cornwall

Posted 13 January 2013 - 09:16 AM

im just gonna repeat what everyone else is saying !! great fabrication, nice clean work... inspirational.

keep up the good work i shall be watching this clubby :D

Filbey

#276 chrisj

chrisj

    Mini Mad

  • Members
  • PipPipPipPip
  • 283 posts
  • Location: Leicestershire

Posted 16 January 2013 - 03:23 PM

I haven't had much time to browse on the forum of recent months but your project Rich is always one I nip on to have a look at, really inspiring work combined with a fantastic detailed write up.

Keep up the great work.

#277 daenesh

daenesh

    Speeding Along Now

  • Members
  • PipPipPipPipPip
  • 423 posts
  • Location: Malaysia
  • Local Club: Classic Car Owners Group

Posted 17 January 2013 - 09:51 AM

when u started off u weren't so good at welding and now my friend you have some mad skills!! keep the great work up..cheers

#278 rich2

rich2

    Speeding Along Now

  • Members
  • PipPipPipPipPip
  • 351 posts

Posted 21 January 2013 - 09:29 PM

Hugh: Cheers! I hadn't seen your thread for a while so I had a look to check on your progress just recently, and you've stormed it! Not far to go for you now!

Andymini: Just posted in your thread. :) I'll be keeping a close eye on your build. Your car is like my car's cooler big brother :)

PNL629G: Hahah! cheers dude!

josh: cheers! I keep meaning to drop in to stenson bubble on one of the dcmoc meet days to check out the minis. :)

F1L8EY, chrisj, daenesh: cheers! I will try my best to keep up the work!


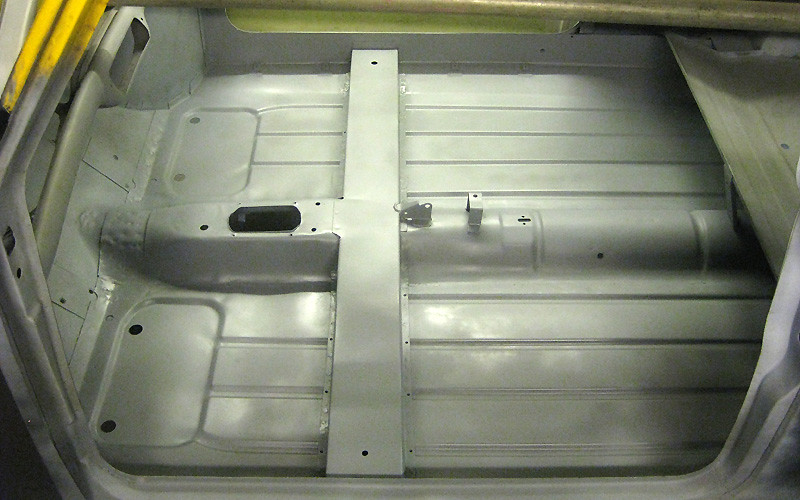
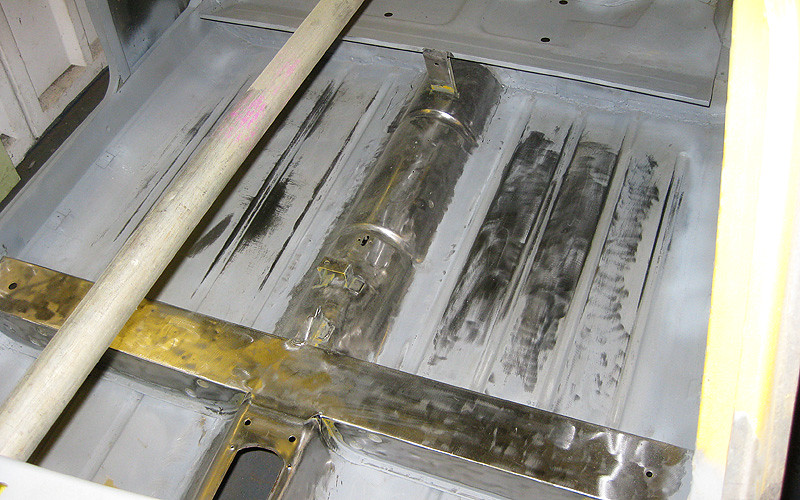
It was freezing cold in the garage this weekend, but alas, the paint was not going to strip itself off the tunnel and cross member...

Posted Image

I scrubbed some of the primer off the new floor while I was at it as I suspicious there might be some rust forming through the paint. It didn't seem to be an issue though as I only found bright metal.

I also took a wire brush and a ****-tonne of nitromors to the underseal on the under side of the tunnel. There is definitely surface rust going on here, so liberal kurust was applied.
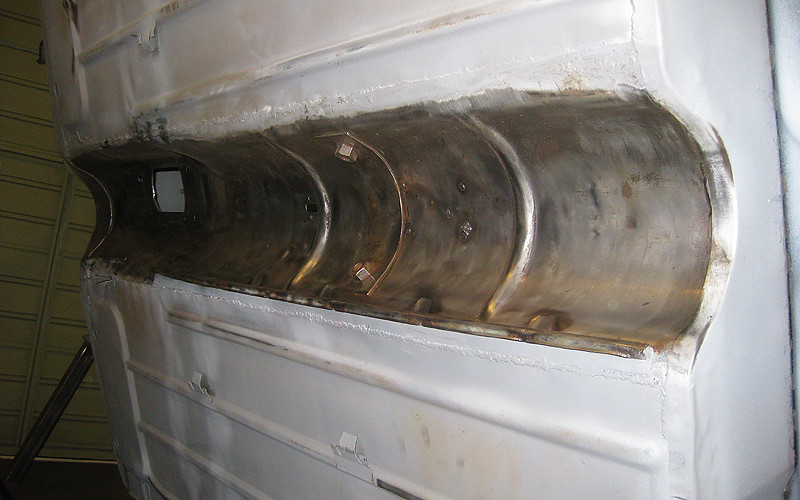
Posted Image

While I was at it, I kurusted all the metal I had just stripped inside the car too.
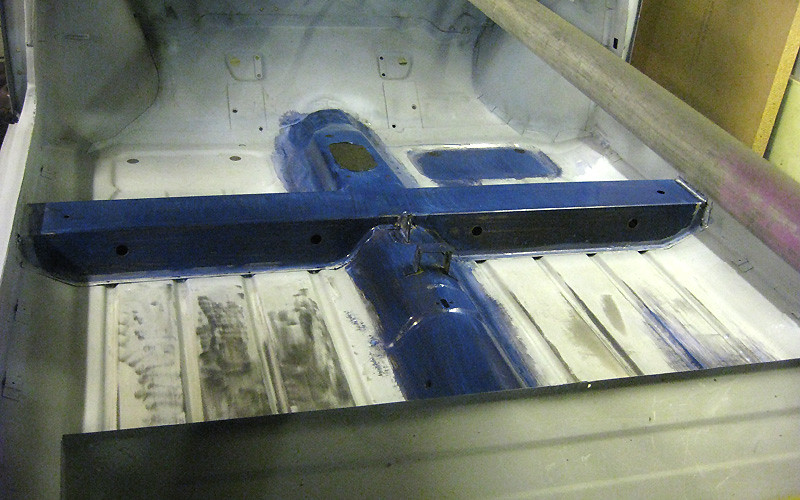
Posted Image

Then primed. BLING! Like a new car!

Posted Image

I decided not to grind the seam welds on the underside fully flat as they won't be seen in normal conditions and I didn't feel the need to unnecessarily risk thinning the metal. I can always go back and do this later if I change my mind.
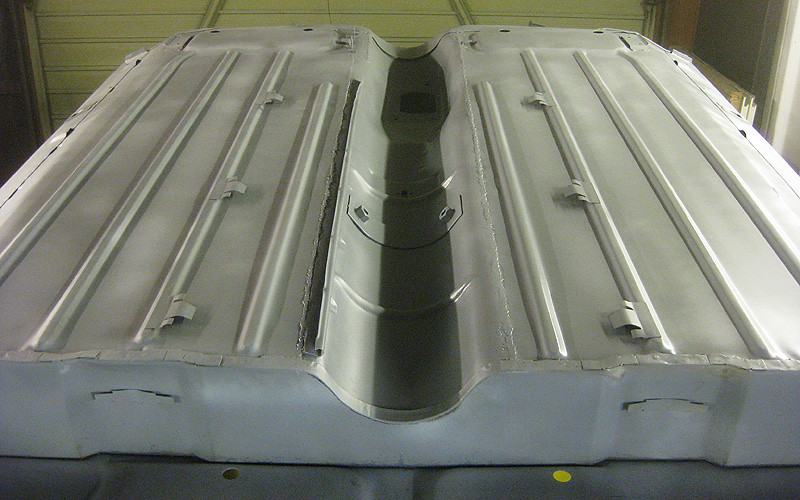
Posted Image

Also, following the wise words of Graham and Neil, I welded up the ends of the outer sills (which really should have gone inside the heelboard. whoops.)

Posted Image

So unless anyone can spot any glaring errors, (i am all ears guys!) thats about it for the floors I think? There are some dodgy rust areas on the roof I need to look at, but the next big job now will be the new front end. Exciting times!

#279 sonikk4

sonikk4

    Twisted Paint Polisher!!!

  • Admin
  • PipPipPipPipPipPipPipPipPipPipPip
  • 15,970 posts
  • Name: Neil
  • Location: Oxfordshire

Posted 21 January 2013 - 09:32 PM

Looking good Rich. By the time you stone chip the floor (that's if you are going that way) a good thick coat will cover the welds anyway.

#280 THE_MINI_BOY

THE_MINI_BOY

    Starting My Mini Up

  • Noobies
  • Pip
  • 3 posts

Posted 21 January 2013 - 09:41 PM

great project man p.s. i love how every thing you have is yellow e.t.c. car, engine hoist, axle stands XD

#281 grahama

grahama

    Up Into Fourth

  • Members
  • PipPipPipPipPipPipPipPipPip
  • 2,442 posts
  • Location: Warrington
  • Local Club: None in my area !!

Posted 21 January 2013 - 09:49 PM

Exactly what I was thinking Neil, stone chip covers plenty up !! Has come out very well.

Graham

#282 Minidarren83

Minidarren83

    One Carb Or Two?

  • Members
  • PipPipPipPipPipPipPip
  • 1,207 posts
  • Location: Stanford Le hope

Posted 21 January 2013 - 09:54 PM

That's my hope a good coat of seam sealer and stone chip it will look like factory. Your doing a great job with this looks nice and clean

Darren

#283 rich2

rich2

    Speeding Along Now

  • Members
  • PipPipPipPipPip
  • 351 posts

Posted 27 January 2013 - 07:08 PM

Just got back from Bingley. I hadn't really planned to go as I thought I would be busy today, but then at the last minute I was free so off I went! There were some seriously awesome cars on show.

I put my haggling hat on and scooped a few bargains on some suspension bits and bobs. Time to start building up some subframes I think ;)
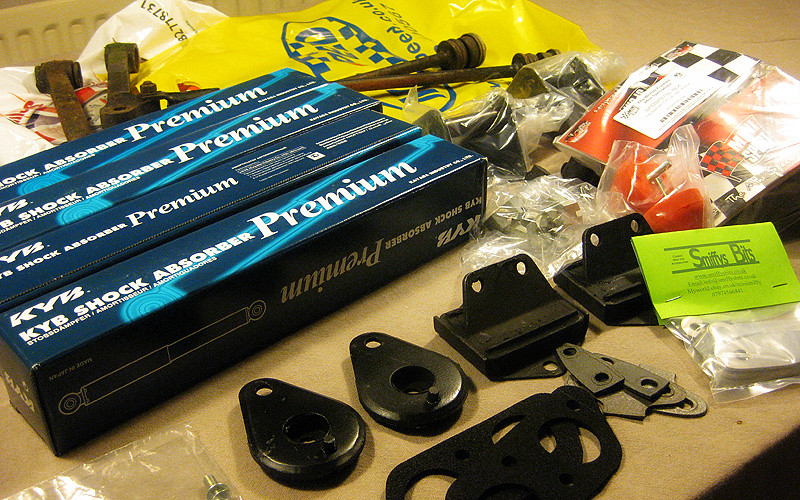
Posted Image

I am coming around to the idea of getting the car up and running on reasonably bog standard parts as opposed to bling high performance bits. The reason being is there is still a lot of money to spend, (not least on paint) and if I seriously want to get this car on the road at some point in the not-too-distant future I'm going to have to be a little economical in some areas! Also, things like dampers can easily be upgraded later :)

#284 rally515

rally515

    Up Into Fourth

  • Members
  • PipPipPipPipPipPipPipPipPip
  • 3,848 posts
  • Location: ask!

Posted 27 January 2013 - 07:18 PM

Your not alone on the spending problem there. I've been doing the same with my project & now running low empty on funds (formaly my saving >_< ).
Now im skrimping & scraping for bargins :goaway: .Still,i've been finding some really nice 2nd hand parts in sheds that you wouldnt find in minisport any time soon.
Good luck with finishing this up rich.

Cliff

#285 rich2

rich2

    Speeding Along Now

  • Members
  • PipPipPipPipPip
  • 351 posts

Posted 27 January 2013 - 08:44 PM

Cheers cliff! yeah I decided the lower arms on my car were a bit far gone, but rather than forking out upto 80 quid for a new pair, I got the ones in the photo above for £7 the pair including the tie rods. They seem to be in a fairly decent-ish state, and will be fine after a wire brush and paint. If not, I guess I've only lost £7 :)


1 user(s) are reading this topic

0 members, 1 guests, 0 anonymous users