Jump to content


Photo
- - - - -

1979 Rust Heap Clubman Rebuild


  • Please log in to reply
625 replies to this topic

#256 Minidarren83

Minidarren83

    One Carb Or Two?

  • Members
  • PipPipPipPipPipPipPip
  • 1,207 posts
  • Location: Stanford Le hope

Posted 19 November 2012 - 02:11 PM

Hi rich I've never commented before but have watched for a while and must say your work is very tidy. The only thing I can say of fitting the floor is on the next side would it not be easier to remove the heel board lip fit the floor and then reweld the lip if that makes sense and with the weld being in a bend it will be easier to blend and the floor will still sit inside the heel board. I was lucky and needed to replace my seat crossmember so cut it out and could slide the floor in that way. I don't mean it to be a criticism in any way your work is far neater than mine just thought it might help you out and be easier/stronger this way

Darren

#257 minimuk

minimuk

    Camshaft & Stage Two Head

  • Members
  • PipPipPipPipPipPipPipPip
  • 1,946 posts
  • Location: Midlands

Posted 19 November 2012 - 06:12 PM

second that Rich, further the MOT guys want to see the floor end inside the lip not welded on the outside, whole floors are a pain to put in especially with the crossmember left in.....other than that yr doing a fab repair job and a nice bit of bracing..... ;D

#258 rich2

rich2

    Speeding Along Now

  • Members
  • PipPipPipPipPip
  • 351 posts

Posted 22 November 2012 - 12:46 PM

OK. Thanks for the heads-up. I'll see what i can do about this on saturday. Might be able to bend the heelboard lip down with a few careful cuts, and get the floor inside...

#259 rich2

rich2

    Speeding Along Now

  • Members
  • PipPipPipPipPip
  • 351 posts

Posted 25 November 2012 - 08:13 PM

Hi - Just a quick update because its just more work fitting the floor this week, so not very exciting.

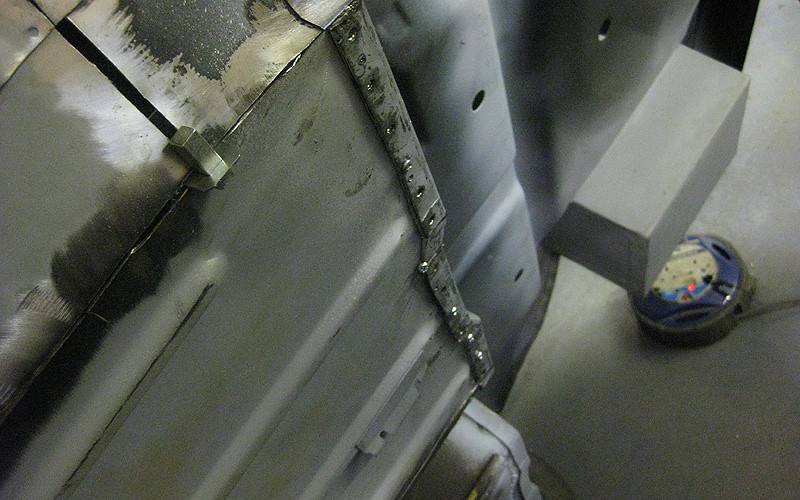
So after reading what you guys said above, I decided to take your advice and get the floor inside the heelboard. I made a little cut at each corner and bent the lip down with some mole grips. With the floor inside, I returned the lip to its correct position with the help of a calibrated impact tool (size large, or course). Glad I did this, because it looks much more factory this way.
Posted Image

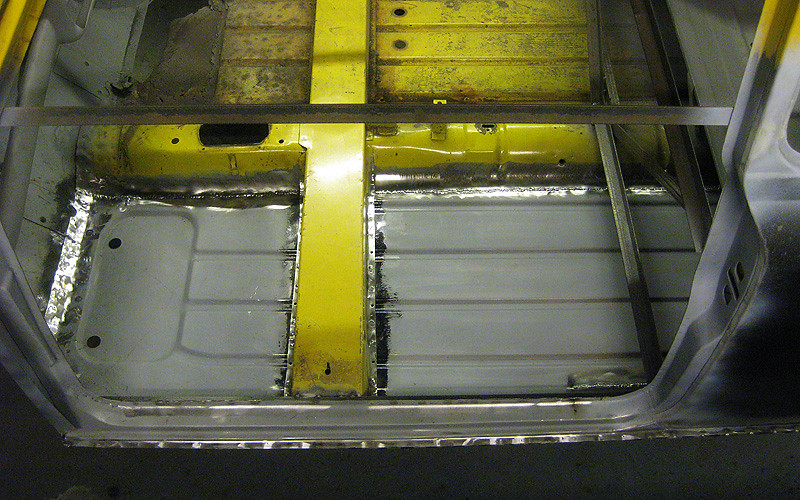
The floor is plug welded in at the heelboard end, and I also added some stitch welds to the bottom for extra security. Then came the weldathon to attach the new floor to the tunnel. I took a long time over this, allowing each 5cm of seam weld to cool before moving on to avoid warping. Didn't do too badly. There is a bit more more welding to do under the rear squab and then a lot of grinding and tidying up, but I was pleased to get this far with it today. :)
Posted Image

#260 alex-95

alex-95

    I am THE CLAMP MAKER

  • TMF+ Member
  • PipPipPipPipPipPipPipPipPipPip
  • 6,019 posts
  • Location: l

Posted 25 November 2012 - 08:35 PM

Look's great, doing an excellent job.

#261 Petrol

Petrol

    One Carb Or Two?

  • Members
  • PipPipPipPipPipPipPip
  • 967 posts

Posted 28 November 2012 - 11:20 PM

Quality fabrication going on here. Thanks for sharing

Pete

#262 Crossbow

Crossbow

    Starting My Mini Up

  • Noobies
  • Pip
  • 1 posts

Posted 29 November 2012 - 11:02 AM

Just read the whole thread. Very impressive and inspiring work. Not to mention the top notch quality. I was in to minds about DIYing the body work, but this has given me comfidence. Here goes nothing...
(famous last words)

Keep it up.

#263 rich2

rich2

    Speeding Along Now

  • Members
  • PipPipPipPipPip
  • 351 posts

Posted 06 January 2013 - 09:08 PM

Cheers guys!

Crossbow:I wasn't sure before I started either, but if you take your time and read enough threads on this forum, its not too difficult to get started. :)

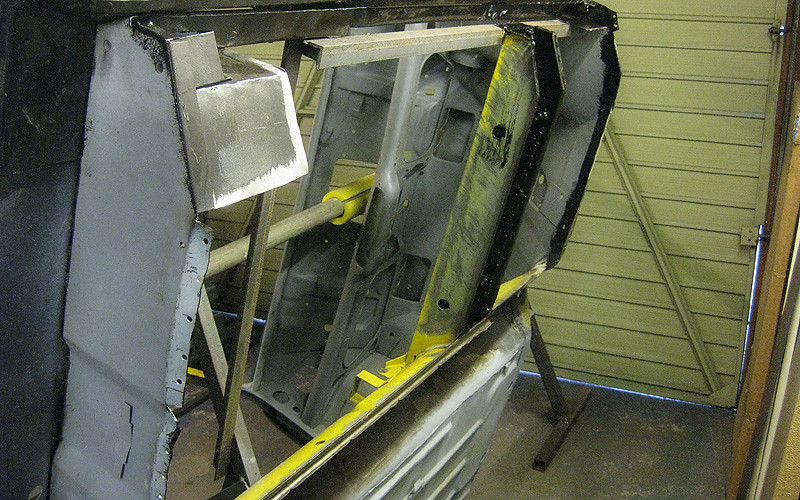
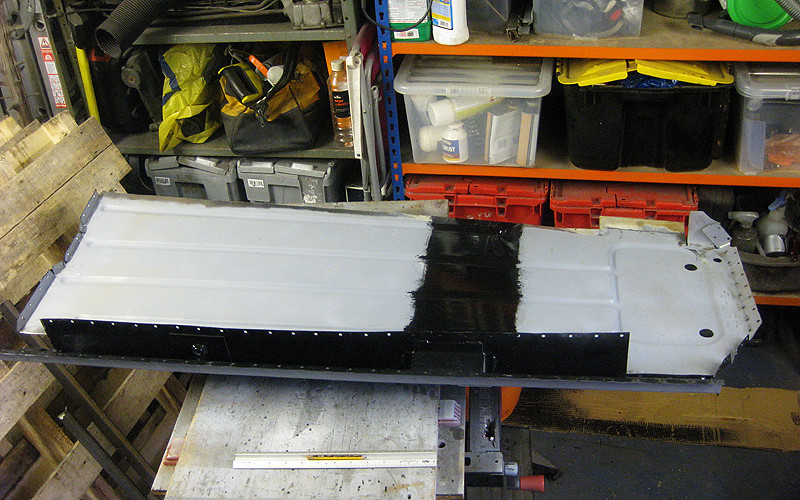
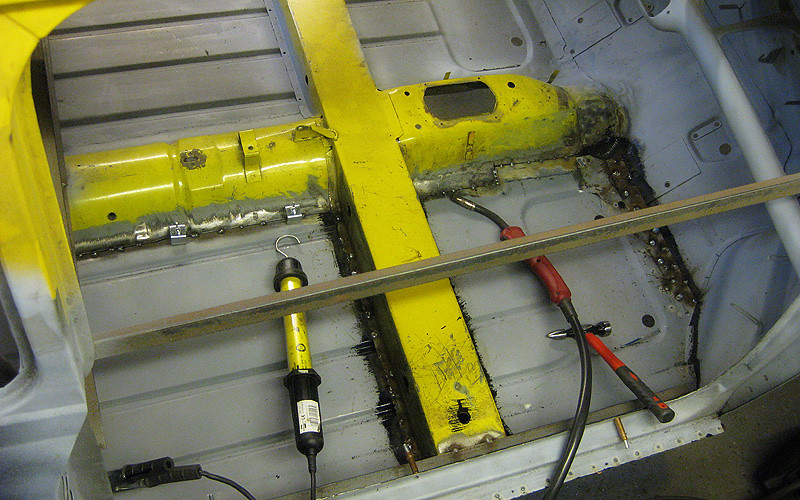
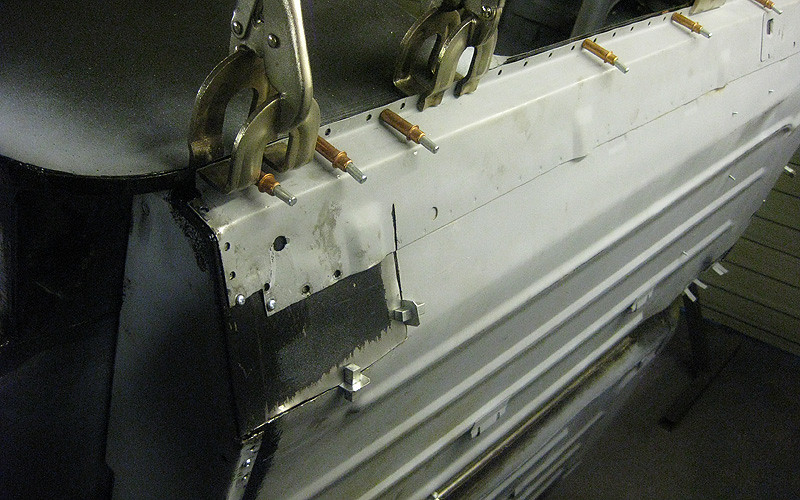
Onto side 2 of the floor! After doing the first side, this should have been a piece of cake, but it still took ages. This time, having learnt the heelboard lesson from last time, I cut and bent out the flaps right at the beginning. The crossmember needed a lot of rust repairs on the driver's side, so I did the necessary rebuilding and painted the inside with POR15. This is a bit of a milestone for the project as this floor panel is the last rusty panel to get the chop. With the exception of a few remaining small areas, there are no more rusty panels to replace on the main shell. :)
Posted Image

New floor/sill panel primed, rust protected and drilled ready for welding in.
Posted Image

Fitted in place with most of the plug welds complete, and tacks along the seam. Intergrips are a godsend when fitting floor panels!
Posted Image

The view from underneath...

Posted Image

As with the passenger side, I kept a chunk of my previous floor repair in place at the heelboard end because it was too integrated into the companion bin stuff to remove.
Posted Image

Post weld and grind:

Posted Image

This area still needs a bit of additional welding from the inside.
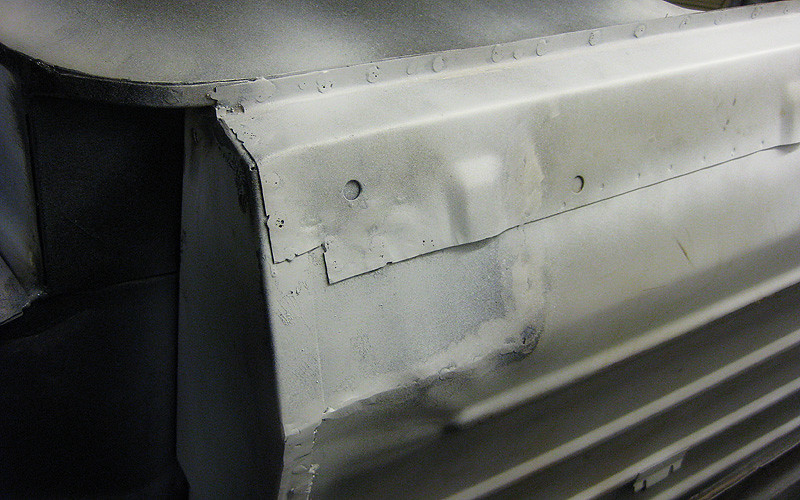
Posted Image

Finally! Both sides of the floor (mostly) complete! There is still some welding to do to join up some gaps on the inner sills and floors towards the back end, but I was able to remove the bracing as the shell is now strong enough to hold its own shape.
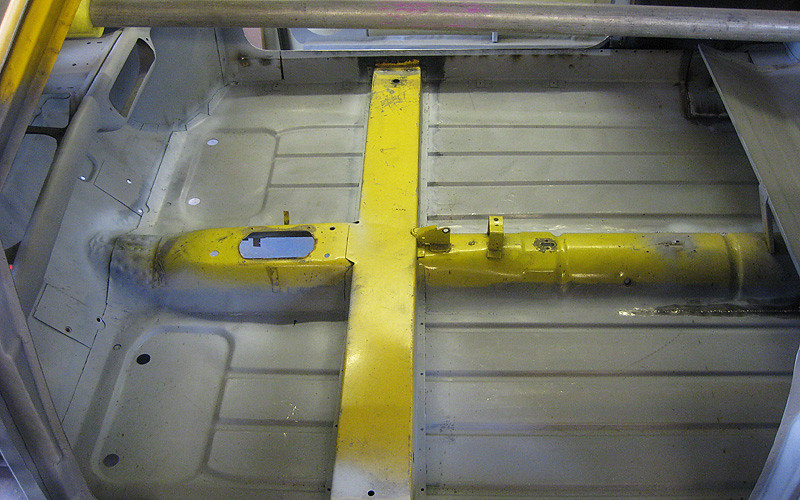
Posted Image

Next job after finishing off tidying up the floor welding is to paint strip and prime the tunnel and crossmember.
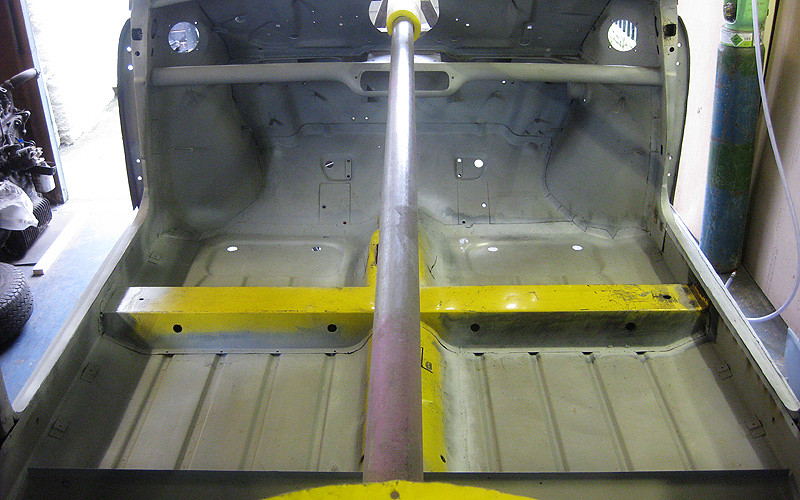
Posted Image

#264 sonikk4

sonikk4

    Twisted Paint Polisher!!!

  • Admin
  • PipPipPipPipPipPipPipPipPipPipPip
  • 15,970 posts
  • Name: Neil
  • Location: Oxfordshire

Posted 06 January 2013 - 09:12 PM

Happy new year Rich and nice job. I would have done things slightly differently though at the outer sill rear end. These are designed to tuck inside the heelboard end not on the outside. I normally chop off the joggled end if you cannot tuck it into the heelboard end and then seam weld it to the edge of the heelboard flange.

I would consider now seam welding that end up so its water tight.

#265 grahama

grahama

    Up Into Fourth

  • Members
  • PipPipPipPipPipPipPipPipPip
  • 2,442 posts
  • Location: Warrington
  • Local Club: None in my area !!

Posted 06 January 2013 - 09:16 PM

Great job there. Nice methodical work, you must be very pleased. I would tho add some weld to the end of the sills at the heelboard end to close any areas open to water and grind flush. Sorry if you have stopped prior to doing this but just a thought.

Keep going.

Graham

Just beat me to it Neil !!!

Edited by grahama, 06 January 2013 - 09:16 PM.


#266 sonikk4

sonikk4

    Twisted Paint Polisher!!!

  • Admin
  • PipPipPipPipPipPipPipPipPipPipPip
  • 15,970 posts
  • Name: Neil
  • Location: Oxfordshire

Posted 06 January 2013 - 09:18 PM

Great job there. Nice methodical work, you must be very pleased. I would tho add some weld to the end of the sills at the heelboard end to close any areas open to water and grind flush. Sorry if you have stopped prior to doing this but just a thought.

Keep going.

Graham

Just beat me to it Neil !!!


Got to be quick Graham and a happy new year to you as well mate.

#267 rich2

rich2

    Speeding Along Now

  • Members
  • PipPipPipPipPip
  • 351 posts

Posted 06 January 2013 - 09:18 PM

Hi Neil! Happy new year!

Oh yes - now that you mention it that makes perfect sense. I think my approach to that area has been completely ass-backwards because I didn't want to undo too much of the work I'd already done there. Oh well - I'll do as you sgeest and seam weld up the edge. It will look a lot neater like that anyway!

#268 rich2

rich2

    Speeding Along Now

  • Members
  • PipPipPipPipPip
  • 351 posts

Posted 06 January 2013 - 10:04 PM

Haha its great that I can post a few pics on here and two of you come on in a matter of minutes to point me in the right direction. :) This forum is awesome!

#269 grahama

grahama

    Up Into Fourth

  • Members
  • PipPipPipPipPipPipPipPipPip
  • 2,442 posts
  • Location: Warrington
  • Local Club: None in my area !!

Posted 07 January 2013 - 07:44 AM

No problem, something like this when you are finished but better lol

Posted Image

If you grind it back too much just pop a bit more weld in till it's all smoothe ish and closed up.

Graham

#270 rich2

rich2

    Speeding Along Now

  • Members
  • PipPipPipPipPip
  • 351 posts

Posted 07 January 2013 - 06:57 PM

Cheers graham thats great. I'll do just that!


2 user(s) are reading this topic

0 members, 1 guests, 0 anonymous users


    Bing (1)