Jump to content


Photo
- - - - -

1979 Rust Heap Clubman Rebuild


  • Please log in to reply
625 replies to this topic

#166 rich2

rich2

    Speeding Along Now

  • Members
  • PipPipPipPipPip
  • 351 posts

Posted 05 November 2011 - 08:44 PM

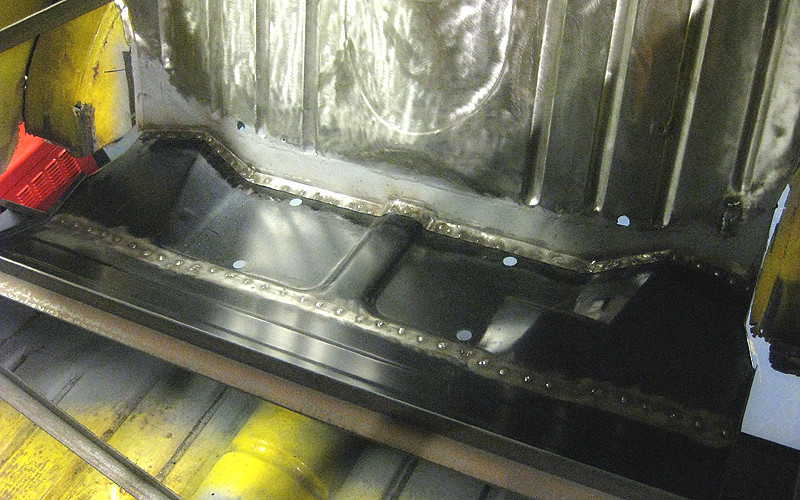
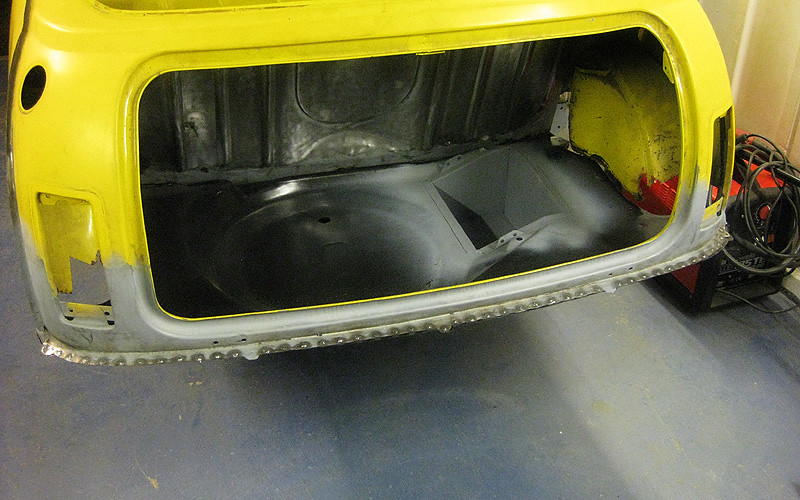
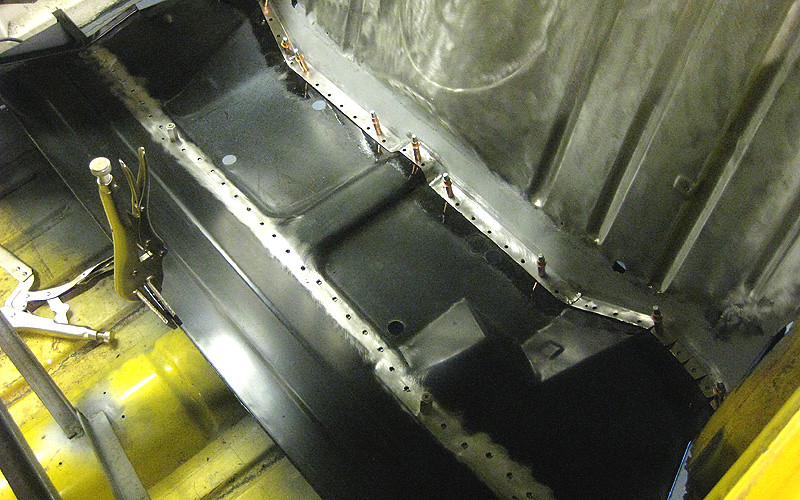
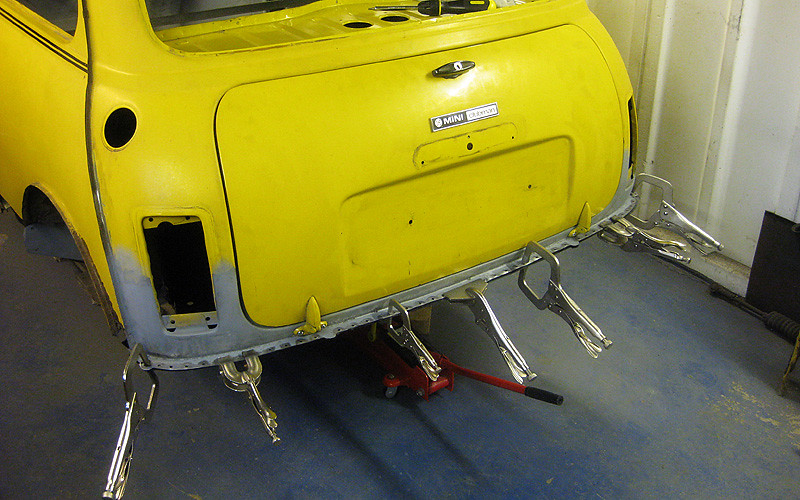
Right then! I got the repair to the lower bulkhead welded in and ground down. If my neighbours didn't hate me before, they probably do now! It took a fair while, but I wanted to get it looking reasonable as I'm probably not going to have a back seat, so this will be on show. Also got the new boot floor fully prepped to go in. Here it is with all plug holes drilled, paint stripped where required, and a double coat of POR15 on the joins, ready for welding in. While I was at it, I paint stripped both sides of the rear bulkhead.

Posted Image

Plug holes on rear panel drilled and all clamped up. Boot lid on to ensure fit.

Posted Image

Get yer weld on! I've got no idea why the heritage boot floor has a recess in the seat squab to fit the heelboard on the N/S but not the O/S. grr...
I finally bit the bullet and invested in a long-jaw clamp which was a big help as I could clamp right around the seat to the heelboard.

Posted Image

And the view from behind...

Posted Image

It looks like the remains of the old arches line up with the floor OK. Hopefully when I replace them (next job) it will all fit nicely. Time permitting, I should get today's welds ground down, cleaned up and primed tomorrow. Only a moron would leave that much bare metal exposed for very long at this time of year! -___-

#167 sonikk4

sonikk4

    Twisted Paint Polisher!!!

  • Admin
  • PipPipPipPipPipPipPipPipPipPipPip
  • 15,970 posts
  • Name: Neil
  • Location: Oxfordshire

Posted 05 November 2011 - 08:46 PM

Rich the bulkhead repair has come up really well and everything is certainly coming along. Looking very good mate.

#168 hughJ

hughJ

    Soldiering Along

  • Members
  • PipPipPipPipPipPipPip
  • 727 posts
  • Location: Highlands, Scotland

Posted 05 November 2011 - 08:47 PM

Superb - really that says it all

Hugh

#169 skoughi

skoughi

    One Carb Or Two?

  • Members
  • PipPipPipPipPipPipPip
  • 1,199 posts
  • Location: Lerwick
  • Local Club: Shetland classic car club

Posted 05 November 2011 - 09:13 PM

Looking good, keep the high standard going!

#170 minimuk

minimuk

    Camshaft & Stage Two Head

  • Members
  • PipPipPipPipPipPipPipPip
  • 1,946 posts
  • Location: Midlands

Posted 05 November 2011 - 09:14 PM

excellent work, just what I needed to see.

cheers

#171 Goacher65

Goacher65

    Mini Mad

  • Just Joined
  • PipPipPipPip
  • 161 posts
  • Location: Maidstone, Kent
  • Local Club: Medway Mini Club

Posted 05 November 2011 - 11:05 PM

I've got no idea why the heritage boot floor has a recess in the seat squab to fit the heelboard on the N/S but not the O/S. grr...


Is this not just a continuation of where the spare wheel well is in the boot floor? Can't think now how my original one looks.

#172 123grosso

123grosso

    On The Road

  • Noobies
  • PipPip
  • 36 posts
  • Location: Victoria

Posted 06 November 2011 - 12:43 AM

this morning i read this whole thread and i am amazed at the level of work, keep it up and i'm looking forward to more updates :)

#173 rich2

rich2

    Speeding Along Now

  • Members
  • PipPipPipPipPip
  • 351 posts

Posted 11 December 2011 - 05:17 PM

Hi!

I can't believe its been over a month since I last posted an update...

Anyway, with the boot floor in place, it was high time the grotty wheel arches got the chop. Just look at the state of it. Bleurgh.

Posted Image

A quick splurge on minispares, and these bad boys arrived:

Posted Image

Here is some fitting-in-progress on the o/s. I faffed around for ages trying to make sure I was positioning them in exactly the right place. I even went back to order the companion bin closing panels so that I could see how they fit in. (Should've bought the whole lot in one go really. Duh.)

Posted Image

Posted Image

I marked the flanges of the rear bulkhead and bootfloor onto the wheel arch with a scribe while it was clamped in position so that I knew exactly where to drill my plug holes when I took it off the car. Drilling the holes on the wheel arch itself meant I would only have to grind down welds inside the arch, which should be more manageable and also hopefully keep the interior of the car nice and neat (ish).

Posted Image

N/S arch welded in:

Posted Image

This is the current state of things at the end of the weekend - one arch in and one ready to go in, just waiting for the final weld. I might get that done one evening this week if I can man up to the cold!

Posted Image

Posted Image

Next up when both arches are in place is to get all the boot floor fittings in (which I made earlier). Then its on to the quarter panels, I think. I quite fancy a rear roll cage, so I also need to look into where the feet go and if they foul the companion bins...
#174 midridge2

midridge2

    Camshaft & Stage Two Head

  • Members
  • PipPipPipPipPipPipPipPip
  • 1,794 posts
  • Location: north east england

Posted 11 December 2011 - 06:32 PM

just had a good read through this rebuild, i must say the quality off the work would put alot of pros to shame.
i do have one concern though, when you fitted the new inner wings you should have fitted the bonnet, this will be a good guide to ensure the inner wings are aligned, and you should really trial fit the doors and trial fit them with the Apex panels in place.
apart from that its looking good.

#175 panelbeaterpeter

panelbeaterpeter

    Crazy About Mini's

  • Members
  • PipPipPipPipPipPipPipPipPipPip
  • 5,606 posts
  • Location: Scotland
  • Local Club: n/a

Posted 11 December 2011 - 07:25 PM

Impressive stuff!

#176 Risky

Risky

    Mini Mad

  • Members
  • PipPipPipPip
  • 213 posts
  • Location: Zegge (The Netherlands)

Posted 11 December 2011 - 09:32 PM

Looking good, what welder do you use if you don't mind me asking?

#177 rich2

rich2

    Speeding Along Now

  • Members
  • PipPipPipPipPip
  • 351 posts

Posted 12 December 2011 - 09:44 AM

midridge: thats a good shout on trial fitting the bonnet. The thing is I removed the brackets that the hinges fit to, so I will need to put those back on before fitting the bonnet. I was aware of this at the time of fitting the inner wings, but I ended up deciding that I should just get them on the car as well as I could, knowing that i might have to section them later if necessary.

Risky: Clarke 135TE. I don't know much about welders, so i just got the one that a lot of people on here seem to have. Its been dead good so far!

#178 sonikk4

sonikk4

    Twisted Paint Polisher!!!

  • Admin
  • PipPipPipPipPipPipPipPipPipPipPip
  • 15,970 posts
  • Name: Neil
  • Location: Oxfordshire

Posted 12 December 2011 - 01:41 PM


I've got no idea why the heritage boot floor has a recess in the seat squab to fit the heelboard on the N/S but not the O/S. grr...


Is this not just a continuation of where the spare wheel well is in the boot floor? Can't think now how my original one looks.


Rich i had exactly the same issue and had to resort to some panel beating to get everything looking the same. Why its like that who knows but such is life.

#179 Risky

Risky

    Mini Mad

  • Members
  • PipPipPipPip
  • 213 posts
  • Location: Zegge (The Netherlands)

Posted 13 December 2011 - 09:28 PM

@rich2, thanks!

#180 rich2

rich2

    Speeding Along Now

  • Members
  • PipPipPipPipPip
  • 351 posts

Posted 07 January 2012 - 06:17 PM

Happy new year!

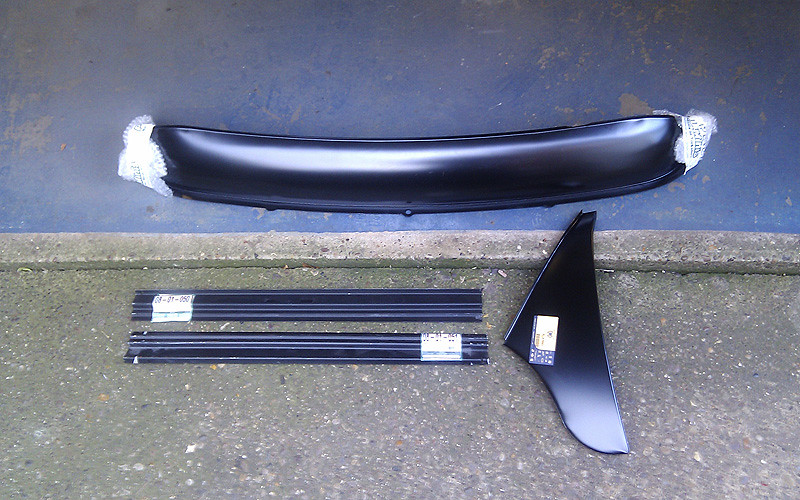
Santa brought me a heritage valance and A panel for xmas. Then I picked up a couple of door steps from TMF member newbambeeno. Cheers! :)

Posted Image

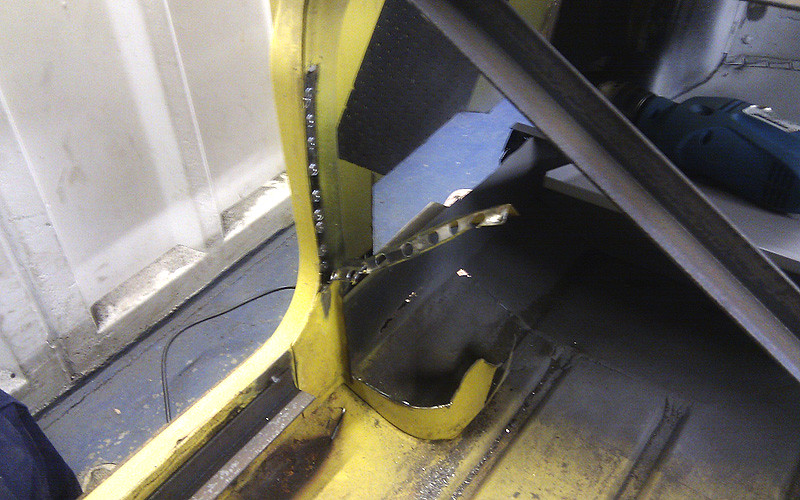
First job on the mini for the new year was to finish removing what was left of the companion bins...

Posted Image

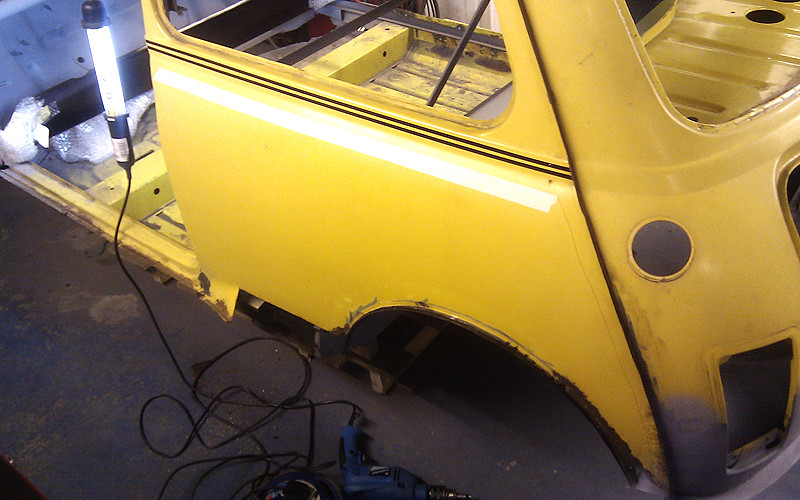
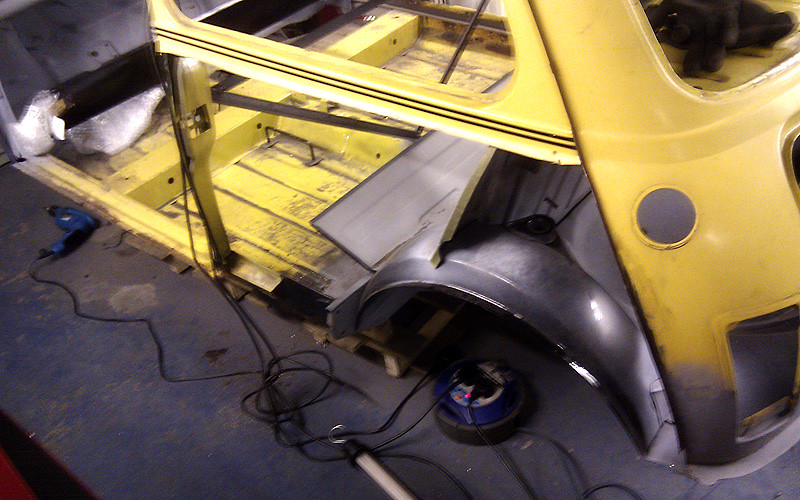
Then I got brave and did this:

Posted Image

Posted Image

Will have to wait until the end of the month now to see if I've got any dosh left to fund a heritage quarter panel. There is plenty of tidying up to be done in the meantime though!


2 user(s) are reading this topic

0 members, 2 guests, 0 anonymous users