Jump to content


Photo
- - - - -

1979 Rust Heap Clubman Rebuild


  • Please log in to reply
625 replies to this topic

#151 rich2

rich2

    Speeding Along Now

  • Members
  • PipPipPipPipPip
  • 351 posts

Posted 09 October 2011 - 06:31 PM

Thanks guys. And congrats on the 25 years Neil!

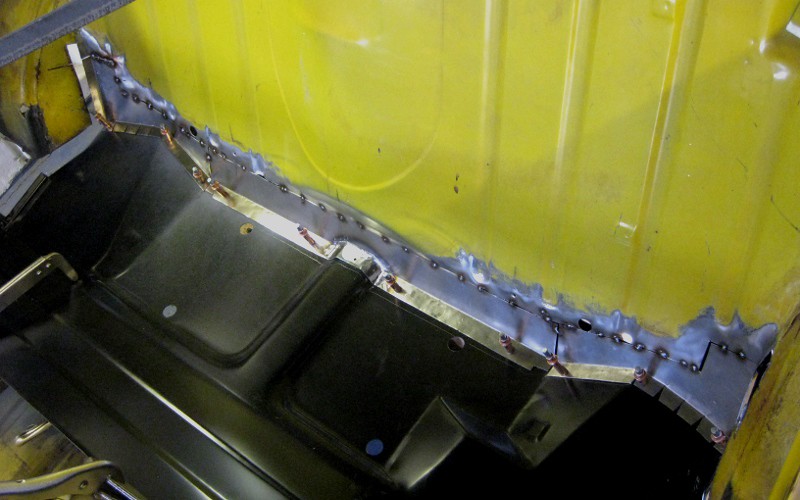
Just a quick update as I spent ages this weekend on the tedious and awkward job of welding in the heel board. After many hours of faff, I'm confident that its on and solid. A bigger C clamp would have made the job 10 times easier. Note to self: invest in correct tools for the job next time, moron.
Posted Image

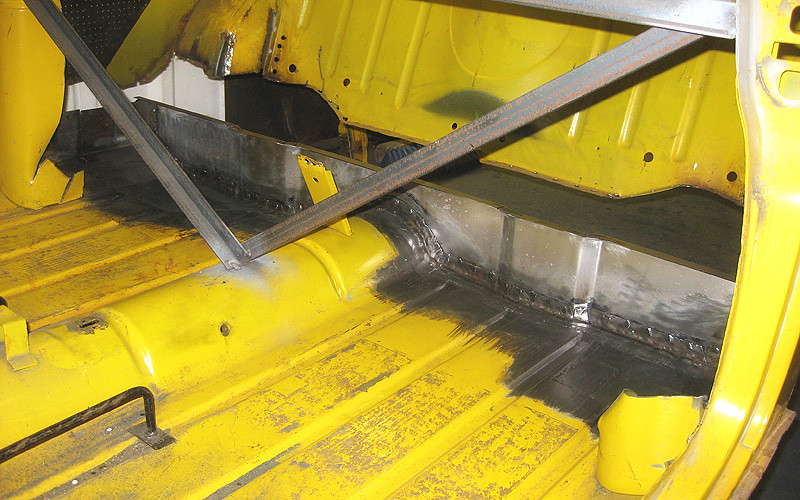
I also put a bit more work into my home-made battery box. Its coming together quite well, but will still need a bit of fiddling to fit into the annoyingly curvy boot floor panel. The white stuff is POR15 metal ready as I'm going to paint the flaps before welding it all together (just to be super thorough).
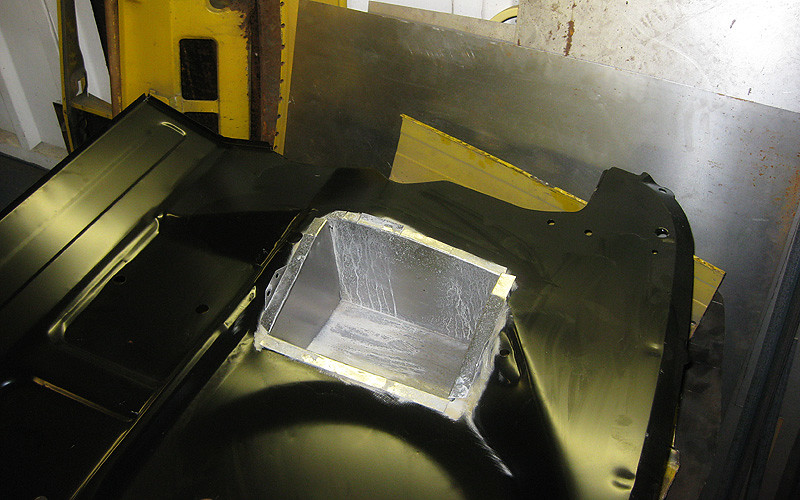
Posted Image

I tried a quick test fitting of the boot floor and it looks good. Did an excited little dance in the garage to celebrate. Its almost starting to look like this car might return to
being in one piece eventually!

#152 Goacher65

Goacher65

    Mini Mad

  • Just Joined
  • PipPipPipPip
  • 161 posts
  • Location: Maidstone, Kent
  • Local Club: Medway Mini Club

Posted 14 October 2011 - 03:41 PM

Odd question. Where do you get your POR-15 from? I am looking to get my subframes shot blasted so i can then paint them, and have been recommended it. Does it take a lot to cover an area or does it cover quite well? How much do you think I would need to paint a front and rear subframe. Do you use the metal ready etc as well?

#153 rich2

rich2

    Speeding Along Now

  • Members
  • PipPipPipPipPip
  • 351 posts

Posted 17 October 2011 - 10:17 AM

I bought mine from frost.co.uk

Its not cheap but its pretty awesome stuff. Yes I use metal ready first. I think this is pretty important because it works as a kind of etch primer. They recommend you use their cleaner before that, but I skip that stage. The POR-15 goes on really thin, so it lasts quite well. I got 3 coats on the front and rear subframes out of 2 of those £20 tins with about half a tin to spare.

#154 skoughi

skoughi

    One Carb Or Two?

  • Members
  • PipPipPipPipPipPipPip
  • 1,199 posts
  • Location: Lerwick
  • Local Club: Shetland classic car club

Posted 17 October 2011 - 09:25 PM

Looking good, like how you've got everything so clean before you've started. Think i should have done the same! Makes thinks look not quite so bad! I agree with what you said about the tools, so many times i've wished that i'd bought a good range of vice clamps etc, instead of fighting on with the five that i have. You never seem to have enough or they're never the right size! Anyway keep it up, you're supplying me with tons of inspiration. ;o]

#155 Daviewonder

Daviewonder

    Needs an extra inch!!

  • Members
  • PipPipPipPipPipPipPip
  • 1,015 posts
  • Location: England

Posted 17 October 2011 - 09:42 PM

Yeah I have to agree about the inspiration. I stumbled across this progress thread one Sunday whilst searching google for something unrelated. I read through it as I didn't have anything else going on. I was so impressed by the end of it I had decided that I needed a Mini Clubman project of my own.

I'm now the proud owner of a 1275 GT project :)

#156 Mini-Mad-Craig

Mini-Mad-Craig

    Crazy About Metro's

  • Members
  • PipPipPipPipPipPipPipPipPipPip
  • 9,298 posts
  • Location: Travelling in a fried out Kombi

Posted 17 October 2011 - 11:49 PM

Cracking project and amazing fab skills. Keep it coming :) enjoyed following

#157 rich2

rich2

    Speeding Along Now

  • Members
  • PipPipPipPipPip
  • 351 posts

Posted 20 October 2011 - 08:36 PM

Cheers guys!

Daviewonder: Really? Thats crazy! Have you got a rebuild thread? I hope for your sake your mini is in a better state than mine! :)


Right, so... I got the battery box welded together. So much graft for one little box that you hardly even see!

Posted Image


Welded into the boot floor skin. Quite pleased with the finished product given the awkward curves involved. (Self tapping plasterboard screws saved the day!)

Posted Image


Next up was this shocking collection of rusty boot fittings. I was hoping to rescue some of them, but all but one turned out to be No Bloody Good.

Posted Image


I cut the shapes out of sheet steel and after liberal application of the panel hammer, I had this little lot.

Posted Image


In the meantime, I had offered up the boot floor. Also bolted the boot lid back on to make sure nothing had moved. The corners of the floor aren't lining up perfectly at the moment, so some surgery might be required.

Posted Image


Inside the car, things look pretty sweet. I just need to replace the crusty lower edge of the bulkhead.

Posted Image


At this point, I'm copying the definitive resource on rear bulkhead repairs, page 4 of Project Erm! Cheers Neil! I've started by reconstructing the middle bit to fit the contours of the new rear squab panel.

Posted Image

Thats all for today. Hopefully I'll get back on this tomorrow!

#158 Boycie

Boycie

    Camshaft & Stage Two Head

  • Members
  • PipPipPipPipPipPipPipPip
  • 1,978 posts
  • Location: Kent/ East Sussex border

Posted 20 October 2011 - 08:41 PM

Lovely progress :)

#159 sonikk4

sonikk4

    Twisted Paint Polisher!!!

  • Admin
  • PipPipPipPipPipPipPipPipPipPipPip
  • 15,970 posts
  • Name: Neil
  • Location: Oxfordshire

Posted 20 October 2011 - 08:45 PM

Your welcome Rick, that's what the forum is all about and liking your fabrication of the bump stops and fuel tank bracket. It is pretty straight forward but common sense is needed. Its cool. I prefer to fabricate i must admit as it gives you a sense of satisfaction.

#160 hughJ

hughJ

    Soldiering Along

  • Members
  • PipPipPipPipPipPipPip
  • 727 posts
  • Location: Highlands, Scotland

Posted 21 October 2011 - 08:06 AM

Wow - a different league of fabrication!!! Great to see such amazing work. Keep informing us.

Hugh

#161 087dave

087dave

    One Carb Or Two?

  • Members
  • PipPipPipPipPipPipPip
  • 952 posts
  • Location: In the living room

Posted 21 October 2011 - 08:56 AM

Great work!

#162 Daviewonder

Daviewonder

    Needs an extra inch!!

  • Members
  • PipPipPipPipPipPipPip
  • 1,015 posts
  • Location: England

Posted 21 October 2011 - 06:12 PM

Daviewonder: Really? Thats crazy! Have you got a rebuild thread? I hope for your sake your mini is in a better state than mine! :)


Totally true Mate. The next part's a bit crazier, I went into work on the monday and asked a random mate if he knew anyone selling a 1275GT. Amazingly he did!

The rest is history. The progress blog is in my signature :)

And yes so far it looks in slightly better nick than yours but who knows what horrors I will uncover.

#163 rich2

rich2

    Speeding Along Now

  • Members
  • PipPipPipPipPip
  • 351 posts

Posted 21 October 2011 - 08:10 PM

Dave thats a cool little mini you've got!

Just a quickie today. I fitted up the rest of the bulkhead repair and tacked it all in place. Bosh.

Posted Image

#164 skoughi

skoughi

    One Carb Or Two?

  • Members
  • PipPipPipPipPipPipPip
  • 1,199 posts
  • Location: Lerwick
  • Local Club: Shetland classic car club

Posted 22 October 2011 - 05:14 PM

That new boot floor looks luverly! Wish i wasn't so tight with the cash and bought one, would have saved sooo much time! I use the self tapping screws as well, handy little things when it comes to awkward corners where clamps can't get in.

#165 grahama

grahama

    Up Into Fourth

  • Members
  • PipPipPipPipPipPipPipPipPip
  • 2,442 posts
  • Location: Warrington
  • Local Club: None in my area !!

Posted 22 October 2011 - 05:23 PM

Excellent work, love the fabrication, soo neat and the gaps you get are bob on, unlike mine which need a little fettling to get sorted usually !!

Graham


2 user(s) are reading this topic

0 members, 2 guests, 0 anonymous users