Jump to content


Photo
- - - - -

Wide Ratio Gearbox And 1380 Engine Build


  • Please log in to reply
419 replies to this topic

#76 AndyMiniMad.

AndyMiniMad.

    Up Into Fourth

  • Members
  • PipPipPipPipPipPipPipPipPip
  • 3,295 posts
  • Location: Under The Bonnet.

Posted 26 September 2010 - 08:53 AM

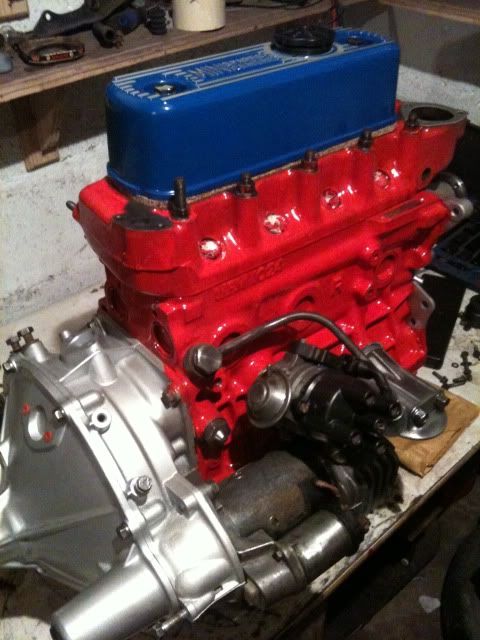
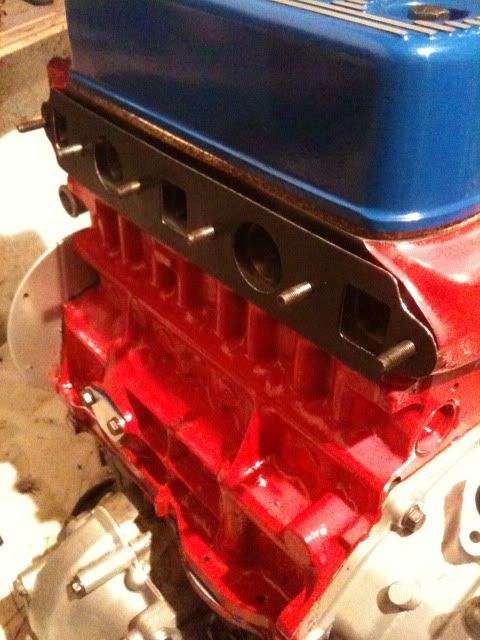
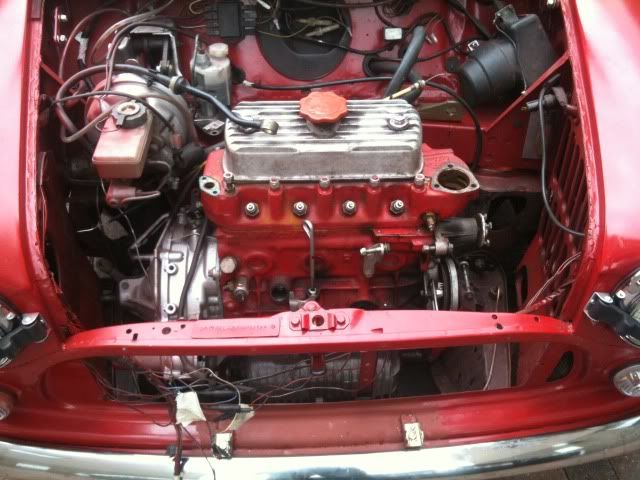
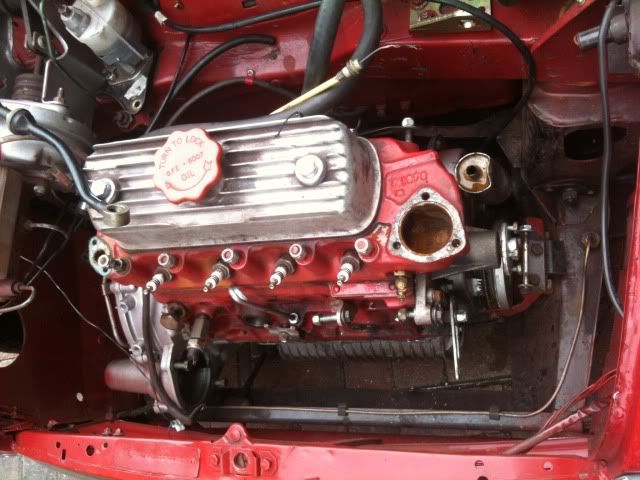
Well the engine isnt fitted yet as im waiting for a dial test indicator tool off flea-bay, I will get the cam all timed up befofe fitting the engine. Here are a couple if pics of "Haggis" waiting to have a Heart transplant.

Posted Image
Posted Image

Thats the old MG Metro 1275 waiting to come out. Here is the new 1380 waiting to go in.

Posted Image
Posted Image

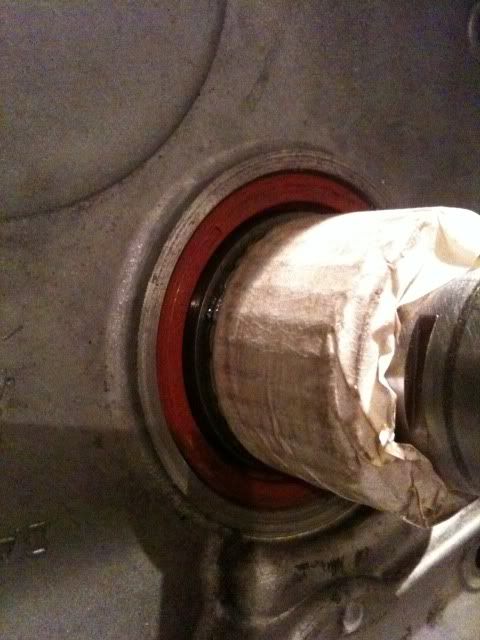
I also ordered a new short arm for the clutch and replaced the oil seal behind the flywheel. A bit of a pain in the arse having to strip the clutch and flywheel out, But im happier knowing there is a new oil seal fitted.

Posted Image

#77 AndyMiniMad.

AndyMiniMad.

    Up Into Fourth

  • Members
  • PipPipPipPipPipPipPipPipPip
  • 3,295 posts
  • Location: Under The Bonnet.

Posted 26 September 2010 - 09:10 AM

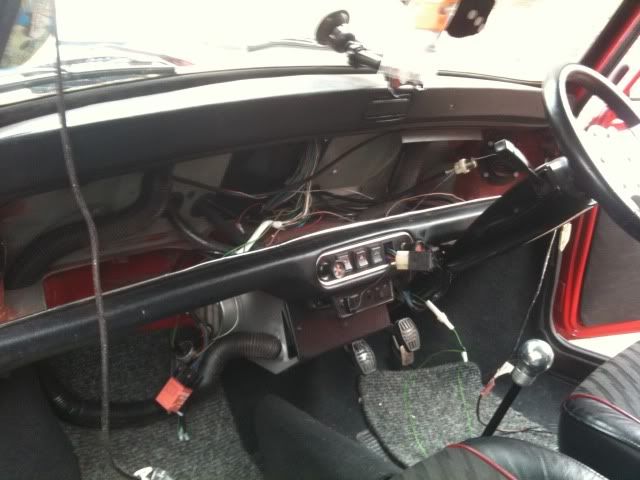
So while ive been waiting for the DTI tool I decided to have a go at making my own dash board. "How hard can it be"???? Here is "Haggis" looking a bit sorry for himself wit no dash.

Posted Image

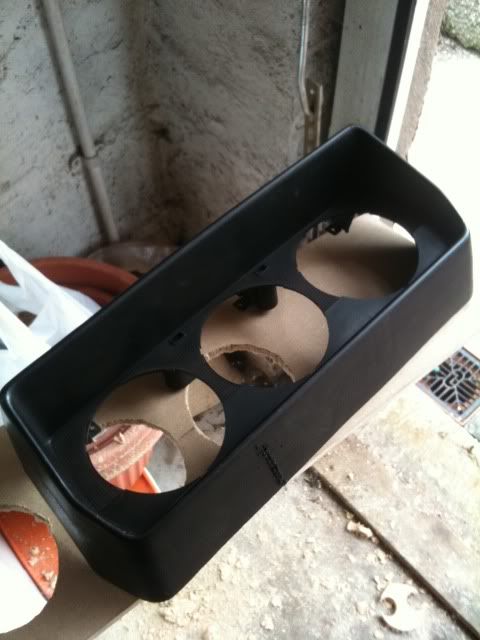
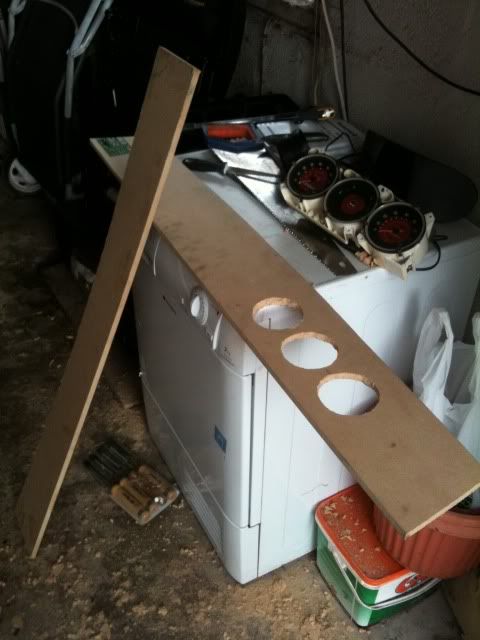
I started by cutting a bit of MDF to the rough shape and then just kept cutting and trimming untill it fitted reasonably ok. Im not to bothered about an exact fit because im going to cover it with some foamy padded type stuff, (Any Ideas)??..

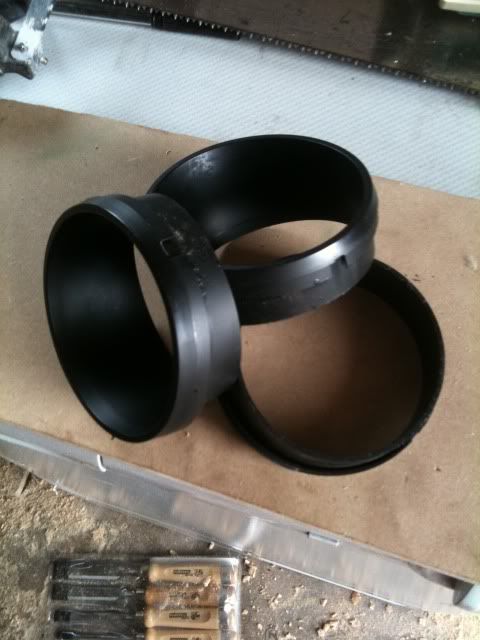
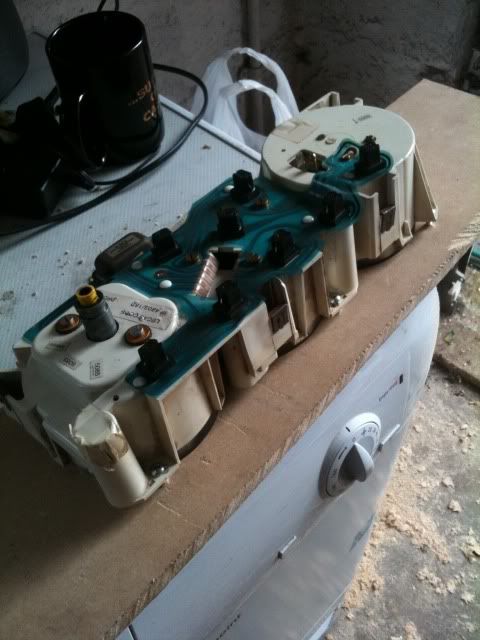
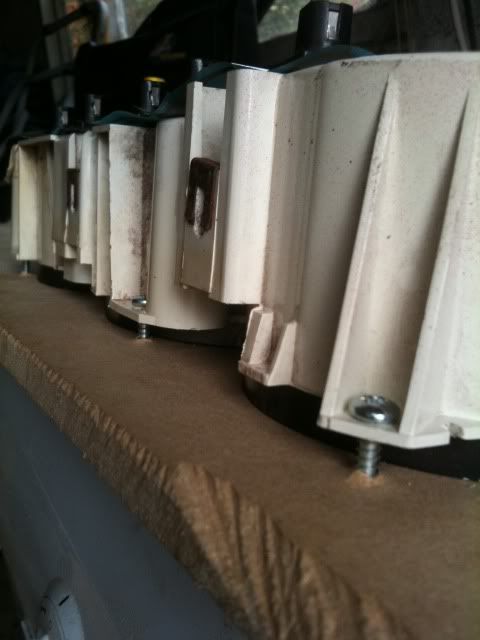
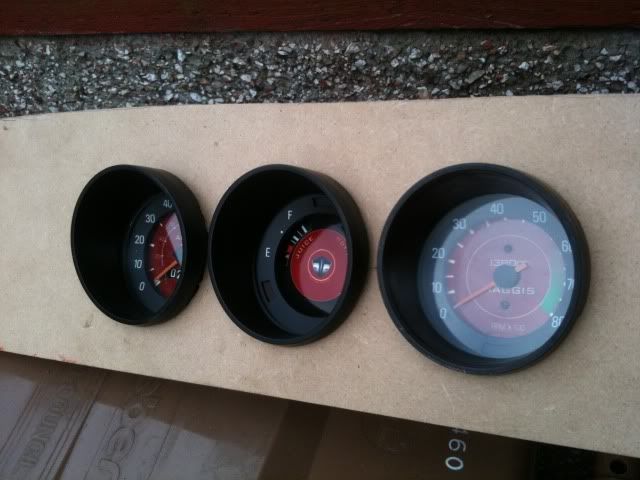
Then I took the old 3 clock binical apart and used the round cowling bits to draw out the bits to cut away.

Posted Image
Posted Image
Posted Image

With that done I lined up the pod and screwed it down.

Posted Image
Posted Image

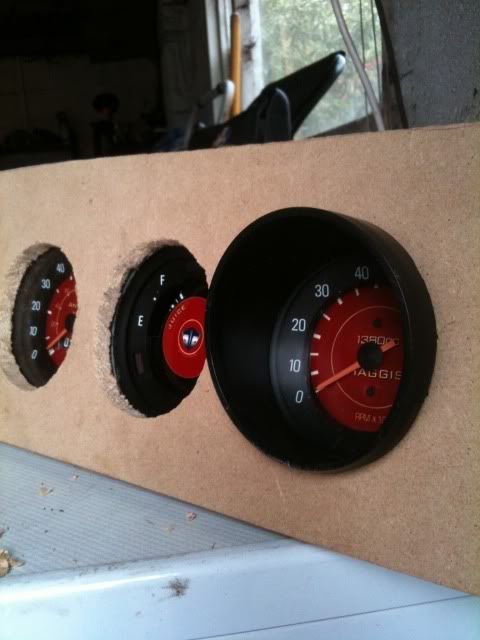
Then i just push fitted the cowls on to the front. I love the gauges that "Gallileo gauges" made for me. Cheers mate they look fab!!! :mrcool:

Posted Image
Posted Image

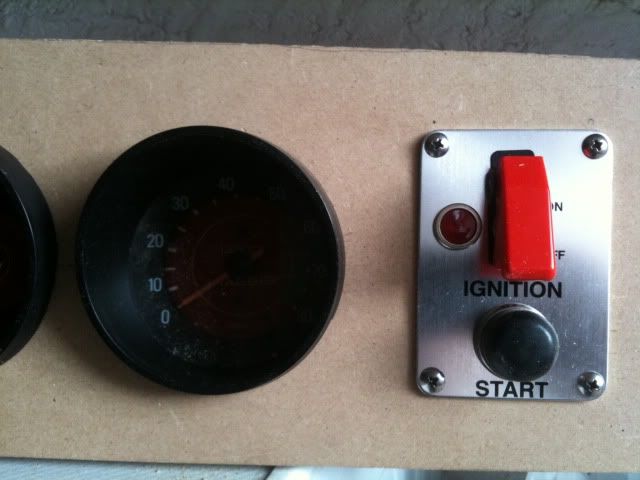
Next was the starter switch which ive decided to fit on this side to give a bit more room for the other gauges and Head unit on the other side.

Posted Image

Thats all so far, Im off to the garage today to fit the other gauges and head unit, will post up the pics later on if im sober enough!! ;)

#78 AndyMiniMad.

AndyMiniMad.

    Up Into Fourth

  • Members
  • PipPipPipPipPipPipPipPipPip
  • 3,295 posts
  • Location: Under The Bonnet.

Posted 26 September 2010 - 11:28 AM

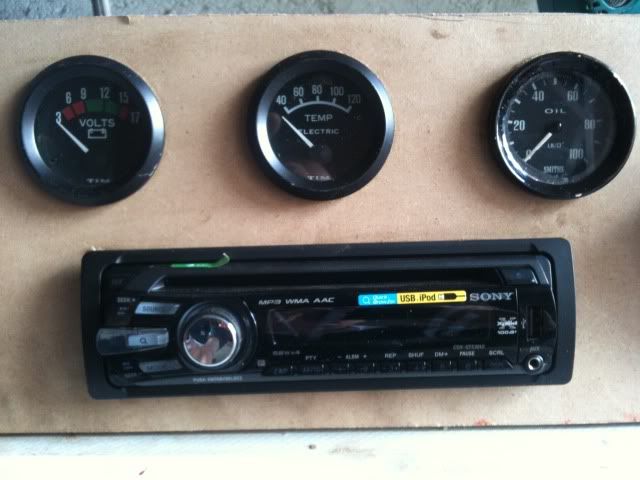
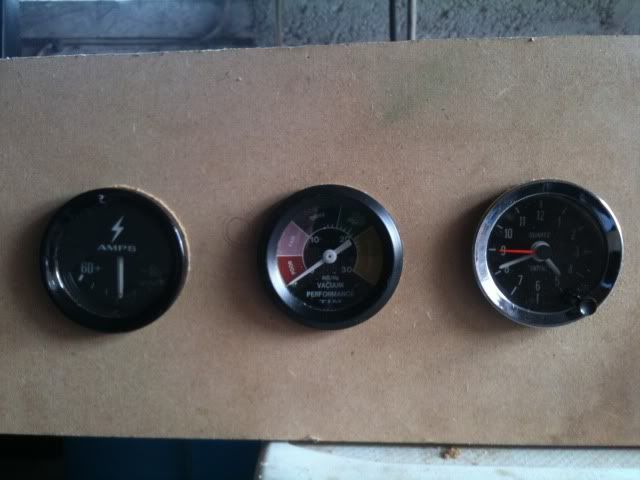
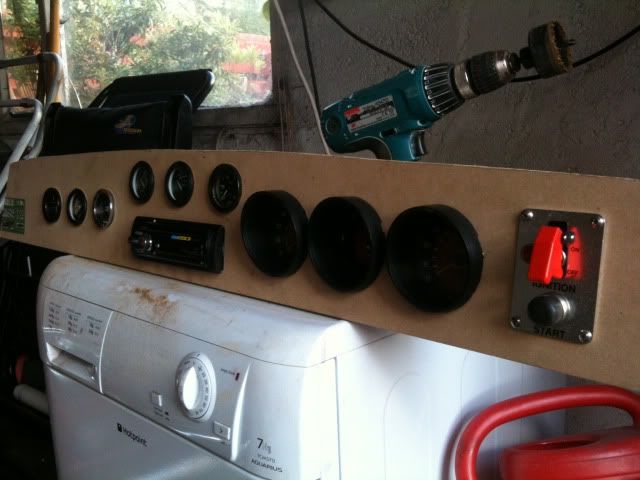
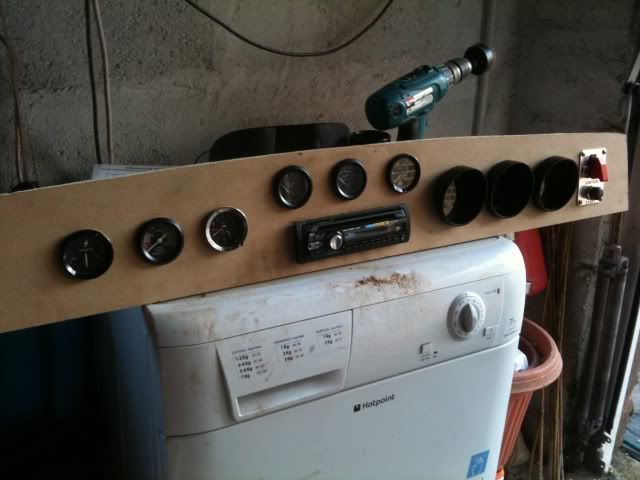
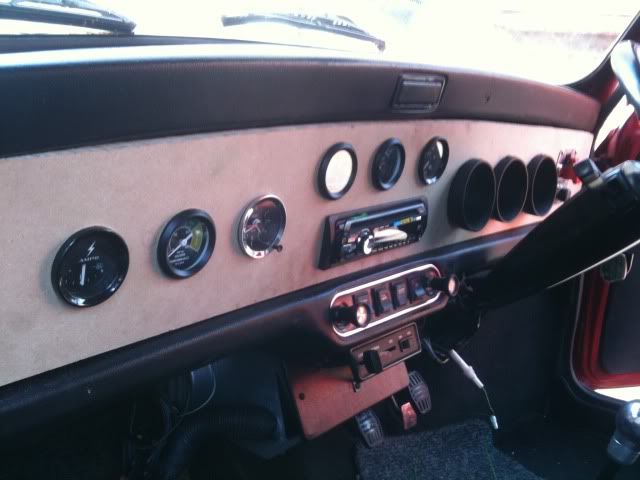
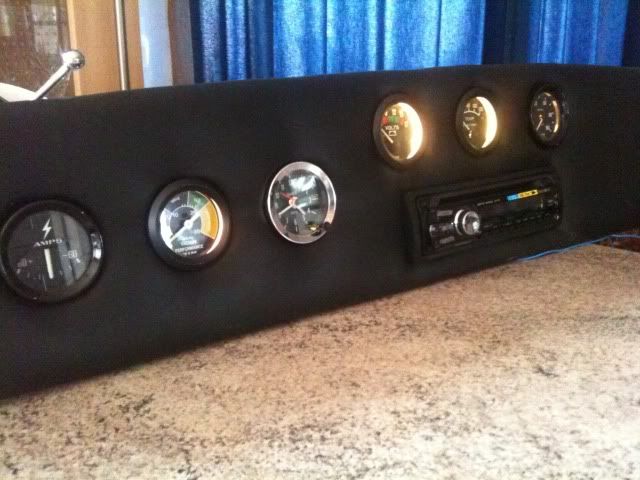
So ive been busy in the garage fitting the gauges and head unit. Cut the hole for the head unit with a pad saw and used a 54mm hole saw for the gauges. The order ive fitted them is: oil pressure, water temp, volts, clock, vacuume and amps, Is this the correct order? does anyone have a better suggestion? Any way here are the pics.
Posted Image
Posted Image
Posted Image
Posted Image
Posted Image

And finally ive plonked it all in "Haggis" to see how it looks. What do you think? Cool eh!!

Posted Image

Edited by AndyMiniMad., 26 September 2010 - 11:30 AM.


#79 AndyMiniMad.

AndyMiniMad.

    Up Into Fourth

  • Members
  • PipPipPipPipPipPipPipPipPip
  • 3,295 posts
  • Location: Under The Bonnet.

Posted 26 September 2010 - 11:36 AM

Im off to the pub now and am going to see a man about an engine crane. Will see if I can persuade him to give me a hand. Whats happened to the forum clock???? Ive just seen lewis hamilton go out of the F1 gp and its 2:45 now but this post is timmed at 12:40 ish very strange....See ya!!!

Edited by AndyMiniMad., 26 September 2010 - 11:44 AM.


#80 AndyMiniMad.

AndyMiniMad.

    Up Into Fourth

  • Members
  • PipPipPipPipPipPipPipPipPip
  • 3,295 posts
  • Location: Under The Bonnet.

Posted 27 September 2010 - 02:18 PM

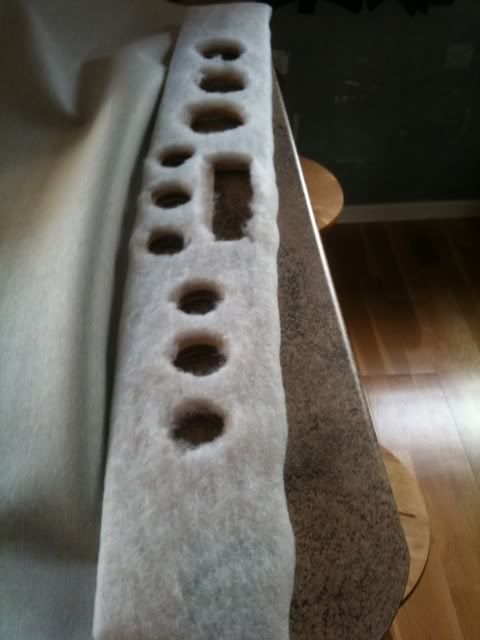
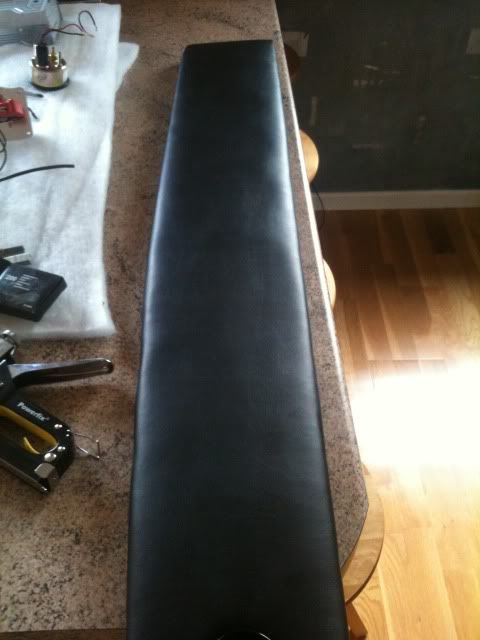
After a bit of searching I managed to find a place in Inverness that sells fake leather material and spongy stuff as padding. So when I got it home I stapled the spongy stuff to the dash.

Posted Image

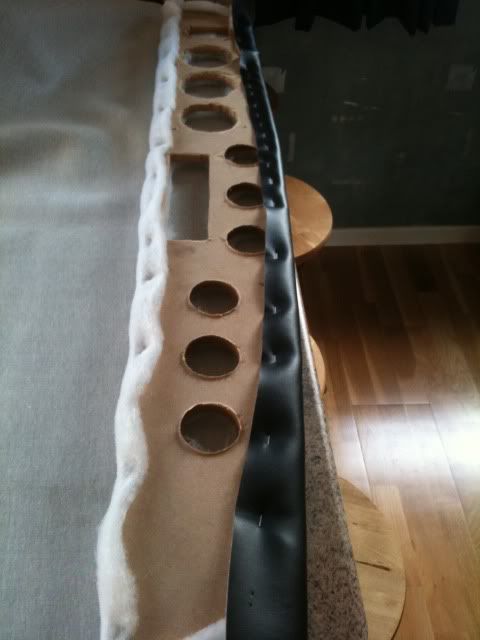
I cut out the rough shape of the holes and then stapled the fake leather to one edge.

Posted Image

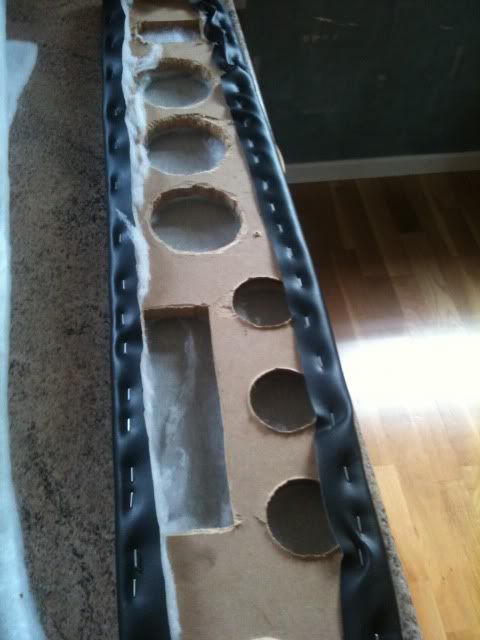
Then it was a slow job to stretch it over the dash and go mad with the stapler..

Posted Image

Once turned over this is how it looked.

Posted Image

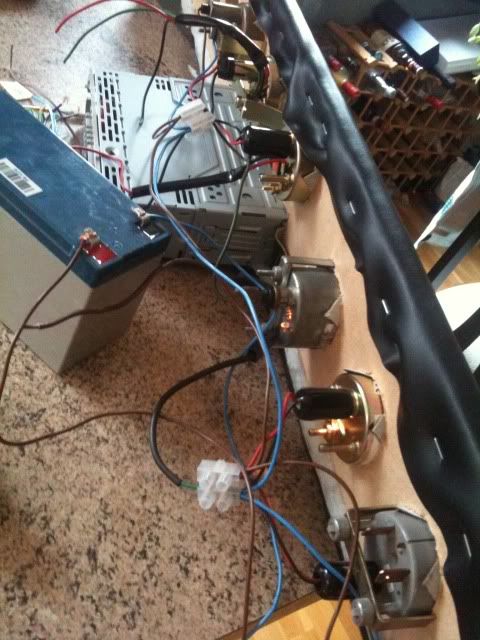
I then used a sharp stanley blade to slit the covering, Jammed in the gauges and head unit holder and fixed them in place. Abit of spagetti wireing and a test battery.

Posted Image

Ta Da!!!! One dash ready to fit...

Posted Image

I am well pleased with how it turned out. Looks good and has a nice soft feel.

Edited by AndyMiniMad., 27 September 2010 - 02:20 PM.


#81 daveeeeee

daveeeeee

    Super Mini Mad

  • Members
  • PipPipPipPipPipPip
  • 684 posts

Posted 27 September 2010 - 05:59 PM

Nice dash! Now I need to back track and see the rest of the build :-

#82 AndyMiniMad.

AndyMiniMad.

    Up Into Fourth

  • Members
  • PipPipPipPipPipPipPipPipPip
  • 3,295 posts
  • Location: Under The Bonnet.

Posted 27 September 2010 - 06:06 PM

Got the engine out of "Haggis" tonight so now he his empty :- . I forgot to undo the earth strap so it took a bit longer than it needed to. So thats it then time to drop the 1380 in at the wekend. Cant wait to fire it up and se if it works.

#83 daveeeeee

daveeeeee

    Super Mini Mad

  • Members
  • PipPipPipPipPipPip
  • 684 posts

Posted 27 September 2010 - 06:08 PM

Ok I've read it all now :- Love all the pictures from the gearbox and engine build, did you use a book/manual/dvd of some kind?

#84 AndyMiniMad.

AndyMiniMad.

    Up Into Fourth

  • Members
  • PipPipPipPipPipPipPipPipPip
  • 3,295 posts
  • Location: Under The Bonnet.

Posted 27 September 2010 - 06:14 PM

Ok I've read it all now :- Love all the pictures from the gearbox and engine build, did you use a book/manual/dvd of some kind?

Not really, Ive got a Haynes manual which was usefull. I looked a lot of stuff up on the interweb. And calvers corner is a great place for info. Thanks for reading this thread.

#85 daveeeeee

daveeeeee

    Super Mini Mad

  • Members
  • PipPipPipPipPipPip
  • 684 posts

Posted 27 September 2010 - 08:19 PM

That was brave, if I ever get round to an engine build I think I'll be finding a book and following it to the letter :- You've done some nice work on this car mate, I've subscribed :thumbsup:

#86 AndyMiniMad.

AndyMiniMad.

    Up Into Fourth

  • Members
  • PipPipPipPipPipPipPipPipPip
  • 3,295 posts
  • Location: Under The Bonnet.

Posted 28 September 2010 - 04:45 PM

That was brave, if I ever get round to an engine build I think I'll be finding a book and following it to the letter :D You've done some nice work on this car mate, I've subscribed :P

Ive heard that there is a book buy a guy called David Vizard that is supposed to be the engine builders bible. Dont know anything about him so cant really comment.

Thanks for the nice comments. Ive checked out your own project thread and im equally impressed with the work your doing....

#87 Adcuz

Adcuz

    One Carb Or Two?

  • Members
  • PipPipPipPipPipPipPip
  • 843 posts

Posted 28 September 2010 - 04:53 PM

That dash is soo nice!

by the way, anyone who wants to learn to build an engine this is an excellent DVD.

#88 AndyMiniMad.

AndyMiniMad.

    Up Into Fourth

  • Members
  • PipPipPipPipPipPipPipPipPip
  • 3,295 posts
  • Location: Under The Bonnet.

Posted 28 September 2010 - 05:08 PM

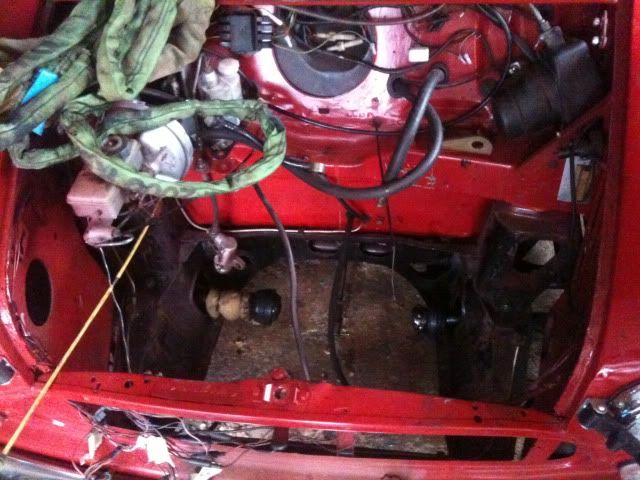
Here is a picture of Haggis with the engine out.
Posted Image

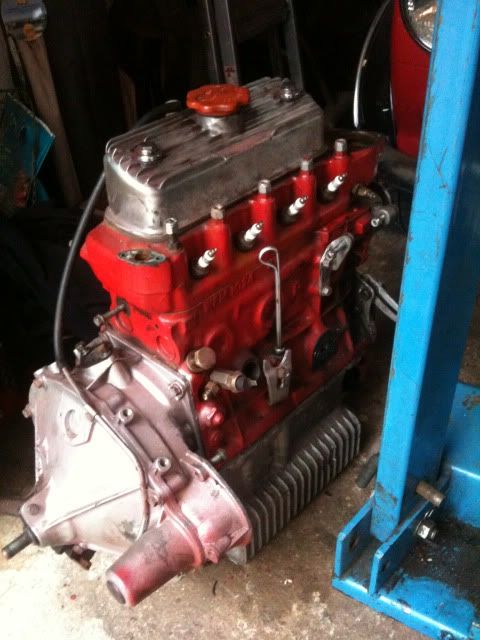
Thats it then for this engine.. Nothing wrong with it... in fact its a very good one. Only 2400 miles since the rebuild. Im thinking supercharging it!!!! but thats for next year.
Posted Image

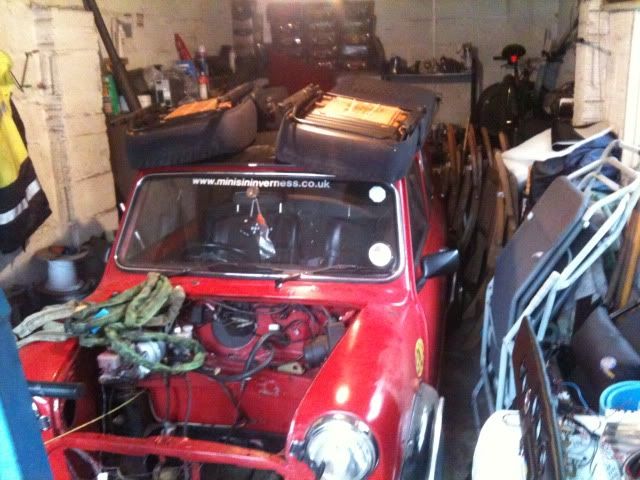
Its getting a bit tight in the garage, Cant believe ive restored the entire car in here.
Posted Image

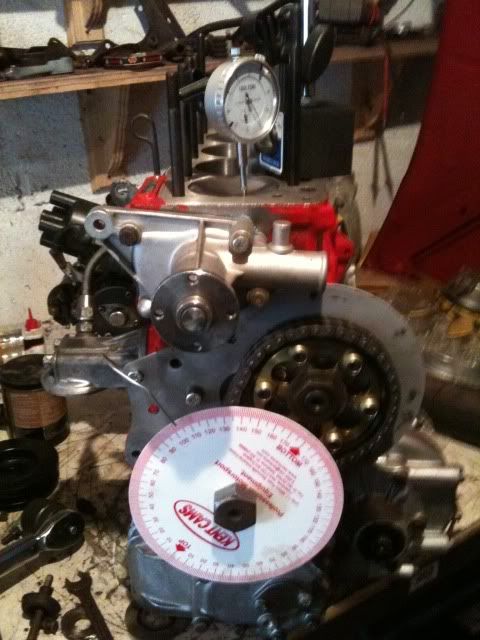
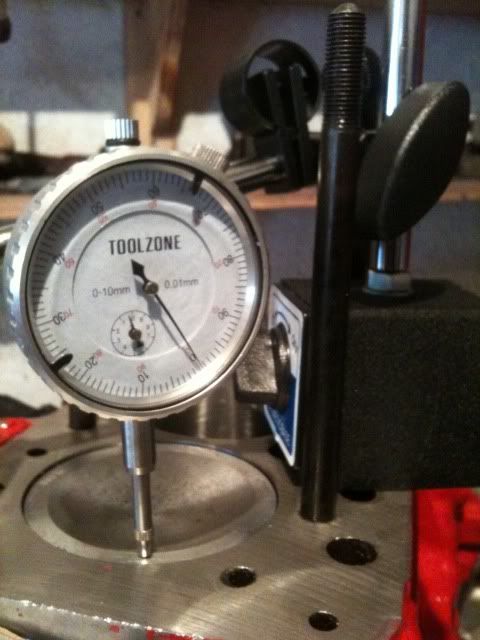
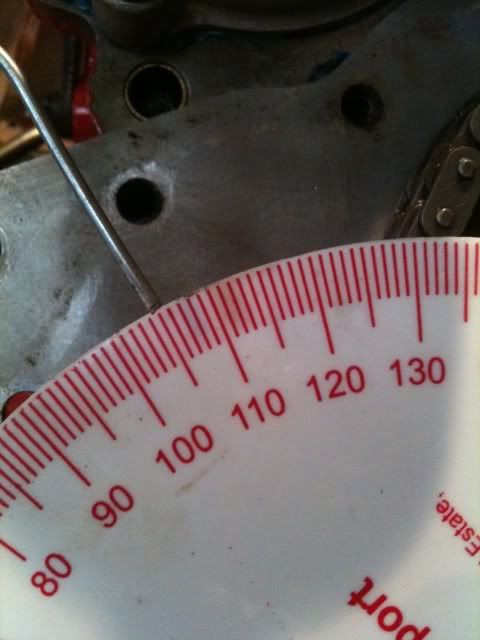
The DTI tool arrived today and ive set up the cam timing, its a bit complicated and took me a while to get my head around all the gobildigook. I ended up printing off the instructions from Calvers Corner.
Posted Image
Posted Image

Anyway I eventually got it all sorted and the cam it timed in at 104.5 deg after top dead centre.
Posted Image

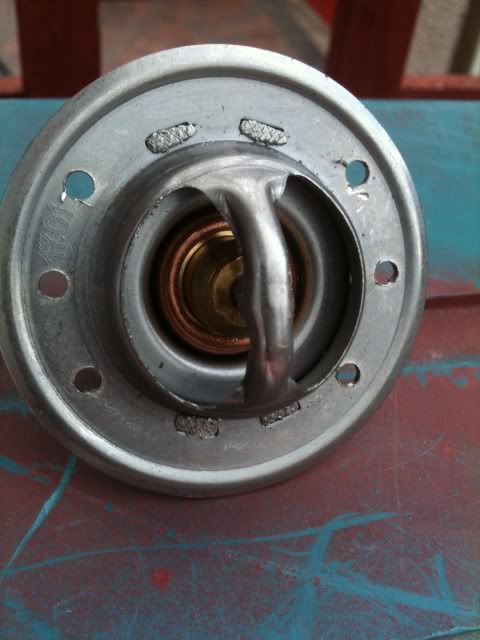
Ive refitted the head and the timing cover is now on. I got a new thermostat from Mini Spares 82 deg and drilled some holes in it because im not useing a bypass hose.
Posted Image

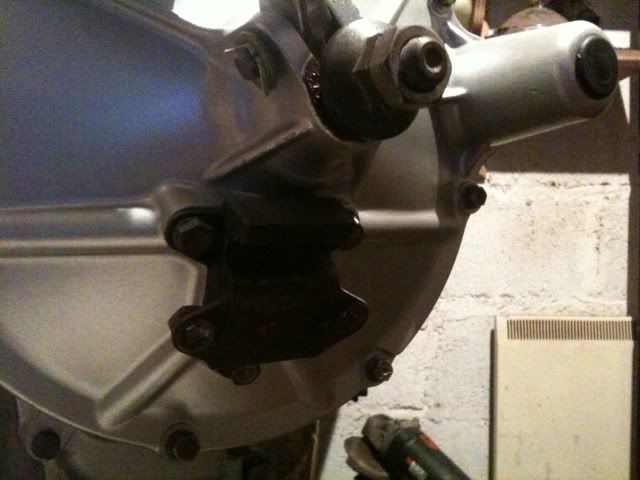
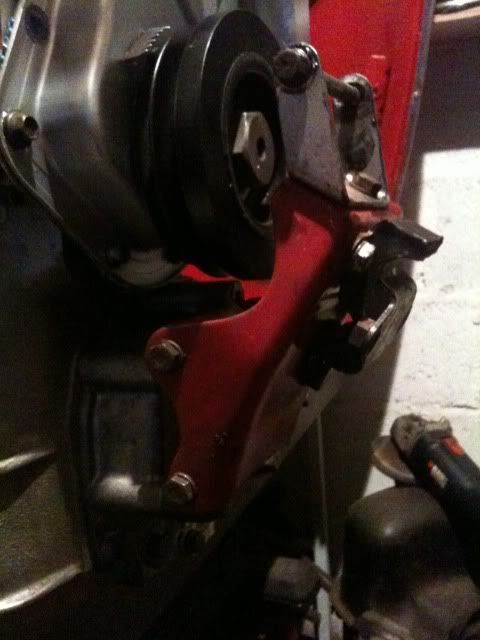
And finally here are a couple off pictures of the engine mounts. I thought some people might be interested to see the different engine mounting bracket required when fitting a Metro engine in a Mini, I know its a basic thing but Maybe someone might find it usefull..
Posted Image

Posted Image

So thats about it for now, Ive got to clean up the engine bay before dropping in the 1380. so will update with some pics later in the week...
#89 daveeeeee

daveeeeee

    Super Mini Mad

  • Members
  • PipPipPipPipPipPip
  • 684 posts

Posted 28 September 2010 - 06:52 PM

So what's the plan with the angle grinder and fuel tank combo? haha. Looks so nice having everything painted up.

#90 AndyMiniMad.

AndyMiniMad.

    Up Into Fourth

  • Members
  • PipPipPipPipPipPipPipPipPip
  • 3,295 posts
  • Location: Under The Bonnet.

Posted 29 September 2010 - 06:23 PM

So what's the plan with the angle grinder and fuel tank combo? haha. Looks so nice having everything painted up.

HaHa. Yeah probably not the best combination.lol. I always keep the grinder handy tho. Its my fav tool, that and a big f*ck off hammer..... I really must get round to tidying up.


3 user(s) are reading this topic

0 members, 1 guests, 0 anonymous users


    Bing (2)